Are you looking to repaint your black furniture with a wrinkle-free finish? You’re not alone. Many people are looking for the best way to get rid of wrinkles on their black furniture. Wrinkle-black spray paint is the perfect solution.
Wrinkle black spray paint is a permanent paint that can be used to remove wrinkles from furniture. It is a chemical-free product that uses heat and pressure to create a wrinkle-free finish. The paint is also non-toxic, so you can use it on any type of surface.
If you want to get rid of wrinkles on your black furniture, Wrinkle black spray paint is the perfect solution. You can purchase the paint online or in stores.
What Is Wrinkle-Free Black Furniture?
Wrinkle-free black furniture is furniture that has no creases or folds when it is new. It is made from strong materials and is easy to clean and maintain.
What Are the Benefits of Wrinkle-Free Black Furniture?
Wrinkle-free black furniture is a great choice because it doesn’t require any special treatment or maintenance, making it more affordable and easy to care for. It also looks more elegant and timeless than traditional black furniture.
What Are Some Tips for Getting Wrinkle-Free Black Furniture?
Here are some tips for getting wrinkle-free black furniture:
- Use the right cleaning products and store them properly. • Vacuum regularly to remove dust and dirt. • Use a good quality furniture polish to keep your furniture looking its best. • Don’t use fabric softener on your furniture as it can cause permanent damage to the fabric. • Always use the right type of spray paint for your type of wood or fabric. • Make sure to follow the instructions on the paint can for best results. • Don’t use too much pressure when applying the paint. • Use a brush or roller to apply the paint instead of a rag or roller with too much pressure. • Let the paint dry completely before moving your furniture. • Clean your furniture often with warm, soapy water and a soft brush or cloth to remove dirt and dust from the surface. • Use a vacuum with a HEPA filter to remove all the dust and debris from your furniture before you move it into storage or use it again. • Never use waxes, oils, or waxed fabrics on black furniture as they can damage the finish over time. • Store your furniture in a well-ventilated, temperature-controlled area to prevent mold and mildew from forming on your furniture. • Always use proper storage techniques when storing your furniture so that it doesn’t get damaged or scratched during storage or transport. • Never store your furniture in direct sunlight or near fireplaces or heat sources as this can damage the finish over time.
How do you spray black wrinkles?
Have you ever wondered how to remove black wrinkles? It can be a frustrating and time-consuming process, but it doesn’t have to be! In this guide, we will discuss the steps you need to take to remove black wrinkles.
The first step is to determine the cause of your wrinkles. Are they due to age, poor hygiene, or a genetic condition? Once you know the cause, you can begin to treat the issue.
If you are looking to remove black wrinkles naturally, there are a few different methods you can try. One is to use exfoliation. This will help remove dead skin cells and allow new skin to grow. You can also apply creams or gels that contain retinoids or other anti-aging ingredients.
Whatever method you choose, be sure to follow the instructions carefully and consistently. If you don’t, your wrinkles may return. So start today and see the difference a little effort can make!.
What Causes Black Wrinkles?
Black wrinkle creams contain ingredients that can help reduce the appearance of wrinkles, but they won’t eliminate them. The factors that contribute to the appearance of black wrinkles are genetics, sun damage, and other environmental factors.
How Do You Remove Black Wrinkles?
There are several ways to remove black wrinkles. You can use a retinol cream, an alpha hydroxy acid (AHA) cream, or a combination of both. You can also use retinol and AHA creams together to create a more effective treatment.
What Products Are Best For Reversing Black Wrinkles?
Retinol and AHA creams are great for reversing black wrinkles because they contain ingredients that help reduce inflammation and redness in the skin, which can help reduce the appearance of black wrinkles.
How Often Should I Wipe Off Black Wrinkles?
You should wipe off any excess oil or makeup that is applied before you apply any retinol or AHA cream so that the product can work its best. You should also avoid rubbing the area too hard, as this can cause irritation and may increase the appearance of wrinkles.
What Are Some Tips To Help Prevent Black Wrinkles From Returning?
To help prevent black wrinkles from returning, you should wear sunscreen every day and keep your skin hydrated by drinking plenty of water. You should also limit your exposure to the sun and wear protective clothing when outdoors.
Now you know how to remove black wrinkles! With the right products and the right techniques, you can easily get rid of those pesky dark circles and fine lines. We hope this guide has been helpful in getting rid of your black wrinkle woes!
How do you fix wrinkled spray paint?
Are you looking for a way to fix wrinkled spray paint? You’re not alone. Many homeowners across the country are looking for a way to remove unsightly wrinkles from their paint. Here are a few tips to help you fix wrinkled paint:
1. Use a hairdryer.
If you have a hairdryer in your home, you can use it to warm up the paint and help it to flow more smoothly. Just be sure to use caution – hot objects can easily burn your skin.
2. Use a fabric softener.
Another option is to use a fabric softener. This will help to soften the paint and make it less stiff, which will help it flow more smoothly. Just be sure not to use too much – excessive fabric softener can also be harmful to your skin.
3. Apply tape.
If you need to fix wrinkles in large areas of paint, you can try applying tape over the area in question. This will help to keep the paint in place while you work and will prevent it from spreading further wrinkles once it’s dried.
If you’re experiencing problems with wrinkled paint, give one of these tips a try. You never know – you might be able to fix your paint before it becomes a problem.
What Causes Wrinkles in Spray Paint?
Ongoing exposure to extreme temperatures, high humidity, and inadequate ventilation can all contribute to wrinkles in your spray paint. Additionally, as the paint ages, it can become more brittle and prone to wrinkling.
What Can I Do to Remove Wrinkles From My Spray Paint?
There are several steps you can take to remove wrinkles from your spray paint. You can try using a small brush or comb to smooth out the paint, or you can try using a hair dryer on low heat to help smooth the paint out. Lastly, you can also use an angled brush to help remove any straggling wrinkles.
How Long Does It Take to Fix Wrinkled Spray Paint?
It depends on the severity of the wrinkles in your paint and how long they’ve been there. Generally speaking, it should only take a few minutes to fix the wrinkles in your paint.
What Are Some Other Ways to Fix Wrinkled Spray Paint?
In addition to using a brush or comb, you can also try using a hair dryer on low heat, rubbing alcohol or acetone, or even a steam cleaner. These are just some of the many options you have for removing wrinkles from your spray paint.
What Are the Benefits of Having Wrinkled Spray Paint Fixed?
Having wrinkled spray paint fixed can help improve the appearance of your home and make it look more polished and professional. Additionally, it will also help protect your walls from damage and reduce the risk of fading over time.
We hope this article has given you some tips on how to fix wrinkled spray paint and made your home look its best. Whether you’re looking for ways to remove wrinkles or just want to make sure your walls stay protected, we hope this article has been helpful.
Does wrinkle paint need a primer?
Does wrinkle paint need a primer? It’s a question that many people have and it can be a bit of a mystery. So, what is the answer? In this essay, we’ll answer that question and delve deeper into the subject.
First, primer is unnecessary for all types of wrinkle paint. Acrylics and oil paints are generally non-pigmented, which means that the paint does not contain any pigment and will not require a primer. On the other hand, some wrinkle paints (particularly those made with light-colored pigments) may require a primer to ensure adhesion to the substrate.
Now that we’ve answered the question of whether or not primer is necessary, let’s talk about what kind of primer should be used. The best type of primer for wrinkle paint depends on a few things: the type of paint being used, the substrate being painted on, and how often it is being used. If you’re using acrylic or oil paint, you can use either a standard priming agent or an anti-fade agent; if you’re using a light-colored pigment wrinkle paint on a porous substrate like paper or canvas, you’ll want to use an extra-strong primer in order to ensure good adherence.
Ultimately, whether or not priming is necessary depends on the specific situation and what type of painting it is being done on. If you’re unsure whether or not priming is necessary, always test a small area of the painting first to see how it reacts.
What is Wrinkle Paint?
Wrinkle paint is a type of lacquer that is used to give wood or metal furniture an aged look. It is a water-based product that contains an oil-based primer to help the paint adhere to the surface.
What is a Primer?
A primer is a type of paint that is applied to a surface before the application of another coat of paint. It serves to fill in any gaps in the surface and make it easier for the next coat of paint to stick.
What is the Role of a Primer in Wrinkle Paint?
Primers are used to help the paint adhere to the surface and provide protection from water and other elements. They also help to make the paint more durable and longer lasting.
Does Wrinkle Paint Need a Primer?
Yes, wrinkle paint does need a primer if you want it to last as long as possible. Without a primer, the paint will likely chip or flake off over time.
What Are the Benefits of Using a Primer for Wrinkle Paint?
Primers are beneficial for wrinkle paint because they help make the paint more durable and longer lasting, as well as helping the paint adhere to the surface better.
So, does wrinkle paint need a primer? The short answer is yes, but it depends on your specific situation. If you want your wrinkle paint to last as long as possible and provide protection from water and other elements, then you should definitely use a primer. However, if you are only looking for an aged look without any additional protection, then you may not need a primer.
What causes paint to wrinkle when sprayed?
Have you ever wondered why paint gets wrinkled when you spray it? It’s a common question and one that many people have asked. In this essay, we will explore the topic of why paint gets wrinkled when you spray it. We will also discuss some possible causes and solutions.
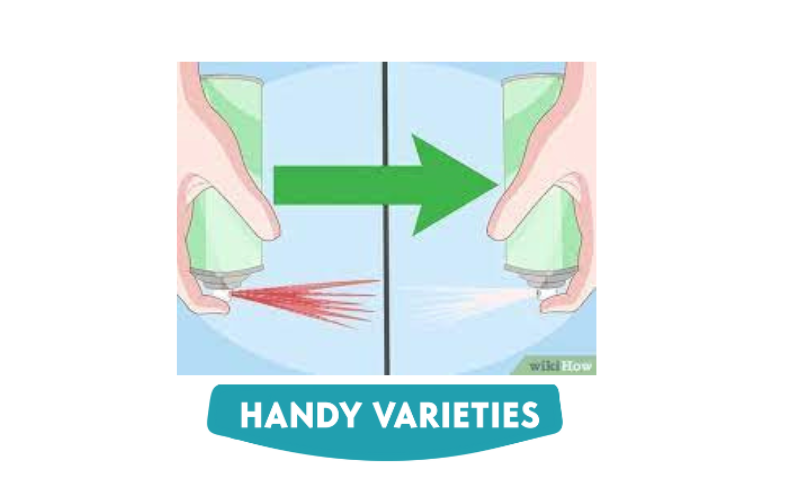
Paint is a mixture of two liquids: oil and water. When you spray paint, the oil vaporizes and the water droplets are created. These tiny droplets are suspended in the air because they are surrounded by air bubbles. The oil evaporates quickly, leaving behind a thin film of paint. The surface tension of the water droplets pulls them together, making them into small wrinkles or waves on the surface of the paint. This is why you see wrinkles in the paint when you spray it – the oil film creates tension between the water droplets, causing them to contract and form wrinkles.
There are several reasons why paint might get wrinkled when you spray it. One reason is that the oil film is too thin. If the film is too thin, then the water droplets can easily escape from it and form waves or wrinkles on the surface of the paint. Another reason is that your nozzle isn’t properly set up. If your nozzle isn’t set up properly, then you will be spraying a continuous stream of water instead of individual droplets. This will cause more pressure on the surface of the paint, and more water droplets will become wrinkle-causing agents.
There are a few things that you can do to prevent wrinkles from forming when you spray paint: use a thicker oil film, adjust your nozzle setting, or use a low-pressure sprayer. If you do find wrinkles forming on your paint, don’t worry – they can be easily removed with a brush or a cloth.
The main cause of paint getting wrinkled when you spray it is the way in which the paint is being applied. If the paint is being applied too quickly, too much pressure is used, or the paint is not thoroughly mixed, this can lead to the paint becoming wrinkled. In addition, if the paint is not properly cured (dried), it can also become wrinkled.
There are a few things that you can do to help prevent wrinkles from forming: use a thicker oil film, adjust your nozzle setting, or use a low-pressure sprayer. If you do find wrinkles forming on your paint, don’t worry – they can be easily removed with a brush or a cloth.
How Does Paint Get Wrinkled When You Spray It?
When you spray paint, air bubbles can form in the paint. These air bubbles can then form into wrinkles if the paint is not applied properly. This can also be caused by too much pressure being used when spraying the paint.
What Are Some Tips for Preventing Paint from Wrinkling When You Spray It?
There are a few tips you can use to prevent your paint from getting wrinkled when you spray it. First, make sure the paint is thoroughly mixed before applying it to your surface. Second, use a low-pressure nozzle and make sure that the nozzle is not too close to the surface of the paint. Third, use a steady hand and make sure you are not pressing too hard on the nozzle.
In conclusion, we explored why paint gets wrinkled when you spray it and what are some tips to prevent it from happening. We hope this essay has answered your question and that you have a better understanding of why paint gets wrinkled when you spray it.
Is wrinkle paint durable?
Are wrinkle paint strips durable? If you’re looking to protect your walls from the ravages of time, you might be considering wrinkle paint strips. But are wrinkle paint strips durable?
The short answer is yes, wrinkle paint strips are generally quite durable. However, there are a few things to keep in mind if you’re thinking about using wrinkle paint strips:
-Make sure the walls you’re painting are properly prepared. Weak or peeling walls can cause the paint to crack and peel.
-Be sure to use a proper sealant if you’re using wrinkle paint strips on wood surfaces. Without a sealant, moisture can seep into the wood and cause it to decay.
-Avoid painting over existing wallpaper or other decorative wallcoverings. If you do, the new paint might not stick well and could start to peel or crack.
What Is Wrinkle Paint?
Wrinkle paint is a type of paint that is designed to resist water and wear and tear. It is most commonly used to repel water from surfaces, but it can also be used to create a more uniform look on walls.
While wrinkle paint is generally quite durable, there are a few things to keep in mind if you’re thinking about using it. Make sure the walls you’re painting are properly prepared and use a proper sealant if you’re painting wood surfaces. Avoid painting over existing wallpaper or other decorative wallcoverings.
What Are Wrinkle Paint Strips?
Wrinkle paint strips are a type of wrinkle paint that has been cut into smaller pieces. These pieces are then adhered to a surface, usually with an adhesive. This allows the wrinkled paint to stick to the wall and create a more uniform look.
What Are the Benefits of Wrinkle Paint Strips?
Wrinkle paint strips can help to create a more uniform look on walls, while also protecting them from damage caused by water. They can also help to reduce the amount of time it takes to apply the paint to the wall.
What are the Drawbacks of Wrinkle Paint Strips?
Wrinkle paint strips are not as durable as other types of wrinkle paint, so they may not last as long as other types of wrinkle paint. They also cannot be used on all surfaces, such as tile or wood.
How Can I Make Wrinkle Paint Strips Last Longer?
To make wrinkle paint strips last longer, you should make sure that they have properly adhered to the wall and that they are applied in a well-ventilated area. You should also avoid using harsh cleaners or abrasive tools on the wall.
Conclusion
If you’re looking for a way to protect your walls from the ravages of time, a wrinkle paint strip might be just what you’re looking for. However, it’s important to understand the pros and cons of this type of product before making a decision.