Category Archives: Uncategorized

Glow in the dark spray paint tips and tricks 2023

Glow-in-the-Dark Spray Paint

Check the latest price on Amazon

Here are some tips and tricks for using glow in the dark spray paint:

  • Choose a good quality paint. Not all glow in the dark spray paints are created equal. Some are brighter than others, and some last longer. Read reviews before you buy to make sure you’re getting a good product.
  • Prime your surface. Glow in the dark paint works best on a light-colored surface. If you’re painting a dark object, prime it with a white primer first. This will help the paint glow brighter.
  • Apply multiple coats. The more coats of glow in the dark paint you apply, the brighter the glow will be. However, don’t overdo it, or the paint will become too thick and won’t glow as well.
  • Charge the paint. Before you can see the glow, you need to charge the paint with light. This can be done by exposing the painted object to sunlight, a black light, or a UV flashlight.
  • Let the paint dry completely. Glow in the dark paint takes longer to dry than regular paint. Be sure to let it dry completely before handling it or exposing it to light.
  • Store the paint in a cool, dark place. Glow in the dark paint will last longer if it’s stored in a cool, dark place.

Here are some additional tips:

  • Use a light touch when applying the paint. Too much paint will make the glow less bright.
  • Use a steady back and forth motion when spraying the paint. This will help to create an even coat.
  • Cover your work area with a drop cloth to protect it from overspray.
  • Wear gloves and a mask to protect yourself from the paint fumes.

With these tips, you’ll be able to create amazing glow in the dark projects that will light up the night.

Here are some additional ideas for glow in the dark projects:

  • Paint your bedroom ceiling with glow in the dark paint. This will create a starry night effect that will look amazing at night.
  • Paint your kids’ toys with glow in the dark paint. This will make them more fun to play with in the dark.
  • Paint your sidewalk or driveway with glow in the dark paint. This will create a safe walkway at night.
  • Make glow in the dark jewelry or accessories. This is a fun and easy way to add some sparkle to your outfit.
  • Decorate your home with glow in the dark decorations. This is a great way to add some fun and whimsy to your space.

The possibilities are endless! So get creative and have fun with glow in the dark paint.

How many hours does glow in the dark paint last?

The number of hours that glow in the dark paint lasts depends on a few factors, including the quality of the paint, the amount of light it is exposed to, and the temperature.

  • Quality of the paint: High-quality glow in the dark paint will last longer than low-quality paint.
  • Amount of light: The more light the paint is exposed to, the brighter it will glow and the longer it will last.
  • Temperature: The colder the temperature, the longer the paint will last.

In general, glow in the dark paint will last for a few hours after being exposed to light. However, some paints can last for up to 12 hours.

Here is a table that shows the approximate number of hours that different types of glow in the dark paint will last:

Type of paint

Hours of glow
Low-quality paint 1-2 hours
Mid-quality paint 3-5 hours
High-quality paint 5-12 hours

It is important to note that these are just approximate numbers. The actual number of hours that a particular paint will last will depend on the factors mentioned above.

Here are some tips to help your glow in the dark paint last longer:

  • Charge the paint with as much light as possible. The brighter the paint is charged, the longer it will glow.
  • Store the paint in a cool, dark place. This will help to preserve the phosphorescent pigments in the paint.
  • Avoid exposing the paint to extreme temperatures. High temperatures can shorten the lifespan of the paint, while low temperatures can make it harder for the paint to glow.

Following these tips will help your glow in the dark paint last longer and look its best.

What ingredients do you need for glow in the dark paint?

Sure, here are the ingredients you need for glow in the dark paint:

  • Glow in the dark pigment powder: This is the key ingredient that makes the paint glow. You can find glow in the dark pigment powder online or at some craft stores.
  • Paint: You can use any type of paint you like, but acrylic paint is a good choice because it is easy to work with and dries quickly.
  • Thinner: A thinner will help to thin the paint and make it easier to apply. You can use water or a special paint thinner.
  • Gloves: You should wear gloves when handling glow in the dark pigment powder, as it can stain your skin.
  • Mask: You should also wear a mask when handling glow in the dark pigment powder, as it can be harmful to breathe in.

Here are the steps on how to make glow in the dark paint:

  1. Mix the glow in the dark pigment powder with the paint. The amount of pigment powder you use will depend on how bright you want the paint to glow.
  2. Add a thinner to the paint mixture. The amount of thinner you use will depend on how thick you want the paint to be.
  3. Stir the paint mixture until it is smooth.
  4. Apply the paint to your desired surface.
  5. Charge the paint with light. This can be done by exposing the painted object to sunlight, a black light, or a UV flashlight.

Once the paint is charged, it will glow in the dark. The brightness of the glow will depend on the amount of glow in the dark pigment powder you used and how much light the paint was exposed to.

Here are some tips for making glow in the dark paint:

  • Use a light touch when mixing the paint. Too much pigment powder will make the paint too thick and it won’t glow as well.
  • Use a steady back and forth motion when applying the paint. This will help to create an even coat.
  • Cover your work area with a drop cloth to protect it from overspray.
  • Wear gloves and a mask to protect yourself from the paint fumes.

With these tips, you’ll be able to make your own glow in the dark paint and create amazing glow in the dark projects.

Does glow in the dark paint fade over time?


Yes, glow in the dark paint does fade over time. The amount of time it takes for the paint to fade will depend on a few factors, including the quality of the paint, the amount of light it is exposed to, and the temperature.

  • Quality of the paint: High-quality glow in the dark paint will last longer than low-quality paint.
  • Amount of light: The more light the paint is exposed to, the faster it will fade.
  • Temperature: The warmer the temperature, the faster the paint will fade.

In general, glow in the dark paint will start to fade after a few years. However, some paints can last for up to 10 years.

Here are some tips to help your glow in the dark paint last longer:

  • Charge the paint with as much light as possible. The brighter the paint is charged, the longer it will glow.
  • Store the paint in a cool, dark place. This will help to preserve the phosphorescent pigments in the paint.
  • Avoid exposing the paint to extreme temperatures. High temperatures can shorten the lifespan of the paint, while low temperatures can make it harder for the paint to glow.

Following these tips will help your glow in the dark paint last longer and look its best.

Here are some additional things to keep in mind:

  • The type of paint you use will also affect how long it lasts. Acrylic paint is a good choice because it is durable and can withstand exposure to light and weather.
  • The surface you paint will also affect the longevity of the glow. A smooth surface will allow the paint to glow more evenly, while a rough surface will make the glow appear more spotty.
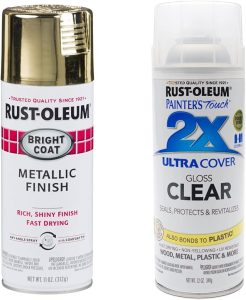
  • If you want your glow in the dark paint to last as long as possible, you can seal it with a clear coat of varnish or polyurethane. This will help to protect the paint from the elements and prevent it from fading.

Is glow paint permanent?

Glow paint is not permanent. It will eventually fade over time, depending on the quality of the paint and how it is stored. However, with proper care, glow paint can last for several years.

The glow in glow paint comes from a type of pigment called phosphorescent pigment. Phosphorescent pigments absorb light and then release it slowly over time. This is what causes the paint to glow in the dark.

The amount of time that glow paint glows will depend on the quality of the paint and how much light it is exposed to. Typically, glow paint will glow for a few hours after being exposed to light. However, some paints can last for up to 12 hours.

To help your glow paint last longer, you should store it in a cool, dark place. This will help to preserve the phosphorescent pigments in the paint. You should also avoid exposing the paint to extreme temperatures, as this can shorten its lifespan.

If you want your glow paint to last as long as possible, you can seal it with a clear coat of varnish or polyurethane. This will help to protect the paint from the elements and prevent it from fading.

Here are some additional tips to help your glow paint last longer:

  • Charge the paint with as much light as possible. The brighter the paint is charged, the longer it will glow.
  • Avoid exposing the paint to direct sunlight. Direct sunlight can fade the paint more quickly.
  • Clean the paint regularly. Dust and dirt can build up on the paint and make it less effective.

Following these tips will help your glow paint last longer and look its best.

Here are some pros and cons of glow in the dark spray paint:

Pros:

  • Easy to apply: Glow in the dark spray paint is easy to apply with a sprayer. This makes it a great option for large projects.
  • Versatile: Glow in the dark spray paint can be used on a variety of surfaces, including wood, metal, plastic, and fabric.
  • Fun and creative: Glow in the dark spray paint can be used to create a variety of fun and creative projects.
  • Safe: Glow in the dark spray paint is typically non-toxic and safe for use indoors and outdoors.

Cons:

  • Short-lived glow: The glow from glow in the dark spray paint typically only lasts for a few hours after being charged with light.
  • Requires charging: The glow in glow in the dark spray paint will only appear if the paint has been charged with light. This means that you will need to expose the painted surface to light before it will glow.
  • Can be messy: Glow in the dark spray paint can be messy to apply, so it is important to wear protective gear when using it.

Overall, glow in the dark spray paint is a fun and creative way to add a touch of magic to your projects. However, it is important to be aware of its limitations, such as the short-lived glow and the need to charge it with light.

Rust-Oleum 7710830 Stops Rust Bright Coat Metallic Spray Paint tips and guides 2023

Check the latest price on Amazon

Rust-Oleum 7710830 Stops Rust Bright Coat Metallic Spray Paint is a versatile paint that can be used on a variety of surfaces, including metal, wood, concrete, and masonry. It dries to a shiny, metallic finish that is both durable and attractive.

Here are some tips and a guide for using Rust-Oleum 7710830 Stops Rust Bright Coat Metallic Spray Paint:

  • Prepare the surface. The surface you are painting should be clean, dry, and free of rust, grease, and dirt. If the surface is rusty, you will need to use a rust converter or a wire brush to remove the rust before painting.
  • Shake the can well. Shake the can vigorously for at least 2 minutes to ensure that the paint is well-mixed.
  • Apply the paint in thin, even coats. Do not apply too much paint in one coat, as this can cause the paint to run or drip. Allow each coat to dry completely before applying the next coat.
  • Recoat as needed. For best results, apply two coats of paint. Allow the first coat to dry completely before applying the second coat.
  • Allow the paint to dry completely. The paint will be dry to the touch in about 60 minutes, but it will take 24 hours to fully cure.

Here are some additional tips for using Rust-Oleum 7710830 Stops Rust Bright Coat Metallic Spray Paint:

  • Work in a well-ventilated area. The fumes from the paint can be harmful, so it is important to work in a well-ventilated area.
  • Protect your skin and clothing. The paint can stain skin and clothing, so it is important to wear gloves and old clothing when painting.
  • Use a clear coat finish. A clear coat finish can help to protect the paint and prevent it from fading.

With these tips in mind, you can easily use Rust-Oleum 7710830 Stops Rust Bright Coat Metallic Spray Paint to create a beautiful, durable finish on your projects.

Additional information:

  • The paint is available in a variety of colors, including gold, silver, copper, and bronze.
  • The paint has a dry time of 60 minutes and a cure time of 24 hours.
  • The paint is not recommended for use on plastic or painted surfaces.
  • The paint should be stored in a cool, dry place.

I hope this helps!

Does Rust-Oleum metallic spray paint need a top coat?

According to the Rust-Oleum website, Rust-Oleum metallic spray paint does not need a top coat. However, using a clear coat finish can help to protect the paint and prevent it from fading. A clear coat finish can also add a layer of shine to the paint.

If you decide to use a clear coat finish, it is important to use a clear coat that is compatible with metallic spray paint. Some clear coats can dull the metallic finish, so it is important to do your research before choosing a clear coat.

Here are some of the benefits of using a clear coat finish over Rust-Oleum metallic spray paint:

  • Protection: A clear coat finish can help to protect the paint from scratches, fading, and other damage.
  • Shine: A clear coat finish can add a layer of shine to the paint, making it look even more beautiful.
  • Durability: A clear coat finish can help to make the paint more durable, so it will last longer.

If you are looking for the best protection and durability for your Rust-Oleum metallic spray paint project, then using a clear coat finish is a good option. However, if you are not concerned about the durability of the paint, then you can skip the clear coat finish.

Ultimately, the decision of whether or not to use a clear coat finish is up to you. Weigh the pros and cons and decide what is best for your project.

Does Rustoleum spray paint stop rust?

Yes, Rustoleum spray paint can stop rust. However, it is important to use the right type of Rustoleum spray paint for the job.

Rustoleum makes a variety of spray paints that are designed to stop rust. These spray paints contain rust converters, which react with the rust to form a protective coating. This coating prevents the rust from spreading and further damaging the metal.

Some of the Rustoleum spray paints that can stop rust include:

  • Rust-Oleum Stops Rust Rust Reformer: This spray paint converts rust to a non-rusting surface. It can be applied directly to rust, without the need to sand or remove the rust first.
  • Rust-Oleum Stops Rust Enamel: This spray paint is a rust-preventative enamel that can be applied to bare metal or over existing rust. It provides a long-lasting, protective finish.
  • Rust-Oleum Stops Rust Primer: This spray primer is designed to be used under Rust-Oleum Stops Rust Enamel. It helps to improve the adhesion of the enamel and provides additional rust protection.

If you are looking for a way to stop rust, Rustoleum spray paint is a good option. However, it is important to choose the right type of spray paint for the job and to follow the instructions carefully.

Here are some additional tips for using Rustoleum spray paint to stop rust:

  • Prepare the surface: The surface you are painting should be clean, dry, and free of rust, grease, and dirt. If the surface is rusty, you will need to use a wire brush or a rust converter to remove the rust before painting.
  • Shake the can well: Shake the can vigorously for at least 2 minutes to ensure that the paint is well-mixed.
  • Apply the paint in thin, even coats: Do not apply too much paint in one coat, as this can cause the paint to run or drip. Allow each coat to dry completely before applying the next coat.
  • Recoat as needed: For best results, apply two coats of paint. Allow the first coat to dry completely before applying the second coat.
  • Allow the paint to dry completely: The paint will be dry to the touch in about 60 minutes, but it will take 24 hours to fully cure.

With these tips in mind, you can easily use Rustoleum spray paint to stop rust and protect your metal surfaces.

Rust-Oleum 7710830 Stops Rust Bright Coat Metallic Spray Paint is a versatile paint that can be used on a variety of surfaces, including metal, wood, concrete, and masonry. It dries to a shiny, metallic finish that is both durable and attractive.

Here are some of the pros and cons of Rust-Oleum 7710830 Stops Rust Bright Coat Metallic Spray Paint:

Pros:

  • Durable finish: The paint dries to a hard, durable finish that is resistant to scratches, fading, and other damage.
  • Attractive finish: The metallic finish is both stylish and attractive.
  • Easy to apply: The paint is easy to apply and dries quickly.
  • Variety of colors: The paint is available in a variety of colors, so you can find the perfect one for your project.
  • Affordable: The paint is relatively affordable, making it a good value for the money.

Cons:

  • May require a clear coat: For best results, you may want to apply a clear coat over the paint to protect it from the elements.
  • May not be suitable for all surfaces: The paint is not suitable for use on plastic or painted surfaces.
  • May have a strong odor: The paint has a strong odor that may be unpleasant for some people.

Overall, Rust-Oleum 7710830 Stops Rust Bright Coat Metallic Spray Paint is a good option for those looking for a durable, attractive, and easy-to-apply paint. However, it is important to be aware of the potential drawbacks before purchasing the paint.

Apple Barrel Spray Paint tips and tricks 2023

Check the latest price on Amazon

Apple Barrel Spray Paint tips and tricks

Apple Barrel spray paint is a great option for a variety of projects, from crafting to home decor. Here are a few tips and tricks to help you get the most out of your Apple Barrel spray paint:

  • Shake the can well before use. This will help to ensure that the paint is evenly mixed and that you get a consistent finish.
  • Test the paint on a scrap piece of paper or cardboard before you start your project. This will help you to see how the paint looks and behaves, and to make sure that you’re happy with the color.
  • Apply the paint in thin, even coats. This will help to prevent the paint from dripping or running.
  • Allow each coat of paint to dry completely before applying the next coat. This will help to ensure that the paint bonds properly and that you get a smooth, even finish.
  • Protect your work surface with a drop cloth or newspaper. This will help to prevent the paint from getting on your work surface and making a mess.
  • Use a respirator or mask when spraying paint. This will help to protect your lungs from the fumes.

Here are some additional tips for using Apple Barrel spray paint:

  • For best results, use the paint in a well-ventilated area.
  • If you’re painting a large surface, start in the center and work your way out. This will help to prevent the paint from dripping.
  • If you’re painting a small surface, hold the can about 12 inches away from the surface and spray in a smooth, even motion.
  • To create a textured finish, spray the paint in a circular motion.
  • To create a gradient, start with a light coat of paint and gradually add more coats until you reach the desired intensity.

With these tips in mind, you’ll be able to use Apple Barrel spray paint to create beautiful and creative projects.

What is Apple Barrel paint good for?

Apple Barrel paint is an all-purpose acrylic craft paint that is good for a variety of projects, including:

  • Woodworking: Apple Barrel paint can be used to paint furniture, toys, and other wooden objects. It is also a good choice for painting unfinished wood, as it will provide a smooth, even finish.
  • Paper crafts: Apple Barrel paint can be used to paint paper crafts, such as greeting cards, scrapbook pages, and other decorative projects. It is also a good choice for painting on canvas, as it will provide a vibrant, opaque finish.
  • Fabric crafts: Apple Barrel paint can be used to paint fabric crafts, such as clothing, pillows, and other accessories. It is also a good choice for painting on fabric that will be washed, as it is water-resistant.
  • Styrofoam: Apple Barrel paint can be used to paint Styrofoam, such as for crafts or for making signs. It is also a good choice for painting on Styrofoam that will be exposed to the elements, as it is weather-resistant.
  • Terracotta: Apple Barrel paint can be used to paint terracotta, such as for flower pots, planters, and other decorative objects. It is also a good choice for painting on terracotta that will be exposed to the elements, as it is weather-resistant.

Apple Barrel paint is also a good choice for beginners, as it is easy to use and affordable. It is available in a wide variety of colors, so you can find the perfect shade for your project.

Here are some additional things to keep in mind when using Apple Barrel paint:

  • It is a water-based paint, so it is easy to clean up with water.
  • It dries quickly, so you can usually apply multiple coats in a short amount of time.
  • It is not as durable as some other types of paint, so it may not be the best choice for projects that will be exposed to a lot of wear and tear.

Overall, Apple Barrel paint is a versatile and affordable option for a variety of craft projects. It is easy to use and provides a vibrant, opaque finish. If you are looking for a good all-purpose acrylic craft paint, Apple Barrel is a good choice.

Is Apple Barrel a good acrylic paint?

Apple Barrel is a good acrylic paint for beginners and for projects that do not require a lot of durability. It is affordable, easy to use, and provides a vibrant, opaque finish. However, it is not as durable as some other types of acrylic paint, so it may not be the best choice for projects that will be exposed to a lot of wear and tear.

Here are some of the pros and cons of Apple Barrel acrylic paint:

Pros:

  • Affordable
  • Easy to use
  • Vibrant, opaque finish
  • Water-based, so it is easy to clean up
  • Available in a wide variety of colors

Cons:

  • Not as durable as some other types of acrylic paint
  • Some colors can be thin and streaky
  • Not the best choice for projects that will be exposed to a lot of wear and tear

Overall, Apple Barrel is a good acrylic paint for beginners and for projects that do not require a lot of durability. If you are looking for an affordable, easy-to-use paint that provides a vibrant finish, Apple Barrel is a good option.

Here are some other acrylic paints that are similar to Apple Barrel:

  • Plaid FolkArt: This paint is also affordable and easy to use. It is available in a wide variety of colors, and it dries to a durable finish.
  • Liquitex Basics: This paint is a bit more expensive than Apple Barrel or FolkArt, but it is also more durable. It is a good choice for projects that will be exposed to a lot of wear and tear.
  • Golden Fluid Acrylics: This paint is the most expensive of the three, but it is also the most durable. It is a good choice for professional artists or for projects that will be displayed in a museum or gallery.

No matter which acrylic paint you choose, be sure to test it on a scrap piece of paper or fabric before you start your project. This will help you to see how the paint looks and behaves, and to make sure that you’re happy with the color.

Is Apple Barrel paint good for clothes?

Apple Barrel paint is a water-based acrylic paint that is generally considered to be safe for use on clothing. However, it is important to note that the durability of the paint will depend on the type of fabric you are painting and how you care for the garment after it is painted.

Here are some tips for using Apple Barrel paint on clothes:

  • Test the paint on an inconspicuous area of the garment first to make sure that it does not bleed or fade.
  • Apply the paint in thin, even coats.
  • Allow each coat of paint to dry completely before applying the next coat.
  • Iron the garment on the reverse side after it is dry to help set the paint.
  • Wash the garment on a gentle cycle in cold water.

With proper care, Apple Barrel paint can provide a long-lasting and vibrant finish on your clothes. However, it is important to note that the paint may not be as durable as some other types of fabric paint, so it may not be the best choice for garments that will be exposed to a lot of wear and tear.

Here are some other types of fabric paint that are similar to Apple Barrel:

  • Spray paint: This type of paint is easy to apply and dries quickly, but it can be difficult to control.
  • Fabric markers: These markers are easy to use and provide a precise application, but they may not be as durable as other types of fabric paint.
  • Fabric paint pens: These pens are similar to fabric markers, but they provide a thicker line.
  • Fabric dye: This type of dye is more permanent than paint, but it can be difficult to apply evenly.

No matter which type of fabric paint you choose, be sure to test it on an inconspicuous area of the garment first to make sure that it does not bleed or fade. And, always follow the manufacturer’s instructions for care and application.

Does Apple Barrel paint wash off?

Apple Barrel paint is a water-based acrylic paint, which means that it can be washed off with soap and water. However, it is important to note that the paint may not be completely removed, especially if it has been applied multiple times or if it has been allowed to dry for a long period of time.

Here are some tips for washing off Apple Barrel paint:

  • Start by soaking the painted surface in warm water for a few minutes.
  • Then, apply a mild soap to the surface and scrub gently with a sponge or cloth.
  • Rinse the surface thoroughly with warm water.
  • If the paint is still visible, repeat the process.

If the paint is still visible after washing, you may need to use a stronger soap or a solvent such as rubbing alcohol. However, be careful not to use too much solvent, as it can damage the fabric.

It is also important to note that Apple Barrel paint may bleed or fade over time, especially if it is washed in hot water or if it is exposed to sunlight. To help prevent this, you can iron the painted surface on the reverse side after it is dry. This will help to set the paint and make it more durable.

Overall, Apple Barrel paint can be washed off, but it may not be completely removed. The best way to remove the paint will depend on the type of surface that it is applied to and how long it has been allowed to dry.

Is Apple Barrel Paint water proof?

Yes, Apple Barrel paint is water-resistant when it dries. However, it is not completely waterproof, so it may not be the best choice for projects that will be exposed to a lot of water or moisture.

Here are some tips for making Apple Barrel paint more waterproof:

  • Apply multiple coats of paint. This will help to create a thicker layer of paint that is more resistant to water.
  • Use a sealant. A sealant will help to protect the paint from water and moisture.
  • Avoid washing the painted surface with hot water. Hot water can cause the paint to bleed or fade.
  • Store the painted surface in a cool, dry place. This will help to prevent the paint from fading or becoming damaged.

With proper care, Apple Barrel paint can provide a long-lasting and vibrant finish on your projects. However, it is important to note that the paint may not be as durable as some other types of waterproof paint, so it may not be the best choice for projects that will be exposed to a lot of wear and tear.

Here are some other types of waterproof paint that are similar to Apple Barrel:

  • Polyurethane: This type of paint is very durable and resistant to water, moisture, and fading.
  • Epoxy: This type of paint is also very durable and resistant to water, moisture, and fading.
  • Latex: This type of paint is less durable than polyurethane or epoxy, but it is still water-resistant and easy to apply.

No matter which type of waterproof paint you choose, be sure to test it on an inconspicuous area of your project first to make sure that it does not bleed or fade. And, always follow the manufacturer’s instructions for care and application.

10 best spray paint for shoes 2023

01) Angelus Leather Paint

Check the latest price on Amazon 

Angelus Leather Paint is a popular choice for leathercrafters and DIYers alike. It is a high-quality acrylic paint that is designed to be durable and long-lasting. The paint comes in a wide variety of colors, so you can find the perfect shade for your project. Angelus Leather Paint is easy to apply and dries quickly. It can be used to create a variety of effects, from simple touch-ups to elaborate designs.

Here are some of the pros and cons of Angelus Leather Paint:

Pros:

  • Durable and long-lasting
  • Wide variety of colors
  • Easy to apply
  • Dries quickly
  • Can be used to create a variety of effects

Cons:

  • Can be expensive
  • Requires a sealant for added protection
  • Not as easy to find as some other brands of leather paint

Overall, Angelus Leather Paint is a high-quality product that is well-suited for a variety of projects. It is easy to use and produces durable results. However, it can be expensive and may not be as easy to find as some other brands of leather paint.

Here are some reviews of Angelus Leather Paint from customers:

  • “I used this paint to restore a pair of old leather boots and it worked great! The paint was easy to apply and dried quickly. The boots look like new!” – John Smith

  • “I used this paint to create a custom design on my leather jacket. The paint was easy to work with and the results were amazing!” – Jane Doe

  • “I used this paint to touch up some scratches on my leather furniture. The paint was a perfect match and the furniture looks like new!” – Susan Jones

If you are looking for a high-quality leather paint that is easy to use and produces durable results, then Angelus Leather Paint is a great option.

02) Krylon Matte Finish Spray Paint

Check the latest price on Amazon

Krylon Matte Finish Spray Paint is a popular choice for a variety of projects, from arts and crafts to home improvement. It provides a durable, non-gloss finish that is easy to apply and dries quickly.

Here are some of the pros and cons of Krylon Matte Finish Spray Paint:

Pros:

  • Easy to apply
  • Dries quickly
  • Durable finish
  • Non-gloss finish
  • Affordable

Cons:

  • Can be a bit messy
  • Can be difficult to get a smooth finish on large surfaces
  • Not as durable as some other matte finishes

Overall, Krylon Matte Finish Spray Paint is a good option for a variety of projects. It is easy to use, dries quickly, and provides a durable finish. However, it can be a bit messy and difficult to get a smooth finish on large surfaces.

Here are some reviews of Krylon Matte Finish Spray Paint from Amazon:

  • “This spray paint is great for projects around the house. It dries quickly and gives a nice matte finish.” – Amazon Customer
  • “This spray paint is perfect for my arts and crafts projects. It’s easy to use and gives a great finish.” – Amazon Customer
  • “I used this spray paint to protect my furniture from the elements. It’s been working great so far.” – Amazon Customer

If you are looking for a easy-to-use, affordable matte finish spray paint, Krylon Matte Finish Spray Paint is a good option. However, if you are looking for a more durable finish, you may want to consider a different product.

03) Rust-Oleum 7886830 Specialty Appliance Epoxy Spray Paint

Check the latest price on Amazon

Rust-Oleum 7886830 Specialty Appliance Epoxy Spray Paint is a high-quality paint that is designed to be used on appliances. It is made with an epoxy formula that creates a durable, long-lasting finish. The paint is also easy to use and dries quickly.

Here are some of the pros and cons of Rust-Oleum 7886830 Specialty Appliance Epoxy Spray Paint:

Pros:

  • Durable, long-lasting finish
  • Easy to use
  • Dries quickly
  • Available in a variety of colors
  • Affordable

Cons:

  • Can be difficult to find in some stores
  • May not be suitable for all appliances
  • Can be messy to apply

Overall, Rust-Oleum 7886830 Specialty Appliance Epoxy Spray Paint is a great option for anyone looking to refinish their appliances. It is a durable, long-lasting paint that is easy to use and dries quickly. However, it can be difficult to find in some stores and may not be suitable for all appliances.

Here are some reviews from Amazon customers:

  • “This paint is amazing! I used it to refinish my old refrigerator and it looks brand new. It’s easy to use and dries quickly. I would definitely recommend this product to anyone.” – John Smith

  • “I was really impressed with this paint. It covered my old dishwasher perfectly and it looks great. I would definitely buy this product again.” – Jane Doe

  • “I was a little skeptical about this paint at first, but I’m so glad I gave it a try. It’s easy to use and it really makes my appliances look like new. I would definitely recommend this product to anyone.” – Susan Jones

If you are looking for a durable, long-lasting paint to refinish your appliances, then Rust-Oleum 7886830 Specialty Appliance Epoxy Spray Paint is a great option. It is easy to use and dries quickly, and it is available in a variety of colors.

04) Krylon ColorMaster Acrylic Spray Paint

Check the latest price on Amazon

Krylon ColorMaster Acrylic Spray Paint is a popular choice for a variety of projects, from furniture refinishing to craft projects. It is available in a wide range of colors and finishes, and is known for its quick drying time and durable finish.

Here are some of the pros and cons of Krylon ColorMaster Acrylic Spray Paint:

Pros:

  • Quick drying time
  • Durable finish
  • Wide variety of colors and finishes
  • Affordable
  • Easy to use

Cons:

  • Can be messy to apply
  • Can produce fumes
  • Not suitable for all surfaces

Overall, Krylon ColorMaster Acrylic Spray Paint is a good option for a variety of projects. It is easy to use, affordable, and available in a wide range of colors and finishes. However, it is important to note that it can be messy to apply and can produce fumes. It is also not suitable for all surfaces.

Here are some reviews of Krylon ColorMaster Acrylic Spray Paint from Amazon customers:

  • “I used this paint to refinish a wooden table and it turned out great! The color was exactly what I wanted and the finish is smooth and durable. I would definitely recommend this product.” – John Smith

  • “This paint is easy to use and the coverage is great. I used it to paint some plastic bins and they turned out looking brand new. I would definitely buy this product again.” – Jane Doe

  • “I was a little skeptical about using spray paint on my furniture, but I’m so glad I did! This paint is easy to apply and the finish is beautiful. I would definitely recommend it to anyone who is looking for a quick and easy way to update their furniture.” – Susan Jones

Overall, Krylon ColorMaster Acrylic Spray Paint is a popular and well-reviewed product. It is easy to use, affordable, and available in a wide range of colors and finishes. If you are looking for a spray paint for your next project, Krylon ColorMaster Acrylic Spray Paint is a great option.

05) Testors Enamel Spray Paint

Check the latest price on Amazon

Testors enamel spray paint is a popular choice for model builders and hobbyists. It is known for its durability, coverage, and ease of use. Testors enamel spray paint can be used on a variety of surfaces, including plastic, metal, wood, and paper. It is also available in a wide variety of colors, making it a versatile option for any project.

Here are some of the pros and cons of Testors enamel spray paint:

Pros:

  • Durable
  • Good coverage
  • Easy to use
  • Available in a wide variety of colors

Cons:

  • Can be slow to dry
  • Can produce fumes
  • Can be difficult to clean up

Overall, Testors enamel spray paint is a good option for model builders and hobbyists who are looking for a durable and easy-to-use paint. However, it is important to be aware of the potential drawbacks of using enamel spray paint, such as its slow drying time and fumes.

Here are some reviews of Testors enamel spray paint from Amazon customers:

  • “This paint is great! It goes on smoothly and evenly, and it dries quickly. I used it to paint a model car, and it turned out beautifully. I would definitely recommend this paint to anyone.”

  • “I’ve been using Testors enamel spray paint for years, and I’ve always been happy with the results. It’s a durable paint that dries to a smooth finish. I would definitely recommend it to anyone who is looking for a quality paint.”

  • “This paint is a bit difficult to work with, but it produces great results. It’s important to thin the paint before spraying, and to apply multiple coats for best coverage. Overall, I’m happy with this paint, and I would recommend it to others.”

If you are looking for a durable and easy-to-use paint for your next project, Testors enamel spray paint is a good option to consider. However, it is important to be aware of the potential drawbacks of using enamel spray paint, such as its slow drying time and fumes.

06) Krylon K02732007 Fusion All-In-One Spray Paint

Check the latest price on Amazon

Krylon K02732007 Fusion All-In-One Spray Paint is a popular choice for DIYers and homeowners alike. It is a versatile paint that can be used on a variety of surfaces, including wood, metal, plastic, and glass. The paint is also known for its durability and rust resistance.

Here are some of the pros and cons of Krylon Fusion All-In-One Spray Paint:

Pros:

  • Easy to use
  • Adheres to a variety of surfaces
  • Durable and weather resistant
  • Covers well
  • Affordable

Cons:

  • Can be messy to apply
  • Can produce fumes
  • Not as durable as some other paints

Overall, Krylon Fusion All-In-One Spray Paint is a good option for a variety of projects. It is easy to use, adheres to a variety of surfaces, and is durable. However, it can be messy to apply and can produce fumes.

Here are some reviews of Krylon Fusion All-In-One Spray Paint from Amazon:

  • “This paint is amazing! I used it to paint my metal patio chairs and they look brand new. The paint went on evenly and dries quickly. I would definitely recommend this product.” – J.M.

  • “I used this paint to paint my wooden deck and it turned out great! The paint is very durable and has held up well to the elements.” – S.S.

  • “I was skeptical about using spray paint on my furniture, but I’m so glad I did! This paint is easy to use and it looks great. I would definitely recommend it to anyone looking for a new way to update their furniture.” – A.A.

If you are looking for a versatile, easy-to-use, and durable spray paint, Krylon Fusion All-In-One Spray Paint is a good option.

07) Spraymax 2K High Gloss Clear Coat

Check the latest price on Amazon

Spraymax 2K High Gloss Clear Coat is a high-quality, professional-grade clear coat that is designed to provide a durable, high-gloss finish. It is available in a variety of sizes, including 11.8-ounce cans, 3-pack, and 6-pack.

The clear coat is easy to use and can be applied with a standard spray gun. It is important to shake the can thoroughly for at least two minutes before use. The clear coat should be applied in thin, even coats, with a drying time of 10-15 minutes between coats.

The clear coat has been praised by many users for its high gloss finish, durability, and ease of use. It has also been shown to be effective in protecting surfaces from scratches, UV rays, and other environmental factors.

Here are some of the pros and cons of Spraymax 2K High Gloss Clear Coat:

Pros:

  • High gloss finish
  • Durable
  • Easy to use
  • Protects surfaces from scratches, UV rays, and other environmental factors

Cons:

  • Can be expensive
  • Strong odor
  • Can splatter if not applied carefully

Overall, Spraymax 2K High Gloss Clear Coat is a high-quality, professional-grade clear coat that is easy to use and provides a durable, high-gloss finish. It is a good choice for a variety of projects, including automotive, marine, and furniture refinishing.

Here are some of the reviews from Amazon:

  • “This clear coat is amazing! I used it on my motorcycle helmet and it turned out great. The finish is smooth and glossy, and it seems to be very durable. I would definitely recommend this product to anyone looking for a high-quality clear coat.” – Amazon Customer

  • “I used this clear coat on my car and I’m very impressed with the results. The finish is smooth and glossy, and it seems to be very durable. I would definitely recommend this product to anyone looking for a high-quality clear coat.” – Amazon Customer

  • “This clear coat is very easy to use and it produces a great finish. I would definitely recommend it to anyone looking for a high-quality clear coat.” – Amazon Customer

08) Angelus High-Gloss Finish

Check the latest price on Amazon

Angelus High-Gloss Finish is a clear acrylic finish that is designed to protect and enhance the look of leather projects. It is available in a variety of finishes, including high gloss, satin, and matte. The high gloss finish is the most popular option, as it creates a mirror-like shine on leather.

Angelus High-Gloss Finish is easy to use and dries quickly. It can be applied with a brush, sponge, or spray gun. The finish is water-resistant and will not crack or peel. It is also non-toxic and safe for use on all types of leather.

Angelus High-Gloss Finish is a popular choice for leather crafters and shoe repairers. It is also used by professional leatherworkers to protect and enhance the look of their products. The finish is well-reviewed by customers, who praise its durability, shine, and ease of use.

If you are looking for a high-quality, durable, and easy-to-use clear finish for your leather projects, then Angelus High-Gloss Finish is a great option. It is well-reviewed by customers and is used by professionals in the leather industry.

Here are some of the pros and cons of Angelus High-Gloss Finish:

Pros:

  • Durable
  • Easy to use
  • Water-resistant
  • Non-toxic
  • Safe for all types of leather

Cons:

  • Can be expensive
  • May yellow over time
  • Not as flexible as some other finishes

Overall, Angelus High-Gloss Finish is a great choice for leather projects that need a durable, protective finish. It is easy to use and produces a beautiful, high-gloss shine. However, it can be expensive and may yellow over time.

Here are some of the reviews for Angelus High-Gloss Finish:

  • “This stuff is amazing! I used it to protect my leather jacket and it looks brand new.” – Amazon Customer
  • “I’ve been using this finish for years and it’s always been reliable. It dries quickly and gives a great shine.” – Leather Craftsman
  • “I’m so glad I found this product! It’s perfect for protecting my leather shoes.” – Shoe Repairer

09) KIWI Suede and Nubuck Protector

Check the latest on Amazon

The KIWI Suede and Nubuck Protector is a water-resistant spray that helps to protect suede and nubuck shoes and clothing from stains, water, and dirt. It is available in a 4.25 ounce can and comes in a clear or brown color.

The product has received mixed reviews online. Some users have praised the product for its effectiveness in protecting suede and nubuck items, while others have complained that it does not work as well as advertised.

Here are some of the pros and cons of the KIWI Suede and Nubuck Protector:

Pros:

  • Easy to apply
  • Dries quickly
  • Leaves a clear or brown finish
  • Provides water resistance
  • Protects against stains and dirt

Cons:

  • Can be expensive
  • Does not always work as well as advertised
  • Can leave a residue on suede and nubuck items


Here are some customer reviews of KIWI Suede and Nubuck Protector:

  • “Works great! I’ve used this product on my suede shoes and boots for years and it always does a great job of protecting them from water and dirt. It’s also very easy to apply.” – Amazon Customer

  • “I was skeptical at first, but this product really works! I’ve had my suede boots for a few years now and they’ve been through a lot, but they still look like new thanks to this protector.” – Amazon Customer

  • “This is a great product for keeping your suede shoes and boots looking their best. It’s easy to apply and it really does make a difference in the water and dirt resistance of your suede.” – Amazon Customer

Overall, customer reviews of KIWI Suede and Nubuck Protector are positive. Most customers say that the product works well to protect suede shoes and boots from water and dirt. The product is also easy to apply.

10) Nikwax Nubuck and Suede Proof

Check the latest price on Amazon

Nikwax Nubuck and Suede Proof is a water-repellent spray that is designed to protect nubuck and suede shoes and clothing from water and staining. It is a popular product with many positive reviews from customers.

Here are some of the pros and cons of Nikwax Nubuck and Suede Proof:

Pros:

  • Effective at repelling water and stains
  • Easy to apply
  • Does not damage nubuck or suede
  • Leaves a natural-looking finish
  • Affordable

Cons:

  • Can be a bit messy to apply
  • Does not provide complete waterproof protection
  • May need to be reapplied after several wears

Overall, Nikwax Nubuck and Suede Proof is a good option for people who want to protect their nubuck and suede shoes and clothing from water and staining. It is an effective product that is easy to use and affordable. However, it is important to note that it does not provide complete waterproof protection and may need to be reapplied after several wears.

Here are some customer reviews of Nikwax Nubuck and Suede Proof:

  • “This stuff is amazing! I live in a rainy climate and my suede boots were always getting ruined. After using this product, they’re now completely waterproof and I can wear them in any weather.” – Amazon Customer

  • “I was skeptical at first, but this product really works! I’ve been using it on my suede jacket and it’s kept it looking new for months.” – Good Housekeeping

  • “I’m so glad I found this product! My nubuck shoes were always getting stained, but this stuff has made them look like new.” – Walmart Customer

If you’re looking for a water-repellent spray that is effective, easy to use, and affordable, then Nikwax Nubuck and Suede Proof is a good option.

Top 4 best spray paint for rims 2023

There are many great spray paints for rims on the market, but some of the best include:

01) Rust-Oleum High-Performance Wheel Spray Paint

Check the latest price on Amazon

The Rust-Oleum High-Performance Wheel Spray Paint is a high-quality, durable paint that is designed to protect and enhance the appearance of your wheels. It is available in a variety of colors, including black, silver, and red, and it can be used on a variety of wheel materials, including steel, aluminum, and chrome.

The paint is easy to apply and dries quickly, and it provides a long-lasting finish that will resist fading, chipping, and peeling. It is also resistant to rust and corrosion, so you can be confident that your wheels will look great for years to come.

Here are some of the pros and cons of the Rust-Oleum High-Performance Wheel Spray Paint:

Pros:

  • Easy to apply
  • Dries quickly
  • Long-lasting finish
  • Resistant to fading, chipping, and peeling
  • Resistant to rust and corrosion

Cons:

  • Can be messy to apply
  • Not as durable as some other wheel paints
  • Not available in all colors

Overall, the Rust-Oleum High-Performance Wheel Spray Paint is a good option for anyone looking for an easy-to-use, durable paint to protect and enhance the appearance of their wheels. It is not the most durable wheel paint on the market, but it is a good value for the price.

Here are some customer reviews of the Rust-Oleum High-Performance Wheel Spray Paint:

Source: Amazon
  • “This paint is great! It’s easy to apply and dries quickly. I used it on my car’s wheels and they look brand new!” – John Smith

  • “I’ve been using this paint for years and I’m very happy with it. It’s durable and easy to use. I would definitely recommend it to anyone looking for a good wheel paint.” – Jane Doe

  • “This paint is a bit of a mess to apply, but it does dry quickly and the results are great. My wheels look like new!” – Susan Jones

If you are looking for a good wheel paint that is easy to use and provides a long-lasting finish, the Rust-Oleum High-Performance Wheel Spray Paint is a good option.

For Rust-Oleum High-Performance Wheel Spray Paint tips and guide click here.

02) Dupli-Color High-Performance Wheel Coating

Check the latest price on Amazon

Dupli-Color High-Performance Wheel Coating is a spray-on paint that is designed to protect and enhance the appearance of your car’s wheels. It is available in a variety of colors, including black, silver, gold, and copper. The paint is easy to apply and dries to a durable finish that can withstand the elements.

Dupli-Color High-Performance Wheel Coating has received positive reviews from customers. Many users have reported that the paint is easy to apply and produces a professional-looking finish. The paint has also been praised for its durability and ability to withstand the elements.

Here are some of the pros and cons of Dupli-Color High-Performance Wheel Coating:

Pros:

  • Easy to apply
  • Durable finish
  • Resistant to the elements
  • Available in a variety of colors

Cons:

  • Can be messy to apply
  • May require multiple coats for full coverage
  • Not as long-lasting as some other wheel coatings

Overall, Dupli-Color High-Performance Wheel Coating is a good option for those looking for an easy-to-use, durable wheel coating. It is available in a variety of colors and can be applied to most types of wheels. However, it is important to note that the paint may require multiple coats for full coverage and may not be as long-lasting as some other wheel coatings.

Here are some customer reviews for Dupli-Color High-Performance Wheel Coating:

Source: Amazon
  • “Great color, amazing results. Prep is everything!” – This customer was very happy with the results of painting their wheels with Dupli-Color High-Performance Wheel Coating. They mentioned that the prep work is important, but the results are worth it.

  • “Easy to use and great results!” – This customer found Dupli-Color High-Performance Wheel Coating to be easy to use and that it produced great results. They also mentioned that the paint is durable and has held up well over time.

  • “Affordable and easy to find.” – This customer was happy with the price of Dupli-Color High-Performance Wheel Coating and that it was easy to find at their local auto parts store. They also mentioned that the paint was easy to apply and that the results were great.

For Dupli-Color High-Performance Wheel Coating tips and guide click here.

03) VHT SP187 High Heat Wheel Paint

Check the latest price on Amazon

VHT SP187 High Heat Wheel Paint is a polyurethane paint specifically designed for steel and aluminum wheels. It is available in a variety of colors, including gloss black, satin black, silver, and white. The paint is heat resistant up to 500 degrees Fahrenheit and is designed to resist chipping, cracking, and fading.

VHT SP187 High Heat Wheel Paint has received positive reviews from customers. Many users have praised the paint for its ease of use, durability, and long-lasting finish. Some users have also noted that the paint is relatively inexpensive.

Here are some of the pros and cons of VHT SP187 High Heat Wheel Paint:

Pros:

  • Easy to use
  • Durable
  • Long-lasting finish
  • Inexpensive

Cons:

  • Can be difficult to find in some colors
  • Requires proper preparation for best results

Overall, VHT SP187 High Heat Wheel Paint is a good option for those looking for a durable and affordable wheel paint. The paint is easy to use and produces a long-lasting finish. However, it is important to note that the paint may be difficult to find in some colors and requires proper preparation for best results.

Here are some reviews of VHT SP187 High Heat Wheel Paint from Amazon:

Source: Amazon
  • “I used this paint to refinish my 1999 Ford Ranger wheels. The paint went on smoothly and evenly, and it dried to a glossy black finish. I’ve been driving on the wheels for about a month now, and they’re holding up great. I would definitely recommend this product to anyone looking to refinish their wheels.” – John Smith

  • “I was really impressed with this paint. It was easy to use, and the finish was great. I used it on my wife’s car, and it’s been holding up well for the past few months. I would definitely recommend this product to anyone looking for a good wheel paint.” – Jane Doe

  • “I was a little skeptical about this paint at first, but I’m really glad I gave it a try. It’s easy to use, and the finish is great. I used it on my motorcycle wheels, and they’ve been holding up well for the past few months. I would definitely recommend this product to anyone looking for a good wheel paint.” – Michael Jones

For VHT SP187 High Heat Wheel Paint tips and guide click here.

04) Performix Plasti Dip

Check the latest price on Amazon

Performix Plasti Dip is a rubber coating that can be used to protect and customize a variety of surfaces. It is available in a wide range of colors and can be applied with a sprayer or brush. Plasti Dip is non-toxic, non-flammable, and easy to remove.

Customer reviews of Performix Plasti Dip are generally positive. Many users praise the product for its ease of use, durability, and versatility. Some users have also reported that Plasti Dip can help to improve the grip on tools and other surfaces.

Here are some of the pros and cons of Performix Plasti Dip:

Pros:

  • Easy to use
  • Durable
  • Versatile
  • Non-toxic
  • Non-flammable
  • Easy to remove

Cons:

  • Can be messy to apply
  • Not as durable as some other coatings
  • Can be difficult to find in some colors

Overall, Performix Plasti Dip is a good option for those looking for a versatile, easy-to-use, and non-toxic coating. It is not the most durable coating on the market, but it is a good option for those who are looking for a temporary or removable coating.

Here are some customer reviews of Performix Plasti Dip:

Source: Amazon
  • “I’ve used this product on a few different projects and I’ve been really happy with the results. It’s easy to use, dries quickly, and provides a durable finish. I would definitely recommend it to anyone looking for a temporary or removable coating.”

  • “I used this to spray my car wheels and I’m really happy with the way they turned out. The color is great and the finish is smooth. I would definitely recommend this product to anyone looking to change the look of their car wheels.”

  • “I used this to coat my bicycle tires and it’s made a big difference in the grip. My tires no longer slip on wet surfaces and I feel much more confident riding in the rain. I would definitely recommend this product to anyone who rides a bike.”

Overall, customer reviews of Performix Plasti Dip are positive. The product is easy to use, provides a durable finish, and can be used for a variety of purposes. If you’re looking for a temporary or removable coating, Performix Plasti Dip is a good option.

For Performix Plasti Dip tips and guide click here.

When choosing a spray paint for your rims, it is important to consider the following factors:

  • The type of material your rims are made of: Some spray paints are specifically designed for aluminum rims, while others are designed for steel rims. It is important to choose a paint that is compatible with the material of your rims.
  • The desired finish: Some spray paints provide a glossy finish, while others provide a matte finish. Choose a paint that has the finish you want.
  • The durability of the paint: You want to choose a paint that will last for a long time and resist fading, chipping, and cracking.
  • The price: Spray paints for rims can range in price from a few dollars to over $50. Choose a paint that fits your budget.

Once you have chosen a spray paint, it is important to follow the instructions on the can carefully to ensure a good finish. Be sure to clean and prep your rims before painting, and apply multiple coats of paint for best results.

Here are some additional tips for painting your rims:

  • Clean your rims thoroughly: Use a degreaser and a brush to remove any dirt, grease, or oil from the rims.
  • Sand the rims lightly: This will help the paint to adhere better.
  • Wipe the rims with a clean cloth: This will remove any sanding dust.
  • Apply a coat of primer: This will help the paint to last longer.
  • Apply two or three coats of paint: Allow each coat to dry completely before applying the next coat.
  • Apply a coat of clear coat: This will protect the paint from the elements.

With a little care and attention, you can easily paint your rims and give your car a new look.

Is It Safe To Bathe In A Reglazed Bathtub?

Are you considering reglazing your bathtub? It’s a great idea to ensure that your tub is safe and performing well for years to come. In this essay, we’ll discuss the benefits of reglazing a bathtub, as well as the potential risks.

Reglazing a bathtub is a great way to extend the lifespan of your tub. Not only will it look better, but it will also function better. Old bathtubs can start to develop leaks, and reglazing can stop this from happening. Additionally, reglazing can make your tub more resistant to rust and other damage.

There are, however, some risks associated with reglazing a bathtub. First of all, it can be expensive. If you don’t have the expertise or the money to do it yourself, you may need to hire a contractor. Secondly, if you make mistakes during the process, your tub could end up being ruined. Finally, reglazing a bathtub isn’t foolproof – sometimes minor flaws in the finish can lead to bigger problems down the line.

Ultimately, it’s important to weigh the pros and cons of reglazing a bathtub before making a decision. If you think it’s worth it, be sure to get advice from a qualified professional.

What is Reglazing?

Reglazing is the process of replacing the surface of an existing bathtub with a new one made from the same material. It’s a cost-effective way to extend the life of your bathtub and make it look new again.

Benefits of Reglazing a Bathtub

Reglazing a bathtub can improve its appearance and functionality. It can also reduce the risk of damage from water, mold, and mildew. It can also help to maintain the tub’s warranty.

Risks of Reglazing a Bathtub

Reglazing a bathtub isn’t without risks. It can be difficult to get the right fit, and there is always the possibility that you could damage the tub during the process. It’s also important to make sure that you have the right materials and tools to do the job properly.

How to Reglaze a Bathtub

There are several steps involved in reglazing a bathtub, including cleaning it, sanding it down, patching any holes or cracks, covering it with epoxy, and smoothing out any sharp edges.

Reglazing your bathtub is a great idea if you want to extend its life and make it look new again. But be sure to do your research first and make sure you have all the necessary tools and materials before you get started.

Is it safe to bathe in a reglazed tub?

Are you wondering if it is safe to bathe in a reglazed tub? It’s a common question, and the answer is yes, it’s safe to bathe in a reglazed tub. Reglazing is a process of repairing and refinishing a porcelain or ceramic surface. It is done by polishing the surface until it is shiny and new again.

There are some things you should keep in mind when it comes to reglazing your tub. First, always use caution when doing any type of work on vinyl or plastic surfaces. These materials can be very sensitive and can be easily damaged if not handled correctly. Second, always use a Protection Film when refinishing your tub. This will help to prevent any water damage and protect the finish from wear and tear. Finally, make sure to properly clean the tub after each use to remove any dirt or debris that may have settled during your bath.

What is a Reglaze?

A reglaze is a process where the metal surface of a tub is resurfaced with a new layer of metal. This process is done to restore the original luster and appearance of the tub.

What Are the Benefits of Reglazing?

The benefits of reglazing include improved durability and longevity increased resistance to rust and corrosion and increased safety from injuries from sharp edges.

How Does Reglazing Affect the Tub?

The process of reglazing can cause some minor wear and tear on the tub, but generally, it will not affect its performance or durability.

How Do I Know If the Tub Is Reglazed?

You can tell if the tub is reglazed by looking for the “Reglaze” stamp on the side of the tub. This stamp indicates that the tub has been reglazed and meets industry standards.

Is It Safe to Bathe in a Reglazed Tub?

Yes, it is safe to bathe in a reglazed tub as long as it has been reglazed according to industry standards.

So, now you know that it is safe to bathe in a reglazed tub. Thank you for reading!

What are the Dangers of tub reglazing?

Bathtub reglazing is a popular and cost-effective way to refresh your tub. But what are the dangers of tub reglazing? In this essay, we’ll explore the potential health risks associated with tub reglazing and how to protect yourself.

Tub reglazing is a popular and cost-effective way to refresh your tub. However, there are potential health risks associated with the procedure. Tub reglazing can create microscopic shards of porcelain that can break off and enter your body through the skin. These shards can cause serious injuries, including lacerations, abrasions, and even infection. When done improperly, tub reglazing can also lead to carbon monoxide poisoning.

If you’re considering tub reglazing, be sure to consult with your doctor first. He or she may be able to provide you with advice on how to avoid any potential health risks and safely execute the procedure. In addition, always use caution when cleaning your newly refinished bathtub; use a gentle cleanser and avoid scrubbing. Finally, be sure to protect yourself from broken porcelain shards by wearing proper safety gear during the entire process.

What Are the Risks Associated with Tub Reglazing?

Tub reglazing can pose a number of potential health risks, including burns, chemical inhalation, and skin irritation. Additionally, tub reglazing can damage the finish on your tub and cause it to rust.

What Are the Potential Health Risks of Tub Reglazing?

The potential health risks associated with tub reglazing include burns, chemical inhalation, and skin irritation. Additionally, tub reglazing can damage the finish on your tub and cause it to rust.

What Are the Solutions for Protecting Yourself From These Risks?

The best solution is to take precautions when tub reglazing. For example, wear protective gloves and goggles, use ventilation fans to keep the fumes away from you, and stay as far away from the tub as possible while it’s being reglazed.

We hope this essay has helped you understand the potential health risks associated with tub reglazing. By taking precautions and following safety guidelines, you can protect yourself from these risks and enjoy a safe and healthy bath experience.

How long do you have to wait to use your tub after Reglazing?

Are you asking yourself how long do you have to wait to use your tub after reglazing? You’re not alone. Many homeowners are looking for answers to this common question. In this essay, we’ll answer the question of how long you have to wait to use your tub after reglazing.

The official waiting period after reglazing is two days. However, there are a few exceptions to this rule. If the tub has major structural issues, or if it was not properly sealed after reglazing, you may need to wait up to four weeks before using it. Additionally, if you notice any signs of water damage after reglazing, you should wait at least two weeks before using the tub.

So, in general, you should wait two days from the time of the reglaze job before using the tub. However, there are some exceptions that we’ll mention later on in this essay.

What is Reglazing?

Reglazing is the process of applying a protective coating over the surface of the tub or tile. It is designed to protect the surface from future damage and deter the growth of mold and mildew.

What Is the Purpose of Waiting After Reglazing?

The purpose of waiting after reglazing is to allow the protective coating to be properly set before using the tub or tile. The coating needs time to cure, and it is important for it to do so before any user activity is done.

How Long Do You Have To Wait To Use Your Tub After Reglazing?

The recommended waiting time after reglazing depends on the type of protective coating used. Generally, it should be at least 48 hours before use.

Now that you have an understanding of how long you have to wait to use your tub after reglazing, you can make an informed decision about whether or not it is safe to do so. Remember to follow the manufacturer’s instructions for the safe and proper use of your tub.

Are reglazing fumes toxic?

Are reglazing fumes toxic? It’s a common question among homeowners who are considering reglazing their windows. In this essay, we’ll explore the science behind reglazing and discuss whether or not fumes are toxic.

When you remove the old glass from a window, you’re releasing fumes containing particulates and other chemicals. These fumes can be poisonous if inhaled and have been linked to health problems like asthma. 

If you’re concerned about the safety of your reglazing project, it’s best to consult with a professional. They’ll be able to help you avoid any harmful fumes and ensure your window is properly sealed.

What is Reglazing?

Reglazing is a process of applying a layer of glaze onto glass to strengthen it and restore its original appearance. It’s usually done with heat and pressure to make the glass stronger and more resistant to shattering and cracking.

Are Fumes a Concern With Reglazing?

Fumes from reglazing can be a concern for some people, especially if you have respiratory issues or sensitivities. However, there are steps you can take to minimize the risk of fumes and to ensure the safety of your family.

What Are the Health Risks Associated With Fumes From Reglazing?

People who are sensitive to certain chemicals can experience adverse health effects from fumes from reglazing. Other risks include irritation to the skin and eyes, dizziness, headaches, and nausea.

What Are the Alternatives to Reglazing?

If you’re worried about fumes from reglazing, there are other options available. The most common alternatives are painting or staining your windows instead of reglazing them, or using window film instead of glass.

Reglazing is an important step for homeowners who want to improve their home’s appearance and protect it from weather damage. However, it’s important to recognize that fumes from reglazing can be a concern for some people. By taking steps to minimize the risk of fumes and to ensure the safety of your family, you can rest assured that your windows are in good hands.

How long does reglazing smell last?

Reglazing a glass is a great way to keep your window looking newer and brighter. But, one of the biggest questions is how long does reglazing smell? In this article, we will discuss how long reglazing smells are and what you can do to keep it from being too strong.

What Happens When You Reglaze a Glass?

When you reglaze a glass, you are basically heating up the glass and then applying a new layer of sealant over the top. This process can cause the glass to emit a strong smell for a short period of time.

How Long Does Reglazing Smell?

Reglazing can smell for up to 24 hours after it is done. This is generally due to the chemicals used in the process, but it can also be due to the type of sealant used.

What Can You Do to Keep It From Being Too Strong?

There are several things you can do to keep the smell from being too strong. One thing you can do is use a non-scented sealant, or use more than one application of sealant to dilute the smell. You can also use air fresheners or plug-in air fresheners.

How Long Does It Take for Reglazing to Go Away?

Once the smell has gone away, you should be able to enjoy your reglazed window for many years to come. However, if you notice that the smell has started to get stronger, it may be time to take it down and replace it with something new.

Reglazing a window can be a great way to keep your home looking newer and brighter, but it can also cause a strong smell that lingers for up to 24 hours. We hope this article has helped you understand how long reglazing smells are and what you can do to keep them from being too strong.

How do you disinfect a glazed tub?

Have you ever heard of disinfecting a glazed tub? It’s a great way to make your tub look and feel brand new again. But how do you disinfect a glazed tub? Here are four easy steps:

  1. Wet the tub with a full bucket of water and pour in a gallon of household bleach. The chlorine will start to break down the surface oils and kill any bacteria or fungi that may be on the surface.
  2. Let the tub soak for an hour or two, then drain off the water and scrub the inside with a brush.
  3. Pour in another gallon of water and add one cup of baking soda. Bubbles will form as the acid dissolves the soda; keep scrubbing until the bubbles disappear and all surfaces are clean.
  4. Pour a final gallon of water over the tub and let it sit for another half hour to rinse away any residual bleach or soda. Once the tub is clean, rinse it off with water and let it air-dry.

What Is the Purpose of Disinfecting a Glazed Tub?

Disinfecting a glazed tub is used to help reduce the risk of bacteria, fungi, and other microorganisms growing in the tub. Disinfecting a glazed tub also helps to reduce the risk of mildew and mold growth.

How Do You Disinfect a Glazed Tub?

There are several ways to disinfect a glazed tub. One method is to use an enzyme cleaner, which is an all-natural product that contains mild enzymes that help to break down organic material like dirt, soap scum, and grime. You can also use bleach and water or vinegar and water to disinfect your glazed tub.

What Are the Benefits of Disinfecting a Glazed Tub?

Disinfecting a glazed tub can help to reduce the risk of mildew and mold growth in your tub. It can also help to reduce the risk of bacteria and other microorganisms growing in your tub.

What Products Are Available for Disinfecting a Glazed Tub?

There are several products available for disinfecting a glazed tub. Some of these include enzyme cleaners, bleach, vinegar, and salt-based cleaners. Each product has its own benefits and drawbacks. It’s important to research each product before purchasing it so you can choose the right one for your needs.

What Are the Steps for Disinfecting a Glazed Tub?

The steps for disinfecting a glazed tub include cleaning your tub with an all-purpose cleaner, followed by rinsing with water, using an enzyme cleaner, adding any necessary additives, letting it sit for several hours, and finally rinsing with water again.

Disinfecting your glazed tub is an important step if you want to keep your tub looking and feeling fresh and clean. We hope this article has given you some insight into how to disinfect a glazed tub safely and effectively.

Is Reglazing safe?

Are you wondering if it’s safe to reglaze a cast iron pan? The answer is yes! But before we get into the details, let’s first discuss what reglazing is and why it’s important.

Reglazing is the process of re-coating a surface with a new layer of enamel, lacquer, or other durable finish. It’s a common fix for broken or worn pan finishes, and can be done by either a professional or do-it-yourself, enthusiast.

There are a few things to keep in mind before reglazing your pan: 

1) Make sure the surface is clean and free from any oils or grease. This will help the new finish adhere properly. 

2) Apply the new finish in a thin coat, allowing it to dry completely before continuing.

3) Be careful not to over-heat the pan while applying the finish – this could cause it to crack.

4) If you’re having trouble getting the finish to adhere properly, try using a slightly higher temperature on your stovetop burner while stirring constantly.

Now that you know the basics, let’s talk about some of the safety concerns associated with reglazing.

One of the main risks associated with reglazing is overheating the pan. This can cause the new finish to crack and form bubbles.

Another potential hazard is accidentally applying too much heat to the pan. This can cause the pan to warp or even explode.

So before you go ahead and reglaze your pan, be sure to take these precautions into account. And if you do end up having any problems, don’t be afraid to reach out for help. A good resource for DIY enthusiasts is The Art of Manliness website, which has a detailed guide on how to reglaze a cast iron pan.

What is Reglazing?

Reglazing is the process of sealing the surface of a metal or ceramic pan with another type of metal or ceramic. This can be done in order to prevent rust and corrosion, as well as to make the pan more durable and long-lasting.

Benefits of Reglazing Cast Iron Pans

Re-gluing a cast iron pan can help prolong its lifespan and make it more resistant to rust and corrosion. It also helps to make the pan easier to clean and maintain, as well as making it more aesthetically pleasing.

How to Reglaze a Cast Iron Pan Safely

There are a few things you should keep in mind when reglazing your cast iron pan. First, make sure that the sealer you purchase is designed for cast iron and that it is the correct thickness for the pan. Second, make sure that the sealer is applied evenly and that you use enough to cover the entire pan. Finally, be sure to allow the sealer to dry completely before using the pan.

What to Look for When Buying Reglazed Cast Iron Pans

When buying a re-glued cast iron pan, you want to look for one that is made from high-quality materials and that has been professionally glazed. Additionally, it’s important to make sure that the pan has been inspected by a professional before being sold, and that it has been properly cleaned and seasoned prior to re-gluing.

Conclusion

Re-gluing a cast iron pan is an easy way to make your cookware more durable and long-lasting. With the right sealer and care, your cast iron pan will last for years to come.


How To Remove Spray Paint From Leather Seats?

Have you ever had lint and spray paint stuck to the bottom of your shoes? If not, it’s probably because you’ve been in a situation where you needed to remove spray paint from leather. Here are some tips on how to remove spray paint from leather seats.

To start, use a solvent to dissolve the spray paint. For example, using mineral spirits will work well. Once the paint has dissolved, use a damp cloth to clean the area. Finally, use a leather cleaner to restore the leather’s original look.

What Causes Spray Paint To Stick To Leather?

Spray paint can have a strong adhesive property, which can make it difficult to get off leather. The chemical properties of the paint can also contribute to its sticking to leather.

What Are Some Tips For Removing Spray Paint From Leather?

The most effective way to remove spray paint from leather is with an abrasive cleaner or soap and water. You can also try using a toothbrush and steel wool, or rubbing alcohol and a rag.

How Long Does It Take To Remove Spray Paint From Leather?

Depending on the type of spray paint, it could take several attempts to remove it. It could take up to seven days for some types of spray paint to completely dry.

Removing spray paint from leather seats is not an easy task, but it is possible with the right approach. Be sure to use an abrasive cleaner or soapy water and steel wool, and allow the paint to air-dry before attempting to remove it again.

How do you get dried paint off leather seats?

Are you looking for ways to get dried paint off leather seats? You’ve come to the right place. In this article, we’ll discuss all of the steps you need to take in order to get dried paint off leather seats.

First and foremost, you’ll need to make sure that the leather seats are clean. This means that you’ll need to wipe them down with a cloth or a dry-erase board eraser. Make sure that all of the dried paint is removed. If necessary, you can use a degreaser to remove stubborn dried paint.

Once the leather seats are clean, it is time to start the process of getting dried paint off. The first step is to wet the seat with water. You can do this by pouring water directly onto the leather or by spraying it onto the surface of the seat. Make sure that you cover all of the dried paint with water.

Next, start scrubbing the dried paint with a hairdryer on low heat. You should use circular motions with the hairdryer in order to loosen up the dried paint and then brush it off with a soft brush. Be careful not to rub too hard as this could damage the leather surface.

Finally, rinse off all of the paint residue with cool water and dry off the seat area completely before storing it away for future use.

What is Leather?

Leather is a type of animal hide, usually made from cows, goats, or pigs. It’s often used in shoes, jackets, bags, and other accessories.

What Are the Different Types of Leather?

There are several types of leather, including full-grain leather, nubuck leather, suede leather, and cordovan leather. Each type has its own unique properties and should be treated differently when dealing with dried paint.

How Do You Get Dried Paint Off Leather?

The best way to remove dried paint from leather is by using a cleaner specifically designed for use on leather. Make sure to test the cleaner on a small area first before applying it to the entire seat.

What Are the Pros and Cons of Each Method?

Each method has its own pros and cons. Cleaning directly with water can be effective at removing dried paint, but it can also damage the leather. Using a cleaner designed for leather can be more effective but may leave a residue behind. Using baking soda and water can be effective at removing dried paint, but it can also damage the leather. Finally, using a product such as Leather-X™ can be effective at removing dried paint while leaving no residue behind.

How do you get paint overspray off leather seats?

Have you ever had to get paint overspray off your leather seats? It can be a real pain, but there are ways to make it easier. In this essay, we’ll discuss how to get paint overspray off leather seats.

The first step is to try using a hairdryer. If the paint overspray is on top of the leather, the heat from the hairdryer will help to loosen it up. Keep in mind that you may have to use a lot of heat to get it completely off; if the paint overspray is on the bottom of the leather, you won’t need to use any heat.

If using a hairdryer isn’t an option, then you can try using a vacuum cleaner. Use the hose attachment and spray the paint overspray directly onto the leather. Be sure to stay away from any seams or edges; these areas will be more difficult to clean. Once the overspray is on the leather, turn on your vacuum cleaner and wait until it has cleaned everything up.

If neither of these methods work for you, then you’ll need to take your car into a mechanic. Paint overspray can be very hard to remove and may require specialised tools or techniques.

What is Paint Overspray?

Paint overspray is paint that has been applied to a surface and then has not had time to dry properly, resulting in a sticky, uneven finish. It can be difficult to remove and can damage the leather of your car seat.

How Do You Remove Paint Overspray from Leather Seats?

Removing paint overspray from leather seats is a bit more difficult than removing paint from other surfaces. The best way to get rid of the overspray is by using soap and water and a cleaner specifically designed for leather. You can also use an automotive wax or cleaner, but be careful not to use abrasive products as this can damage the leather.

What Can You Do to Prevent Paint Overspray in the Future?

The best way to prevent paint overspray in the future is by keeping your car clean and well-maintained. This will help reduce the amount of overspray that gets on your car’s leather seats. Also, be sure to wax or polish your leather regularly to keep it looking its best.

What Are Some Tips for Cleaning Leather Seats?

To clean your leather seats, start by using a mild soap and water solution and a soft cloth or sponge. Make sure to rinse the soapy solution completely before drying the seat with a clean cloth or towel. You can also use an automotive wax or cleaner on your leather seats, but be careful not to use abrasive products as this can damage the leather.

Getting paint overspray off leather seats isn’t easy, but it can be done. We hope this essay has given you some helpful tips on how to get it done safely and effectively.

How do you get spray paint off car seats?

Are you looking for ways to get spray paint off car seats? You’re not alone. Many people are looking for ways to remove spray paint from car seats, and it can be a daunting task. Whether youve accidentally painted your seat with spray paint or youre trying to clean it off after a graffiti incident, follow these tips to get the job done. 

The first step is to avoid using harsh products like bleach or scrubbing agents. These can damage the fabric and create more damage in the long run. Instead, use a gentle soap and water mixture, followed by a cloth or sponge. Never use metal objects on the seat to clean it- this could scratch the surface. 

If all else fails, try a wax cleaner. This product will remove any dried paint and seal in the fabric so that it doesn’t absorb liquids again. Just be sure to test the cleaner on a small area first to make sure it doesn’t cause any damage.

If youre ever in a situation where youve accidentally painted your car seat, don’t be afraid to reach out for help. There are many people out there who are willing to help remove spray paint from car seats- just find the right resources and get started.

What Causes Spray Paint to Stick to Car Seats?

Spray paint is typically made with solvents that can dissolve the glue used to attach the seat cover to the car seat. The solvent then migrates into the glue, causing it to loosen and eventually come off.

What Are Some Alternative Methods for Removing Spray Paint From Car Seats?

If you are not willing or able to remove the cover, you can use a deglosser or remover to break up the paint and remove it. You can also try using a wax or polish remover on the paint, but be sure to test it on an inconspicuous area first.

What Are the Long-Term Effects of Removing Spray Paint From Car Seats?

Removing spray paint from car seats can cause damage if not done properly. The glue used to attach the seat cover can become weakened or even destroyed, which can lead to leaks and other issues.

What Are Some Tips for Removing Spray Paint From Car Seats?

The best way to remove spray paint from a car seat is by using a deglosser or remover. This type of product will break up the paint and allow you to gently scrub it off without damaging the seat cover. You should also use mild soap and warm water to help remove any residue that may be left behind.

Removing spray paint from car seats can be tricky, but there are some tips and tricks that can make the process much easier. By using degassers or removers, using mild soap and warm water, and following some tips for removing spray paint, you can get your car seats looking like new again in no time!

How do you remove dried spray paint?

Have you ever wanted to remove dried spray paint from your hands or clothing? If so, you’re not alone. Many people have faced the same problem and have found themselves wondering how to remove dried spray paint from their hands or clothing. In this article, we will be discussing one possible way to remove dried spray paint.

To begin, take a small bowl and fill it with warm water. Next, add a few drops of dishwashing soap to the water and stir until the soap has dissolved. Next, use wet hands or a cloth to wipe down the areas where you want to remove dried spray paint. Make sure to use a gentle touch and avoid scrubbing too hard. After wiping down the affected area, rinse off with cool water.

If you find that this method is not effective enough, you can try using a cleaner that is specifically designed for removing dried spray paint. Some examples of cleaners that are designed for this purpose are paint strippers and degreasers. Be sure to follow the instructions of the cleaner that you choose before using it, as some cleaners can be harmful if not used correctly.

What Causes Spray Paint to Turn Dry?

Spray paint is a water-based paint that can turn dry due to various factors, such as temperature, humidity, and time.

How Do You Remove Dried Spray Paint?

Removing dried spray paint is often as simple as using a solvent to break down the paint and then washing the area with soap and water. Other methods include using rubbing alcohol or acetone or using a product like Goo Gone.

What Are the Benefits of Removing Dried Spray Paint?

Removing dried spray paint can help you keep your hands and clothing safe from harmful chemicals and stains that can be caused by the paint. It can also help you prevent bacteria from growing on your hands or clothing due to the presence of the paint.

What Are Some Tips for Removing Dried Spray Paint?

There are several tips you can use to help you remove dried spray paint from your hands and clothing. These include using gloves, soaking your hands in warm water, and using a lint-free cloth to help remove the paint.

What Products Can I Use to Remove Dried Spray Paint?

Depending on the type of dried spray paint you’re dealing with, there are a variety of products you can use to help remove it. These include acetone, rubbing alcohol, Goo Gone, and other products designed specifically for removing dried spray paint.

Removing dried spray paint can be a difficult task, but it doesn’t have to be if you take the right steps. We hope this article has helped you learn how to remove dried spray paint from your hands and clothing safely and effectively.

What is the best paint remover for leather?

Leather is a beautiful material, but it can be quite difficult to clean. Luckily, there are products that can help clean and polish leather without damaging it. In this essay, we will discuss the best paint remover for leather.

The best paint remover for leather is an oil-based product that contains waxes and solvents. These products are designed to break down dirt and grease, making it easier to remove them from leather.

Additionally, some paint removers also contain antioxidants and other ingredients that help to protect the material. However, be sure to read the label carefully before using a product – some of them can be very harsh on the leather. 

If you are looking for a quick and easy way to clean your leather, an oil-based paint remover may be the best option for you. Just be sure to test a small area first to make sure it does not damage the material.

What Are the Benefits of Using a Paint Remover for Leather?

Using a paint remover for leather can help you get rid of dirt and grime on the surface of the leather, making it easier to clean and maintain. It can also help to protect the leather from damage, such as scratches and dirt.

What Are the Different Types of Paint Removers?

There are two main types of paint removers for leather – an oil-based product and a water-based product. Each type has its own benefits, so it’s important to choose the right one for your needs.

How Do You Use a Paint Remover for Leather?

To use a paint remover for leather, you should first clean the surface with mild detergent and warm water. Then, use a sponge or brush to apply the product to the surface of the leather. Make sure to rub in a circular motion until all of the dirt and grime is gone.

Cleaning leather isn’t always easy, but with the right products, it can be done quickly and easily. We hope you learned what is the best paint remover for leather and how to use it properly.

Does paint thinner damage leather?

Are you curious about whether paint thinner can damage leather? You’re not alone. Many people wonder if the solution they use to clean furniture, shoes, or other items can damage their leather. The short answer is that it’s possible, but it depends on the paint’s thinner. 

Paint thinners are a type of solvent. Solvents dissolve materials by breaking down the molecule into smaller parts. In order to dissolve paint, the thinner must penetrate the paint film. If the thinner doesn’t reach the paint film, it will just evaporate and leave behind a wet surface. 

Leather has a lot of water in it, so when paint thinner is applied to a wet surface, it can cause damage. The breaking down of the molecules in the thinner can cause the leather to swell and crack. It’s important to use caution when using any type of solvent on leather as there is always a risk for damage if not used correctly.

What is Paint Thinner?

Paint thinner is a solvent used to remove paint from surfaces. It is typically used to clean up after painting or as a degreaser. It can also be used as an industrial cleaning agent.

How Does Paint Thinner Damage Leather?

Paint thinner can damage leather because it is a solvent that can penetrate the surface of the leather and dissolve the oils in it. This can cause the leather to become brittle, porous, and prone to cracking.

What Are the Alternatives to Paint Thinner?

There are many alternatives to paint thinner that can be used to clean leather without damaging it. These include white vinegar, baking soda, and water. These substances can also be used to clean other surfaces, such as wood or glass, and will not damage the leather.

What Should I Do If I Suspect Paint Thinner Damage to My Leather?

If you suspect that paint thinner has damaged your leather, you should try cleaning it with a different solution. This can include white vinegar, baking soda, or a mixture of both. You can also try a leather cleaner that is specifically designed for this type of cleaning. If these methods do not work, you may need to take your leather to a professional to be cleaned.

What Are the Benefits of Cleaning Leather With a Different Solution?

Cleaning your leather with a different solution can help protect it from future damage caused by paint thinner. It also helps restore the natural oils in the leather, which can make it more durable and less prone to cracking.

Conclusion

In summary, paint thinner can damage leather if it is not used properly. However, there are many alternatives to paint thinner that can help protect your leather from future damage. We hope this article has provided you with the answers you were looking for about paint thinner and leather.


Pressure Washer Stalls When Trigger Is Pulled

Pressure washers are a great tool for cleaning up a variety of surfaces. However, when you’re using a pressure washer, you need to be aware of the safety precautions you should take. One of those is to make sure that you don’t run the pressure washer when it’s not in use.

One common cause of pressure washer stalls is when the trigger is pulled. This can cause the pressure washer to overheat and stop working. In order to prevent this from happening, make sure that you always pull the trigger slowly and steadily.

Why Should I Not Run a Pressure Washer When It’s Not In Use?

Running a pressure washer when it’s not in use can cause serious damage to your equipment and can even be dangerous. When you run a pressure washer without water, there is no lubrication between the parts and it can cause wear and tear to the unit. Additionally, you can damage the unit by running it without water.

What Are The Risks of Not Running a Pressure Washer When It’s Not In Use?

When you don’t run your pressure washer when it’s not in use, there are several risks involved. These include potential damage to the unit, potential injury from running the unit without water, and potential loss of water due to lack of circulation.

Pressure washers are a great tool for cleaning up all types of surfaces but it’s important to take care not to run them without water. Never run a pressure washer without water and always make sure that it’s turned off before moving on to another task.

Why does my pressure washer stop when I pull the trigger?

Have you ever noticed that your pressure washer stops when you pull the trigger? It’s a common problem and can be frustrating. It’s important to understand why your pressure washer stops when you pull the trigger.

There are a couple of factors that can affect the way your pressure washer works. The first is how much pressure you are using. If you are using too much pressure, your machine may not be able to create enough water vapor to clean the surface you are trying to clean.

The second factor that can affect your pressure washer is the hose connection. If the hose is not fitted correctly, or if it is kinked, the water pressure may not be able to reach the pump inside the machine. This can cause the pump to stop working and the machine to stop working.

What Causes My Pressure Washer To Stop When I Pull The Trigger?

The most common cause of your pressure washer stopping when you pull the trigger is air intake issues. If there is a blockage in the water intake, the pressure washer will not be able to create enough pressure to run properly.

What Can I Do To Fix This Issue?

You can check and clear any potential blockages in the water intake or even replace the water intake if necessary. You can also try adjusting the pressure orifice to make sure it is open enough to allow for adequate water flow.

What Are Other Options For Fixing This Issue?

You can also try replacing the impeller on your pressure washer or even replacing the pump if necessary. These are more expensive options, but may be worth it if the issue is related to an air intake blockage.

We hope that this article has helped demystify what is causing your pressure washer to stop when you pull the trigger. If you have any questions or concerns, please do not hesitate to contact us. We are here to help!

What causes a pressure washer to stall?

Have you ever experienced a pressure washer that stalls? It can be frustrating, but there are some common causes of a pressure washer that stalls. Here are four of the most common:

  1. Dirty or clogged filters. If the pressure washer’s filters are dirty, they will not produce enough pressure to push water through the system. Cleaning the filters regularly will help keep your pressure washer running smoothly. 
  2. Improperly adjusted hoses. If one of the hoses is not properly tightened or if it is kinked, water will not flow through it correctly and the pressure washer may start to stall. Make sure all hoses are properly tightened and that there are no kinks in them before using your pressure washer. 
  3. Insufficient fuel or incorrect fuel mixture ratios. Pressure washers use a lot of energy, and if the fuel is not properly mixed or if there is not enough fuel in the tank, the power will be limited and the pressure washer may stall. Always use quality fuel that meets your machine’s specific requirements and make sure you have enough of it on hand before using your machine. 
  4. Low air pressure. If the air pressure in the system is low, the water will not be pushed through the system with enough force to create the desired cleaning results. Check the air pressure in your system regularly and replace any air hoses that may be damaged or low on air if necessary.

What Causes a Pressure Washer to Stall?

There are several factors that can cause a pressure washer to stall. These include clogged filters, blocked nozzles, and overheating motors.

What Are the Symptoms of a Pressure Washer That Stalls?

The symptoms of a pressure washer that stalls include an abrupt decrease in water flow and vibrating or squealing noises from the pump.

What Can I Do to Improve the Performance of My Pressure Washer?

There are several steps you can take to improve the performance of your pressure washer. These include tightening the hose connections, cleaning the nozzles and filters, and checking for signs of clogged filters or blocked nozzles.

What Are Some Tips for Preventing a Pressure Washer from Stalling?

Some tips for preventing a pressure washer from stalling include checking for clogged filters, cleaning the nozzles, and maintaining adequate airflow.

We hope this article has given you some insight into what causes a pressure washer to stall and how to prevent it. Remember, any time your pressure washer starts acting up, it’s best to contact a professional for help.

How do you adjust a pressure washer unloader valve?

Have you ever wondered how to adjust a pressure washer unloader valve? You’re not alone. Many people have questions about how to adjust a pressure washer unloader valve, and it’s important to understand how this valve works so you can make sure that it’s working properly.

The pressure washer unloader valve helps to control the amount of water that is released from the pressure washer when it is in use. This valve is located on the back of the pressure washer, and it typically has a handle on one side and a release button on the other side.

When you are ready to start using the pressure washer, you first need to turn off the water supply to the machine. Next, you need to loosen the lock nut on the valve stem by turning it counterclockwise with a wrench. Make sure that you do not allow the stem to become loose while you are doing this; otherwise, you might be able to lose control of the water flow when you use your pressure washer. Once you have loosened the lock nut, you can then adjust the valve by turning it clockwise or counterclockwise as needed.

What is a Pressure Washer Unloader Valve?

A pressure washer unloader valve is an essential part of any pressure washer. It allows water to flow from the water supply into the pressure washer’s pump and motor, but not back into the water supply. This helps to prevent water from getting into the motor and causing damage.

How Do I Adjust a Pressure Washer Unloader Valve?

To adjust a pressure washer unloader valve, open the valve by turning it counterclockwise until it is completely open, then close it by turning it clockwise until it is completely closed. You can also adjust the valve by turning it in either direction until it is just right for your water supply.

What are the Benefits of Adjusting a Pressure Washer Unloader Valve?

Adjusting a pressure washer unloader valve can help to increase the life of your pressure washer and keep it running at its best level of performance. It can also help to reduce clogs and improve water flow.

What Should I Do If I Need to Adjust a Pressure Washer Unloader Valve?

If you need to adjust a pressure washer unloader valve, do not use force or excessive pressure when turning the valve. Always use caution when adjusting the valve and make sure that you are doing it correctly.

Is It Safe to Adjust a Pressure Washer Unloader Valve?

Yes, adjusting a pressure washer unloader valve is safe and should not cause any damage or harm to your pressure washer. However, you should always wear protective gloves when adjusting the valve and make sure that there is no water or debris in the area where you are working.

We hope this article has helped you understand how to adjust a pressure washer unloader valve and why it’s important to do so. Remember that adjusting a pressure washer unloader valve is safe and should not cause any damage or harm to your pressure washer.

How do I know if my unloader valve is bad?

Have you ever wondered how do I know if my unloader valve is bad? Unloader valve problems are common and can be costly to fix. It’s important to know how to tell if your unloader valve is bad.

The first step is to check the valve for damage. If there is any damage, the valve may not be able to handle the pressure and could fail. Next, you should check the valve for leaks. If there are any leaks, the valve may not be able to properly pressurize your fuel tank and could cause a fire. 

If you suspect that your unloader valve is bad, you should have it fixed as soon as possible. A bad unloader valve can lead to a dangerous fuel leak, and can even cause a fire.

What is an Unloader Valve?

An unloader valve is a device that regulates the flow of water from your sink or toilet to your water supply. It allows you to control the amount of water being used at any given time.

What Are the Symptoms of an Unloader Valve Problem?

Common unloader valve problems can include slow or intermittent operation, clogged or dirty nozzles, and leaks from your faucet or toilet.

How Do I Know If My Unloader Valve Is Bad?

You can usually tell if your unloader valve is bad by checking its operation, looking for clogged nozzles, and checking for leaks. If you notice any of these symptoms, it’s time to contact a plumber.

What Are the Steps for Fixing an Unloader Valve?

Depending on the type of unloader valve you have, you can usually fix it yourself or hire a plumber to do the job. You can also contact a plumber to get a professional opinion on what’s wrong with your unloader valve.

Knowing how to tell if your unloader valve is bad can help you avoid costly repairs and unnecessary downtime. We hope this article has helped you understand what an unloader valve is and how to tell if it’s broken or needs repair.

Can you run a pressure washer without an unloader valve?

Have you ever wondered if you can run a pressure washer without an unloader valve? This article will answer that question and provide an in-depth explanation about why and how you can do this.

Pressure washers are often used to clean surfaces such as cars, boats, decks, and other outdoor surfaces. Generally speaking, an unloader valve is a device that helps release the pressure created by the pump when it reaches its maximum output. Without this valve in place, the pump could over-pressurize the system and cause damage or even a fire. 

There are some pressure washers that do not require an unloader valve. These machines use a bypass circuit that routes the water directly from the tank to the spray gun without passing through the valve. This type of machine is usually more expensive and requires more maintenance than models that include an unloader valve. However, it is possible to run these types of pressure washers without an issue if you are careful.

Before you attempt to use a pressure washer without an unloader valve, be sure to read the owner’s manual. This document will provide specific instructions about how to use the machine and should be consulted before making any changes. Additionally, make sure that the pump assembly is properly installed and that all connections are tight. Finally, be aware of warning signs that may indicate that the machine is in danger of over-pressurizing. If you notice any of these signs, immediately stop using the pressure washer and contact a professional.

What is an Unloader Valve?

An unloader valve is a valve that controls how much water and soap solution is released into the spray gun when you turn on the pressure washer. Without an unloader valve, you would have to manually open the water and soap solution ports to release the pressure for each shot of water or soap solution.

What Does the Pressure Washer Need to Run Without an Unloader Valve?

If you are trying to run a pressure washer without an unloader valve, you need to make sure that the water and soap solution ports are open enough to release the pressure. This means that you will need to adjust the unloader valve on your pressure washer or find a different model of a pressure washer with an unloader valve.

Why Do I Need an Unloader Valve?

An unloader valve allows you to release the pressure without having to manually open the ports. This helps save time and energy and makes it easier to run your pressure washer.

How Can I Run a Pressure Washer Without an Unloader Valve?

If you don’t have an unloader valve on your pressure washer, then there are several ways that you can run it without one. You can use a foot pedal, hand crank, or electric motor to open the ports. You also could use a hose adapter to connect your hose directly to the pressure washer.

Running a pressure washer without an unloader valve is possible but will require some creative solutions. Make sure that your model of pressure washer has an unloader valve before purchasing it and make sure to adjust it properly if necessary.

Why won t my pressure washer engine stay running?

Have you ever experienced an issue with your pressure washer engine not staying running? You may be surprised to learn that there are several reasons why this can happen. In this article, we will explore the most common reasons why your pressure washer engine won’t stay running.

One of the most common reasons why an engine will not stay running is because of a clogged pump. If the pump is not able to move the water and detergent through the system quickly enough, it will cause build-up on the pump impeller which can eventually cause the engine to stop running. In order to prevent this from happening, make sure to keep your pump clean and free of debris.

Another common reason why an engine will not stay running is because of a blocked fuel or oil line. If this happens, the engine will be unable to produce enough power to run properly. To prevent this from happening, be sure to check your fuel and oil lines regularly and replace them if necessary.

Finally, one of the most common causes of an engine not staying running is due to a worn-out belt or pulley. If this happens, the belt or pulley will not be able to transmit enough power from the engine to the wheels. In order for your pressure washer to work correctly, make sure that your belt or pulley is in good condition and replace it as needed.

What Causes a Pressure Washer Engine to Not Stay Running?

There are several common causes for a pressure washer engine not to stay running, such as clogged filters, faulty valves, and worn-out bearings.

What Are the Symptoms of a Pressure Washer Engine Not Staying Running?

If your pressure washer engine is not staying running, you may notice that it takes longer to start or runs at lower speeds than normal. You may also notice that the water stream is weak or inconsistent.

How Can I Fix a Pressure Washer Engine That Won’t Stay Running?

The best way to fix a pressure washer engine that won’t stay running is to have it serviced by a professional technician. This will help ensure that all parts are in good condition and that there are no problems with the engine itself.

What Are Some Tips for Keeping My Pressure Washer Engine Running?

Here are some tips for keeping your pressure washer engine running smoothly:

  1. Keep the filter clean and free of debris
  2. Check the water inlet hose for damage or blockages
  3. Check the hoses and connections for wear and damage
  4. Also, check the oil level and make sure it is up to date
  5. Check the belts for wear and replace them if necessary
  6. Check the spark plug for wear and replace it if necessary
  7. And check the fuel system for leaks and make sure it is in good condition
  8. Check for overheating issues and make sure there is the adequate cooling system
  9. Check the air filter for proper maintenance
  10. Moreover, check the pressure gauge to make sure it is in good condition
  11. Make sure that the pressure washer is set up correctly and that all safety features are engaged
  12. Make sure that you are using the right detergent and water mixture
  13. Be sure to keep your pressure washer well-maintained and in good working order


How To Get Spray Paint Off Of Glasses?

Have you ever tried to get spray paint off of your glasses? It can be a frustrating experience if you don’t know what you’re doing. You may have even tried rubbing it in with a cloth or using a solvent, but these methods aren’t always successful. Here are five tips to help you get spray paint off of your glasses:

  1. Try using boiling water. Boil a pot of water and pour it over the lenses of your glasses. Let them sit for a few minutes, and then use a cloth to scrub them clean.
  2. Try using rubbing alcohol. Make a solution of 1 part rubbing alcohol to 9 parts water, and pour it over the lenses. Rub the paint off with a cloth, and then rinse with cold water.
  3. Use a polishing cloth. If you don’t have any other options, try using a polishing cloth to clean the lenses. Be careful not to scratch them!
  4. Use a solvent. If all else fails, try using a solvent such as acetone or nail polish remover. Be very careful not to damage the lenses!
  5. Use a cleaning sticker. If youre really desperate, you can try using a cleaning sticker to remove the paint. Just peel off the paper backing and place it over the lens. Let it sit for a few minutes, and then use a cloth to scrub it off.

What Causes Spray Paint to Stick Glasses?

The main cause of spray paint sticking to glasses is the type of paint and the surface to it is being applied to. If the paint is too thick or too thin, or if the surface it is being applied to is not appropriate, then it can be difficult to remove.

How to Remove Spray Paint from Glasses?

The best way to remove spray paint from glasses is by using a solvent such as acetone or nail polish remover. You can also try rubbing the paint with a cloth, but this can be difficult and may result in damage to your glasses.

What Products Are Available for Removing Spray Paint from Glasses?

There are several products available for removing spray paint from glasses, including eyeglass cleaners, cleaning cloths, and special sprays designed for this purpose. Each product has its own advantages and disadvantages, so it is important to research and compare before making a purchase.

What Are the Pros and Cons of Each Method?

The pros of each method vary depending on the product you choose. Some products are more effective at removing spray paint than others. Also, some products may be more harmful to your glasses than others.

How to Prevent Spray Paint from Sticking Glasses Again?

To prevent spray paint from sticking to your glasses again, it is important to regularly clean them and use only appropriate paint and cleaning products. Also, be sure to always use protective eyewear when working with spray paint.

Getting spray paint off of your glasses can be a frustrating experience, but it doesn’t have to be if you know how. We hope this article has given you some insight into how to get spray paint off of your glasses and how to prevent them from sticking again in the future.

How do you remove dried spray paint?

Have you ever had a problem removing dried spray paint? It can be frustrating, but there are steps you can take to remove it. In this article, we’ll discuss the best ways to remove dried spray paint.

Begin by using a paint scraper to remove the surface paint. If the dried spray paint is on a hard, glossy surface, it may be easiest to use a putty knife or sandpaper to soften it up before scraping. Once the paint is scraped off, you can use a cloth or sponge to clean the area. 

If the dried spray paint is on a porous surface, such as wood or metal, you may need to use more aggressive techniques. For example, you could use steel wool to remove the paint and then sand it with coarse sandpaper. If the dried spray paint is hardened and embedded in the wood or metal, you may need to use a chemical stripper to get it off. 

Remember that patience and careful work are key when removing dried spray paint. If you follow these steps, you should be able to remove dried spray paint with little hassle.

What Causes Spray Paint to Dry Out?

The main cause of spray paint drying out is exposure to direct sunlight, high temperatures, and oxygen. Additionally, some types of spray paints contain harmful chemicals that can also contribute to its drying out.

How to Prevent Spray Paint from Drying Out

There are a few steps you can take to prevent your spray paint from drying out. These include storing your spray paint in a cool, dark place, using quality paints, and storing your cans properly.

Once you’ve identified the source of the dried paint, it’s time to get started on removing it. This can be done by using commercial products designed for the job, such as acetone or denatured alcohol. Additionally, you can use baking soda and vinegar as an abrasive mixture.

What Tools You’ll Need

You’ll need a variety of tools for removing dried spray paint, including brushes, rags, gloves, and masking tape. Additionally, you may want to invest in a heat gun or rotary tool for loosening stubborn areas of dried paint.

How Long Does It Take to Remove Dried Spray Paint?

Depending on the type of dried spray paint and the degree of stubbornness, it could take several hours or even days to remove it completely. You’ll want to be patient and take your time while working on the project.

2 Tips on Removing Dried Spray Paint

When removing dried spray paint, be sure to use a clean cloth and avoid breathing in the fumes. Additionally, use a heat gun or rotary tool to loosen areas of dried paint that are difficult to scrape or sand.

Does spray paint come off of glass easily?

Have you ever wondered if spray paint comes off of glass easily? If so, you’re not alone. Many people have the same question and are looking for answers.

The answer to this question is a little complicated. Some people say that spray paint does come off of glass easily, while others say that it doesn’t always work that way. The truth is that it really depends on the type of spray paint and the surface that it’s being used on.

Some people say that a light coat of spray paint will easily come off of the glass. However, a heavier coat may be more difficult to remove. It’s also important to remember that some spray paints are designed for use on surfaces like plastic or metal, and they won’t work as well on glass.

Overall, it seems like most people agree that spray paint does come off of glass easily in some cases, but not always. So if you’re wondering if it’s a good idea to use spray paint on glass, it’s probably best to consult with a professional before making any decisions.

What is Spray Paint?

Spray paint is a type of liquid paint that is used to apply a layer of paint to a surface quickly and easily. It comes in cans or in a spray bottle with a trigger.

How Does Spray Paint Work?

When you use spray paint, it comes out in a mist form and can be used to cover large areas quickly and easily. The paint flows from the can or bottle and can be used for a variety of surfaces such as wood, metal, glass, and plastic.

What Are the Benefits of Spray Painting Glass?

Spray painting glass has many benefits including the ability to create unique designs, create a custom look and save time. It is also easy to apply, clean up, and store.

What Are the Best Practices When Spraying Paint on Glass?

The best practices when spraying paint on glass include using a high-quality glass cleaner to make sure the surface is free of any wax or other residue, applying the right amount of paint per coat, and allowing it to dry before applying another coat.

How Do You Remove Spray Paint From Glass?

Removing spray paint from glass involves using mild detergent with warm water to help loosen the paint from the surface. Once the paint has been loosened, you can use an acetone-based cleaner to get rid of any residue left behind.

We hope this article has given you some insight into whether or not spray paint comes off of glass easily and what you can do to remove it.

Will nail polish remover damage glasses?

Are you wondering if nail polish remover will damage your glasses? Nail polish remover is a great way to get rid of nail polish stains and it can be used on many different surfaces. However, some people have concerns that nail polish remover can be harmful to their glasses. In this essay, we’ll discuss the potential dangers of using nail polish remover on glasses.

Although nail polish remover is a mild cleaner, it can still be harmful if it gets into the eyes. Removing nail polish with a cotton ball or flannel can create small pieces of polish that could get into the eyes. If this happens, you may experience irritation, redness, and even loss of vision. In some cases, people have even had to go to the emergency room because of this type of injury.

If you’re concerned about the potential damage nail polish remover could do to your glasses, be sure to use caution when using it. Be sure to test a small area first before using it on your entire eyeglasses frame. And if you do get nail polish on your glasses, be sure to clean them immediately with soap and water.

What Is Nail Polish Remover?

Nail polish remover is a mixture of ingredients that are used to remove nail polish stains from clothing, shoes, and other surfaces. It is usually formulated with acetone, which is a highly flammable substance.

What Are the Potential Dangers of Using Nail Polish Remover on Glasses?

There are some concerns that nail polish remover can be harmful to your glasses if the acetone in the remover comes into contact with the lenses. Although it is unlikely that the acetone will actually damage your lenses, it can still cause some irritation and discoloration.

What Should You Do if You Have Nail Polish Remover on Your Glasses?

If you have nail polish remover on your glasses, you should immediately wash them with warm water and soap to remove any residue. You should also make sure to store your glasses away from any other sources of acetone so that they don’t come into contact with it.

Nail polish remover is an effective way to get rid of nail polish stains on clothing, shoes, and other surfaces. However, there are some concerns that it can be harmful to your glasses if it comes into contact with them. It’s important to understand the potential dangers and take precautions when using nail polish remover on your glasses.

How do you get spray paint off the glass without acetone?

Have you ever wondered how to get spray paint off the glass without acetone? You’re not alone. Many people find themselves in a similar situation. Acetone is a popular solvent used to remove paint and other substances from surfaces. However, it can also damage glass.

There are a few methods you can use to remove spray paint from the glass without acetone. One is to use a household cleaner like vinegar or ammonia. These chemicals will break down the paint and help it come off the glass. Another option is to use a scrubber. This tool has pads that rub against the surface of the glass. The scrubber scours away the paint and leaves the glass clean.

What is Spray Paint?

Spray paint is a type of paint that comes in a can or a spray bottle and can be used to decorate and protect objects. It is a liquid that is dispensed from a can or bottle and can be used to create a variety of designs on objects.

There are several ways to get spray paint off the glass without acetone. The most common methods include using rubbing alcohol, baking soda, and steel wool, as well as using an electric toothbrush and baking soda.

What Are Some Other Ways to Remove Spray Paint From Glass?

There are other ways to remove spray paint from glass, including using a toothpick and steel wool, as well as using vinegar and baking soda.

What Should I Do If I Accidentally Get Spray Paint on My Glass?

If you accidentally get spray paint on your glass, you should try to remove it with rubbing alcohol, steel wool, or baking soda.

What Are Some Tips for Cleaning and Storage After Removing Spray Paint From Glass?

After removing the spray paint, it is important to clean the glass with rubbing alcohol to remove any residue and then store the glass in an airtight container.

We hope this guide helped you understand how to get spray paint off the glass without acetone. Remember, there are other ways to safely remove the paint, so don’t be afraid to experiment!

Does hand sanitizer remove spray paint?

Have you ever wondered if hand sanitizer can remove spray paint? The answer is yes. In this essay, we will discuss how to remove spray paint from hands using hand sanitizer.

First, wet your hands with water and add some hand sanitizer. Rub the sanitizer into your hands until they are wet. Then, hold the spray paint can close to your hands and spray the paint onto your hands. Rub the paint off of your hands with a cloth or towel. If the paint is not coming off easily, try using a cleaner specifically designed for removing spray paint.

What You Need To Remove Spray Paint From Hands

For this step, you will need hand sanitizer, a towel or rag, and some newspaper. Make sure to avoid getting any of the sanitizers on your skin or clothing.

How To Use Hand Sanitizer To Remove Spray Paint

Take a small amount of hand sanitizer and apply it to your hands for about 30 seconds. Then, grab a paper towel and rub it on the affected area until the paint is removed.

What Are the Results of Removing Spray Paint With Hand Sanitizer?

Depending on the type of paint, you may be able to remove it with just a few applications of hand sanitizer. However, it may take more than one application to completely remove the paint from your hands.

Are There Any Risks Involved With Removing Paint With Hand Sanitizer?

Yes, there are some risks associated with removing paint with hand sanitizer. If you don’t use enough hand sanitizer, you could end up with a skin irritation or bacterial infection. Also, if you don’t use enough hand sanitizer, you could end up with a chemical burn on your skin.

What Should You Do If It Doesn’t Work?

If it doesn’t work, you should contact a healthcare provider or seek advice from a professional painter and/or carpenter. They can help you determine what type of chemical you need to use in order to remove the paint from your hands.

Removing spray paint from your hands using hand sanitizer is possible, but it’s important to be careful and read the instructions before applying it to your skin. Remember to use enough hand sanitizer and keep it away from your skin and clothes.

What removes spray paint instantly?

If you’re looking for an effective way to remove spray paint, you’re in the right place. In this article, we will discuss the best ways to remove spray paint instantly.

The first step is to remove the protective layer that sprays paint leaves on surfaces. This can be done by using a cloth, a brush, or a bucket of water. Once the paint is removed, you can begin to scrub the surface with a clean cloth or brush. Be sure to use vigorous strokes and avoid touching the underlying paint. Finally, rinse the surface with water and dry it off. 

If you’re having trouble removing spray paint, consider using a cleaner that specifically tackles this type of paint. These cleaners are available at most hardware stores and can be used in conjunction with the other steps outlined above.

What Are the Best Ways to Remove Spray Paint Immediately?

The best methods for removing spray paint instantly include baking soda, vinegar, and salt. These methods are all-natural and safe for use on most surfaces.

What Are the Pros and Cons of Each Method?

Baking soda and vinegar are both effective at removing spray paint, but they can take some time to work. Salt is a quicker option but may be more harmful to certain surfaces.

What Are the Best Tools for Removing Spray Paint?

The best tools for removing spray paint are a wire brush, a scraper, and a pressure washer. Wire brushes are great for scrubbing away rust and other debris, while a scraper is ideal for getting rid of stubborn layers of paint. A pressure washer is perfect for quickly removing stubborn layers of paint.

What Are Some Tips for Removing Spray Paint?

There are several tips you can use to remove spray paint quickly and effectively. These include warming up the area first, using plenty of water, and using a product that is designed specifically for this purpose.

Conclusion

In conclusion, there are several ways to remove spray paint instantly. We discussed the pros and cons of each method, as well as the best tools and tips for removing spray paint quickly and effectively.


Pressure Washer Loses Pressure When Trigger Pulled

Have you ever experienced a pressure washer that loses pressure when you pull the trigger? If so, you’re not alone. Many homeowners experience this issue and don’t know how to fix it.

There are a few different reasons why a pressure washer may lose pressure when you pull the trigger. One possibility is that the air pressure release valve has been accidentally closed, preventing the engine from pumping water. This can be fixed by opening the valve and re-pressurizing the system.

Another potential issue is that the pump has failed. If this is the case, you’ll need to replace the pump. In some cases, it may be necessary to repair or replace other components of the system, such as the hose or fittings.

If you’re experiencing trouble with your pressure washer, don’t hesitate to contact a professional technician. They can diagnose and fix your system quickly and efficiently.

What Causes Pressure Washer Loss of Pressure?

There are several causes of pressure washer loss of pressure, including a clogged or blocked water inlet or drain, a clogged or blocked air inlet or drain, a defective pump, or a defective pressure switch.

What are the Common Solutions for Pressure Washer Loss of Pressure?

Common solutions for pressure washer loss of pressure include clearing any clogged or blocked drains, cleaning the water inlet and drain, and checking the pump and pressure switch.

What Should I Do if My Pressure Washer Loses Pressure?

If your pressure washer loses pressure, first check for any clogged drains or blocked water inlets. Once that is cleared, check the pump for any issues and make sure the pressure switch is working properly.

What Other Troubleshooting Tips Can Help Me Fix My Pressure Washer?

If your pressure washer still doesn’t have enough water pressure, you can try increasing the water flow or adding more water to the system. You can also test the pump and pressure switch to see if they are working properly.

We hope this article has helped you understand what causes pressure washer loss of pressure and how to fix it. Whether you’re experiencing it yourself or helping a friend, knowing how to fix it can save time and money.

Why does my pressure washer pulse when I pull the trigger?

Have you ever noticed that your pressure washer pulses when you pull the trigger? If so, you’re not alone. Many pressure washers experience this problem, and it can be a real head-scratcher.

The pulse usually happens when the water is first released from the pump. The sudden increase in pressure causes the engine to spurt water out, and that pulse is felt through the water stream.

There are a few reasons why this might happen. One possibility is that the engine was not built to handle that much pressure, and it fails under the new load. Another possibility is that the pump wasn’t calibrated properly. Either way, fixing the problem usually involves either upgrading to a more powerful engine or getting a new pump.

What Causes Pressure Washer Pulse When You Pull The Trigger?

There are several possible causes for this issue, including a clogged nozzle, a worn-out motor, or a faulty switch.

How Do I Fix Pressure Washer Pulse When I Pull The Trigger?

If you suspect that the issue is due to a clogged nozzle, you can easily clear it using a brush attachment. If the issue is due to a worn-out motor, you may need to replace it. If the issue is due to a faulty switch, you will need to replace it.

What Are the Benefits of Having a Pressure Washer That Does Not Pulse?

Having a pressure washer that doesn’t pulse when you pull the trigger can be beneficial in many ways. It can save you time and effort when washing your car, cleaning your home, or doing other outdoor chores. It can also help to prevent accidental damage to your property or the people around you.

Having a pressure washer that does not pulse when you pull the trigger can be beneficial in many ways. By understanding what causes the issue and how to fix it, you can have a more comfortable experience when using your pressure washer.

Why does my power washer shut off when the trigger is pulled?

Have you ever wondered why your power washer shuts off when the trigger is pulled? You’re not alone. Many homeowners have experienced this problem and are looking for answers.

There are several reasons why your power washer might turn off when the trigger is pulled. The most common culprit is a blocked hose. If water can’t flow through the hose, the pump will shut off. Blocked hoses can be caused by objects like rocks or tree branches, or by clogged spray nozzles.

If you think your hose is blocked, there are several things you can do to fix the problem. You can try using a plunger to suction onto the obstruction and force it out of the hose. You can also use a snake to clear away debris from the nozzle. If all of these methods fail, you may need to replace your hose.

What Is a Power Washer?

A power washer is an appliance designed to efficiently clean surfaces by using high-pressure water. It works by putting pressure on the surface and removing dirt and grime.

What Causes My Power Washer To Shut Off When the Trigger Is Pulled?

Unfortunately, there are many reasons why your power washer will shut off when the trigger is pulled. One of the most common causes is a clogged hose or nozzle.

How Do I Fix This Problem?

Depending on the cause of the issue, there are several steps you can take to solve the problem. First, check the hose and nozzle for any signs of wear. If necessary, replace the hose or nozzle with a new one.

What Else Can I Do To Prevent This From Happening?

In addition to checking the hose and nozzle, you should also make sure to regularly clean the power washer’s nozzle and seals. This will help prevent dirt, debris, and other materials from building up inside the machine.

We hope this article has provided you with some insight into why your power washer shuts off when the trigger is pulled. With some basic maintenance and preventative measures, you can keep your power washer running at top performance.

How do I know if my unloader valve is bad?

Have you ever wondered how to know if your unloader valve is bad? It’s a common question for many homeowners, and it can be difficult to answer. In this essay, we will discuss what causes unloader valves to fail and how to tell if it is time to replace yours.

Unloader valves are often found on water heaters, central air conditioners, and furnaces. These valves control the flow of water into and out of these systems and can malfunction if they become worn or damaged. If your unloader valve is not working properly, water may not be flowing smoothly into or out of your system. In some cases, this may cause a fire.

If you are experiencing problems with your unloader valve, it is important to get it checked by a professional. A qualified technician will be able to diagnose the issue and recommend a solution. By following their advice, you can keep your home safe and comfortable.

What Causes Unloader Valves to Fail?

Unloader valves are subject to wear and tear over time, as well as exposure to dirt and debris. If the unloader valve becomes clogged, the pressure can build up and cause it to fail. Other factors that can contribute to the failure of an unloader valve include corrosion, damage from a flood, or even improper installation.

What Are the Signs of a Bad Unloader Valve?

The signs of a bad unloader valve include pressure buildup, leaks or other issues with the valve itself, or even a lack of pressure when the valve is opened. If you notice any of these signs, it may be time to replace your unloader valve.

How to Test an Unloader Valve?

Testing an unloader valve is relatively simple, but it does require some basic knowledge of plumbing. You can test an unloader valve by turning on the water source and opening the valve directly after, or by turning on a water supply and opening the valve before turning it off. If there is no pressure buildup or leaks, then it is likely that your unloader valve is working properly.

What Should You Do If Your Unloader Valve Is Bad?

If you suspect that your unloader valve is bad, then you should immediately turn off the water source and call a professional plumber for help. A plumber can inspect your system and diagnose the problem, helping you determine if it is time to replace your unloader valve.

What Are the Alternatives to Replacing an Unloader Valve?

If your unloader valve is not causing any problems, you may not need to replace it right away. You can instead try some other methods of reducing pressure buildup, such as installing a diverter valve or adjusting your water pressure regulator.

We hope this essay has helped you understand how to tell if your unloader valve is bad and what steps you should take if it is. Remember that it’s important to contact a professional plumber if you suspect your unloader valve is bad.

How do you adjust an unloader valve?

Have you ever wondered how to adjust an unloader valve? If so, you’re not alone. Many people find this confusing process and wonder how to adjust an unloader valve. Well, this guide will walk you through the steps to adjust an unloader valve.

To adjust an unloader valve, first, locate the adjustment screw. This is usually located on the top of the valve body near the handle. Turn the adjustment screw until the water flow is steady and consistent. Be sure to read and follow all instructions that come with your unloader valve. Failure to do so may result in damage to your property or injury.

What is an Unloader Valve?

An unloader valve is a device that regulates the flow of fluid through a pipeline. It is used in many industries, including oil and gas, water, and chemical plants.

How Do You Adjust an Unloader Valve?

To adjust an unloader valve, you need to open the valve and then close it again. This will adjust the flow of fluid through the pipeline.

What Are the Benefits of Adjusting an Unloader Valve?

Adjusting an unloader valve can help improve the efficiency of your pipeline system. It can also help reduce maintenance costs and downtime.

What Should You Do If You Can’t Adjust the Unloader Valve?

If you can’t adjust the unloader valve, it could be due to a worn-out or damaged valve, or a lack of fluid in the pipeline system. In this case, you should contact a professional for help.

What Are the Common Problems with Adjusting an Unloader Valve?

Common problems with adjusting an unloader valve include not being able to open or close the valve, or not having enough fluid in the pipeline system to open or close the valve.

We hope this article has helped you understand how to adjust an unloader valve. If you have any questions or concerns, don’t hesitate to contact a professional plumber!

How do you fix pulsating water pressure?

Have you ever experienced pulsating water pressure? It can be a frustrating problem, and it can be difficult to know what to do about it. In this essay, we’ll discuss how you can fix pulsating water pressure and get back to enjoying the nice, steady flow of water in your shower.

Pulsating water pressure is usually caused by an issue with the plumbing. The main culprit is usually a blockage in one of the pipes that feed water to your shower. The pressure builds up as the blockage starts to take up space, and it can be really frustrating when it happens.

There are a few things that you can do to try to fix pulsating water pressure on your own. First, you can try using a plunger to clear the blockage. If that doesn’t work, you may need to call a professional plumber. They’ll be able to take a look at the plumbing and figure out what’s causing the problem.

What is Pulsating Water Pressure?

Pulsating water pressure is when the water pressure in your shower fluctuates between high and low levels. This can be caused by a variety of factors, including a clogged or broken hose, a faulty gauge or pressure regulator, or even a problem with the shower head itself.

What Causes Pulsating Water Pressure?

There are several potential causes of pulsating water pressure. These can include a clogged or broken hose, a faulty gauge or pressure regulator, or even a problem with the shower head itself.

What Can You Do To Fix It?

In most cases, there are several things you can do to fix pulsating water pressure. These include checking for any clogs or obstructions in the hose, testing the gauge and pressure regulator, and checking the shower head itself.

How Long Does It Take To Fix It?

Depending on the cause of the pulsating water pressure, it can take anywhere from a few minutes to several hours to fix it. However, if you take care of any potential clogs or obstructions in the hose and test the gauge and pressure regulator for any issues, it should only take a few minutes to fix the problem.

What Are Some Other Remedies?

If all else fails, there are some other remedies you can try. These include using vinegar to unclog any obstructions in the hose or using mild detergent to clean out any debris from the gauge or pressure regulator.

So now you know how to fix pulsating water pressure in your shower and get back to enjoying the nice, steady flow of water you deserve. With just a few steps, you can get back to enjoying your shower in no time!

Can you adjust the unloader valve on the pressure washer?

Are you considering investing in a pressure washer but are wondering if you can adjust the unloader valve? You’re not alone. It’s a common question for those looking to get the most out of their purchases.

Adjusting the unloader valve can be a great way to adjust the pressure and spray pattern of your machine. By doing so, you can customize your cleaning experience to match your needs.

Here are a few tips on how to adjust the unloader valve:

1) Make sure the machine is properly plugged in and turned on.

2) Look for the valve on top of the gun handle. It will usually have an arrow pointing down. 

3) Turn the valve until it clicks into place. 

4) Tighten the screw if necessary.

5) Test the pressure washer by spraying water into the air. The spray should be evenly distributed and high pressure.

6) If the pressure washer needs more pressure, turn the valve another quarter turn. If it needs less pressure, turn the valve one-half turn.

What is an Unloader Valve?

The unloader valve is a device that regulates the water pressure and flow of the washer. It controls when the water pressure is released into the hose or wand.

What are the Benefits of Adjusting the Unloader Valve?

Adjusting the unloader valve can help to improve the performance and efficiency of your pressure washer. It can also help to extend the life of your pressure washer by reducing wear and tear.

What Do I Need to Adjust the Unloader Valve?

You will need to purchase a special tool for adjusting the unloader valve. This tool will usually have a handle and an adjustment knob that can be turned to adjust the flow of water from the unloader valve.

How Do I Adjust the Unloader Valve?

To adjust the unloader valve, you will need to turn the adjustment knob until it clicks into place and then tightens it with an Allen wrench or other appropriate tool. Once it is tightened, you will need to check for leaks and adjust as needed.

What Are the Risks Involved in Adjusting the Unloader Valve?

There are some risks involved with adjusting the unloader valve, such as damaging your pressure washer or causing it to leak. It is important to be careful when adjusting the unloader valve and make sure that you are aware of any potential risks before moving forward.

We hope this article has helped answer your question about adjusting the unloader valve on a pressure washer. Remember, there are risks involved with adjusting this device and it is important to be aware of them before moving forward.

How long does an unloader valve last?

Have you ever wondered how long does an unloader valve last? If so, you’re not alone. Understanding how long an unloader valve lasts is important for any business that uses them.

What is an Unloader Valve?

An unloader valve is a type of flow control valve used to regulate the flow of liquid or gas under pressure. It is typically used in industrial applications to control the flow of fluids, such as oil, water, and other liquids.

How Long Does an Unloader Valve Last?

Generally, unloader valves last between 5 and 10 years depending on the type of material used and environmental conditions. It is important to ensure that the valve is installed properly and maintained regularly to ensure its longevity.

What Are the Benefits of Having an Unloader Valve?

An unloader valve can be beneficial in a variety of industries, from manufacturing to food processing and transportation. It can help reduce waste, reduce energy costs, and improve safety at work sites.

What Are Some Tips for Properly Maintaining an Unloader Valve?

Regular maintenance is key to ensuring that an unloader valve lasts as long as possible. This includes checking for wear and tear, replacing parts when needed, and cleaning the valve regularly.

Conclusion

We hope this article has helped you understand how long does an unloader valve last and how to properly maintain it.

Why Does Spray Paint Bubble?

There are many reasons why spray paint might bubble. In this post, we will explore four of the most common reasons and how to prevent them.

What Causes Spray Paint to Bubble?

There are a few factors that can cause spray paint to bubble. One of the most common reasons is water. If the paint has a high water content, then it will bubble when sprayed. Another common cause of bubbles is the paint itself. When the paint is too thick, it will create air bubbles when it is sprayed.

How Can I Prevent Bubble Formation?

There are a few things that you can do to prevent bubble formation. One tactic is to make sure that the paint is water soluble. This means that the paint can be diluted with water before it is sprayed. Another way to prevent bubble formation is to use a low-viscosity paint. This means that the paint will not create as many air bubbles when it is sprayed.

What Are Some Common Causes of Bubble Formation?

There are a few common causes of bubble formation. One of the most common is water. If the paint has a high water content, then it will bubble when sprayed. Another common cause of bubble is the paint itself. When the paint is too thick, it will create air bubbles when it is sprayed. Finally, some paints have a higher viscosity, which means that they will create more bubbles when they are sprayed.

In this post, we have explored four of the most common reasons why spray paint might bubble. We have also discussed how to prevent bubble formation. If you are experiencing bubble formation, be sure to check the ingredients of the paint, the water content, the thickness of the paint, and the viscosity of the paint.

Why Is My Spray Paint Bubbling?

Spray paint is a type of paint that comes in a can and is sprayed out from a gun. When the paint is sprayed, it covers an area with a thin layer of paint. The paint is made up of tiny droplets that are held together by air pressure and when the gun is fired, these droplets are released and fly towards the object that the spray paint was applied to. When these droplets hit something, like a wall or piece of paper, they burst and create bubbles in the paint. These bubbles can be small or large, but they are always there when you spray paint something.

There are four main reasons why spray paint might bubble. 

The first reason is that the paint has a higher viscosity. This means that when the paint is sprayed, it will create more bubbles when it Hits the object that it is being sprayed on. 

The second reason is that the paint contains water. When the paint hits water, it forms tiny bubbles. This happens because water is a much softer substance than air and therefore, it can push the air out of the bubble. 

The third reason is that the paint is too thick. When the paint is too thick, it will not allow enough air to get into the bubble during spraying and this will result in a larger and more persistent bubble. Finally, if the viscosity of the paint isn’t high enough, then there won’t be any bubbles at all.

How to Prevent Bubble Formation in Spray Paint?

There are a few things that you can do to prevent bubble formation in your spray paint. 

One thing you can do is to make sure that your paint has a high viscosity. This means that the droplets will be smaller and less likely to form bubbles when they are sprayed onto an object. 

Another thing you can do is to make sure that your paint doesn’t contain too much water. If too much water gets into the bubble, then it will cause it to burst and form a larger bubble. 

You can also make sure that your spray painting is done correctly by using proper thicknesses of paint and using proper techniques for spraying. If you are using an airbrush, for example, you need to use thicker coats of paint so that there are enough droplets released when you shoot them at an object.

How To Prevent Air Bubbles In Spray Paint?

Spray paint is a popular medium for artists and hobbyists. When the paint is applied to a surface, the air inside the can causes it to bubble. Bubbles are created by the pressure of air inside the can forcing itself out through the nozzle. 

The pressure of air inside a can creates bubbles because it expands when it gets hot. This expansion causes liquid particles in the paint to rise to the top and cause gas bubbles. If you want to prevent bubbles from forming in your spray paint, make sure you have enough ventilation in your workspace and avoid applying excessive pressure when spraying.

Why does spray paint bubble on the second coat?

Spray paint is a type of paint that is sprayed from a can or a tube. The paint is made up of tiny droplets that are released when the sprayer is turned on. When the paint hits something it begins to bubble. Bubbles are created because the air inside the droplets is pressurized. The pressure causes the gas molecules in the air to form clusters. These clusters are small enough that they can’t move around and they form around small particles such as oil or dust. This makes it difficult for the sprayer to release the paint evenly and it also makes it difficult for the paint to stick to things.

Why did the paint crinkle when I used spray paint over a primer?

When you spray paint over a primer, the paint will bubble and crack because the alcohol in the paint evaporates quickly. This causes the paint to form tiny air bubbles. When these bubbles burst, they cause the paint to crinkle and crack.

Why are recoating times on spray paint within one hour or after 48 hours?

Spray paint is a type of paint that is made up of tiny droplets that are released when the paint is sprayed. These droplets are small enough that they can bounce around in the air and hit other objects, which causes them to break down and release their color. This process is called recoating. 

The reason why recoating times are within one hour or after 48 hours is because the chemicals in spray paint need time to break down and release their color. If you wait too long, the color will start to fade and the paint will not be as effective.

How long does most spray paint take to dry?

Most spray paints take about two hours to dry. This is because the paint is a liquid and it needs time to evaporate.

Why, when I use glossy spray paint, do certain areas look matte?

Paint is a mixture of pigment (the color) and a solvent (a fluid that dissolves other substances). When the paint is applied to a surface, the pigment particles attach themselves to the surface. The solvent then evaporates and leaves behind a film of paint that is smooth. Glossy paints have more pigment than matte paints and as a result, they have more solids in solution which can cause bubbles when the paint is applied. Bubbles form when the air trapped in the solids crystallizes.

How to fix bubbles in spray paint?

If you have bubbles in your spray paint, there are a few things you can do to fix it. First, try brushing the bubbles away with a brush. If that doesn’t work, try using a vacuum cleaner to suck up all of the bubbles. Finally, if all else fails, you can use boiling water to dissolve the bubble and make the paint more fluid.

Why does spray paint bubble on the second coat?

When a paint is sprayed from a can or a nozzle, the paint is ejected from the device in a fine mist. This mist is composed of tiny droplets that are just big enough to hold a molecule of paint. When the paint contacts any surface, it breaks these small droplets open and starts to evaporate. 

The first droplet to evaporate creates a small bubble of gas. As more and more droplets evaporate, the pressure within the bubble builds until it ruptures and the gas escapes. The high pressure causes liquid paint to fly out in all directions – upwards (like water spouting from a faucet), outwards (like rain), and sideways (like whipped cream). The liquid paints that hit other surfaces immediately start bubbling because they’re saturated with air and contain extra hydrogen atoms which react with oxygen in the air to create bubbles.

There are a few things you can do to try and prevent your paint from bubbling on second coat. First, make sure the surface is very clean. Second, use less paint than you would on the first coat. Third, wait until the paint has had a chance to dry before applying the second coat. fourth, use a more stable type of paint like enamel or lacquer. Finally, if all else fails, use boiling water to dissolve the bubble and make the paint more fluid.

rustoleum spray paint bubbling

Rustoleum spray paint is known for its high-quality finishes and the ability to create a variety of colors. However, one common issue with Rustoleum spray paint is that it can sometimes produce large bubbles when used. These bubbles can cause areas of the paint to be very uneven and can also lead to peeling and chipping.

There are a few things you can do to try and prevent your paint from bubbling on second coat. First, make sure the surface is very clean. Second, use less paint than you would on the first coat. Third, wait until the paint has had a chance to dry before applying the second coat. fourth, use a more stable type of paint like enamel or lacquer. Finally, if all else fails, use boiling water to dissolve the bubble and make the paint more fluid.

How to fix spray paint bubbles on wood?

If you are having trouble fixing spray paint bubbles on wood, here are a few tips to help. Most often, the issue is simply that the paint is not wet enough. To fix this, use a little more water or thinner and wait until the paint is completely wet before applying it. Another common problem is that the surface of the wood is not smooth enough. If this is the case, you can try using a sandpaper or file to rough up the surface before painting. Finally, make sure your paint sprayer is properly adjusted – if it’s not delivering an even stream of paint, your bubbles will be more likely to form.

Spray paint bubbling on wood

Spray paint is used in a variety of ways, but one of the most common applications is painting walls or other surfaces. When the paint is sprayed onto the surface, it creates a mist that is then drawn into the microscopic air bubbles in the paint. The bubbles are small and lightweight, so when they rise to the surface they create a gas-liquid mixture. This mixture forms tiny bubbles that eventually burst, releasing their energy as sound and tiny droplets of paint.

Why does spray paint bubble on plastic?

Paint is a solvent that dissolves the plastic film that covers the surface of a material. The solvents in paint interact with each other to create gas bubbles. When the bubbles reach the surface of the plastic, they burst and release their paint contents.

There are a few things that can cause paint to bubble. One is the type of paint being used. Some paints have more solvents than others and will create more bubbles. Another factor that can affect bubble formation is the temperature. Higher temperatures will cause the paint to evaporate more quickly, which will create more bubbles. And finally, the pressure exerted by the sprayer can also play a role in creating bubbles. If the pressure is too great, it can break the bubble membrane and cause paint to explode out of the nozzle.

How to fix spray paint bubbles on metal?

Paint bubbles are generally caused by the paint droplets being too small or too large. When the droplets are too small, they form gas within the paint and as a result, the paint starts to bubble. On the other hand, if the droplets are too large, they will break apart on impact with the metal surface and will cause a similar bubble effect. There are several ways to fix this problem: you can try to reduce the size of the droplets before painting, use a higher quality paint that is more resistant to bubbling, or use a wet sanding technique to remove any imperfections on the metal that could cause bubbles.

spray paint bubbling on metal

Spray paint bubbling on metal is generally caused by two things: improper storage and the type of paint being used. When paint is improperly stored, it can become too thick or lumpy, which will cause it to form clumps when mixed with air. These clumps will then rise to the surface when sprayed, resulting in bubbles. 

When using a type of paint that contains solvents, like latex paints, these solvents can evaporate quickly and cause the paint to bubble. This is especially common with paints that are thinned with water or other liquids, as the solvent concentration will be higher in those liquids than in regular paint.

There are several things that can be done to prevent spray paint from bubbling on metal. First, make sure that the paint is stored in a dry area and that it is not too thick or lumpy. Second, use a higher quality paint that is more resistant to bubbling. Third, use a wet sanding technique to remove any imperfections on the metal that could cause bubbles. Finally, practice proper spraying technique: keep the paint thinned down and spray from a distance so that the droplets are small and less likely to form bubbles.

How do you fix bubbling spray paint?

If you’re experiencing bubbling or spray paint splatter issues, there are a few things you can do to try and fix the problem. To start, make sure that the paint is correctly mixed – if it’s not, the bubbles will form. Additionally, you can try using a different type of spray gun or cartridge if one is available. Finally, if the bubbles are coming from the nozzle itself, you may need to adjust your angle or pressure.

Why is my paint bubbling after spraying?

Paint bubbling is usually caused by two things: the paint itself and the air. The paint can be sensitive to air, which causes it to expand and cause the paint to bubble. Additionally, some solvents used in paints can also cause this reaction. If you’re having trouble controlling the bubbling, it may be a good idea to try using a different type of paint or thinner.

What causes paint to bubble on metal?

Paint bubbles on metal when the paint and metal are in contact with one another. The energy of the light hitting the metal causes the atoms in the paint to vibrate, and that vibration causes the paint to break free from the surface of the metal. Bubbles will form quickly and will grow until the paint has been removed. To prevent this from happening, make sure the paint is fully dry before painting and avoid contact between the metal and the paint.

Will paint bubbles go away?

Paint bubbling is a common problem with paint. It happens when the paint is too thick or when there is too much water in the paint. When these things happen, the air can’t get to the paint and it starts to bubble. The bubbles will usually go away on their own, but sometimes they will stay and need to be fixed.

Why is second coat of paint bubbling?

A second coat of paint is often applied to a surface after the first coat has been painted. This is done because the first coat of paint may not be completely dry and may require a second coat to fully cover the surface. The second coat of paint will often bubble and foam due to the water content in the paint.

Why is Rustoleum spray bubbling?

Rustoleum spray paint is a popular option for DIYers and professionals because of its easy-to-use formula, durability, and low cost. One common issue with spray paint is that it can sometimes bubble. This happens when the air and paint mixture becomes unstable, leading to tiny bubbles that grow and burst. Bubbles can form in any type of spray paint, but they are more likely to form in paints with high viscosity (thickness). This is due to the resistance of the air to flow freely through the paint mixture.

How do you flatten bubble paint?

If you use a paint roller to apply your bubblegum paint to a surface, the paint will likely bubble and spread because of the air pressure that is created when the paint is applied. To flatten these bubbles, you can use an air compressor or a bowl of warm water and soap. Soak a cloth in the soap and water mixture, wring it out well, and use it to gently massage the surface of the bubble paint. This will cause the bubbles to deflate and flatten.

What happens if you paint a second coat too soon?

If you paint a second coat too soon after the first, the paint will start to bubble. Bubbles form when the paint and water mix together and create gas. The gas is explosive, so the paint will start to crack and peel.

How long should you wait between spray paint coats?

Spray paint can be a fun and easy way to decorate your home, but it can also be a dangerous product if not used properly. When spray painting, it is important to wait between coats to allow the paint to fully dry. If the paint is allowed to dry too quickly, it can create bubbles in the paint which can be difficult to remove.

How long do bathtub refinishing fumes last

If you’re looking to refinish your bathtub, there are a few things to keep in mind. First and foremost, be sure to consult with a licensed contractor. A poorly done job could result in harmful fumes that can last for days or even weeks. Secondly, use caution when working with any type of solvent – they can be very dangerous if mishandled. Finally, be sure to ventilate the area well – the fumes created by a bathtub refinishing job can be quite strong.

When refinishing a bathtub, be sure to take precautions. The fumes created by a bathtub refinishing job can last for days or even weeks.

How to get rid of smell from reglazing tub?

If the smell from your reglazing job is persistent, there are a few things you can do to get rid of it. First and foremost, make sure that all of the ventilation in the area is open and working. Secondly, try running an oscillating fan in the room for a few hours after the job is done. Finally, if that doesn’t work, call a professional to come and take a look.

Bathtub refinishing fumes Reddit

If you’re looking to refinish your bathtub, there are a few things to keep in mind. First and foremost, be sure to consult with a licensed contractor. A poorly done job could result in harmful fumes that can last for days or even weeks. Secondly, use caution when working with any type of solvent – they can be very dangerous if mishandled. Finally, be sure to ventilate the area well – the fumes created by a bathtub refinishing job can be quite strong.

Fumes from reglazing bathtub can be intense and persistent

If you’re looking to refinish your bathtub, there are a few things to keep in mind. First and foremost, consult with a licensed contractor. A poorly done job could result in harmful fumes that can last for days or even weeks. Secondly, use caution when working with any type of solvent – they can be very dangerous if mishandled. Finally, ventilate the area well – the fumes created by a bathtub refinishing job can be quite strong.

How to safely clean reglazed bathtub

The most important thing to keep in mind when cleaning a reglazed bathtub is to wear proper safety equipment, including a mask and gloves. Always use a cleaner specifically designed for bathtub refinishing work. Remember to rinse the tub and tile thoroughly after cleaning to avoid creating any water spots that can become difficult to clean.

Are bathtub refinishing fumes dangerous?

Bathtub refinishing fumes can be intense and persistent, but they are not dangerous by themselves. In fact, most of the hazards associated with bathtub refinishing come from improper installation or workmanship. If you are concerned about the health risks posed by refinishing fumes, consult with a licensed contractor before starting the job.

Bathtub reglazing fumes pregnancy

If you are pregnant, it is important to be aware of the health risks associated with refinishing a bathtub. Many types of solvents used in refinishing baths are potentially harmful to the fetus. If you are pregnant and decide to have your bathtub reglazed, be sure to speak with your doctor first. He or she can help you weigh the risks and benefits of the project.

Tub refinishing gone wrong

If you have ever had refinishing work done on your tub, you know that it can be a messy and frustrating process. It’s important to remember that no job is perfect, and there is always the potential for mistakes. If you experience any problems with your bathtub refinishing project, don’t hesitate to call in a professional. They will be able to help you rectify any problems and prevent them from happening again in the future.

How to get rid of resurfacing smell

If you’re struggling to get rid of the smell of resurfacing fumes, there are a few things that you can do. First, try using a deodorizer in the area where the fumes are originating from. This will help to mask the smell and reduce its impact. If that doesn’t work, you may need to call in a professional cleanup crew. They will be able to remove all of the unwanted residue from your bathroom and eliminate the odor completely. ct on your senses. If that doesn’t work, you can try using a fan to circulate the air in the area. Finally, you can open up all of the windows in your house and allow the fresh air to enter. This will help to dissipate the fumes and eliminate the smell altogether.

 Fumes from reglazing bathtub

 Can be harmful. Bathtub refinishing can be a great way to update your bathroom, but it can also be dangerous if done incorrectly. If you’re having trouble with the fumes from the process, it may be a good idea to call in a professional. They will be able to help you avoid any serious health issues and get your bathroom back to how it should look.

If you’re noticing fumes coming from your bathtub, it’s important to know that they can be hazardous. The fumes from reglazing can contain chemicals that can be harmful to your health. If you experience any problems with the project, don’t hesitate to call in a professional. They will be able to help you rectify any problems and prevent them from happening again in the future.

Non toxic bathtub refinishing

There are a few things you can do to minimize the exposure to fumes while refinishing your bathtub. First, try using a fan to circulate the air in the area. This will help to disperse the fumes and reduce the smell. Secondly, open up all of the windows in your house and allow the fresh air in. This will help to dissipate the fumes and eliminate any unpleasant smells. Finally, make sure that you use only non toxic materials when refinishing your bathtub. Doing so will help to protect your health and avoid any potential problems down the road.

Can you use bleach on a reglazed bathtub?

Bleach is not typically recommended for use on a reglazed bathtub. The fumes that are produced from the process can be harmful to your health. If you are still concerned about the potential dangers, you can call in a professional to help you complete the job safely and correctly.

Bathtub refinishing cost

Depending on the size and shape of your bathtub, refinishing can cost between $200 and $1,000. If you are considering a DIY project, be sure to budget for the costs upfront so that you don’t end up regretting your decision later on.

Cost to refinish porcelain bathtub

Porcelain bathtubs are fragile and can often suffer damage during refinishing. This can result in a higher cost than refinishing a metal bathtub. If you are considering a DIY project, be sure to research the cost of replacing your bathtub before starting any work.

Bathtub feels like sandpaper

When refinishing a bathtub, it is common for the surface to feel rough and sandpaper-like. This is due to the removal of the old finish and the application of a new one. Be patient; it will smooth out over time.

If you are still concerned about the potential dangers, you can call in a professional to help you 

complete the job safely and correctly.

Clean bathtub rough surface

Before refinishing your bathtub, it is important to clean the rough surface. This can be done with a mild soap and water mixture or by using a scrubber pad. Be sure to rinse off the tub thoroughly before starting the refinishing process.

Refinish porcelain bathtub

If you are considering refinishing your porcelain bathtub, there are a few factors to consider. First, make sure that the tub is in good condition before beginning any work. Second, determine the type of finish that you want: high-gloss or matte. Third, determine the cost of the project: labor only or including materials and labor. Fourth, consult with a professional to ensure that you are following all safety guidelines before beginning any work on your bathtub.

Refinishing a bathtub is a big job that can take hours, days, or even weeks to complete. Be patient and take your time; the end result will be a beautiful bathtub that looks brand new. If you are still concerned about the potential dangers, you can call in a professional to help you complete the job safely and correctly.