Category Archives: Tips & Tricks

Grafix Edge Stencil Film tips and tricks

Check the latest price on Amazon

Grafix Edge Stencil Film is a versatile tool that can be used for a variety of projects, from spray painting to screen printing. Here are a few tips and tricks to help you get the most out of this product:

  • Use a sharp blade. A dull blade will make it difficult to cut through the film cleanly, which can lead to ragged edges on your stencil.
  • Cut outside the lines. When you’re cutting your stencil, it’s best to cut outside the lines of your design. This will give you a little bit of extra room to work with, and it will also help to prevent the paint from bleeding under the edges of your stencil.
  • Use a lightbox. If you’re working with a complex design, a lightbox can be a great help. It will allow you to see your design clearly, and it will also make it easier to cut out the small details.
  • Adhere your stencil securely. Once you’ve cut out your stencil, you’ll need to adhere it securely to your surface. You can use spray adhesive, double-sided tape, or even just plain old tape.
  • Use the right type of paint. Not all paints are created equal. Some paints, such as acrylic paint, will bleed under the edges of your stencil. It’s best to use a paint that is specifically designed for stenciling.
  • Clean your stencil properly. After you’re finished using your stencil, it’s important to clean it properly. This will help to prevent the paint from drying and hardening on the film, which can make it difficult to reuse your stencil.

Here are some additional tips and tricks:

  • If you’re using Grafix Edge Stencil Film for spray painting, be sure to use a light coat of paint. A heavy coat of paint can make it difficult to see your design, and it can also cause the paint to bleed under the edges of your stencil.
  • If you’re using Grafix Edge Stencil Film for screen printing, be sure to use a high-quality screen. This will help to ensure that your print is clear and crisp.
  • Grafix Edge Stencil Film can also be used for other projects, such as drawing, painting, and airbrushing. Experiment with different techniques to see what you can create!

I hope these tips help you get the most out of Grafix Edge Stencil Film. Have fun creating!

How do you use stencil film?

Here are the steps on how to use stencil film:

  1. Prepare your surface. The surface you plan to stencil on should be clean, smooth, and dry. If you’re working on a porous surface, such as wood or canvas, you may need to apply a coat of primer first.
  2. Trace your design. If you have a pre-made design, you can trace it onto the stencil film using a pencil or marker. If you’re creating your own design, you can draw it freehand or use a stencil template.
  3. Cut out your stencil. Use a sharp blade to cut out your design. Be sure to cut outside the lines of your design to give yourself a little bit of extra room to work with.
  4. Adhere your stencil. There are a few different ways to adhere your stencil to your surface. You can use spray adhesive, double-sided tape, or even just plain old tape.
  5. Apply paint. Use the type of paint that is recommended for stenciling. Apply the paint in a light coat, and be sure to work from the inside out to prevent the paint from bleeding under the edges of your stencil.
  6. Remove your stencil. Once the paint is dry, carefully remove your stencil. Be sure to peel it away from the edges to avoid tearing the film.
  7. Clean your stencil. After you’re finished using your stencil, it’s important to clean it properly. This will help to prevent the paint from drying and hardening on the film, which can make it difficult to reuse your stencil.

Here are some additional tips:

  • If you’re using stencil film for spray painting, be sure to use a light coat of paint. A heavy coat of paint can make it difficult to see your design, and it can also cause the paint to bleed under the edges of your stencil.
  • If you’re using stencil film for screen printing, be sure to use a high-quality screen. This will help to ensure that your print is clear and crisp.
  • Grafix Edge Stencil Film can also be used for other projects, such as drawing, painting, and airbrushing. Experiment with different techniques to see what you can create!

I hope this helps!

Is stencil film reusable?

Yes, stencil film is reusable. However, the number of times you can reuse it will depend on the type of stencil film you are using and how you are using it.

Some stencil films are made of a thin plastic that can be washed and reused several times. Other stencil films are made of a thicker plastic that is more durable and can be reused even more times.

If you are using stencil film for spray painting, you may be able to reuse it more times than if you are using it for screen printing. This is because spray painting uses a lighter coat of paint, which is less likely to damage the stencil film.

To extend the life of your stencil film, it is important to clean it properly after each use. You can use soap and water to clean stencil film, or you can use a special stencil cleaner.

If you are careful with your stencil film, you should be able to reuse it many times. This can save you money and reduce waste, making it a more sustainable option.

Here are some tips for extending the life of your stencil film:

  • Use a sharp blade when cutting out your stencil. A dull blade can make it difficult to cut through the film cleanly, which can damage the film.
  • Be careful not to overstretch the film. Overstretching the film can weaken it and make it more likely to tear.
  • Clean your stencil properly after each use. This will help to prevent the paint from drying and hardening on the film, which can make it difficult to reuse the film.
  • Store your stencil film in a cool, dry place. This will help to prevent the film from warping or cracking.

By following these tips, you can help to extend the life of your stencil film and get the most out of it.

Grafix Edge Stencil Film is a versatile tool that can be used for a variety of projects, from spray painting to screen printing. Here are some of the pros and cons of this product:

Pros:

  • Reusable: Grafix Edge Stencil Film can be reused multiple times, which can save you money and reduce waste.
  • Durable: This stencil film is made of a thick plastic that is resistant to tearing and warping.
  • Easy to use: Grafix Edge Stencil Film is easy to cut and apply, even for beginners.
  • Versatile: This stencil film can be used with a variety of paints and mediums.

Cons:

  • Not as detailed as some other stencil films: Grafix Edge Stencil Film is not as detailed as some other stencil films, so it may not be suitable for projects that require fine detail.
  • Can be difficult to clean: Some users have found that Grafix Edge Stencil Film can be difficult to clean, especially if it is used with acrylic paint.
  • Not as opaque as some other stencil films: Grafix Edge Stencil Film is not as opaque as some other stencil films, so it may not be suitable for projects where you need a sharp contrast between the stencil and the background.

Overall, Grafix Edge Stencil Film is a versatile and durable stencil film that is a good option for a variety of projects. However, it is not as detailed as some other stencil films and can be difficult to clean.

3M Super 77 Multipurpose Permanent Spray Adhesive glue tips and tricks 2023

Check the latest price on Amazon

Here are some tips and tricks for using 3M Super 77 Multipurpose Permanent Spray Adhesive:

  • Shake the can well before use. This will ensure that the adhesive is evenly mixed.
  • Apply the adhesive in a well-ventilated area. The fumes can be strong, so it’s best to work in a place where you can get some fresh air.
  • Hold the can about 6 to 8 inches away from the surface and spray in a smooth, even motion. Don’t overspray, as this can make the adhesive difficult to control.
  • Allow the adhesive to dry for a few minutes before attaching the two surfaces. This will give the adhesive time to set and form a strong bond.
  • If you need to reposition the two surfaces after they’ve been sprayed, you can do so within 30 minutes. After that, the adhesive will be set and will not be able to be repositioned.
  • To clean up any excess adhesive, use a damp cloth. Be sure to wipe up the adhesive immediately, as it can become difficult to remove once it dries.

Here are some additional tips:

  • 3M Super 77 is a permanent adhesive, so be sure to use it on materials that you want to bond permanently.
  • This adhesive is not recommended for use on porous materials, such as wood or fabric. It will soak into these materials and may not create a strong bond.
  • If you are using 3M Super 77 on delicate materials, such as paper or fabric, be sure to test the adhesive in an inconspicuous area first. This will help you to determine the amount of adhesive that you need to use and to make sure that the adhesive does not damage the material.

I hope these tips help you to use 3M Super 77 Multipurpose Permanent Spray Adhesive effectively.

What is Super 77 spray adhesive used for?

Super 77 spray adhesive is a versatile adhesive that can be used for a variety of projects. It is a permanent adhesive that bonds quickly and securely to a wide range of materials, including paper, cardboard, fabric, plastic, metal, and wood.

Here are some of the most common uses for Super 77 spray adhesive:

  • Mounting posters, photos, and other artwork.
  • Attaching fabric to furniture or other surfaces.
  • Bonding foam to other materials.
  • Securing insulation in place.
  • Making repairs to clothing or other items.
  • Creating crafts and decorations.

Super 77 spray adhesive is a great choice for any project where you need a strong, permanent bond. It is easy to use and can be applied to a variety of materials. However, it is important to note that this adhesive is not recommended for use on porous materials, such as wood or fabric, as it will soak into these materials and may not create a strong bond.

Here are some additional tips for using Super 77 spray adhesive:

  • Shake the can well before use. This will ensure that the adhesive is evenly mixed.
  • Apply the adhesive in a well-ventilated area. The fumes can be strong, so it’s best to work in a place where you can get some fresh air.
  • Hold the can about 6 to 8 inches away from the surface and spray in a smooth, even motion. Don’t overspray, as this can make the adhesive difficult to control.
  • Allow the adhesive to dry for a few minutes before attaching the two surfaces. This will give the adhesive time to set and form a strong bond.
  • If you need to reposition the two surfaces after they’ve been sprayed, you can do so within 30 minutes. After that, the adhesive will be set and will not be able to be repositioned.
  • To clean up any excess adhesive, use a damp cloth. Be sure to wipe up the adhesive immediately, as it can become difficult to remove once it dries.

I hope this helps!

How long does 3M Super 77 last?

The shelf life of 3M Super 77 is about 15 months when stored in a cool, dry place. The adhesive will start to lose its effectiveness after this time, so it is best to use it before the expiration date.

Here are some tips for extending the shelf life of 3M Super 77:

  • Store the can in a cool, dry place. The ideal temperature range for storing 3M Super 77 is 60° to 80°F.
  • Keep the can upright. This will help to prevent the adhesive from settling to the bottom of the can.
  • Shake the can well before use. This will ensure that the adhesive is evenly mixed.
  • Use the adhesive within 30 minutes of opening the can. This will help to prevent the adhesive from drying out.

If you store 3M Super 77 properly, it should last for several years. However, it is always best to check the expiration date on the can before using it.

Here are some additional tips:

  • If you are not sure how long 3M Super 77 has been stored, it is best to err on the side of caution and not use it.
  • If the adhesive has become thick or separated, it is not safe to use.
  • If you have any questions about the shelf life of 3M Super 77, you can contact 3M customer service.

Which is stronger 3M 77 or 3M 90?

3M 90 is stronger than 3M 77. 3M 90 has a higher initial tack, which means that it bonds to surfaces more quickly and securely. It also has a higher shear strength, which means that it can withstand more force before the bond breaks.

Here is a table comparing the adhesive strengths of 3M 77 and 3M 90:

Adhesive Initial Tack Shear Strength
3M 77 120 lbs./in. 175 lbs./in.
3M 90 160 lbs./in. 250 lbs./in.

As you can see, 3M 90 has a higher initial tack and shear strength than 3M 77. This means that 3M 90 will bond to surfaces more quickly and securely, and it can withstand more force before the bond breaks.

However, it is important to note that 3M 90 is also a more permanent adhesive than 3M 77. This means that it can be more difficult to remove 3M 90 if you need to make a change to your project.

So, which adhesive is right for you? If you need a strong, permanent bond that can withstand a lot of force, then 3M 90 is the better choice. However, if you need an adhesive that is easier to remove, then 3M 77 may be a better option.

Ultimately, the best way to decide which adhesive is right for you is to consider the specific needs of your project.

How long does it take for 3M Super 77 spray adhesive to dry?

The drying time of 3M Super 77 spray adhesive depends on a few factors, including the temperature and humidity of the environment, the amount of adhesive applied, and the type of surfaces being bonded. However, in general, it takes about 15 seconds to 1 minute for the adhesive to dry to the touch. The bonding range is 15 seconds to 15 minutes.

Here are some tips for drying 3M Super 77 spray adhesive:

  • Apply the adhesive in a well-ventilated area. This will help the adhesive to dry more quickly.
  • Use a light coat of adhesive. A heavier coat of adhesive will take longer to dry.
  • Allow the adhesive to dry completely before handling the project. This will help to prevent the adhesive from coming loose.

If you are working in a cold or humid environment, the drying time of 3M Super 77 spray adhesive may be longer. You may also need to use a hair dryer or heat gun to help the adhesive dry more quickly.

Here are some additional tips:

  • If you are not sure how long 3M Super 77 needs to dry, it is best to err on the side of caution and wait longer.
  • If the adhesive is still tacky after a few minutes, you can use a hair dryer or heat gun to help it dry more quickly.
  • Be careful not to overheat the adhesive, as this can damage the surfaces being bonded.

I hope this helps!

Here are some of the pros and cons of 3M Super 77 Multipurpose Permanent Spray Adhesive:

Pros:

  • Strong, permanent bond: 3M Super 77 forms a strong, permanent bond that can withstand a lot of force.
  • Versatile: 3M Super 77 can be used on a wide variety of materials, including paper, cardboard, fabric, plastic, metal, and wood.
  • Easy to use: 3M Super 77 is easy to apply and can be used with a variety of surfaces.
  • Repositionable: 3M Super 77 can be repositioned for up to 30 minutes after application.
  • Low odor: 3M Super 77 has a low odor, making it a good choice for indoor use.

Cons:

  • Permanent bond: 3M Super 77 is a permanent adhesive, so it can be difficult to remove if you need to make a change to your project.
  • Can be messy: 3M Super 77 can be messy to apply, so it is important to use it in a well-ventilated area.
  • Can be flammable: 3M Super 77 is flammable, so it is important to use it in a safe manner.

Overall, 3M Super 77 is a versatile and effective adhesive that is a good choice for a variety of projects. However, it is important to be aware of the pros and cons of this adhesive before using it.

Here are some additional tips for using 3M Super 77:

  • Shake the can well before use. This will ensure that the adhesive is evenly mixed.
  • Apply the adhesive in a well-ventilated area. The fumes can be strong, so it’s best to work in a place where you can get some fresh air.
  • Hold the can about 6 to 8 inches away from the surface and spray in a smooth, even motion. Don’t overspray, as this can make the adhesive difficult to control.
  • Allow the adhesive to dry completely before handling the project. This will help to prevent the adhesive from coming loose.
  • To clean up any excess adhesive, use a damp cloth. Be sure to wipe up the adhesive immediately, as it can become difficult to remove once it dries.

I hope this helps!

Liquitex Professional Gesso Surface Prep Medium Tips and tricks 2023

Check the latest price on Amazon

Here are some tips and tricks for using Liquitex Professional Gesso Surface Prep Medium:

  • Shake the bottle well before using. This will ensure that the gesso is well-mixed and that you get an even application.
  • Apply the gesso with a brush or roller. A brush will give you more control, while a roller will be faster.
  • Apply the gesso in thin, even coats. This will help to prevent the gesso from cracking or peeling.
  • Let each coat of gesso dry completely before applying the next coat. This may take several hours, depending on the humidity and temperature.
  • Sand the gesso between coats to create a smooth, even surface. Use a fine-grit sandpaper for best results.
  • Clean your brushes and rollers thoroughly with soap and water after use. This will prevent the gesso from hardening and making your brushes unusable.

Additional tips:

  • For a smoother finish, you can thin the gesso with water. Start with a small amount of water and add more as needed until you reach the desired consistency.
  • If you want to add a tint to the gesso, you can mix in a small amount of acrylic paint. Just be sure to use a transparent or translucent paint so that the gesso doesn’t become opaque.
  • You can also use Liquitex Professional Gesso Surface Prep Medium to prime wood, paper, and other surfaces. Just be sure to test the gesso on a small area first to make sure that it doesn’t react adversely with the surface.

Common mistakes to avoid when using Liquitex Professional Gesso Surface Prep Medium:

  • Not shaking the bottle well before use. This can cause the gesso to be unevenly mixed, which can lead to cracking or peeling.
  • Applying the gesso too thickly. This can also lead to cracking or peeling.
  • Not letting each coat of gesso dry completely before applying the next coat. This can cause the gesso to become gummy and difficult to work with.
  • Not sanding the gesso between coats. This can leave a rough surface that will affect the final finish of your painting.

I hope these tips help you get the most out of Liquitex Professional Gesso Surface Prep Medium.

What is the difference between gesso and acrylic medium?

Gesso and acrylic medium are both used to prepare surfaces for painting, but they have different properties and uses.

  • Gesso is a white paint that is made with a binder, such as chalk or titanium white, and a drying agent. It is typically used to prime canvases and other surfaces before painting with acrylics or oils. Gesso provides a smooth, even surface that helps the paint to adhere and prevents it from soaking into the surface. It also gives the paint a matte finish.
  • Acrylic medium is a clear liquid that is made with acrylic resins. It can be used to thin acrylic paint, extend its drying time, or modify its properties. Acrylic mediums are also available in matte, satin, and gloss finishes.

Here is a table that summarizes the key differences between gesso and acrylic medium:

Feature Gesso Acrylic Medium
Color White Clear
Binder Chalk, titanium white, or other pigment Acrylic resins
Drying time Fast Varies depending on the medium
Finish Matte Matte, satin, or gloss
Use Priming surfaces for painting Thinning acrylic paint, extending drying time, or modifying properties

Here are some additional points to consider when choosing between gesso and acrylic medium:

  • Gesso is more opaque than acrylic medium, so it will give your painting a more opaque finish.
  • Acrylic medium is more versatile than gesso, as it can be used for a variety of purposes, such as thinning paint, extending drying time, or modifying properties.
  • Gesso is typically more affordable than acrylic medium.

Ultimately, the best choice for you will depend on your individual needs and preferences. If you are looking for a clear, matte finish that will help your paint to adhere, then gesso is a good option. If you are looking for a more versatile product that can be used for a variety of purposes, then acrylic medium is a good option.

What is gesso medium used for?

Gesso is a white paint that is used to prepare surfaces for painting. It’s typically made with a binder, such as chalk or titanium white, and a drying agent. It can be used on a variety of surfaces, including canvas, wood, and paper.

Benefits, including:

  • It provides a smooth, even surface that helps the paint to adhere.
  • It prevents the paint from soaking into the surface.
  • It gives the paint a matte finish.
  • It can be tinted to create different colors.

Used for a variety of purposes, including:

  • Priming canvases for painting with acrylics or oils.
  • Preparing wood surfaces for painting.
  • Creating a smooth surface for collage or mixed media work.
  • Tinting paper for watercolor painting.
  • Creating a protective finish for artwork.

Gesso is a versatile and easy-to-use product that can be used to improve the quality of your paintings. If you are looking for a way to prepare your surfaces for painting, gesso is a good option to consider.

Here are some additional tips for using gesso:

  • Shake the bottle well before using. This will ensure that the gesso is well-mixed and that you get an even application.
  • Apply the gesso in thin, even coats. This will help to prevent the gesso from cracking or peeling.
  • Let each coat of gesso dry completely before applying the next coat. This may take several hours, depending on the humidity and temperature.
  • Sand the gesso between coats to create a smooth, even surface. Use a fine-grit sandpaper for best results.
  • Clean your brushes and rollers thoroughly with soap and water after use. This will prevent the gesso from hardening and making your brushes unusable.

I hope this helps!

What is the benefit of gesso?

Gesso is a white paint that is used to prepare surfaces for painting. It has a number of benefits, including:

  • It provides a smooth, even surface that helps the paint to adhere. This is especially important for canvas, which can be rough and uneven. Gesso creates a smooth surface that allows the paint to flow evenly and prevents it from soaking into the canvas.
  • It prevents the paint from soaking into the surface. This is important for both acrylic and oil paints, as it can prevent the paint from becoming too thick and difficult to work with.
  • It gives the paint a matte finish. This is a personal preference, but many artists prefer the matte finish that gesso provides.
  • It can be tinted to create different colors. This can be useful if you want to create a specific color palette for your painting.

Overall, gesso is a versatile and easy-to-use product that can be used to improve the quality of your paintings. If you are looking for a way to prepare your surfaces for painting, gesso is a good option to consider.

Here are some additional benefits of using gesso:

  • It can extend the life of your artwork. Gesso creates a protective barrier between the paint and the surface, which can help to prevent the paint from fading or cracking over time.
  • It can make your paintings more vibrant. Gesso helps the paint to reflect light more evenly, which can give your paintings a more vibrant appearance.
  • It can make your paintings easier to clean. Gesso creates a non-porous surface that is less likely to attract dirt and dust. This makes your paintings easier to clean and maintain.

If you are considering using gesso, I recommend doing some research to find the right product for your needs. There are many different types of gesso available, so it is important to choose one that is appropriate for the surface you are painting on and the type of paint you will be using.

Can I put gesso over acrylic paint?

Yes, you can put gesso over acrylic paint. In fact, it is a common practice to do so, as it can help to create a smooth, even surface for the next layer of paint. Gesso is also a good way to seal in acrylic paint and prevent it from fading or cracking over time.

Here are some tips for putting gesso over acrylic paint:

  • Make sure the acrylic paint is dry before applying the gesso. If the acrylic paint is still wet, the gesso may not adhere properly.
  • Sand the acrylic paint lightly before applying the gesso. This will help the gesso to adhere better and create a smoother finish.
  • Apply the gesso in thin, even coats. This will help to prevent the gesso from cracking or peeling.
  • Let each coat of gesso dry completely before applying the next coat. This may take several hours, depending on the humidity and temperature.

If you are using a tinted gesso, it is important to note that the color of the gesso may affect the final color of your painting. If you are not sure how the gesso will affect the color, it is a good idea to test it on a small area of your painting first.

Overall, putting gesso over acrylic paint is a safe and effective way to create a smooth, even surface for your next painting. By following these tips, you can ensure that your gesso will adhere properly and create a beautiful finish.

Liquitex Professional Gesso Surface Prep Medium is a popular gesso that is used by artists to prepare surfaces for painting. It has a number of pros and cons, which are summarized below:

Pros:

  • It is easy to use. Liquitex Professional Gesso Surface Prep Medium can be applied with a brush or roller, and it dries quickly.
  • It is versatile. Liquitex Professional Gesso Surface Prep Medium can be used on a variety of surfaces, including canvas, wood, and paper.
  • It is affordable. Liquitex Professional Gesso Surface Prep Medium is a relatively inexpensive gesso.
  • It is archival. Liquitex Professional Gesso Surface Prep Medium is archival, which means that it will not yellow or fade over time.

Cons:

  • It can be thick. Liquitex Professional Gesso Surface Prep Medium can be thick, which can make it difficult to apply in thin coats.
  • It can be difficult to sand. Liquitex Professional Gesso Surface Prep Medium can be difficult to sand, especially if it is applied in thick coats.
  • It can be messy. Liquitex Professional Gesso Surface Prep Medium can be messy, especially if it is applied with a brush.

Overall, Liquitex Professional Gesso Surface Prep Medium is a good option for artists who are looking for an easy-to-use, affordable, and archival gesso. However, it is important to be aware of the potential downsides of this gesso before using it.

Here are some additional pros and cons of Liquitex Professional Gesso Surface Prep Medium that you may want to consider:

Pros:

  • It is a water-based gesso, which makes it less toxic than solvent-based gessos.
  • It is available in a variety of colors, which can be helpful if you want to create a specific color palette for your painting.
  • It can be tinted with acrylic paint to create custom colors.

Cons:

  • It can yellow slightly over time, especially if it is exposed to sunlight.
  • It is not as durable as some other types of gesso, so it may not be suitable for outdoor use.

Ultimately, the best way to decide if Liquitex Professional Gesso Surface Prep Medium is right for you is to try it out and see how you like it. If you are looking for an easy-to-use, affordable, and archival gesso, then this is a good option to consider.

Mod podge spray tips and tricks 2023

Check the latest price on Amazon

Here are some tips and tricks for using Mod Podge spray:

  • Shake the bottle well before using. This will ensure that the product is evenly mixed and that you get a consistent application.
  • Protect your work surface. Mod Podge spray can be messy, so it’s a good idea to cover your work surface with a drop cloth or newspaper.
  • Start with a light coat. It’s better to apply too little than too much, as Mod Podge can be difficult to sand off if you apply too thick of a coat.
  • Work in small sections. This will help you to avoid drips and uneven application.
  • Let each coat dry completely before applying the next one. This will help to prevent the layers from peeling or lifting.
  • Use a heat gun or hair dryer to speed up the drying process. Just be careful not to overheat the project, as this could cause the Mod Podge to crack.
  • For best results, apply 2-3 coats of Mod Podge spray. This will help to create a durable, water-resistant finish.

Here are some additional tips:

  • Use a test piece of paper or fabric to see how the Mod Podge spray will look on your project. This will help you to avoid any surprises when you’re finished.
  • If you’re using Mod Podge spray on a delicate surface, such as fabric or paper, you may want to seal it with a clear coat of Mod Podge after it’s dry. This will help to protect the surface from fading or damage.
  • Mod Podge spray can be used to adhere a variety of materials, including paper, fabric, photos, and even glitter. Experiment with different materials to see what you can create.

With these tips in mind, you’ll be well on your way to creating beautiful Mod Podge spray projects.

How do you use Modge podge spray?

Here are the steps on how to use Mod Podge spray:

  1. Shake the bottle well. This will ensure that the product is evenly mixed and that you get a consistent application.
  2. Protect your work surface. Mod Podge spray can be messy, so it’s a good idea to cover your work surface with a drop cloth or newspaper.
  3. Prime the pump. Spray a few bursts of Mod Podge onto a scrap piece of paper or paper towel to prime the pump and ensure that the spray is consistent.
  4. Apply Mod Podge to your project. Hold the bottle about 8-10 inches away from your project and spray in a smooth, even motion. Work in small sections to avoid drips and uneven application.
  5. Let the first coat dry completely before applying the next one. This will help to prevent the layers from peeling or lifting.
  6. Add embellishments, if desired. Once the first coat is dry, you can add embellishments, such as glitter, beads, or stickers.
  7. Apply a top coat. Once you’re happy with your project, apply a top coat of Mod Podge to seal it and protect it from wear and tear.

Here are some additional tips:

  • For best results, apply 2-3 coats of Mod Podge spray. This will help to create a durable, water-resistant finish.
  • Use a heat gun or hair dryer to speed up the drying process. Just be careful not to overheat the project, as this could cause the Mod Podge to crack.
  • If you’re using Mod Podge spray on a delicate surface, such as fabric or paper, you may want to seal it with a clear coat of Mod Podge after it’s dry. This will help to protect the surface from fading or damage.
  • Mod Podge spray can be used to adhere a variety of materials, including paper, fabric, photos, and even glitter. Experiment with different materials to see what you can create.

I hope this helps!

How do you make Mod Podge spray dry faster?

There are a few ways to make Mod Podge spray dry faster:

  • Apply a thin coat. The thinner the coat of Mod Podge, the faster it will dry.
  • Use a heat gun or hair dryer. Hold the heat gun or hair dryer about 6 inches away from your project and move it in a circular motion. Be careful not to overheat the project, as this could cause the Mod Podge to crack.
  • Work in a warm, dry environment. The warmer and drier the environment, the faster the Mod Podge will dry.
  • Apply the Mod Podge in a well-ventilated area. The fumes from the Mod Podge can be strong, so it’s important to work in a well-ventilated area.

Here are some additional tips:

  • If you’re in a hurry, you can apply the Mod Podge and then place the project in a warm oven (set to the lowest setting) for a few minutes. This will help to speed up the drying process.
  • If you’re using Mod Podge spray on a delicate surface, such as fabric or paper, you may want to seal it with a clear coat of Mod Podge after it’s dry. This will help to protect the surface from fading or damage.
  • Mod Podge spray can be used to adhere a variety of materials, including paper, fabric, photos, and even glitter. Experiment with different materials to see what you can create.

I hope this helps!

Why is my Mod Podge spray still sticky?

There are a few reasons why your Mod Podge spray might still be sticky:

  • You applied too thick of a coat. Mod Podge spray dries clear, but it can take a while for the thicker coats to dry completely. If you applied too thick of a coat, it’s likely that the Mod Podge is still tacky.
  • You didn’t let the coats dry completely between applications. Mod Podge spray needs to dry completely before you apply the next coat. If you don’t let the coats dry completely, the Mod Podge will not adhere properly and will be more likely to be sticky.
  • The temperature or humidity is too low. Mod Podge spray dries best in warm, dry conditions. If the temperature or humidity is too low, the Mod Podge will take longer to dry and may be more likely to be sticky.
  • You used the wrong type of Mod Podge spray. There are different types of Mod Podge spray available, each with its own drying time. If you used a type of Mod Podge spray that is designed to dry quickly, it may still be sticky if you didn’t let it dry completely.

If your Mod Podge spray is still sticky, there are a few things you can do:

  • Wait longer. Give the Mod Podge more time to dry completely. If you’ve waited at least 24 hours and the Mod Podge is still sticky, you may need to wait even longer.
  • Apply a light coat of clear acrylic sealer. This will help to protect the Mod Podge and make it less sticky.
  • Sand the surface lightly. This will help to remove the sticky layer of Mod Podge and create a smooth surface for the next coat.

If you’ve tried all of these things and your Mod Podge spray is still sticky, you may need to contact the manufacturer for assistance.

Mod Podge spray is a versatile product that can be used for a variety of projects, including decoupage, paper crafting, and home decor. Here are some of the pros and cons of Mod Podge spray:

Pros:

  • Easy to use. Mod Podge spray is easy to apply and can be used on a variety of surfaces.
  • Fast-drying. Mod Podge spray dries quickly, so you can get your project finished in no time.
  • Water-resistant. Once Mod Podge spray is dry, it is water-resistant, so your project will be protected from the elements.
  • Durable. Mod Podge spray is durable and can withstand wear and tear.

Cons:

  • Can be messy. Mod Podge spray can be messy, so it’s important to work in a well-ventilated area and protect your work surface.
  • Can be difficult to control. It can be difficult to control the amount of Mod Podge spray that comes out of the bottle, so it’s important to apply it in a light, even coat.
  • Not as strong as other adhesives. Mod Podge spray is not as strong as other adhesives, so it may not be suitable for all projects.

Overall, Mod Podge spray is a versatile product that can be used for a variety of projects. It is easy to use, fast-drying, and water-resistant. However, it can be messy and difficult to control, and it is not as strong as other adhesives.

Montana Black spray paint tips and tricks 2023

Check the latest price on Amazon

Here are some Montana Black spray paint tips and tricks:

  • Shake well. This is the most important tip, as Montana Black spray paint has a high pigment load that needs to be evenly dispersed. Shake the can vigorously for at least 2 minutes, or until you hear the mixing balls rattling freely.
  • Work in a well-ventilated area. Montana Black spray paint is solvent-based, so it can be harmful to breathe in the fumes. Work in a well-ventilated area, or wear a mask to protect yourself.
  • Start with a light coat. It’s better to start with a light coat and build up to the desired coverage, rather than applying too much paint at once. This will help to prevent the paint from running or dripping.
  • Hold the can at a distance. When spraying, hold the can at a distance of about 12-18 inches from the surface. This will help to create a smooth, even coat of paint.
  • Apply thin coats. As mentioned above, it’s better to apply thin coats of paint than one thick coat. This will help the paint to dry more evenly and prevent it from cracking or peeling.
  • Let the paint dry completely. Montana Black spray paint dries quickly, but it’s important to let each coat dry completely before applying the next one. This will help to prevent the paint from lifting or peeling.

Here are some additional tips and tricks:

  • Use a primer. If you’re painting on a porous surface, such as wood or metal, use a primer before applying the Montana Black spray paint. This will help the paint to adhere better and prevent it from chipping or peeling.
  • Use a clear coat. To protect your finished project, apply a clear coat over the Montana Black spray paint. This will help to prevent the paint from fading or scratching.
  • Experiment with different techniques. There are many different ways to use Montana Black spray paint. Experiment with different techniques to find what works best for you.
  • Have fun! Montana Black spray paint is a versatile and fun medium to use. Let your creativity run wild and see what you can create.

I hope these tips help you get the most out of your Montana Black spray paint.

How long does it take for Montana black spray paint to dry?

Montana Black spray paint dries to the touch in about 15-20 minutes, depending on the environmental conditions and the amount of layers of paint you apply. The total drying time is about 24 hours.

Here are some factors that can affect the drying time of Montana Black spray paint:

  • Temperature: The paint will dry faster in warm temperatures and slower in cold temperatures.
  • Humidity: The paint will dry slower in humid conditions.
  • Number of layers: The paint will take longer to dry if you apply multiple layers.
  • Surface: The paint will dry faster on a smooth surface than on a rough surface.

If you’re in a hurry, you can speed up the drying time of Montana Black spray paint by using a hair dryer on the cool setting. However, be careful not to overheat the paint, as this can cause it to crack or peel.

Here are some tips for getting the best results with Montana Black spray paint:

  • Shake the can well before use. This will help to ensure that the paint is evenly dispersed.
  • Work in a well-ventilated area. The fumes from Montana Black spray paint can be harmful, so it’s important to work in a well-ventilated area.
  • Start with a light coat. It’s better to start with a light coat and build up to the desired coverage, rather than applying too much paint at once. This will help to prevent the paint from running or dripping.
  • Apply thin coats. As mentioned above, it’s better to apply thin coats of paint than one thick coat. This will help the paint to dry more evenly and prevent it from cracking or peeling.
  • Let the paint dry completely between coats. This is important to prevent the paint from lifting or peeling.

I hope this helps!

How do you get Montana spray paint to work?

Montana spray paint is a high-quality spray paint that is known for its vibrant colors and smooth finish. However, it can be a bit tricky to get it to work properly. Here are some tips on how to get Montana spray paint to work:

  1. Shake the can well. This is the most important step, as Montana spray paint has a high pigment load that needs to be evenly dispersed. Shake the can vigorously for at least 2 minutes, or until you hear the mixing balls rattling freely.
  2. Work in a well-ventilated area. Montana spray paint is solvent-based, so it can be harmful to breathe in the fumes. Work in a well-ventilated area, or wear a mask to protect yourself.
  3. Start with a light coat. It’s better to start with a light coat and build up to the desired coverage, rather than applying too much paint at once. This will help to prevent the paint from running or dripping.
  4. Hold the can at a distance. When spraying, hold the can at a distance of about 12-18 inches from the surface. This will help to create a smooth, even coat of paint.
  5. Apply thin coats. As mentioned above, it’s better to apply thin coats of paint than one thick coat. This will help the paint to dry more evenly and prevent it from cracking or peeling.
  6. Let the paint dry completely. Montana spray paint dries quickly, but it’s important to let each coat dry completely before applying the next one. This will help to prevent the paint from lifting or peeling.

Here are some additional tips:

  • Use a primer. If you’re painting on a porous surface, such as wood or metal, use a primer before applying the Montana spray paint. This will help the paint to adhere better and prevent it from chipping or peeling.
  • Use a clear coat. To protect your finished project, apply a clear coat over the Montana spray paint. This will help to prevent the paint from fading or scratching.
  • Experiment with different techniques. There are many different ways to use Montana spray paint. Experiment with different techniques to find what works best for you.
  • Have fun! Montana spray paint is a versatile and fun medium to use. Let your creativity run wild and see what you can create.

I hope these tips help you get the most out of your Montana spray paint.

Is Montana spray paint permanent?

Montana spray paint is considered to be permanent, but it can fade or be removed over time. The longevity of the paint will depend on the surface you are painting on, the type of Montana spray paint you are using, and the conditions it is exposed to.

Here are some factors that can affect the longevity of Montana spray paint:

  • Surface: The paint will last longer on a smooth surface than on a rough surface.
  • Type of Montana spray paint: Some Montana spray paints are more durable than others. For example, Montana GOLD is a high-quality acrylic spray paint that is known for its long-lasting finish.
  • Conditions: The paint will last longer in a dry, cool environment than in a humid, hot environment.

If you want your Montana spray paint to last as long as possible, there are a few things you can do:

  • Use a primer: A primer will help the paint to adhere to the surface better and prevent it from fading or peeling.
  • Apply multiple coats: Applying multiple coats of paint will help to build up the thickness of the paint and make it more durable.
  • Let the paint dry completely: It is important to let the paint dry completely between coats and before exposing it to the elements.
  • Store the paint properly: When you are not using the paint, store it in a cool, dry place.

By following these tips, you can help to ensure that your Montana spray paint will last for many years to come.

Montana Black spray paint is a high-quality spray paint that is known for its vibrant colors, smooth finish, and durable performance. It is a popular choice for artists, graffiti writers, and DIY enthusiasts.

Here are some of the pros and cons of Montana Black spray paint:

Pros:

  • High pigment load: Montana Black spray paint has a high pigment load, which means that the colors are very intense and bold. This is perfect for creating eye-catching designs that stand out from their surroundings.
  • Smooth finish: Montana Black spray paint dries to a smooth, even finish. This is ideal for creating professional-looking projects.
  • Durable performance: Montana Black spray paint is durable and resistant to fading, scratching, and peeling. This makes it a good choice for projects that will be exposed to the elements.
  • Wide range of colors: Montana Black spray paint comes in a wide range of colors, so you can find the perfect shade for your project.
  • Versatile: Montana Black spray paint can be used on a variety of surfaces, including wood, metal, plastic, and canvas.

Cons:

  • Solvent-based: Montana Black spray paint is solvent-based, so it can have a strong odor. It is important to work in a well-ventilated area when using this type of paint.
  • Pricey: Montana Black spray paint is more expensive than some other brands of spray paint.
  • Not suitable for all surfaces: Montana Black spray paint is not suitable for all surfaces. It is important to check the product label to see if the paint is compatible with the surface you are painting on.

Overall, Montana Black spray paint is a high-quality spray paint that is a good choice for artists, graffiti writers, and DIY enthusiasts. It is important to be aware of the pros and cons of this type of paint before you purchase it.

Rust Oleum Painter’s Touch 2X Ultra Cover Spray Paint tips 2023

Check the latest price on Amazon

Here are some tips and tricks for using Rust Oleum Painter’s Touch 2X Ultra Cover Spray Paint:

  • Shake the can well for at least 2 minutes before use. This will ensure that the paint is evenly mixed and that you get the best coverage.
  • Apply 2 or more light coats, allowing 10-15 minutes of dry time between coats. This will help to prevent runs and drips.
  • Spray in a steady, back-and-forth motion, holding the can about 8-10 inches from the surface. Don’t overspray, as this can cause the paint to run.
  • Work in a well-ventilated area. The fumes from the spray paint can be harmful, so it’s important to spray in a place where there is plenty of fresh air.
  • Protect your workspace. The spray paint can make a mess, so it’s a good idea to cover your workspace with a drop cloth or newspaper.
  • Let the paint dry completely before handling or using the surface. This usually takes about 24 hours.

Here are some additional tips:

  • For best results, sand the surface lightly before painting. This will help the paint to adhere better.
  • If you are painting over a glossy surface, you will need to use a primer first. This will help the paint to adhere and prevent it from peeling.
  • If you are painting in cold weather, bring the can inside to warm up for a few minutes before using. This will help to prevent the paint from clogging the nozzle.
  • Clean the nozzle after use. This will help to prevent the paint from drying in the nozzle and making it difficult to use the can again.

I hope these tips help you get the best results.


There are many reasons why you might want to buy Rust-Oleum Painter’s Touch 2X Ultra Cover Spray Paint. Here are a few of the most common reasons:

  • It provides twice the coverage as Rust-Oleum® general purpose spray paint in each coat. This means that you can finish projects faster and use less paint.
  • It dries quickly and leaves a smooth, durable finish. This makes it a good choice for projects that need to be completed quickly or that will be exposed to the elements.
  • It is available in a wide variety of colors. This means that you can find the perfect color for your project.
  • It is relatively inexpensive. This makes it a good value for the money.

Here are some additional reasons why you might want to buy Rust-Oleum Painter’s Touch 2X Ultra Cover Spray Paint:

  • It is easy to use. The spray can has a comfort spray tip that makes it easy to control the flow of paint.
  • It is versatile. It can be used on a variety of surfaces, including wood, metal, plastic, and wicker.
  • It is durable. The paint is resistant to chipping and fading, so your project will last for years to come.

Overall, Rust-Oleum Painter’s Touch 2X Ultra Cover Spray Paint is a good choice for a variety of projects. It is easy to use, versatile, and durable. If you are looking for a spray paint that will give you professional-looking results, it is a good option.

Here are some of the pros and cons of Rust-Oleum Painter’s Touch 2X Ultra Cover Spray Paint:

Pros:

  • Provides twice the coverage as Rust-Oleum® general purpose spray paint in each coat.
  • Dries quickly and leaves a smooth, durable finish.
  • Available in a wide variety of colors.
  • Relatively inexpensive.
  • Easy to use.
  • Versatile.
  • Durable.

Cons:

  • Can be messy to use.
  • The paint can be strong-smelling, so it’s important to use it in a well-ventilated area.
  • The paint can be flammable, so it’s important to keep it away from heat and open flames.
  • The paint can chip or fade over time, especially if it is exposed to the elements.

Overall, Rust-Oleum Painter’s Touch 2X Ultra Cover Spray Paint is a good choice for a variety of projects. It is easy to use, versatile, and durable. However, it is important to be aware of the potential drawbacks before using it.

Krylon COLORmaxx Spray Paint and Primer tips and guides 2023

Check the latest price on Amazon

Here are some tips and guides for using Krylon COLORmaxx Spray Paint and Primer:

  • Shake the can well for 2 minutes before use. This will ensure that the paint and primer are mixed evenly.
  • Apply the paint in a well-ventilated area. The fumes can be strong, so it’s best to work outside or in a garage with the doors open.
  • Start by spraying a light coat of paint. This will help to prevent runs and drips.
  • Apply additional coats of paint as needed. Let each coat dry completely before applying the next one.
  • For best results, apply the paint in a smooth, even motion. Don’t overspray, as this can create a build-up of paint.
  • Let the paint dry completely before handling or using the project. This will typically take 20 minutes to dry to the touch and 1 hour to dry to handle.

Additional tips:

  • For best results, use the paint on a clean, dry surface. If the surface is dirty or oily, the paint may not adhere properly.
  • If you’re painting metal, be sure to sand the surface lightly before applying the paint. This will help the paint to adhere better.
  • For outdoor projects, use a paint that is specifically designed for exterior use. This will help the paint to withstand the elements.
  • Clean up any spills or drips immediately with mineral spirits. This will prevent the paint from hardening and becoming difficult to remove.

Here are some guides for using Krylon COLORmaxx Spray Paint and Primer on specific surfaces:

  • Wood: Sand the wood lightly before applying the paint. This will help the paint to adhere better.
  • Metal: Sand the metal lightly with a wire brush to remove any rust or debris. Then, apply a coat of primer before applying the paint.
  • Plastic: Clean the plastic with soap and water before applying the paint.
  • Glass: Clean the glass with glass cleaner before applying the paint.
  • Fabric: Test the paint on an inconspicuous area of the fabric first to make sure it doesn’t bleed or fade.

I hope these tips and guides help you get the best results when using Krylon COLORmaxx Spray Paint and Primer.

There are many reasons why you might want to use Krylon COLORmaxx Spray Paint and Primer. Here are a few of the benefits:

  • It’s a paint and primer in one, so you don’t have to worry about applying two separate products. This saves time and money.
  • It provides premium coverage and superior color. The paint is thick and opaque, so you only need to apply one or two coats to get the desired coverage.
  • It has adhesion and durability. The paint will adhere to a variety of surfaces, including wood, metal, plastic, glass, and fabric. It is also durable enough to withstand the elements, making it a good choice for outdoor projects.
  • It is easy to use. The spray can has a large button tip that makes it easy to spray the paint evenly.
  • It is available in a variety of colors and finishes. This means you can find the perfect color to match your project.

Overall, Krylon COLORmaxx Spray Paint and Primer is a versatile and easy-to-use product that can be used for a variety of projects. It provides premium coverage, superior color, and adhesion and durability. If you are looking for a paint and primer in one, Krylon COLORmaxx Spray Paint and Primer is a great option.

Here are some additional reasons why you might want to use Krylon COLORmaxx Spray Paint and Primer:

  • It is fast drying. The paint dries to the touch in 20 minutes and dries to handle in 1 hour. This means you can complete your project quickly.
  • It is affordable. Krylon COLORmaxx Spray Paint and Primer is a relatively inexpensive product. This makes it a good option for budget-minded DIYers.
  • It is environmentally friendly. Krylon COLORmaxx Spray Paint and Primer is low-odor and contains no harmful chemicals. This makes it a safe choice for indoor and outdoor use.

I hope this helps!

Here are some pros and cons of Krylon COLORmaxx Spray Paint and Primer:

Pros:

  • Paint and primer in one: This saves time and money, as you don’t have to apply two separate products.
  • Premium coverage and superior color: The paint is thick and opaque, so you only need to apply one or two coats to get the desired coverage.
  • Adhesion and durability: The paint will adhere to a variety of surfaces, including wood, metal, plastic, glass, and fabric. It is also durable enough to withstand the elements, making it a good choice for outdoor projects.
  • Easy to use: The spray can has a large button tip that makes it easy to spray the paint evenly.
  • Available in a variety of colors and finishes: This means you can find the perfect color to match your project.
  • Fast drying: The paint dries to the touch in 20 minutes and dries to handle in 1 hour. This means you can complete your project quickly.
  • Affordable: Krylon COLORmaxx Spray Paint and Primer is a relatively inexpensive product. This makes it a good option for budget-minded DIYers.
  • Environmentally friendly: Krylon COLORmaxx Spray Paint and Primer is low-odor and contains no harmful chemicals. This makes it a safe choice for indoor and outdoor use.

Cons:

  • Can be messy: The paint can be a bit messy to apply, so it’s important to work in a well-ventilated area and wear protective clothing.
  • Not as durable as some other paints: The paint is not as durable as some other paints, so it may not be the best choice for high-traffic areas or projects that will be exposed to the elements.
  • Some colors may fade over time: Some of the colors in the Krylon COLORmaxx line may fade over time, so it’s important to choose a color that will be well-suited for your project.

Overall, Krylon COLORmaxx Spray Paint and Primer is a versatile and easy-to-use product that can be used for a variety of projects. It provides premium coverage, superior color, and adhesion and durability. However, it’s important to be aware of the potential messiness and potential fading of some colors before using this product.

Performix Plasti Dip tips and guides 2023

Check the latest price on Amazon

Here are the steps on how to use Performix Plasti Dip:

  1. Shake the can vigorously for 2 minutes. This will ensure that the plasti dip is evenly mixed.
  2. Choose a well-ventilated area to work in. Plasti dip can be harmful if inhaled, so it’s important to work in a place where there is plenty of fresh air.
  3. Cover any areas that you don’t want to get plasti dip on with newspaper or painter’s tape. This includes your floor, furniture, and any other surfaces that you don’t want to get messy.
  4. Apply the plasti dip in a thin, even coat. Do not overspray, as this can cause the plasti dip to become too thick and difficult to apply.
  5. Allow the first coat to dry completely before applying the next coat. This will usually take about 30 minutes.
  6. Apply 2-3 more coats of plasti dip, allowing each coat to dry completely before applying the next. The more coats you apply, the thicker and more durable the finish will be.
  7. Once the plasti dip is dry, you can peel off the painter’s tape and enjoy your new, customized look!

Here are some additional tips for using Performix Plasti Dip:

  • For best results, apply the plasti dip in a warm, dry environment.
  • If you are spraying the plasti dip, hold the can about 6-8 inches away from the surface and apply in a sweeping motion.
  • If you are brushing the plasti dip, use a soft-bristled brush and apply in long, even strokes.
  • If you are dipping an object in the plasti dip, make sure to coat it completely and allow it to dry upside down so that the excess plasti dip can drip off.
  • Plasti dip can be removed by peeling it off or by using a heat gun to soften it.

Plasti dip is a versatile product that can be used to protect, decorate, and customize a variety of objects. With a little practice, you can use it to create your own unique look.

There are many reasons why you might want to buy Performix Plasti Dip. Here are a few of the most common reasons:

  • To protect your belongings. Plasti dip is a durable coating that can protect your belongings from the elements, such as water, dirt, and UV rays. This makes it a great choice for protecting things like car rims, tools, and furniture.
  • To customize your belongings. Plasti dip is available in a variety of colors, so you can use it to customize the look of your belongings. This is a great way to add a personal touch to your belongings or to make them stand out from the crowd.
  • To create a temporary coating. Plasti dip is a removable coating, so you can use it to create a temporary change in the look of your belongings. This is a great way to try out a new color or design without making a permanent commitment.

Overall, Performix Plasti Dip is a versatile product that can be used for a variety of purposes. If you are looking for a way to protect, customize, or temporarily change the look of your belongings, then Plasti dip is a great option.

Here are some additional benefits of using Performix Plasti Dip:

  • Affordable. Plasti dip is a relatively inexpensive product, making it a great option for budget-minded DIYers.
  • Easy to use. Plasti dip is easy to apply and remove, making it a great choice for first-time users.
  • Versatile. Plasti dip can be used on a variety of surfaces, including metal, plastic, wood, and fabric.
  • Durable. Plasti dip is a durable coating that can withstand wear and tear.
  • Removable. Plasti dip can be removed easily, leaving no residue behind.

If you are looking for a versatile, affordable, and easy-to-use coating for your belongings, then Performix Plasti Dip is a great option.

Pros of Performix Plasti Dip:

  • Affordable: Performix Plasti Dip is a relatively inexpensive product, especially when compared to traditional paint or powder coating.
  • Easy to apply: Performix Plasti Dip can be applied with a spray gun or by brush. It is important to follow the manufacturer’s instructions carefully to ensure a good finish.
  • Removable: Performix Plasti Dip can be peeled off without damaging the underlying surface. This makes it a great option for temporary applications, such as changing the color of your car wheels for a race or event.
  • Durable: Performix Plasti Dip is a durable coating that can withstand the elements and protect your surfaces from scratches, dents, and fading.
  • Versatile: Performix Plasti Dip is available in a variety of colors, so you can customize the look of your project.

Cons of Performix Plasti Dip:

  • Not as durable as traditional paint or powder coating: Performix Plasti Dip is not as durable as traditional paint or powder coating, so it may not be the best option for long-term protection.
  • Can be difficult to remove: If you apply Performix Plasti Dip incorrectly, it can be difficult to remove. It is important to follow the manufacturer’s instructions carefully to avoid this problem.
  • Not as smooth as traditional paint or powder coating: Performix Plasti Dip has a slightly textured finish that may not be to everyone’s taste.

Overall, Performix Plasti Dip is a versatile and affordable coating that can be used to protect and change the look of a variety of surfaces. It is a good option for DIYers who are looking for a temporary or reversible solution.

VHT SP187 High Heat Wheel Paint tips and guides 2023

Check the latest price on Amazon

Here are the steps on how to use VHT SP187 High Heat Wheel Paint:

  1. Prepare the surface. Clean the wheel with a degreaser and allow it to dry completely. Sand the wheel with 320 grit sandpaper or a scuff pad. Wipe away any dust with a clean cloth.
  2. Apply the paint. Shake the can vigorously for 2 minutes. Apply the paint in a thin, even coat, about 6-12 inches from the wheel. Allow each coat to dry completely before applying the next coat. For best results, apply 2-3 coats of paint.
  3. Apply a clear coat. A clear coat will help to protect the paint and give it a glossy finish. Apply the clear coat in a thin, even coat and allow it to dry completely.
  4. Allow the paint to cure. The paint will need to cure for at least 24 hours before driving the vehicle.

Here are some additional tips for using VHT SP187 High Heat Wheel Paint:

  • Work in a well-ventilated area. The paint contains solvents that can be harmful if inhaled.
  • Wear gloves and a respirator when applying the paint. The solvents can irritate the skin and lungs.
  • Do not apply the paint in direct sunlight or in temperatures above 90 degrees Fahrenheit. The paint will not dry properly in these conditions.
  • Allow the paint to dry for at least 24 hours before driving the vehicle.

VHT SP187 High Heat Wheel Paint is a great way to protect your wheels from the elements. With proper preparation and application, the paint will last for years.

Here are some additional things to keep in mind:

  • If you are painting the wheels on your vehicle, it is a good idea to remove them first. This will make it easier to get to all sides of the wheels and will prevent overspray from getting on the rest of your car.
  • If you are not comfortable painting the wheels yourself, you can take them to a professional.
  • VHT SP187 High Heat Wheel Paint is available in a variety of colors, so you can choose the perfect color to match your car.

There are many reasons why you might want to buy VHT SP187 High Heat Wheel Paint. Here are a few of the most common reasons:

  • To protect your wheels from the elements. VHT SP187 High Heat Wheel Paint is designed to withstand high temperatures, so it can help to protect your wheels from the sun, road salt, and other harsh elements.
  • To improve the appearance of your wheels. VHT SP187 High Heat Wheel Paint is available in a variety of colors, so you can choose the perfect color to match your car.
  • To give your wheels a new lease on life. If your wheels are scratched, faded, or otherwise damaged, VHT SP187 High Heat Wheel Paint can help to restore them to their former glory.
  • To save money. Painting your own wheels can be a cost-effective way to improve the look and protect your wheels.

Here are some of the pros and cons of VHT SP187 High Heat Wheel Paint:

Pros:

  • Easy to apply
  • Dries to a durable finish
  • Available in a variety of colors
  • Can protect your wheels from the elements
  • Can improve the appearance of your wheels
  • Can save you money

Cons:

  • Can be hazardous to your health if not used properly
  • Can be difficult to remove if you don’t like the results
  • May not last as long as professional-grade paint

Overall, VHT SP187 High Heat Wheel Paint is a great option for anyone looking to protect and improve the appearance of their wheels. It is easy to apply, dries to a durable finish, and is available in a variety of colors. However, it is important to note that the paint can be hazardous to your health if not used properly, and it may not last as long as professional-grade paint.

Dupli-Color High-Performance Wheel Coating tips and guides 2023

Check the latest price on Amazon

Here are the steps on how to use Dupli-Color High-Performance Wheel Coating:

  1. Prepare the wheels. Clean the wheels thoroughly with soap and water, then degrease them with a wheel cleaner. Sand the wheels with 180-grit sandpaper, then wipe them down with a clean rag.
  2. Apply the primer. Apply the primer evenly to the wheels, using a light coat. Allow the primer to dry completely.
  3. Apply the paint. Apply the paint evenly to the wheels, using a light coat. Allow the paint to dry completely between coats. Apply 3-4 coats for best results.
  4. Clearcoat the wheels. Apply the clearcoat evenly to the wheels, using a light coat. Allow the clearcoat to dry completely.

Here are some additional tips:

  • Work in a well-ventilated area.
  • Wear gloves and safety glasses when working with the paint.
  • Do not apply the paint in direct sunlight or extreme heat.
  • Allow the paint to dry for at least 24 hours before driving the car.

Benefits of using Dupli-Color High-Performance Wheel Coating:

  • Durable finish that resists brake dust, chemicals, and the elements.
  • Restores original wheel appearance or allows for customization.
  • Resists cracking, flaking, and peeling.
  • Easy to apply.

If you are looking for a high-quality wheel coating that will protect your wheels and give them a new look, Dupli-Color High-Performance Wheel Coating is a great option.

Some additional tips for getting the best results when using Dupli-color High-Performance Wheel Coating:

  • Make sure the wheels are clean and dry before applying the coating.
  • Apply the coating in a well-ventilated area.
  • Use light coats of the coating and allow them to dry completely between coats.
  • Apply 3-4 coats of the coating for best results.
  • Allow the coating to dry completely before driving the car.

Here are some common problems that can occur when using Dupli-color High-Performance Wheel Coating and how to fix them:

  • The coating is not adhering to the wheels. This can be caused by the wheels not being clean or dry enough, or by using too much or too little coating. Make sure the wheels are clean and dry before applying the coating, and use light coats of the coating.
  • The coating is cracking or peeling. This can be caused by the coating not being applied properly, or by the wheels being exposed to harsh chemicals or elements. Make sure the coating is applied properly, and protect the wheels from harsh chemicals and elements.
  • The coating is not shiny. This can be caused by the coating not being applied evenly, or by the wheels being exposed to direct sunlight. Apply the coating evenly, and protect the wheels from direct sunlight.

Dupli-Color High-Performance Wheel Coating is a high-quality wheel coating that offers a number of benefits. It is durable, resists brake dust, chemicals, and the elements, and it can be used to restore the original wheel appearance or to customize the wheels with a new look. Dupli-Color High-Performance Wheel Coating is also easy to apply.

Here are some of the pros and cons of Dupli-Color High-Performance Wheel Coating:

Pros:

  • Durable finish that resists brake dust, chemicals, and the elements.
  • Restores original wheel appearance or allows for customization.
  • Resists cracking, flaking, and peeling.
  • Easy to apply.

Cons:

  • Can be expensive.
  • May not be available in all colors.
  • May require multiple coats for best results.
  • Can be difficult to remove if not applied properly.

Overall, Dupli-Color High-Performance Wheel Coating is a great option for anyone looking for a high-quality wheel coating that will protect their wheels and give them a new look.

I hope this helps!

Rust-Oleum High-Performance Wheel Spray Paint tips and guides 2023

Check the latest price on Amazon

Rust-Oleum High-Performance Wheel Spray Paint is a great way to give your wheels a new look and protect them from rust. Here are some tips and guides for using this product:

  1. Prepare the wheels. Before you start painting, make sure the wheels are clean and dry. You can use a degreaser or wheel cleaner to remove any dirt, grease, or brake dust.
  2. Sand the wheels. Lightly sanding the wheels will help the paint to adhere better. Use a fine-grit sandpaper (220-320 grit) and sand in a circular motion.
  3. Clean the wheels again. Once you’re done sanding, wipe the wheels down with a clean, dry cloth to remove any sanding dust.
  4. Apply the paint. Start by spraying the paint in a well-ventilated area. Apply the paint in thin, even coats, working from the center of the wheel out to the edges. Allow each coat to dry completely before applying the next.
  5. Apply a clear coat. For added protection, you can apply a clear coat to the wheels. This will help to protect the paint from fading and chipping.

Here are some additional tips for using Rust-Oleum High-Performance Wheel Spray Paint:

  • For best results, apply the paint in warm, dry weather.
  • Do not apply the paint in direct sunlight.
  • Allow the paint to dry completely before driving the car.
  • This product is flammable, so keep it away from heat and open flames.
  • Use the product in a well-ventilated area to avoid inhaling the fumes.

With a little preparation and care, you can easily use Rust-Oleum High-Performance Wheel Spray Paint to give your wheels a new look and protect them from rust.

There are many reasons why you might buy Rust-Oleum High-Performance Wheel Spray. Here are a few of the most common reasons:

  • To protect your wheels from rust. Rust-Oleum High-Performance Wheel Spray is a high-quality paint that is specifically designed to protect your wheels from rust. It is also resistant to the elements, so it can help to keep your wheels looking good for years to come.
  • To give your wheels a new look. Rust-Oleum High-Performance Wheel Spray comes in a variety of colors, so you can choose the perfect color to match your car or your personal style. It is also a very durable paint, so you can be sure that your new look will last for a long time.
  • To save money. Painting your own wheels can be a great way to save money on wheel repair or replacement. Rust-Oleum High-Performance Wheel Spray is a relatively inexpensive product, and it is very easy to use. With a little time and effort, you can easily paint your own wheels and save a lot of money.

If you are looking for a high-quality, durable wheel paint that can help to protect your wheels from rust and give them a new look, Rust-Oleum High-Performance Wheel Spray is a great option. It is easy to use and affordable, making it a great choice for DIYers and budget-minded car owners alike.

Here are some of the pros and cons of Rust-Oleum High-Performance Wheel Spray:

Pros:

  • Easy to use
  • Affordable
  • Durable
  • Resistant to rust and the elements
  • Available in a variety of colors

Cons:

  • Can be messy to apply
  • Not as durable as some other wheel paints
  • Not as resistant to fading as some other wheel paints

Overall, Rust-Oleum High-Performance Wheel Spray is a good option for DIYers who are looking for a high-quality, affordable wheel paint. It is easy to use and provides good protection from rust and the elements. However, it is not as durable or resistant to fading as some other wheel paints.

Here are some of the common mistakes to avoid when using Rust-Oleum High-Performance Wheel Spray Paint:

  • Not preparing the wheels properly. This can lead to the paint not adhering properly and peeling or chipping off.
  • Not sanding the wheels properly. This can also lead to the paint not adhering properly.
  • Not applying the paint in thin, even coats. This can lead to the paint being uneven and looking patchy.
  • Not allowing the paint to dry completely between coats. This can lead to the paint cracking or peeling.
  • Not applying a clear coat. This can leave the paint unprotected and vulnerable to fading and chipping.

By following these tips and avoiding these mistakes, you can ensure that your Rust-Oleum High-Performance Wheel Spray Paint job turns out looking great.

Shellac Spray Primer For Silicone

Are you looking for a shellac primer spray for silicone? You’re in the right place. In this article, we’ll discuss the pros and cons of using a shellac primer spray for silicone.

Primers are important for two reasons: they help the paint adhere to the surface, and they help to prevent future chipping and peeling. When you’re spraying a primer on silicone, be careful not to overdo it. Too much primer will cause the silicone to become tacky and difficult to work with.

Some of the best shellac primers for silicone include Krylon’s All-In-One primer, Zinsser Gesso Primer Spray, and Rust-Oleum’s TrueFinish Surface Primer. Let us know which primer you choose in the comments!

What Is Shellac?

Shellac is a polymerized resin that is used as a protective coating on furniture, floors, and other surfaces. It is also used as an adhesive coat to seal off cracks and chips in wood or other materials.

What Are the Benefits of Using a Shellac Primer Spray for Silicone?

A shellac primer spray can provide a durable, long-lasting coating on silicone surfaces that can help protect against dirt, dust, and other elements. It can also help to make your silicone surfaces more durable and resistant to wear and tear.

What Are the Disadvantages of Using a Shellac Primer Spray for Silicone?

Since shellac is a highly flammable substance, it can be dangerous if not used properly. It can also be difficult to remove from surfaces, so be sure to follow the instructions on the label.

How to Use Shellac Primer Spray for Silicone?

To use shellac primer spray for silicone, apply a small amount of the product to a clean surface. Then, use a clean cloth or brush to spread it evenly over the surface. Let it sit for about 15 minutes, then rinse with warm water and dry with a soft cloth.

What Are Some Other Options for Priming Silicone?

There are other types of primers available that are specifically designed to work with silicone materials. These include acrylic primers, water-based primers, and non-flammable primers.

In conclusion, there are many different options available when it comes to priming silicone surfaces. From shellac primers to water-based primers, there is something out there for everyone’s needs and preferences.

Will shellac primer stick to silicone?

Are you wondering if shellac primer will stick to silicone? You’re not alone. Many homeowners are looking for the answer to this question, and the answer is yes. Primers made with shellac will adhere to silicone surfaces, but there are a few things to keep in mind.

First, make sure that the primer is properly applied to the silicone. Too much primer can create a sticky mess, and too little primer may not have enough of an effect. Second, remember that shellac primers are designed to seal and protect the paintwork, so be careful not to excessively scrub or scratch the silicone. Finally, if you do experience problems with adhesion, try using a different type of primer or using a sealant before applying the shellac.

What Is Shellac Primer?

Shellac primer is a paint-like product that is used to protect surfaces from water and other elements. It is typically applied with a brush or roller and can be used on wood, metal, plastic, and other surfaces.

What Are the Benefits of Shellac Primer Sticking to Silicone?

When shellac primer sticks to silicone, it provides a moisture barrier and an additional layer of protection for the surface. This helps to prevent damage from water and other elements. Additionally, it helps to reduce friction between surfaces, making it easier for surfaces to slide against each other.

How Do I Know If Shellac Primer Will Stick to Silicone?

If you are looking for an answer to this question, you should be able to tell if shellac primer will stick to the silicone by using a piece of paper or a ruler. If the primer can be peeled off without leaving any residue behind, then it should be able to stick to silicone.

What Are the Best Practices for Sticking Shellac Primer to Silicone?

The best practices for sticking shellac primer to silicone include using a clean surface and a thin layer of primer. This should be followed by allowing the primer to dry completely before applying any additional coats. Additionally, it is important to use a quality primer that has been specifically designed for silicone surfaces.

What Are the Risks of Not Sticking Shellac Primer to Silicone?

If you do not follow the best practices for sticking shellac primer to silicone, then there is a risk of damage or failure of the surface due to exposure to water or other elements. Additionally, if you do not use a quality primer, then you could experience issues with adhesion and durability.

As you can see, shellac primer will stick to silicone. It is important that you follow the best practices for sticking shellac primer to silicone in order to prevent damage or failure of the surface due to exposure to water or other elements.

What primer will stick to silicone?

Do you have a silicone manicure? If so, you may be wondering what primer will stick to silicone nails. You’re not alone. Many people have questions about how to properly apply a primer to their nails.

Here are a few tips to help you choose the right primer for your silicone manicure:

-Choose a primer that is specifically designed for silicone nails. 

-Choose a primer that is lightweight and oil-free. 

-Apply a thin coat of primer to your nails and allow it to dry completely before applying your nail polish. 

-If you experience any irritation or pain while wearing your silicone manicure, stop using the product and consult with a professional.

What is a Primer?

A primer is a product used to help your nails adhere better to the nail polish or nail polish remover. It can also help extend the life of your manicure or pedicure.

What Are the Benefits of Using a Primer?

Primers can help your manicure or pedicure last longer, reduce chipping, and improve the appearance of your nails.

What Types of Primers Are Available?

There are several types of primers available, including silicon-based, oil-based, and water-based primers. Each type has its own benefits and drawbacks, so it’s important to research before making a decision.

How Do I Apply a Primer on My Nails?

Applying a primer is easy! Just apply it to your nails and massage it in until it’s evenly distributed. Once it’s dry, apply your base coat, then apply your polish or nail polish remover.

What Are the Best Practices for Applying a Primer on Silicone Nails?

It’s important to use a primer that is formulated specifically for silicone nails. Make sure to use a thin layer and allow it to dry completely before applying any other products. Also, make sure to remove any excess primer before applying your base coat or polish.

Now that you know what primer is and how to apply it, you’re ready to protect your manicure or pedicure from chipping and extending its life!

What is shellac primer best used for?

Shellac primer is a very versatile product that can be used for a variety of projects. It’s commonly used for woodworking and can help protect your project from water, waxes, and other solvents. It can also help increase the longevity of your project.

What is Shellac Primer?

Shellac primer is a thin, liquid-based coating that is used to protect wood surfaces from water, waxes, and other solvents. It is an easy way to protect your project from damage and make it look better.

What Are the Benefits of Using Shellac Primer?

There are many benefits to using shellac primer, including protection from water, waxes, and other solvents, improved adhesion to the wood surface, increased durability, and added beauty to the wood.

What Types of Projects Can Shellac Primer Be Used On?

Shellac primer can be used on almost any type of wood surface, such as wood floors, furniture, cabinets, and more. It is also great for painting projects and can be used on wood items such as signs and frames.

What Materials Should I Use With Shellac Primer?

Shellac primer can be used with many different types of materials, such as oil-based paints and stains, lacquers, enamels, epoxy resin, and even varnishes. It is important to choose the right material for the project you are working on.

How Do I Apply Shellac Primer?

Application of shellac primer is easy – simply spray it on the wood surface and let it dry. Then you can go ahead with your project and finish off with any other materials you need.

Shellac primer is a great product for protecting your projects from water, waxes, and other solvents. It’s easy to use and can be used on almost any type of wood surface. We hope this article has given you a better understanding of what shellac primer is best used for and how to apply it properly.

Will the Zinsser bin stick to silicone?

Are you looking for the answer to the question will the Zinsser bin stick to silicone? It’s a common question among homeowners and it’s important to know the answer before making a purchase.

Zinsser is a popular brand of paint and coatings, and many people use their products on silicone surfaces. However, there is a possibility that the bin could peel off the silicone over time.

Since Zinsser products are designed to be used on surfaces such as ceilings and walls, it’s important to take precautions before using them on silicone. For example, always test a small area first to make sure the product will adhere properly. If you’re not sure, err on the side of caution and don’t use it.

What is the Zinsser bin?

The Zinsser bin is a versatile storage solution for organizing your home. It’s made from durable polypropylene plastic, which is easy to clean and store. It features a wide mouth with a hinged lid for easy access and visibility.

What are the Benefits of Using a Zinsser bin?

The main benefit of using a Zinsser bin is that it’s durable, affordable, and easy to store. It also has a wide mouth for easy access and visibility, and its hinged lid makes it easy to open and close.

What Materials Can a Zinsser Bin Be Used With?

The Zinsser bin can be used with just about any type of material, including wood, paper, and plastic. It’s also versatile enough to be used in any room of your home.

What are the Drawbacks of Using a Zinsser Bin?

One disadvantage of using a Zinsser bin is that it’s not as lightweight as some other storage solutions. Additionally, it’s not as space-efficient as other storage solutions, so you may need to purchase additional storage solutions for your home.

How Do I Know if a Zinsser Bin is Suitable for My Home?

Before purchasing a Zinsser bin, it’s important to consider what kind of storage solutions you already have in your home and how much space you have available. If you have enough storage space, then the Zinsser bin may be an ideal solution for you.

What Are Some Other Storage Solutions I Can Consider?

As you can see from our answers above, there are many pros and cons associated with using a Zinsser bin in your home. However, in most cases, the benefits outweigh the disadvantages and it’s worth considering if this solution is right for you.

Does shellac seal silicone?

Are you looking for a way to seal your silicone sinks and tubs? Shellac is an excellent choice because it is a long-lasting, durable finish that is easy to clean and maintain.

Shellac is a type of varnish that is made from resin, lacquer, and shellac. It is applied to the surface of objects as a finish or protection and can be used on a variety of surfaces, including sinks and tubs.

One of the main benefits of using shellac is that it is resistant to water and soap. This means that it will stay clean and looking good for a long time. Additionally, shellac is easy to apply and requires little maintenance. All you need is a brush and some polish, and it will be ready to use again in no time.

What is Shellac?

Shellac is a finish used on furniture, cabinets, and other wood products. It is made up of natural resins that are boiled and then spun on a surface to create a hard, durable finish. It is also non-toxic and environmentally safe.

What Are the Benefits of Using Shellac on Silicone Surfaces?

The benefits of using shellac on silicone surfaces include durability, ease of maintenance, and low cost. It also offers a smooth, glossy finish that will last for years with minimal upkeep.

How Do You Apply Shellac on Silicone Surfaces?

To apply shellac, first, clean the surface with warm water and mild detergent. Make sure any dust or dirt is removed from the surface. Then, apply a thin layer of shellac using a rag or brush. Let it dry for 5-10 minutes and then wipe off any excess with a clean rag or cloth.

What Are the Steps to Remove Shellac from Silicone Surfaces?

Once the shellac has dried, it can be easily removed by using mineral spirits or acetone. Use a clean rag or cloth to gently rub off any residue from the surface, then rinse with warm water and soap. Finally, use a mild detergent to clean the surface again and allow it to air dry completely before use.

What Products Are Available for Use with Shellac?

There are several products available that are safe for use with shellac. These include waxes, polishes, cleansers, and protectants that can be used to maintain the shine and sheen of your finish.

Overall, shellac is an excellent choice for sealing your silicone surfaces because it offers long-lasting durability and easy maintenance. It can be easily applied using a variety of products available in stores and online.

What permanently sticks to silicone?

Have you ever wondered what permanently sticks to silicone? If you have, then you are not alone. Many people are curious about what can permanently stick to silicone and how to clean it off.

One possible answer is oil. If you use silicone oil on silicone, then it will permanently stick to the silicone. Another possible answer is wax. If you Wax your silicone toys, then they will also permanently stick to the silicone.

What Can Permanently Stick to Silicone?

The most common substances that can permanently stick to silicone include oil, dirt, food, waxes, skin cells, minerals, and even water.

How Do You Clean Silicone Off?

To clean silicone off, you can use mild soap and warm water or a silicone-specific cleaner. You should also use a soft cloth or sponge to help remove any stubborn residue.

What Are Some Advantages of Silicone?

Silicone is a popular material for cookware because it is durable, easy to clean, and heat resistant. It is also non-toxic and safe for use with food. Some people also like the fact that silicone is non-stick and easy to maintain.

We hope you now understand more about what can permanently stick to silicone and how to clean it off. Have any questions or comments? Feel free to leave them in the comment section below.

Should you use a primer with silicone?

Are you wondering if you should use a primer with silicone? Primers are a great way to protect your skin while priming your makeup. They help keep your makeup looking fresh and vibrant. But are primers safe to use with silicone products?

Yes, primers are safe to use with silicone products. Silicone is a type of material that is often used in beauty products. It is non-toxic and doesn’t contain harmful chemicals. This means that primers made with silicone are safe to use on your skin.

However, it is always important to read the product label before using a product. Some brands may recommend against using a primer with silicone products because of the potential for irritation. If you have any concerns about using a primer with silicone, please consult the product label or consult your doctor.

What is Primer?

Primers are skincare product that helps to prepare the skin for makeup application. They are typically applied before makeup application to help keep makeup looking fresh and vibrant.

What Is Silicone?

Silicone is a type of plastic that is used in many cosmetic products, including primers. It is often used because it can help to blend makeup more easily, as well as to help it last longer.

What Are the Benefits of Using a Primer With Silicone?

Primers with silicone can help to protect your skin from the harmful effects of the sun and other elements. They also help to keep makeup looking fresh and vibrant and can help to keep your skin looking smooth and healthy.

What Are the Downsides of Using a Primer With Silicone?

While silicone-based primers can be beneficial to your skin, they can also cause irritation if not properly used. Also, silicones can leave a residue on your skin that can be difficult to remove.

How Do I Know If I Need to Use a Primer With Silicone?

You should only use a primer with silicone if you have sensitive skin or if you have had reactions to other types of primers in the past. You should also consider whether or not your skin is oily or dry, as these may affect which primer you should use.

Conclusion

Primers are a great way to protect your skin from the harmful effects of the sun and other elements while helping to keep makeup looking fresh and vibrant. We hope this article has helped you understand the benefits and drawbacks of using primers with silicone and how to choose the right one for your needs.

How To Get Rid Of Bathtub Reglazing Smell?

Have you ever experienced the stench of reglazing? If so, you’re not alone. Many homeowners have had to deal with the unpleasant odor of reglazing, and it can be a real nuisance. Here’s how to get rid of the bathtub’s reglazing smell.

The first step is to determine the source of the smell. Is it coming from the bathtub or the drain? If it’s coming from the drain, then you’ll need to clean out the drain. If the smell is coming from the bathtub, then you’ll need to remove any fillers or caulk that may be blocking the ventilation of the tub.

Once you’ve determined where the smell is coming from, you can start to tackle it. First, try airing out the area by opening all of your windows and door as wide as possible. If that doesn’t work, try using a fan to circulate air in and out of the room. Finally, try using a deodorizer like Febreze in the vicinity of where the smell is strongest.

What Causes Bathtub Reglazing Smell?

The source of the smell is usually the chemicals used in the process of reglazing. This can include solvents, paint thinners, and other ingredients. These chemicals can sometimes seep into the surrounding area, causing a strong odor.

How Can I Get Rid of Bathtub Reglazing Smell?

The first step is to determine the source of the smell. If it’s coming from the reglazing process, you may need to make some changes to your process or equipment. If it’s coming from the surrounding area, you may need to seek professional help.

What Are Some Strategies for Getting Rid of the Bathtub Reglazing Smell?

There are several strategies that can help you get rid of the bathtub’s reglazing smell. These include air fresheners, deodorizers, and even masking agents. You can also try to use natural products such as essential oils or pH-balancing cleansers.

Getting rid of the bathtub reglazing smell is a difficult task, but not impossible. With a little research and dedication, you can find a solution that works for you and your home.

How long does bathtub reglazing smell last?

Have you ever wondered how long the bathtub’s reglazing smell last? If so, you’re not alone. Many people are curious about the length of time that a bathtub reglaze will last.

Typically, a bathtub reglaze will last for approximately one year. However, this time frame can vary depending on the specific formula and ingredients used in the reglaze. Additionally, factors such as climate and usage can also affect how long a bathtub reglaze will last. 

So if you’re wondering how long bathtub reglazes will last, it’s best to consult with a professional. They’ll be able to provide you with an accurate estimate based on your specific situation.

What Is Bathtub Reglazing?

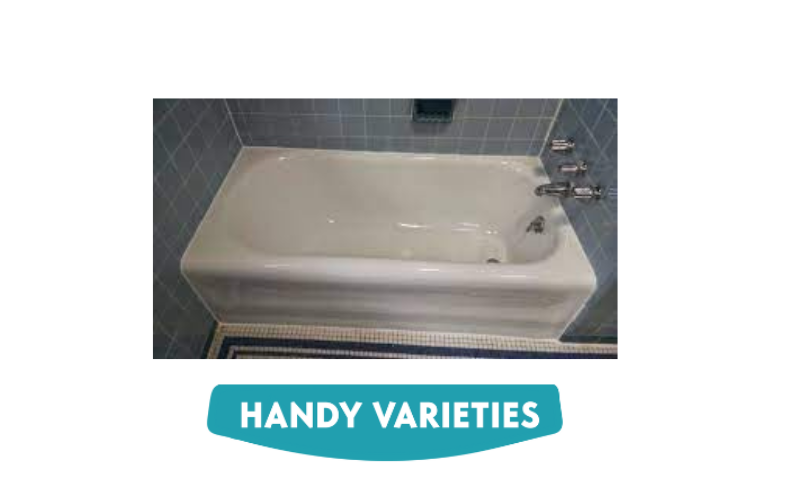
Bathtub reglazing is a process of applying a new finish to a bathtub or other tubular fixture. It is done to make the tub look newer and shinier, and to extend its life span.

How Long Does Bathtub Reglazing Smell Last?

The smell from bathtub reglazing can last for up to a few days, depending on the type of finish used and the size of the tub. It can also vary depending on what scents you have in your home.

How Long Does Bathtub Reglazing Take?

Depending on the size and complexity of the tub, the process can take from a few hours to a few days. It is usually best to leave it for several hours after it is done to allow for a good bond between the new finish and the old finish.

What Are the Benefits of Bathtub Reglazing?

Bathtub reglazing is an affordable way to make your tub look great and last longer. It also helps to protect against stains, water damage, and corrosion. Additionally, it can help to make your tub more comfortable and aesthetically pleasing.

What Are the Risks of Bathtub Reglazing?

While bathtub reglazing is a relatively safe process, there are certain risks involved. These include the potential for fire or electrical shock, as well as damage to the tub or fixtures. It is important to be aware of these risks before starting any project.

What is the smell after bathtub reglazing?

Have you ever wondered what the smell is after a bathtub reglazing? It’s not something many people think about, but it’s actually a surprisingly common occurrence. In this essay, we’ll discuss the smell after bathtub reglazing and why it happens.

The smell after bathtub reglazing is usually caused by the release of water vapor. This vapor is made up of water and other gases, and when the bathtub is refilled, these gases are released. These gases can include hydrogen sulfide, ammonia, and hydrocarbons.

These gases are all poisonous if inhaled, and they can cause a variety of health problems. The most common problem is eye irritation, but other problems can include headaches, nausea, and vomiting. In extreme cases, poisoning can even lead to death.

So why does this happen? The main reason is that the vaporized gas forms an aerosol. An aerosol is a suspension of small particles in the air or another gas. When the bathtub is filled with hot water and refilled, the vaporized gases form an aerosol that rises to the surface of the water.

The aerosol contains both water vapor and poisonous gas molecules. When people breathe in these molecules, they are exposed to them in high concentrations. This can cause health problems for both people who refill the tub and those who take a bath afterward.

What Causes the Smell After Bathtub Reglazing?

There are a few possible causes of the smell after bathtub reglazing. These include old caulk, mildew, and lingering odor from products used during the reglazing process.

What Are Some Causes of the Smell After Bathtub Reglazing?

The most common cause of the smell after bathtub reglazing is old caulk. It can become moldy if it isn’t cleaned regularly and can contribute to the overall unpleasant odor.

What Can You Do to Reduce the Smell After Bathtub Reglazing?

There are a few things you can do to reduce the smell after bathtub reglazing. These include cleaning the tub with vinegar and water solution, using a deodorizer such as Febreze, and using a neutralizing agent such as baking soda.

We hope we’ve answered your question about what the smell after bathtub reglazing is and why it happens. In addition, we hope we’ve given you some tips on how to reduce the smell and prevent it from happening in the future.

Are Reglazing fumes toxic?

Are reglazing fumes toxic? It’s a common question among homeowners who are considering reglazing their windows. In this essay, we’ll discuss the answer to this question.

First, the answer to this question depends on what type of glass reglazing fumes are. There are three common types of glass reglazing fumes: propane, butane, and natural gas. 

Propane is the most commonly used type of reglazing fume. It is a highly flammable gas that is used in many appliances such as tanks and lamps. As a result, propane fumes can be dangerous if they escape into the air. 

Butane is a less common type of reglazing fume. It is also a highly flammable gas, but it doesn’t contain propane. Butane can be used in things like torches and blowtorches. 

Natural gas is the third type of reglazing fumes. It is made up of methane and other gases, and it doesn’t contain any chemicals. Natural gas doesn’t pose as much of a danger as the other two types of fumes because it doesn’t have as much flammability. 

Based on this information, it would appear that propane is the most dangerous type of reglazing fumes when it comes to toxicity. As a result, it is important to be careful when using propane to reglaze your windows.

Butane and natural gas are not as dangerous as propane, but they still pose a risk. In fact, they can still be toxic if they escape into the air. If you are concerned about the toxicity of reglazing fumes, it is important to consult with a professional. They can help you determine the safest way to use these gases.

What Are Reglazing Fumes?

Reglazing fumes are the gases released when reglazing a window or other glass surface. These fumes contain chemicals such as sulfur dioxide, nitrogen oxide, and carbon monoxide.

What Health Risks Are Associated With Reglazing Fumes?

According to the Environmental Protection Agency (EPA), these fumes can be harmful to human health if they are inhaled or come in contact with skin or eyes. Specifically, the EPA states that inhaling these fumes can cause lung irritation, nosebleeds, and headaches.

How Do Reglazing Fumes Affect the Environment?

Reglazing fumes can be emitted into the air, which can cause problems for nearby residents and wildlife. Emissions from reglazes can also contribute to acid rain and global warming, as well as increase air pollution in the surrounding area.

What Are the Alternatives to Reglazing?

There are many alternatives to reglaze windows, including caulking, painting, and using an adhesive with less environmental impact. Additionally, homeowners can consider using alternative materials for their windows, such as acrylic or urethane.

What Should Homeowners Do If They Suspect Reglazing Fumes?

If you suspect that your windows are emitting fumes, you should take action immediately by ventilating your house and keeping windows and doors closed. Additionally, you should contact a professional to determine whether or not your windows are emitting fumes and take any necessary steps to reduce them.

Reglazing fumes can be harmful to human health if they are inhaled or come in contact with skin or eyes. However, there are many alternatives to reglaze windows, such as caulking, painting, or using an adhesive with less environmental impact. Homeowners should also be aware of potential emissions from their windows and take any necessary steps to reduce them.

Is tub resurfacing toxic?

Are you looking for a quick and easy way to get rid of those unsightly, yet common, signs of aging? You may want to consider tub resurfacing. But is tub resurfacing toxic?

While tub resurfacing is a popular method of skin care, there are some potential risks associated with it. Tub resurfacing can cause dryness and irritation, which can lead to the development of new skin conditions like eczema or psoriasis. Additionally, tub resurfacing can also lead to scarring.

Before deciding to have tub resurfacing done, be sure to discuss your options with your doctor. There are many safe and effective treatments for aging skin that don’t involve surgery or intense topical treatments. Contact a skin care specialist today to learn more about the different resurfacing options available to you.

What is Tub Surfacing?

Tub resurfacing is a procedure that uses heat and pressure to reshape your tub’s surface. It is a safe and effective way to restore the look and feel of your tub.

What Are the Benefits of Tub Surfacing?

Tub resurfacing can help improve the look and feel of your tub, as well as reduce the risk of mildew, mold, and algae growth. It also helps to reduce water spots and blemishes.

What Are the Risks of Tub Surfacing?

There are some risks associated with tub resurfacing, such as skin irritation, minor burns, and damage to the tub. It is important to use caution when undergoing this procedure.

What Are the Side Effects of Tub Surfacing?

Depending on the type of resurfacing used, there may be some side effects associated with tub resurfacing, such as skin irritation, minor burns, and damage to the tub. It is important to use caution when undergoing this procedure.

What Are the Alternatives to Tub Surfacing?

There are some alternatives to tub resurfacing, such as cleaning your tub regularly and using mineral-based cleaners to remove stains and odors from your tub.

Tub resurfacing is a safe and effective way to restore the look and feel of your tub. However, it is important to be aware of the risks associated with this procedure and make sure to follow all instructions when undergoing it.

Can you use baking soda on a Reglazed tub?

Have you ever used baking soda on a reglazed tub? You may be wondering if it’s safe to use baking soda on a reglazed tub. In this essay, we’ll discuss the pros and cons of using baking soda on a reglazed tub.

Baking soda is a common household cleaning agent. It can be used to clean surfaces, remove grease and oil, remove stains, and remove odors. Because of its versatility, baking soda is often used on dishes and dishes in the oven.

The pros of using baking soda on a reglazed tub are that it is an inexpensive cleaning agent and it has a variety of uses. The cons of using baking soda on a reglazed tub are that it can cause damage to the tub if not used correctly and it can be abrasive. When used correctly, baking soda is non-toxic but should not be ingested or breathed in.

What is Baking Soda?

Baking soda is a type of chemical compound that is used in many household products, such as cleaning products and detergents. It is also used as a deodorizer and in baking recipes.

What is Reglazing?

Reglazing is the process of sealing a previously glazed surface with another layer of clear coat or enamel. It is commonly used on kitchen tiles, bathroom vanities, shower doors, and other surfaces.

How Does Baking Soda Work?

Baking soda works by creating a thin layer of mineral deposits on the surface of the tub that can help to prevent stains and watermarks.

What Are the Benefits of Using Baking Soda on a Reglazed Tub?

The main benefit of using baking soda on a reglazed tub is that it can help to reduce the chances of stains and watermarks. It can also provide an antimicrobial effect, which can help to keep your tub cleaner for longer.

What Are the Risks of Using Baking Soda on a Reglazed Tub?

There are some risks associated with using baking soda on a reglazed tub, such as staining and cracking due to the chemical reaction between the baking soda and the enamel. Additionally, it can be difficult to remove after it has been applied, so it’s important to do the job correctly in the first place.

In conclusion, baking soda can be used on a reglazed tub if done correctly. However, there are some risks associated with it, such as staining and cracking due to the chemical reaction between the baking soda and the enamel. Always follow the manufacturer’s instructions when using baking soda on a reglazed tub.

What to do after reglazing a bathtub?

Have you ever thought about reglazing a bathtub? It can be a daunting task, but if you follow these steps, you’ll be ready to get started. Here are five tips to help you get the job done right.

1. Do your research first

Before you reglaze a bathtub, it’s important to understand the process and what needs to be done. Read up on the topic and find out what products are available. This will give you a better idea of what you need and how to go about getting it.

2. Get the right supplies

You’ll need some basic supplies to reglaze a bathtub: a tub liner, glaze, primer, paint, and sealant. Make sure you get the right type of product for your bathroom—for example, if your bathtub is porcelain, use porcelain glaze instead of latex or acrylic.

3. Prep the surface

Before beginning the job, make sure all surfaces are clean and free from any damage. Remove any old caulks or sealants, then prep the surface with a primer or sealant. This will help protect the new glaze from cracking or chipping.
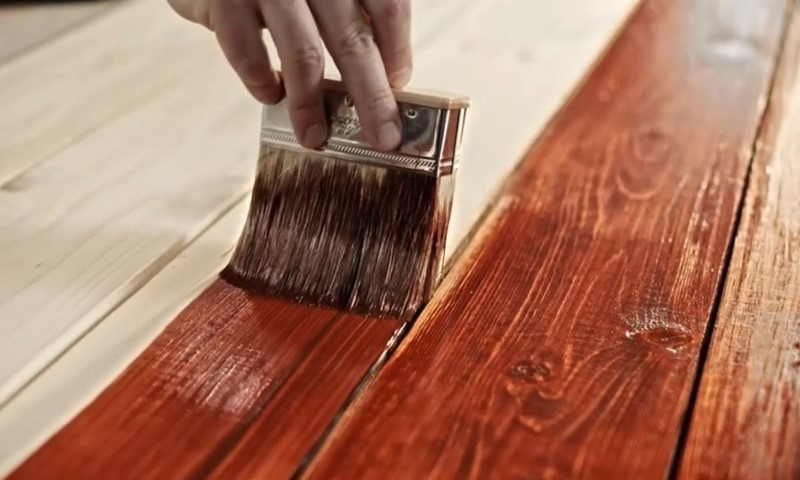
4. Apply the glaze

Once all surfaces are prepped, apply the glaze in a thick coat using a brush or sprayer. Be careful not to get too close to the edges of the tub; excess glaze can cause bubbling and peeling later on in the process. Let the glazes dry completely before finishing up with paint or sealant.

5. Finish up with paint or sealant

Once the glaze has dried, finish the job by applying a coat of paint or sealant to the tub. Be sure to use a high-quality product that will not chip or crack. Remember to take care when cleaning the bathtub after reglazing; excess glaze can cause scratches and gouges.

What is Reglazing?

Reglazing is the process of covering an old bathtub with a new coating of acrylic or epoxy. This protects the tub from corrosion and allows it to look like new.

What Are the Benefits of Reglazing a Bathtub?

The benefits of reglazing a bathtub include improved durability, longer life, and lower maintenance costs. Additionally, it helps to keep your tub looking newer for longer.

What Are the Steps to Reglaze a Bathtub?

The steps to reglaze a bathtub include measuring the tub, cleaning it, applying the coating, and waiting for it to dry. Additionally, you may need to adjust the temperature of the water for optimal results.

What Are the Considerations When Reglazing a Bathtub?

When reglazing a bathtub, you should consider factors such as the type of coating you use, the temperature of the water, and how long it will take for the coating to dry. Additionally, you should check for any leaks or cracks before applying the coating.

How Do I Care for the Reglazed Bathtub?

After reglazing a bathtub, you should clean it regularly and check for any leaks or cracks in the coating. Additionally, you should use mild detergents and hot water when cleaning it. You should also be sure to protect it from scratches and abrasions.

Conclusion

Reglazing a bathtub can be a daunting task, but with these steps in mind, you’ll be ready to get started. With proper care and maintenance, your tub will look new for years to come.

How To Store Spray Paint?

How to store spray paint: Today, we’re going to talk about how to store spray paint. This is an important topic, as it can help you save a lot of time and money.

How Do You Store Spray Paint?

There are a few different ways to store spray paint. We’ll discuss each one below.

1. In a Can

This is the most common way to store spray paint. Simply place the paint cans in a cool, dry place. Make sure the cans are tightly closed and stacked on top of each other.

2. In a Jar

Another way to store spray paint is in a jar. You can either store the paint in a single jar, or store multiple jars in a single location.

3. In a Palette

Some people prefer to store spray paint in a palette. This is helpful if you want to use multiple colors of spray paint at the same time. Simply store the paint in a palette and grab it whenever you need it.

What Are The Benefits Of storing spray paint this way?

The benefits of storing spray paint this way are threefold. First, it’s easy to access. You don’t need to go searching for the paint can or jar. Second, it’s easy to clean. All you need to do is wipe down the container with a cloth or a paper towel. Third, it’s easy to store. Just place the paint cans in a cool, dry place and you’re ready to go.

What Are Some Disadvantages Of storing spray paint this way?

There are a few disadvantages of storing spray paint this way. First, it can be expensive. Second, it can be difficult to find a specific color of spray paint when you need it. Finally, it can be dangerous if the paint cans roll around.

So there you have it – how to store spray paint. We hope this article was helpful. If you have any questions, please feel free to ask us in the comments section below. Thanks for reading!

Storing Spray Paint the Safe and Organized Way

Storing spray paint can be a challenge, but it can be done safely and organized. Follow these tips to keep your paint safe and accessible: 

First, store your spray paint in a cool, dry place. Heat or humidity can cause the paint to deteriorate faster. 

Second, make sure your spray paint is tightly sealed in its container. If the container is open, the paint could evaporate or escape and create a safety hazard. 

Finally, label your containers clearly with the name of the color along with the date and time it was used. This will help you track when your paints are getting low and need to be replaced.

Things You Shouldn’t Store In Your Garage

If you’re like many people, you probably have a garage that’s filled with things you use but never really think about. Unfortunately, some of these things can be dangerous if they’re not stored correctly. Here are five things you should never store in your garage:

1. Gasoline

Storing gasoline in your garage is a big no-no because it can easily leak and cause a fire. If you do need to store gasoline, make sure to do it in a safe container or pump station away from your other items.

2. Chemicals and Paints

Just like gasoline, storing chemicals and paints in your garage can be dangerous and lead to leaks or fires. Make sure that all of these items are properly stored in containers with tight-fitting lids so that they don’t leak or catch on fire.

3. Firearms and Explosives

While it may seem like storing firearms and explosives in your garage would be safe, this is actually not the case at all. If something goes wrong with either of these items, they could easily go off and cause serious damage or even death. Keep them locked up securely out of reach of children and pets.

4. Refrigerators and Freezers

Storing refrigerators and freezers in your garage is not a good idea because they tend to get warm and can cause damage to the walls or ceilings if they’re not properly sealed. These items should always be stored in a cool, dry location away from other objects.

5. Hazardous Chemicals

If you use hazardous chemicals like paint or varnish, make sure to store them in a safe, high-security container that is inaccessible to children and pets. This way, if something goes wrong with the container, no one will be harmed by the contents.

Is it safe to store spray paint in the house

While there are no guarantees in life, it is generally considered safe to store spray paint in a household. The chemicals used in most spray paints are not particularly dangerous, but they can be harmful if ingested or if they come into contact with skin. It is always best to use proper safety precautions when working with any type of chemicals, including spray paint. Keep the paint can and any other supplies out of reach of children and pets, and use common sense when using the product. Always wear eye protection and a dust mask when working with aerosols, and avoid breathing the fumes.

Can you store spray paint on its side?

Paint can be stored on its side if it is stored in a closed container that is at least 3/4 full. If the container is open, the paint should be stored with the nozzle pointing down.

spray paint storage temperature

When storing spray paint, keep the temperature consistent and between 50-70 degrees. This will help to prevent the paint from becoming brittle or clumping.

spray paint can holder diy

One easy and inexpensive way to store spray paint is to buy a spray can holder that you can DIY. This is a great option if you want to save money and have some control over the look of your storage area. There are many different options available, so you can find one that fits your needs.

How do you store spray paint after use?

When spraying paint, it is important to be careful not to inhale the fumes. Many people store their spray paint in an airtight container in a cool, dry place.

Do you have to store spray paint upright?

Spray paint can be stored in a variety of ways, but it is important to keep spray paint upright to avoid spilling. If you are storing spray paint in a plastic container, make sure the lid is secure and that the paint is completely covered. If you are storing spray paint in a metal can or bottle, make sure the can or bottle is tightly closed and shake it occasionally to redistribute the paint.

Should spray paint be stored indoors?

It is generally recommended that spray paint be stored in a cool, dry place. Some people choose to store their spray paint indoors, while others store theirs outdoors. There are pros and cons to both approaches. Indoor storage can be more convenient for those who have a limited amount of space. However, if the weather conditions are unfavorable (i.e., too hot or too cold), the paint may not stay fresh. Outdoor storage can be more practical in climates where temperatures fluctuate frequently. However, if there is heavy rain or snowfall, the spray paint may seep into the ground and become inaccessible.

How do you keep spray paint from drying out?

One way to keep spray paint from drying out is to keep it in a closed container. You can also store it in a cool, dark place. Another way to keep spray paint from drying out is to add a layer of oil or wax to the can or bottle. This will help to prevent the paint from sticking to the can or bottle.

How long is spray paint good for?

Spray paint is a popular choice for artists, DIY enthusiasts and homeowners because it’s easy to use and lasts a long time. The downside is that when spray paint is used improperly, it can be dangerous. Always use proper safety precautions when using spray paint, including wearing gloves and eye protection, and storing the paint in a safe place out of reach of children.

Will spray paint dry in the cold?

Spray paint is a popular medium for artists and craftsmen because of its quick drying time. However, cold temperatures can affect the speed of the paint’s dry process. In general, spray paint will dry more slowly in colder climates. If you’re concerned about how your spray paint will behave in cold weather, follow these tips: 

-Store your spray paint in a cool, dark place to slow down the drying process. 

-Allow the paint to fully dry before storing it in a cold environment.

Does spray paint dry better in hot or cold?

Spray paint is a type of paint that is made up of a mixture of solvents, pigment and other fillers. Most spray paints are designed to be used with an aerosol can, which sprays the paint out in a mist. 

One important factor to consider when storing spray paint is how it will react when it comes in contact with other materials. Spray paint does not generally dry well in hot environments, as the heat will cause the solvents to evaporate quickly. In cold environments, however, the cold can slow down or stop the evaporation process. 

It is important to keep in mind that different types of spray paints will behave differently under different conditions. For example, lacquer based paints will start to deteriorate quickly when exposed to high temperatures, while enamels may last for extended periods without issue. It is always best to test a small amount of the paint before storing any large quantities.

Does spray paint get ruined if it freezes?

Spray paint is a type of paint that is used to apply a layer of color to a surface. The paint is aerosolized and when it comes into contact with water or another liquid, it will start to degrade. The spray paint will start to form clumps and the color will start to fade. 

If spray paint freezes, the clumps will form even more and the color will fade even more. It is best to store spray paint in a cool, dry place away from sunlight or heat.

Can you use a hair dryer to dry spray paint?

There are a few ways to store spray paint. One way is to keep it in a sealed container. Another way is to place it in a plastic bag and seal the bag. You can also place it in an airtight container. You can also use a hair dryer to dry the paint. Just be sure to use a low heat and be careful not to overheat the paint.

Why is my second coat of spray paint cracking?

When you spray paint, you are putting a very thin layer of paint on top of a surface. Thin layers of paint are less likely to crack than thicker layers, because they can more easily flow into and fill any cracks that form. However, if the thickness of the layer is too great, it can cause the paint to “cavity” or “overfill” any cracks that do form. This causes the paint to start to crack, since the thin layer of paint is not strong enough to hold itself together.

Why is my spray paint still tacky after 24 hours?

Spray paint is a type of paint that is used to create a variety of colors on surfaces. The paint is typically applied using a spray can, and it can be difficult to store the paint after it has been used. Many people store the spray paint in a container that is designed for the purpose, but some people find that the spray paint still remains tacky after 24 hours. This may be because the container was not designed to store spray paint, or because the paint has been stored in an environment that is not ideal for it. It is important to keep the spray paint in an airtight container if you want to ensure that it will remain dry and free from bacteria.

What is the fastest way to dry spray paint?

Drying spray paint is important to ensure the longevity of your artwork. There are a few different methods you can use to dry spray paint: 

The quickest way to dry spray paint is using an airbrush. Airbrushing speeds up the drying process by using air currents to help the paint evaporate. You can also use an air compressor if you have one, but be careful not to over-pump the air and cause wrinkles in the painting. 

Another method of drying spray paint is using a fan. Set your painting on a sturdy surface like a table and place a fan near it so that the breeze can whip the paint around. This method can take a little longer than using an airbrush or compressor, but it’s less likely to damage your painting.

How long should I wait between coats of spray paint?

When spraying paint, it is important to wait between coats to allow the previous coat of paint to dry. Typically, it is recommended to wait two hours between coats. However, this time frame may vary depending on the type of paint and the temperature. Always follow the manufacturer’s instructions for proper drying times.

Why is my spray paint sticky?

Paint can be sticky for a variety of reasons. One common cause is that the paint has been mixed with solvents, which can cause it to be too thick or pasty to flow properly. This can make the paint difficult to spray and spread, as well as make it stick to surfaces. If the paint is too thick, you may also need to add thinner to achieve the desired consistency. Additionally, some paints are designed to be water-resistant or weatherproof, which can lead to them becoming sticky if they are not properly stored. In order for paint to become dry and shelf-stable, it needs a stable environment in whichto dry out – such as a cool, dark place where there is little humidity.

How do you make spray paint harder?

If you want to make spray paint harder, you can do a few things. You can increase the viscosity of the paint by adding polymers or thickeners, or increase the amount of pigment in the paint. Increasing the viscosity will make it harder to apply, while increasing the pigment will make it more opaque. Be careful not to increase the viscosity too much, as this can make the paint too thick and difficult to spray.

How long does it take for spray paint to fully harden?

Spray paint is a type of paint which is made up of small, pressurized droplets that are released when the can or bottle is opened. The small droplets cause the paint to be sprayed in a fine mist which means that it can be used for a variety of tasks such as painting, stenciling, and spraying artwork onto surfaces. 

When spray paint is first opened, the small droplets are still in suspension and it takes about two minutes for the paint to fully harden. This means that you can use spray paint right away but if you want to keep it for longer periods of time, you should put it in an airtight container or seal it with a plastic wrap.

How do you protect spray paint?

There are many ways to store and protect spray paint. You can keep it in a closed container, in a cabinet with other art supplies, or in a locked safe. If you are going to be using the paint frequently, it is best to buy a large can so that you don’t have to refill it as often.

Why is my spray paint soft?

Spray paint is a type of aerosol paint that is used to spray a fine mist of paint onto a surface. Aerosols are made up of tiny particles that are released into the air when the aerosol can is opened. These tiny particles contain the paint and when they enter the air they become suspended in water droplets. 

The smaller the particle size, the more likely it is to become dispersed in the air and bounce around. This means that less paint will be deposited on your surface, which will create a softer finish. Larger particles will deposit more paint onto your surface, which will create a harder finish.

How can you tell if spray paint is bad?

If you are a painter, then you know that the best way to achieve great results is to use the right paint. However, like with anything else in life, there is always a chance of getting a bad batch. What do you do if you suspect that your spray paint has gone bad? 

The first thing to do is test the paint on some scrap wood or paper before using it on your project. If the color is off or the paint is not spraying evenly, then it is probably bad and should be disposed of. Bad spray paints can also give off an odor, which means that it could potentially damage your projects if used. If you have any doubts about whether or not your spray paint is bad, then simply put it in a sealed container and take it to a local waste disposal facility for disposal.

So, how do you store your bad spray paint?

Ideally, you should store your spray paint in a sealed container to avoid the paint from going bad. If you do not have a sealed container available, then you can simply put the paint in a sealed bag. Make sure that the paint is out of reach of children and pets so that they do not accidentally get their hands on it.

Should I sand between coats of spray paint?

Many homeowners choose to sand between coats of spray paint to smooth out the finish. There are pros and cons to this decision, so it’s important to weigh both before taking any action. Sanding can remove material from the surface that will need to be replaced, which could add cost and time to your project. It can also create bumps and other imperfections that may not go away with subsequent coats of paint. Some homeowners feel that the slightly rougher texture adds character to a painted surface. Ultimately, it’s up to each individual homeowner whether or not they choose to sand between coats of spray paint.

Does Pressure Treated Wood Need To Be Sealed

Pressure treated lumber or wood is a blessing for wood-frame projects. Because of their long-lasting and sustainable nature due to chemical preservatives applied to them, pressure-treated woods have elevated their usability at an exponential rate.

However, the answer to how often you should be sealing pressure-treated wood is not clear to most of the treated wood users; especially to those who are using it for the first time. Our article is focused today on some best treatments for pressure-treated wood you can imply to have the best service from these woods.

What Is Pressure Treated Wood?

Normal woods if left untreated can last only for a few years. There are different levels of manipulation that can be done on woods to increase their long ability. Other than structural efficiency, these types of engineering done on woods make them immune to tear and wear, insects, rain, mold, or any wood rot.

Pressure-treated woods are such types of woods that have undergone special types of processes to prolong their durability and enhance their performance. Based on the type of processing used on them, different types of pressure-treated woods are available. They can last from 10 to 40 years depending on their maintenance and indoor or outdoor use.

Why Does Pressure Treated Lumber Need To Be Sealed?

Pressure-treated lumbers do surpass the regular lifespan of untreated lumbers. However, to ensure proper maintenance (such as regular heavy rainfall, moisture, or fungus), it is essential to seal them every once in a year or so.

Once pressure-treated lumbers are dry upon finishing the process of pressure treatment, a water repellent sealant is highly suggested for them. This sealer for pressure-treated wood, besides providing an outstanding look, will protect the exposed lumber from dampness and cracks.

How Long Does Pressure Treated Wood Last?

Pressure-treated wood can last up to 10-40 years or more. Factors such as the types of pressure treatment used on them, types of chemicals used in the process, nature of the wood, maintenance, sealant used, environment, and surrounding influence the legibility of pressure-treated woods as well.

Whereas it is observed that indoor usage of pressure-treated woods such as pressure-treated deck boards or flooring will last a minimum of 10 years or more upon excellent maintenance.

Treated woods used outdoors such as piles or garden homes are sure to last for 40 years or more.

Is Pressure Treated Wood Waterproof?

Pressure-treated woods are not resistant to water to any extent. Exposure to heavy water flow and harsh environments cannot save them from getting damp and rotten. They will easily lose their moisture and start to absorb water.

This is why a strong water repellent is highly suggested once the treated woods are dry. One should apply a water coating wood sealant prior to the installation.

How Long Should You Wait For Waterproof Treated Lumber?

It is quite alarming how pressure-treated woods are left vulnerable without any water repellent. For proper maintenance and for a long-term service, applying a sealant is a must.

However, you cannot instantly apply sealant on treated lumber right after they have gone through the pressure chamber. Because special preservatives are applied during the process, it is mandatory for the treated lumber to dry completely before applying any sealant.

You must wait a minimum of 1 month before using any sealant on them. Once the lumber is dry, only then it will be able to absorb the sealant. After a period of 30 days, you have to go through a process to test whether the treated lumbers are completely dry and then apply the right waterproof sealant on them.

Can You Waterproof Pressure Treated Wood?

Yes, you can definitely waterproof pressure-treated wood by applying a proper waterproof sealant or stainer. In fact, it is highly suggested to have a finish with waterproof sealants or water repellent stains following a period of time. This will make the treated woods more sustainable, durable, and a service worth a lifetime.

Based on the kind of your usage, you will need to select quality stains or sealers. Such as miracle cover marine protects pressurized boat parts made of wood.

Is It Better To Stain Or Paint Pressure Treated Wood?

Compared to paints on pressure-treated woods, it is easier to stain them. However, if you have a liking for both of them, you can without any hesitation apply both of them on the pressure-treated wood.

As pressure-treated woods are porous in nature, it is highly recommended that you don’t apply paint on them directly without using any stain first. This will make the woods soak the paint and get swollen until they finally dry out. This will gradually lead to great damage to the wood which is irreversible.

How Often Do You Stain Pressure Treated Wood?

Once you have applied stain on pressure-treated woods. You can undeniably pass 2-4 years without any maintenance problems. This is actually should be the case for most of the pressurized woods.

However, at some points, your pressure treated woods can start to show some signs like Mildews or molds; or start to soak water; or the color starts to faint away. These are the clear signs that your treated woods need another staining. When these signs start to show up, do not delay further to give proper maintenance to the treated woods.

How To Stain Pressure Treated Wood?

Staining or sealing pressure treated wood can be quite simple if you follow these steps properly:

Choose The Stain

Different types of stains are available in the market; based on where you are using pressure-treated wood. Two types of stain: Oil type stain and Latex based stains are the most common ones for household treated woods.

Where most users prefer oil-type stains because it is entirely soaked by the treated woods and easy to use, most latex-based stains give a refreshing look to the woods.

Wash The Wood

You need to thoroughly clean the wood before applying your chosen stain. The wisest way is to use a blower or pressure washer to clean the woods. However, if you feel like that is not enough due to the long exposure to dirt and other stains, you can use professional cleaners especially built to clean treated woods.

Preparing To Stain

Before beginning with stain, make sure to check the moisture of the treated woods; as they have to be completely dry. Once you are ready, shake the stain container frequently and equally on every corner.

Apply The Stain: Once you are done with the following steps, use a clean brush or pads specially made for staining to apply one layer of stain on the entire surface first. Start with the top, it will help you to follow through the end terminal.

Conclusion

It is always a fun job to stain or seal the pressure treated woods at your usage. If you feel like there is more to add to our article, feel free to leave a comment. And let your friends know who are struggling with proper maintenance of pressure-treated woods.

Related Posts:

  1. How Long To Wait For Primer To Dry Before Painting