Category Archives: Tips & Tricks

How Much Does It Cost To Paint A Bumper? DIY Estimates

There are several reasons why your bumper may need a new brush stroke. You might have brought a new bumper to fit your car or you are simply having an old rattled bumper that needs an upgrade. Whatever the reason might be, we know your main concern is how much does it cost to paint a bumper?

You can paint your bumper with the help of professionals, or you can DIY paint your bumper as well. Be it professional or DIY, we are offering you a complete breakthrough of the total cost involved in painting a bumper. In our guide, you will have all the detailed evaluations you need to know before jumping into the task.

When Would a Bumper Need to be Painted?

Does your bumper really need to be painted? Keep reading and you will know.

Your bumpers can be made of either of these materials. They are metal or thermoplastic bumpers. Modern cars are mostly built of plastic. However, if you are an antique lover, you might have metal bumpers in your garage.

Whatever the material is, you might feel the urgency to paint your bumper for any of the following reasons:

You might get into a car crash: Roads are really rusty out there. It’s not unusual to face a smash-up and end up with a dented bumper.

In this case, you need to repair your damaged bumper for scratches and cracks. After repairing, you need to repaint your entire bumper. Painting the newly repaired part only will lead to a mismatch in color with the rest of the bumper. It can also deteriorate the already existing paint of the entire bumper.

Bumper Replacement; Old Bumper

Metal bumpers get rusty with age. And thermoplastic bumper paint slowly degenerates over time. Even with proper care and maintenance, both metal and plastic bumpers will need to be renovated after a certain time.

You need to sell your car

If you ever decide to sell your car, you need to make sure that your car is in good shape. If your bumper is in poor condition, it is always wise to repair and repaint it before selling. You can always compensate for the bumper repair cost with the overall sell price of your car.

Brought a new bumper

You might know as well, new bumpers don’t come painted. You need to paint on raw bumpers to match your car’s color. If you have bought a new bumper, it is obvious that you will have to paint your bumper.

How much does it cost to paint an unpainted bumper

New bumpers are needed to be painted before installation. They come unpainted, mostly in black or raw metal color. You can do DIY or have professional help to paint your bumpers. Here is how much to paint a bumper :

DIY Costs

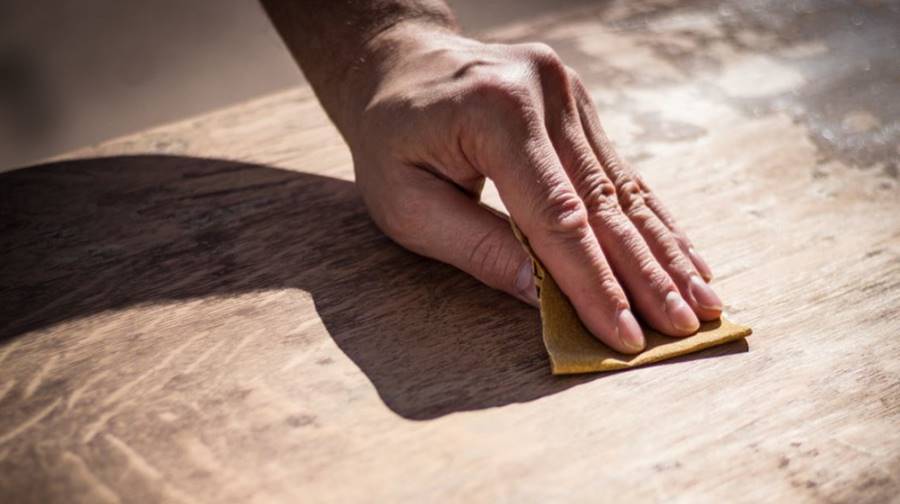
DIY is a clever move to avoid additional labor costs. While doing DIY paint on your bumpers, the only costs that will be added are: sandpaper (from 80 grits to 600 grits), a suitable paint, and a minimum of one painting of base and enamel paint each.

Sandpapers will only cost you 5-15 dollars while depending on the quality of paint including base and clear coat paint, it will cost you 25-50 dollars.

Hence, the entire DIY pricing shouldn’t be more than $70. However, don’t forget the buying price of a new bumper; which would range between $250-$1000.

In total, based on the new bumper cost, it can cost you up to $450 to $850; assuming the price of an average bumper.

Professional Cost

If you are planning to seek professional auto paint jobs, you must be well acquainted with some of their service and charge as well. Auto bumper repair shops like Maaco or Automotive Depot issue total pricing based on labor hour, materials used, the level, and the amount of job.

If you are about to paint whole new bumpers, it will exclude the removal charge of the car bumper; as a result, labor hours will be reduced.

With unpainted new bumpers, you will need to pay a minimum of $180-$450 in order to have a professional service; excluding the primary cost of buying a new bumper. If we add up the bumper price, the cost will surely rise up to $400-$900 at a minimum; including labor charge and other essentials.

What is The Cost To Paint Per Square Foot?

What should be the cost to paint depends on the type of vehicle you are using. Mini cars have a width of 6 feet while family cars like SUVs can be 6.5 feet in width. Then again, school buses will be maximum of 8.2 feet in width.

On average, whatever the vehicle you have, your bumper size should be within 6 feet.

DIY Cost Per Square Foot: You will need to buy at least one can/pint of automotive paint for your bumper. Additionally, you will also need a transparent clear coat to stabilize the base paint and enhance your car’s look.

If in total, you have to spend $60 to DIY, the cost per square foot would be no more than $8-$10 including paints and other materials.

Professional Cost Per Square Foot

Whether you are repainting on existing bumpers or painting on new ones, the average cost for professional service shouldn’t be more than $350-$750.

Even if you are using quality paints for painting both bumpers, then the regular painting cost per square foot shouldn’t be more than $70-$80.

Estimated Cost of Paint For A Bumper?

Bumpers don’t need primers on them; hence avoiding its auxiliary cost. You will need to pay for one can of base coat and one of the clear coats to apply on bumpers.

What should the amount of paint be? For a single bumper, 1 pint of each coat will be enough. You might as well save some of the paints for future use.

However, repainting both of the bumpers will need 1 quart of base coat and 1 quart of clear coat. This will allow you to cover both of the quarter panels after finishing the bumpers as well.

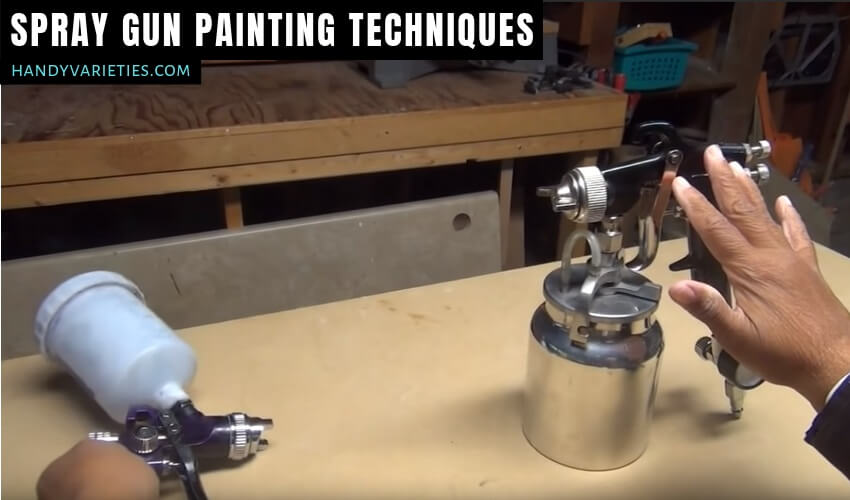
One-quarter of each base color coat and clear coat will cost you a total of $40-$45. However, if you intend to use spray paint on both bumpers, the cost will rise up a bit. For both of the bumpers, you will need to buy 2 cans of spray paint base and clearcoat.

Also, make sure you match the base color of bumpers with the color code of your car. To have an exact match, you might have to pay a few bucks more.

Estimated Cost of Labor For A Bumper?

Labor charge is issued based on hours dedicated for the task, removal, and reinstallation of bumpers, and the type of vehicles you are using.

Usually, average car models would not need more than 2-3 hours for completion. However, if it gets to Porsche or Mercedes, the hour of completion can take up to 5-6 hours.

Based on the hourly rate, the labor cost should be between $350 to $550. However, if your bumper is severely damaged, the cost may rise up to $750. Of course, you have to purchase additional parts like the rear bumper cover, hoods, fog light, etc.

Average Bumper Repaint Cost

Considering each of the factors like paint price for both base paint and clear coat, amount of preparation work, and materials, the average bumper paint job cost should be within $600-$700.

In this case, you have to take in the efforts of finding the same color shade and code for your bumpers that match your car color. This will cost you extra but however, also make sure the bumpers completely blend in with the color of your car.

Economy Paint Job

It is okay to go for moderate plans for painting bumper cover. But, with this, you also have to keep in mind that the quality offered in a low-budget painting job can often disappoint you in the long run.

Some must-do tasks like matching color codes, applying clear coats will be avoided in low-end painting projects to reduce the cost. Also, cheaper paints will be used which only results in disappointment in the long run.

In total, it won’t cost you more than $250-$300.

Premium Paint Job

A trusted and reliable body shop can offer a top-notch painting job within $600-$700.

Of course, the price is a bit higher here. However, in lieu of this price range, you will get excellent protective coverage for your bumpers; that will last longer than economical plans.

If you want another premium services-like dual-color paints or if your bumper is badly dented and you want to turn them into completely new, the prices may cross above $1000.

Can a Bumper Be Painted Without Removing It?

Yes, Bumpers can be painted without being removed from the car. You can simply mask off or cover a large portion of your car with water and paint proof cover.

Final Thoughts

Once in a few years, you will need to repaint your bumpers. It can occur due to natural catalysts like radiation or any other factors.

However, if you are involved in an accident that leads to bumper damage, a specific amount is paid under collision coverage of auto insurance. This amount can vary from $24-$30 per month. Hence, it is wise not to lag behind and have poor painting plans for your bumpers. Always try to go for the premium plans that ensure durable and almost new-like bumpers.

How to Remove Water Stain from Ceiling Without Paint

There is a poor ceiling stain in your home, and painting is not an option for you? Not a problem. Water stains in the ceiling often indicate that there is a water leakage behind those ceiling tiles. Our article can be an excellent guide for you if you want to know how to remove water stains on the ceiling without painting.

Brown spots in the ceiling are the ultimate result of a leaky rooftop. When the infected area of your ceiling becomes saturated with water, the water spots begin to show up. If left unchecked, it can seriously mess with your ceiling color, texture and eventually deteriorate the overall environment of your home.

How To Remove Water Stains On The Ceiling?

There are a few steps to be followed to remove water stains from your ceiling. Here, in our article, we will write down each step in a subsequent order. Let’s begin with identifying the source of the leak.

Identifying the Source of Leak

In order to find out where the source of the leakage is, you must have access to the attic. Grab a flashlight and try looking around with bare eyes. If you notice any soppy area or mold around, that is the possible source of water spots on your ceiling.

However, if there is a mesh of insulation network around the attic, you need to remove them from the possibly affected part. And look for any damp area around the attic.

In any case, there are pipes in the possible area of leakage, look through the pipes. Inspect them carefully and look for any corrosion, crack, or verdigris (green patina) on them. Often, a leak in the old rusty pipes above your ceiling or rooftop can cause poor yellow or brown stain on the ceiling beneath their location.

What Kind of Ceiling Do You Have?

Nowadays, many types of textured ceilings are seen around us, what’s more! These textured ceilings have gained immense popularity within a short period. They are sophisticated and smart in appearance.

While the most common ceiling types we find in our residents are seamless and flat, other textured ceilings like orange peeling, skip trowel, popcorn ceiling, and swirled ceiling are also noticeable.

Textured ceilings often require chunky nap rollers (¾ inch to 1 inch and 1 and ½ inch to 1 and ¼ inch). Their form of construction is such that only a few regular accessories for stain removal will be valid for them. You can also use quality stain-blocking primers on textured ceilings specially made for them.

Plaster Ceiling or Else

Your ceiling can be made of any of these materials: wood, plaster, concrete, drywall, or standard ceiling tiles. The appropriate process for removing water spots on the ceiling after heavy rain depends on the type of medium you have used to build the ceiling.

Wooden ceilings are delicate in nature. And they should be cleaned with a proper solution of water and hydrogen peroxide.

When it comes to the concrete ceiling or standard ceiling tiles, you can use a regular sprayer made especially for removing stains or any other methods.

However, water damage will eventually lead to scraps of plasters falling off your ceiling when it comes to plaster ceiling. In this case, after properly cleaning the area, you can use a light homemade solution of bleach to clean the infected part.

Prepare your Materials

Now that we have acquainted with different types and materials of the ceiling. It is time to move on to the next part of our article.

Hard water stain on the ceiling in an apartment can never be removed completely. However, you can conceal them using proper materials and solutions. To approach the process of concealing, you need certain accessories like a drop cloth, protective gears, and appropriate paint rollers, a putty knife, sponge, ladder, and of course, a proper solution for removing wall stains. Once you are ready, you only need to follow these steps accordingly.

Clear and Cover Your Floors and Furniture: Use a drop cloth to cover the floor and furniture in your room. Amenities that are hard to wash, like cushioned sofa or seats, must be covered thoroughly. Remove your electrical gadgets to any other room.

Take Necessary Protection: When taking necessary measures for ceiling leaks, ensure you have all the proper protective gear. Most of the stain blocking primers contain VOCs, even a small amount. It is mandatory to avoid health hazards using necessary gloves, masks, and eye goggles while working.

Even with home remedies like bleach chlorine solution or vinegar, they can be extremely toxic to human skin if kept exposed for too long.

Make the Bleach Solution: While many other chemical mixtures like chlorine or oxygen bleach can be applied to remove water stain; let’s suppose for now, we are using a bleach solution.

Water sports in the ceiling don’t require more than a mild bleach solution. And you can easily make it with three cups of warm water and one cup of bleach. This light bleach solution will easily remove the remaining mildew, dirt, or stains.

Use Ladder to Reach Ceiling: Do not use any fragile seat or table to reach the ceiling. Use step ladders to do the job and keep safety in mind always.

Sponges for Removing The Bleach Solution: When lifting the bleach solution, do not use any regular piece of soaking cloth. Always use a sponge and saturate it with bleach solution using a glove.

You can also use a magic eraser sponge to remove stains from the ceiling. Magic erasers work efficiently against wall-stains due to their special cleaning agent inside.

Bleach the Stain

We are almost final to removing stubborn stains from the damaged ceiling. Once you have reached the ceiling with a bleach-saturated sponge in hand, start rinsing the water-damaged area of your ceiling.

Bleach is an excellent solution for removing dust or grease stains. It is also easily available around you.

Rinse and Repeat

Cleaning once is not enough. Water stains are very stubborn. It would be best to wipe over the affected area back and forth. And repeat the process several times until no or very little residue of stain is left behind.

Let it Dry and Try again If necessary

Once you are done with the entire process, let your ceiling dry. Once it is completely dry, rinse over that specific part again if you notice any residue of hard stains left unchecked.

How Do I Stop the Stain from Bleeding Through?

Bleed through is a naturally occurring phenomenon in wooden furniture. It acts like a stain and mainly appears due to the presence of tannins in the wood. Tannins are water-resolvable substance that is acidic. It is present in most plant food, responsible for decreasing plant growth and net efficiency.

Bleed through can appear in any wooden furniture, even if they are painted. However, it is mostly noticed with dark-colored woods like mahogany or walnut.

It is wise to stop this wood stain from bleeding through at an early stage; before applying paint to it. Fortunately, there are many bleeds through block primers available. You can use any of them to lock this odd-looking wood stain. I suggest Zinsser Bulls Eye Shellac. It is around the corner and affordable on a budget.

How Do I Find the Cause of the Stain on My Ceilings?

While looking for the source of stain on your ceiling, you should cross-check these three parts of your home several times.

Plumbing Leaks

Plumbing leaks are the common reason for most of the leakage in households. If a plumbing network is located in your ceiling, it can be an approximate source of leaking. Although plumbing pipes are hidden below the construction, you can easily check for leaks using a water meter.

Up On the Roof Top

While looking for sources of leaks, start with your rooftop. There can be many penetration ports in your roof that can be compromised. I mean plumbing lines, ventilation systems, chimneys, and even dormers by penetration ports.

Without any passageway inward, there shouldn’t be any vulnerable point in your roof, even if it is too old.

No Leaks? More Ventilation

Even with a headstrong search, you cannot find any leak? Then check for your ventilation system. Our household ventilation network is supposed to drive away moisture, humidity, and warmth outside our house to balance inner and outer pressure.

However, skipping your knowledge, some ventilation tubes or hoses may lead to the attic inside your house. This can result in slow dampening, leading finally to ceiling stains.

Can You Paint Over Water Damage?

Yes, you can paint over water damage. Although our article is about getting rid of water stains from the ceiling without using paint, you can paint over water-spoiled areas as long as they are not drooping or bowing down.

Final Words

“How to Remove Water Stains on the Ceiling Without Painting” is a common question to many people suffering from stubborn water ceiling damage. In many cases, painting over water stains is not an effective option. Hence our article today is for those who prefer alternative solutions to water damage avoiding painting.

How To Remove Mold From Silicone Caulking: Get off Mold From Shower Caulk Naturally

The mold is an irritating substance in your house that can grow anywhere. Whether it is your bathroom or the moist corner of your kitchen, this black fungus can follow you everywhere.

Generally, they are harmless. Their contribution to deteriorating the environment of your interior is more than serious health hazards. However, mold spores can be released into the air in some cases, resulting in a human inhalation.

A damp and moist environment is the perfect habitat for mold to grow. Places where light is low to reach, such as silicone caulking of your house, are the easy targets of mold. Here, we will discuss today how to remove mold from your silicone caulking.

How to Remove Mold from Silicone Rubber Sealant (6 Methods, Solved!)

There are several ways you can remove mold without having to damage silicone sealant. Each of the processes has its own pros and cons. This is because you need chemicals to remove and kill mold. And all chemicals, at specific points, are harmful to human health.

Our article will focus on five effective solutions to remove mold from silicone rubber grout for permanent. Plus, an additional key with bleach for your information.

Natural Cleaners: When chemical components offer you a clean solution, their drawbacks can be at large too. In order to keep it entirely out of danger, natural cleaners are a relief.

Baking soda is a safe solution for removing the mold from your ground. It also eliminates moisture from specific corners of your home through absorption that causes mold to grow in the first place.

Take a quarter of a tablespoon of baking soda and mix it with water. Spray it on the affected area and scrub the area with a brush. Once you are done with removing mold, respray the solution on the same area and leave it to dry.

That’s how the mold won’t come back to the same place.

You can also use lemon or oil the same way as baking soda as natural solutions.

Apply lemon juice directly to the affected area. And leave it for five minutes before you clean the place. In the case of oil, use tea tree oil and mix it with water with a ratio of 1:3. Spray it over the place and leave it open for 1 hour before removing the mold.

Use Ammonia: Ammonia is a potential solution for removing mold. It is very effective on hard surfaces; however, not so effective on porous ones (where liquid passes from one end to another).

To use ammonia to get rid of mold, mix 50% clear ammonia with 50% water and spray on the affected area. Then leave the place open for 2-3 hours before cleaning and wiping the mold out. You need to remove the mold spores separately once you are done wiping the mold away.

Being a chemical component, ammonia can be dangerous to health if not used with caution. Ammonia is corrosive in nature. If mixed with bleach or chlorine, it can result in poisonous gas.

Hydrogen Peroxide: Chemicals are often harmful while using. But when it comes to hydrogen peroxide, it is comparatively safer than other chemical compounds like bleach. It doesn’t leave any toxic materials or harmful gas behind. Hence, it is relatively safer to use hydrogen peroxide as a quick solution.

Use 3% concentrated hydrogen peroxide. Spray it all over the surface where it is moldy. Make sure all the affected areas are covered with the solution. Let the place be for 10-15 minutes. Then scrub and wash the area properly to remove all the mold and mold spores.

Borax: Borax is a natural compound and alkaline in nature. It is a type of mineral and often deals with the pH level of the environment that mold prefers to grow within.

It is completely harmless and effortless to use. Use one cup of Borax to one gallon of hot water. Mix the solution until Borax is completely dissolved. Spray all over the affected area and wipe them hard until the mold is removed. Repeat the process, and when finished, leave the place to dry.

Caution: It is wise not to use Borax on a porous surface like wood.

Bleach Solution: Bleach is a very powerful chemical product. EPA often recommends not to use bleach except in some exceptional cases. This is because the amount of toxic residue bleach leaves behind; is very harmful to human health.

Bleach doesn’t exterminate the mold underneath the surface, and the molded membrane remains, resulting in the mold’s possibility of growing back again.

However, if you have no other options other than using bleach to remove black mold in shower caulk, here is what you should do. Use one cup of bleach to one gallon of water. Spray it all over the place. And scrub it with a brush. Once you are done, let the area dry and then wipe it with a clean piece of cloth. This will remove any left harmful residue of bleach.

How to remove mold from silicone caulk without bleach?

There are several ways to kill mold off the surface without using bleach. We definitely do not recommend using bleach as it has some hazardous drawbacks. Vinegar is an alternate option to bleach. However, you can also find plenty of other choices mentioned above.

How to remove mold from Tub, Shower, and Sinks caulking?

There are several ways to clean mold off from places where you use water most. These places are rapidly exposed to water. Please make sure to dry your tub or shower or sink’s caulking before using any chemical, or be it any natural remedy.

The best time is the morning when these areas have almost no use during the nighttime. Once these specific areas are dry, follow any of the procedures above to remove mold.

How to remove black mould from silicone sealant naturally?

Silicone sealant in your bathroom is one of the ideal spots for mold to grow. Using very powerful chemical components can wash away the silicone sealant with the mold itself. Hence, it is wise to use natural remedies to remove mold from the silicone sealant.

Using vinegar, lemon, or tea tree oil, baking soda can be an excellent solution to kill mold and also remove mold behind caulking.

Final Words

The mold is often an awful substance found in the moisture parts of your house. The more you let it grow, the more reliable it will be to mess with the beautiful environment of your home. Nobody would want a piece of rough black or green mold. However, being unnoticed, they can still grow in different parts of your house.
A quick read to our article will help you to get a potential remedy against the mold. For valuable articles like this, follow our blog and let others know as well.

Related Posts:

  1. How To Paint Over Silicone Caulking

How Often Should You Paint Your House Interior: A Complete Solution To Know Exact Time of Painting

Once in every 5 years, your home will need a change or recovery in its look. It doesn’t matter how premium paints you use on the interior of your home. After a particular time, it is bound to face deterioration.

Some parts of your home, such as the kitchen, ceilings, infrequent rainy areas, or the wall attached to your washroom, will need extra care every once in a while. This is because these parts are exposed to water/ heat frequently. Whether you want to or not, these specific parts of your home will show you signs prominently.

Today, we will discuss in detail repainting your house’s interior and how often should you paint your house.

Repainting Your House and How Often Should it be?

Interior paints in your house will last in between 5 to 8 years. And when it comes to premium quality paint, you can spend 10 years with a glimpse of your eyes. But when it comes to freshening the mood of your home, you shouldn’t wait more than 5 years.

Your interior can face different levels of wear and tear. Strong stains like spilled tea or coffee, oil, food, and others will take the need of repainting one more step ahead. Things will accelerate if you have a toddler at home. Trust me, I do.

Then again, there are other corners of your home that face extreme exposure to moisture or sun.

Hence, it is wise to get to the job before it is 5 years or more than the last time you had your walls painted.

How Often Should You Paint Interior Walls?

Different parts of your home need different levels of care. For example, your bedroom is a place where regular movement is usual. Then again, the kitchen is where you visit every day for a certain time and spend some time cooking or cleaning the place.

Hence, we will have different sections to discuss which parts of your home need repainting often or if they can wait.

Bedroom

Bedroom is the place in our house where we find ourselves in the most comfort. It is the most desirable place at the end of a hasty day. But, when it comes to grownups, once a unique color is selected and applied, their room would merely need any repainting in 5 years, unless there are any serious issues or a damped wall.

But when it comes to teenagers and children under 5, their bedroom will often need redecoration and repainting every once in 1-2 years. Children’s worlds are made of imagination. If they are given a surrounding that grows spontaneously with their mental development, the results can be astounding.

They often prefer light and sweet colors. Painting beautiful and lovely objects like flowers or rockets while repainting the wall can help boost their imagination power at an exponential rate.

Living Room And Dining Room

Living room and dining room are mainly dedicated to entertain and host the people invited to your house. Therefore, when you are deciding to repaint your home, they will be of your most minor concern.

It is more than okay to paint them every 5-7 years and so.

Kitchen

Kitchen is the third most used place in your home. And most of the time, your kitchen is open to heat/ oil/ grease and others. Cooking delicious food is not enough if you are not doing it in a cleanly painted walled kitchen.

Within 2 years of painting your kitchen first, the walls are bound to face tear and wear. Hence, it is wise to repaint your kitchen within 2 years of their first painting.

Bathroom

The second most used place in your house? Yes, it is your washroom we are talking about. A warm relaxing shower after a tiring day is what we crave for. But if the walls in your bathroom are damped and start to tear off, it will almost feel like a public toilet only.

However, bathrooms and washrooms are mostly exposed to water. Moisture and humidity are two friendly companions of your bathroom. Hence, they need a frequent retouch every once in a while. Two years is the best time limit for repainting your bathroom. However, three is the max.

Hallways

Hallways are the most traffic concentrated place in your house. While taking something out or in, your hallways are most likely to face extreme tear or hard-to-remove stains. You can often clean them off with your bare hands or clothes. But to give the best impression of your home to others, you should frequently paint your hallways to provide your entire house a shining look.

Every once in 1-2 years, you should definitely paint your hallways, depending on usage level.

How Often Should You Paint Your Ceilings?

Your ceilings are okay for a certain time if you are living in a tropical zone. If it rains at a balanced rate in your place, you shouldn’t take less than 5 years to repaint your ceiling.

However, if there are other issues such as an open water drainage system or indoor plant house on your roof, you should repaint the ceiling within every 3 years.

How Often Should You Paint Your Trim & Baseboards?

Baseboards in your house are the most frequent parts in your home to tolerate moisture. While cleaning or when any liquid gets spilled out of the cup, baseboards are the parts that tolerate the most.

It is quite the opposite for trim. And trims are exposed to pressure and other external forces. Hence it is wise to repaint your baseboard every 2 years, and when it comes to trim, a 4 year gap is ideal.

How Long Does Interior Paint Last On The Wall?

Interior paint will last depending on the quality of paint you are using. And a touch of professionalism is also a prerequisite for having durable and long-lasting wall paint.

Premium paints will last on your at most 10 years. However, it is wise to retouch your walls within 5-7 years and not completely wait for 10 years.

How Many Coats Of Paint On Your Interior?

It is ideal to have two coats of paint for your interior. It is tough and challenging to clean one coat of paint if you plan to do so. Another coat will offer a proper barrier to the first one. And help the first coat to adhere to the surface.

However, when using deep-colored paints, you may need another coat of paint as well.

Final Words

Think of your room where you need to change the bedsheet or the curtains every once in a while to give your room a refreshing look. The same goes for your home as well.

It is essential to repaint the interior of your home after a certain time. Whether you are going to apply the same color or anything new, to elevate the environment of your house and every time feel like a new one, you must definitely repaint your interior. So, now you know exactly how often should you paint your house.

If you like our article, feel free to share it with others.

Related Posts:

  1. Best paint sprayer for interior walls and ceilings

Can You Use Exterior Paint on Kitchen Cabinets? Learn The Answers!

Your kitchen is a place at home where you prefer a delightful environment. After all, tons of your favorite snacks are placed here. You don’t want to take it out from a dull cabinet and miss enjoying the food.

There are several ways you can add value to your kitchen. But what matters most to the eye are the cabinets. Beautifully painted kitchen cabinets can be your source of good action.

Many people rush to interior paints for kitchen cabinets, which often leads to very poor results. Can you use exterior paint on kitchen cabinets? Is it possible? You should go for exterior paints for painting interior kitchen cabinets. Aside from offering colorful kitchen cabinets, exterior paints protect them from dust or moisture. You will get protective shields for long lasting cabinets and eye smooth colors as well. That’s two in one!

Benefits of an Exterior Kitchen Cabinets Paints

Kitchen cabinets are often subjected to rough usage. Whether you are slamming the doors or sliding bottles, these types of regular use will genuinely lead to cabinet decay. Again, we cannot simply avoid the fact of exterior kitchen cabinets being exposed to water/ oil/ heat or moisture.

Whether you are using a wood cabinet or mdf made exterior cabinets, you need to take good care of them for a durable and long lasting service.

Exterior paints are made in such ways that they can withstand these harsh uses. Exterior cabinet paint adheres to the cabinet surface and offers a strong hold to the related elements of your cabinet. Hence, resulting in a durable, prune to exposure and long life of the kitchen cabinets.

And yes, you can definitely use exterior paints for painting interior kitchen cabinets.

Risk when Using Exterior Paints

Exterior paints are made of chemicals. Chemicals that can easily blend with the nature of your cabinet surface for longer sustainability. Earlier exterior paints were oil based. But following the recent law for launching environment safe products, exterior paints are now made of acrylic.

These acrylic based exterior paints are way safer than the oil based ones. However, the volatile organic compounds (VOCs) used in these paints are a serious health concern for the human body. Being exposed to these compounds directly for a long time can cause hazardous health issues like cancer or any other dangerous nervous failure.

It is highly suggested not to use these paints in a close environment or using a sprayer to apply these exterior paints.

Preparation & Pre-Work Before Start Painting

If you have finally decided to paint your kitchen cabinetry, some pre-work has to be done for the better and easier implementation of the exterior paints. Here is a list of to-do things you must do before finally putting the paints on.

Remove Doors and Hardwares: Anything that is placed inside the cabinets, you need to remove them to a safer place first. If the cabinet doors are flexible, you need to take them out and place them in an open place where proper airflow is available. And if the doors or other units are fixed in your cabinet, think of using a blower or any mini air fans.

Clean the Surface: This is very important as a clean surface will make it easier for the paint to blend in. Use a clean and soft cloth piece to remove the dust. Do not use any oil or any other chemicals as it will have a complex reaction with the elements of the paint and may mess up with the entire procedure of painting. If cleaned with water, let the units dry fully first

Sanding & Apply Primer: Using a primer on any surface, requires proper sanding. The goal of sanding is to smoothen the upper surface that has primer on it. Sanding helps to balance the adhesion offered by the primer.

Start Painting Your Cabinets: Once you are all done with the above three steps, start painting your kitchen cabinets to your heart’s content. But make sure to wear gloves and use a mask to avoid the particles getting into your system.

Using Exterior Paints Inside Kitchen Cabinets

Can you use exterior paints inside your kitchen cabinets? This has been the curious question of many who are painting their cabinets for the first time. Yes, you can definitely use exterior paints for painting interior kitchen cabinets.

However, exterior paints are delicate and soft in nature. Kitchen cabinets that have exterior paints applied on require a regular amount of airflow. If you paint inside kitchen cabinets, it will become hard and messy to maintain the dryness of the exterior paint. And gradually, you will lose the structure of the exterior paints.

Hence, although you can apply exterior paint on interior kitchen cabinets, it is wise not to use them for proper hygiene and maintenance.

What Happens If I Use Exterior Paint On Interior Cabinets

Using exterior paint on interior cabinets should result in no visible concern. You can hardly tell the difference in your interior cabinets. However, the level of acrylic and VOCs used in exterior paint, if exposed for too long can cause serious health issues.

It is not so uncommon if you face strong odor or mild breathing problems once you have applied exterior paint on the interior. And a long exposure can cause respiratory problems or any other damages. Afterall, exterior and interior are two different parts of your home that need different treatments.

Best Paint to Use on Your Kitchen Cabinets

Durability and sustainability are two important factors when it comes to exterior paints. Kitchen cabinets are often exposed to rough uses. Premium quality paints like Valspar Pro Contractor Coat or Emerald are best fit to maintain long and regular use.

Then again, when it comes to color, your kitchen needs a delightful decoration. Color you choose plays a vital role on how you want to present your kitchen theme.

Subtle colors can lift up your kitchen environment more than the dark and heavy ones. But because the kitchen is such a place where a bright visual presentation can refresh your mind to a great extent, it is better to go for the soft ones like lime or sky blue.

You can find a handful of suggestions online on what types of paint for kitchen cabinets you should use. Check them out here.

Final Words

Using paint on kitchen cabinets has always been an exciting and fun job. If proper precautions like mentioned in our article above are taken, you can present yourself with a beautiful and shiny kitchen that will elevate your mental health.

When it comes to choosing paint, go for the ones that offer durable and quality service. A few more bucks is really worth of long year service. Hence, the decision is yours to take. We hope you already get the point about, can you use exterior paint on kitchen cabinets or not?

If you like our article and it is helpful to you, please share it with your friends and family and let others know as well.

How To Remove Carpet Glue From Hardwood Floor Technically (Solved!)

Are you wondering how to remove carpet glue from hardwood floor? 

You might want to make your hardwood floor more beautiful. But removing old carpet glue isn’t a simple process. When you start to remove previously installed carpet, you will notice the carpet glue left behind on the hardwood floor. If you want to bring back beautiful and shiny hardwood floors, you need to take several steps. Make sure you take care of the whole process without damaging the surface of the hardwood floor.

So, how to remove glue from hardwood floors naturally? When homeowners install their carpet on wooden floors, they use glue or adhesive in liquid form. It’s better to remove them to go back to their natural stage. Keep your eye to know the best way to remove underlay glue from the wooden floor. 

What Tools will You Need To Finish This Job?

  1. Best Adhesive or Glue Remover
  2. A wider Plastic Putty Knife
  3. A Pair of Rubber Gloves
  4. Sponge and Old Towels/Rags
  5. A good Respirator

How to Deal With the Carpet Glue

Carpet glue is a very strong adhesive and tough to remove. But you can’t leave it on your wood floor. If you leave it on the floor, it starts to collect dirt and grime, which will look horrible. 

You want to remove the glue as well as expect your hardwood floor will remain undamaged. This is the reason you need to remove the carpet first. 

You can easily remove the glue using a scraper or elbow grease. But there is a high chance you damage the hardwood floor. If you think to use soap and water, it will not give you a satisfactory result rather than shining the glue. 

That’s why you have to take back the glue in its initial stage, and solvents work well for the purpose. Solvents are mainly a chemical-based substance that helps you to get back the glue in the liquid stage. Once it is done, you can easily remove all glue without damaging the floor. 

How to Remove Glue Using Elbow Grease

Removing your carpet glue manually is very effective and time-consuming. It has several advantages and disadvantages, but you will pay the price if you carefully do that. First, put a pair of rubber gloves on your hands. It protects your hands from getting dirty. 

Now, use elbow grease over the glue and start removing the glue using a plastic putty knife. Make sure you only attack the glue. But there is a high chance of damaging the floor surface. So you have to deal with the plastic putty knife carefully. 

Once you detached all the glue, clean them using a vacuum. Afterward, you can sand the whole surface to make it more staining. 

5 Steps to Remove Carpet Glue from a Wood Floor Using Solvent

The solvent is a very effective way to remove carpet glue from the hardwood floor. It has some shortcomings that you should be aware of. You have to follow a few steps to avoid those. Let’s go through them. 

1. Prepare Yourself Before Start

Before starting, you have to deal with the right tools. And it starts with the right solvent or adhesive. 

Don’t forget to get a plastic putty knife or any scraper and make sure it’s wider enough to scrape glue. You will also need an old towel and rubber gloves. If you want to keep anything as a backup, get a heat gun or blow dryer, sandpaper, and water. 

Now, you have to prepare the room to start the work. Open the window and turn on the fan. That little participation will help the strong chemical work nicely. 

2. Apply The Chemicals and Solvents

If the glue is too thick and firmly attached to the floor, you can chip them with the putty knife. But chipping all the way has a chance to damage the wooden floor badly. In this case, you can weaken the glue by applying chemical solvent. 

First, you need to identify the type of glue used on your floor. If the glue is tar-based, you have to apply tar remover with mineral spirits. You can use orange oil solvent for any other carpet glue. 

Don’t apply the solvent in all areas. Test a small corner in the first stage. If you see the area is cleaned well without damage, continue with the rest of the areas. Once you have applied the solvent to the whole area, give the glue time to loosen. 

3. Scrape Away the Old Glue

After the solvent has finished its work, put gloves on your hand and find the loosest area to start removing. Use a putty knife to remove the carpet glue, gently scrape the glue. Make sure you don’t damage the wooden surface. 

If any glue doesn’t come out easily, be aware of forcing it. When you are finished, apply more chemicals or solvents and rub them with an old towel. Soon, you will see the glue is starting to lose. 

If the glue still remains, repeat those steps again until it’s gone. 

4. Clean The Surface

Once you successfully remove all the carpet glue, you have to clean the area. Rinse the surface with water and let it dry for 24 hours. 

If you want to smooth the imperfection area, sanding will be a great idea. And to do that, a light sander will be your main tool. Why light sander?

It slowly sands the wood grain without any damage to your hardwood floor. You will need this only when you see the area isn’t properly clean. 

5. Be Alert Using Rough Chemicals and Physical Pressure

If you are in a hurry or the previous methods didn’t work for you, don’t go for harsher chemicals or extreme pressure to speed up the work. You have to think about this twice. In the end, you may successfully remove the glue, but the wooden floor can be damaged badly, which may cost double or triple to repair. 

If you don’t have confidence, hiring a professional is a smart decision. Those flooring professionals remove all carpet glue without damaging the floor surface (Wood, Concrete, or Tile). You can save your floor and time by spending a few dollars. 

How Long Does It Take Time to Remove Carpet Glue from Hardwood Floors?

The actual time depends on how much work you have to do and how well you are prepared. Sometimes it depends on the types of glue you have to deal with. On average, the whole work can be done within 24 hours or sometimes more than that. 

If you work alone, this is an ideal time. But, more people can make the job easier to do in a short time. You must prepare fully with proper tools and knowledge. Otherwise, you can badly hit your hardwood floor. If you don’t feel much confidence to do it yourself, better to hire a professional. 

Final Words

So those are the details about how to remove carpet glue from hardwood floors. If you love to decorate your own home by yourself, these detailed guides definitely help you give your floor a good shape. Every step is very crucial to finish the job perfectly. But not too much like installing the whole floor. All you need to find the right solvent or chemical to remove the right type of glue. And also, you have to confirm the other tools. 

Now you know all that you have to do to remove those carpet glue. Please take the right steps and attack it in the right way to get your nice and smooth hardwood floor. Don’t think too much, just get what you want to achieve. We wish you to give your family a nice hardwood floor.

Pressure Washer Shuts Off When Trigger Is Pulled? (We Explains & Fix)

Are you wondering if the pressure washer shuts off when trigger is pulled? 

A pressure washer is effective to achieve a high level of cleanliness. Power washing is very convenient to accomplish your cleaning. This tool is essential to use for both home and professional tasks. 

However, using this powerful tool correctly gives you excellent results. It can easily pull down old paints, stains, debris and specks of dirt. And you can use it for different purposes depending on your requirements. But what happens when the pressure washer shuts off after a few seconds. This is very annoying, isn’t it? 

If this happens from time to time, the only reason is the unloader valve needs to be fixed or replaced. Here, we explain how you identify and fix the problems, So, keep digging! 

What is a Pressure Compressor Unloader Valve?

The unloader valve is used to divert the water flow inside of the pressure washer. It is designed to control the water pressure level. When you release the trigger, water starts to flow from the pump. The pressure can also be controlled even if you release water through the nozzle. 

The unloader valve’s main job is to control the water pressure constantly. So the problem with this machine means the whole process will stop immediately. 

The Unloader Valve Makes Things Easier

There are different types of pressure cleaning machines that can be found in the market. Among them, a pump motor pressure washer is easy to operate, just like doing on and off. 

But the problem occurs when you are staying a few feet away from the hose. That means you have to walk back to the machine to turn it off. At this point, a handle is essential to control the pressure. Using the trigger or unloader, you can easily regulate the flow of water. 

Pressure Washer Bogs Down When Trigger Is Pulled

Before finding and fixing the problem, you need to figure out which types of pressure washer you are using. You will find four different pressure washers on your requirements. 

  1. Hot water pressure washers provide excellent results for cleaning oil and grease. 
  2. If you are a homeowner, a cold pressure washer is a good option for you. 
  3. For cleaning outdoor surfaces, a gas power cold pressure washer works perfectly. 
  4. Sometimes you’ve to deal with low or damaged surfaces and an electric power pressure washer will be a good choice.

Which types of pressure washer you are using is crucial before you find the fault and fix it. 

What you Need to Fix A Pressure Washer

Sudden pressure washer engine shutdown is a common problem for any homeowner. This can occur for the fault of a few parts of the pressure washer. That means you need to inspect those issues for replacement or fixing immediately. 

You will need different tools for identifying and solving those problems. We have listed them below for you.

  1. Wrench
  2. Screwdrivers
  3. Grease
  4. Kerosene or alcohol
  5. Dry cloth
  6. Alcohol
  7. Pliers

You can also buy a tool kit box, where you can get all of them at a time. Let’s talk about the problems and fixing them. 

Inspect the Carburetor

The carburetor in the pressure washer helps to balance engine air and fuel combination. Problems in the carburetor are very common, either it is loose or clogged. A loosen carburetor needs to tighten while you have to clean the gas tank for a clogged carburetor. 

How to Fix a Faulty Unloader Valve

Unplug the Unloader Valve

First, you have to unplug the unloader valve from where it is located. Use a screwdriver and wrench to unplug the retaining pin of your valve. This isn’t even tough for the most powerful pressure washer because the manufacturers place the valve in a visual area for quickly changing. 

The pin looks like a shape of U that is general for every pressure washer. You need to use a screwdriver to take out the retaining pin.

Remove the Unloader Valve

If you successfully pry out the pin, it will be easy to remove the valve from the inside. Make sure the piston is there to stay without any harm. 

A piston is an integral part of an unloader valve, and it helps to control the retention of a pressure washer. When you are running, your pressure washer piston helps to move it backwards and forward.  

If you notice that the piston does not move freely, the pressure washer will stop working immediately. And you can be sure that it is the main culprit. 

Check and Replace the Piston

If you see the piston works fine, skip this section. If it’s not, then you have to solve the issue quickly. Using a wrench loose the piston nuts and take it out from the valve. Make sure you unplug both piston and spring. 

Now, use kerosene or alcohol to clean them thoroughly and wait a few minutes to let them dry. After that, you need to add grease to both of them. This will make the piston and spring smooth to work. And put them back where they belong. 

Inspect the Valve Setting

The pressure washer has an adjustable setting for creating the amount of pressure needed to finish a job. Before turning it on make sure the setting is perfect. 

If you see the setting is too high, don’t turn it on. Otherwise, the engine will stack and the pressure washer will stop working. 

Open the unloader valve so that the water cycle can flow properly into the inlet side. If you can’t make it open, an unusual high pressure will create and stop the engine. So check the setting properly and make sure there is no unusual pressure. 

Adjusting the O-Ring

It’s located with the unloader valve, also called a seal or washer. Issues with the O-ring is one of the primary reasons that the pressure washer keeps shutting off. 

It stops sealing the pump because of getting worn down or torn out. If you identify this is the reason, take out the o-ring and get the same size to avoid further issues. When you replace it correctly, the pump will be seated and work as new. 

Adjusting the Pressure Gun

If you find that everything is fine and the pressure washer still turns off when water is turned on, the culprit may be the pressure gun. Without any delay, inspect your gun to make sure it is at an optimal level. 

If there is a problem with the valve, you can adjust it on the requirement, but issues with the pressure gun won’t matter. So, inspect the pressure gun as well, sometimes you may need to replace the entire gun.  

What Happens If Everything Fails

If you take all the possible steps that we are talking about and still face the problem, you have to try a few other alternatives. 

  1. Clean the air filter if it seems dirty.
  2. Check the spark plug – if it looks dirty, clean it using alcohol.
  3. Check the water inlet or the wand screens to make sure it’s in good condition.

If everything is in good condition, it’s necessary to buy a new unloader valve and replace it with the older one. 

Final Words

The pressure washer is a sturdy and highly effective tool for homeowners and professionals. Sometimes you can face pressure washer cuts off when spraying. But if you ensure the proper maintenance, you can avoid the pressure washer shuts off when trigger is pulled. 

By providing routine maintenance and ensuring not to get dirty, you can keep your pressure washer safe. If you fail, you have to buy a brand new machine.

Related Posts:

  1. How Long To Wait For Primer To Dry Before Painting

How Long To Wait For Primer To Dry Before Painting (Complete Guide)

Whatever, this is the easiest way to bring your painting expertise into your home. What else will be well more than beautify your house. Painting your home involves many steps, and adding primer is one of them. 

Now, are you worried about how long to wait for the primer to dry before painting? Most primers take 30 minutes to 1 hour to dry. But experts suggest waiting around 3 hours to achieve a great finish on painting. If you work under high humidity or cool temperatures, the drying time will change accordingly. 

So, before buying any primer, take a look at our guide. You will find every ins and outs of how long you should let your primer sit before painting. 

How Long Can Primer Sit Before Painting

Well, it depends on the types and quality of the primer. So, the time between primer and paint wouldn’t be going too long. 

  1. It takes almost 30 days for latex paint to sit properly before painting. Oil-based primers don’t last longer than 14 days. If you cross the time, you have to re-apply the primer again. 
  2. There may be a few extended primers in the market. Look at the primer can or manual you will find the maximum time period. 
  3. Heat and humidity prolong the drying time.
  4. If the area is full of dust and debris, they interrupt the primer to sit properly. So clean the surface before applying primer.
  5. Thick coats can affect drying time. If you accidentally put too much primer on some areas, sanding those areas with sandpaper or sand block. 

What Type of Primer Are You Using?

There are two different types of primers. So, how long it will take your primer to dry depends on which one you choose. 

Water-based primers are much easier to apply and dry within 3 hours. Besides, oil-based primers take 24 hours to completely dry and are tougher to work than water-based. 

If you don’t want much hassle, then use latex primer and latex paint. 

What Are The Environmental Conditions?

Temperature and humidity in your home affect the overall drying time of the primer. 

DIY experts recommended keeping the room temperature and humidity in balance (around 70 degrees F and 50% humidity) for primer application. If you go over it, the drying time for primer and paint will be changed accordingly. 

Don’t apply primer when there is more atmospheric humidity because it increases the water molecules in the air and extends the drying time. Here, humidity is more crucial than temperature. 

Cold environments are more convenient for drying primer and paint color fast. 

What Happens If You Wait Too Long To Paint Over Primer?

Waiting too long means you will need to re-prime the surface again. 

Why do you need to do that?

If you wait longer to adhere primer, the surface will be textured with dust and grime in the meantime. Sometimes you can experience primer decay in some parts of the surface. This is a huge disadvantage during painting.  

Along with those problems, you can also face paint slippage issues. Does it sound horrible to you? If you want to avoid slippage issues, don’t wait too long to dry the primer. 

How Long Should Primer Dry Before Sanding?

Sanding would be necessary if you apply thick primer coats on the wall. But primer needs to dry fully before sanding, or the whole process will ruin. 

Wait at least 24 hours to dry and start sanding from a small area to know primer dry completely or not.

How To Know When The Primer Is Dry

The best way to know if the primer is 100% dry or not is to check by hand. So lightly touch the priming area with your finger, and if you feel it isn’t sticky or doesn’t come off on your finger, you can be sure the area is ready to paint. But we suggest waiting another 30 minutes for full confirmation. 

When you are completely sure the primer is dried, sand the surface and add another layer. Though it’s not compulsory, it helps to perfect the paint job. 

Many surfaces don’t need an extra layer of primer coats. If you saw the first coat is dried, start applying the paint over it. 

Do All Projects Require Painting Primer?

Using primers on the surface is a good idea to adhere paint colors perfectly. This is because many surfaces don’t hold the paint properly without a primer. Again a few of them don’t need to apply primer. So, where you need to apply primer and where you don’t, keep reading-

  1. A high gloss surface can’t hold the paint well. It’s necessary to apply primer on glossy surfaces before painting. 
  2. Go with the same color as a primer. If you apply dark color over light color won’t be good. 
  3. If the wall surface isn’t in good condition (scratch, debris, dust, or old stain), apply one or two coats of primer for getting a good result. 
  4. Painting on an old surface needs a lot of attention. You have to clean the area first and then priming it. 

What About Self-Priming Paint?

If you don’t want to apply the primer and paint separately, there is an option of self-priming. This paint is normally thicker than others. 

However, you can apply it to all different surfaces. But the result isn’t as satisfactory as you want. That’s why professionals stick with primers and regular paints. 

You still have the option to use self-priming under a quick fix. Of course, you have to clean the surface properly. Though it is a hit or miss deal. 

How Can You Make Primer Dry Faster?

There a few options you can apply to make your primer dry faster – 

  1. A dehumidifier is a great choice, and It will lower the room temperature for faster drying. 
  2. You can run a table fan and also keep open the window and door for proper ventilation. 
  3. Apply a thin coat, and you can use a paint sprayer for better application. 

Final Words

If you are already in here, that means you now have a better understanding of how long to wait for primer to dry before painting. 

Once you figure out the time between primer and paint, you can easily plan what to do. So we can recap the thing again, you have to wait 3 hours for your primer to sit properly. But you can’t wait more than 30 days, or you have to re-primer again. The best way is to follow the manual instruction. 

Moreover, painting your walls is very easy if you follow the process we told you to do. Make sure the surface is well prepared before you apply primer and paint.

Related Posts:

  1. Pressure Washer Shuts Off When Trigger Is Pulled?
  2. Does Pressure Treated Wood Need To Be Sealed

How To Paint Over Silicone Caulking: 10 Paintable Solution

Silicone caulking is a useful product to use by homeowners and carpenters to repair small and big holes in objects. Caulk is an excellent product to seal gaps, but painting over the silicone caulk ensues a lot of trouble. So, getting the best result on how to paint over silicone caulking needs the best action. 

Paint doesn’t stick with the caulking surface after doing a well covering. We don’t say you can’t do it, we want to say simply paint can’t overcome the situation. There are a few secrets and different ways you need to apply when you paint over silicone caulk. So, you can’t finish the job by doing a simple paint. 

Moreover, carefully priming the caulk gives you a quick and easy solution to paint over after an hour. But, the more better option is using a paintable caulk over it for fast adhesion. 

Let’s see what you need to do to paint over silicone caulking. 

True Method For Painting Over Silicone Caulk 

Use of Shellac Spray Primer

Shellac is a very affordable primer for any surface. This can stick with any surface for better painting. So, this will be a niche short out before painting over silicone caulk. There are many reputed brands out there for you to get one to use. 

For best priming over silicone caulk, Rust-Oleum Zinsser is a good choice. 

Shake and Mix Well

If you want the primer stick over the caulk, shake it 10-12 times for mixing well. Take the lid off, hold it top with one finger and rest of the fingers in the body, then use it to shake thoroughly up and down. 

Start Spraying Over Caulk

Hold the spray primer 2-3 inches from the silicone caulk. Open the nozzle cap, point it to the caulk and start shooting primer over it. Work until you completely cover the caulk. 

If you don’t want to spread the primer around, wrap them using painter’s tape. Also, use hand gloves to save your hand from primer and paint. 

Time to Dry 

Don’t be so hurry, let the primer dry for a couple of minutes (around 40-45 min). Meanwhile, ready your paint so well for applying the first coat. 

Always double-check the primer instruction manual, there will be noted the drying time. Sometimes, it will take less or more than 45 minutes depending on the brands. You can use your hairdryer for faster drying, but we don’t recommend this to try. 

Painting Your Favoured Color

When you notice the primer dry completely, apply the first coat of paint color you want to paint. You can use latex paint or oil-based paint over shellac primer. 

However, one coat is enough to paint. If you see the primer is showing up, apply the second coat of paint after drying the first coat. Cover around with painter’s tape so that you can stop painting other areas.

Use of Paintable Silicone Caulk  

Now we will talk about the second method, which will be easier to paint over silicone caulk than the first one. This method is very familiar to homeowners and handyman service providers. 

You need two things to start – get a paintable caulk and a tube to apply it. You can add a new caulk layer over the non-paintable one. But, the best way to apply a paintable caulk is to remove the old one. 

Remove the Non-paintable Silicone Caulk

A caulk remover or putty knife is enough to remove all old silicone caulk. In Fact, it’s the easiest way to do it. 

If you successfully loosen all existing silicone caulk, then you’re ready to apply the new paintable silicone caulk. 

Use a Caulking Gun

You can speed up the work using a caulking gun. Take a scissor to cut the caulk tip and put it into the caulking gun. Now aim it where you want to cover. Start pressing the gun from a line and slowly fill it with the paintable silicone caulk. 

If you don’t keep your hand stays steel from too much shaking, cover the outside area using painter’s tape so you can avoid caulking non-painted areas. 

Apply Paintable Caulk Over the Old Caulk

Poured some alcohol over the caulking surface. It will work as sandpaper to remove oils. Thoroughly clean the surface so that there will be no silicone residue left. Test an area by applying a new wider bead of caulk so that you can know the oils are no longer residing on the surface. 

Now apply paintable caulks as much as needed. Make sure you add the new bead slightly wider than the old one. Because it helps to stick the new bead on either side of the silicone. 

Finally Paint Over Silicone Caulk

Time to finish the final part of how to paint over silicone caulking. Before painting over silicone caulk, wait 24 hours to dry the paintable silicone caulk. Start to paint color on your choice when it’s fully cured and dry. 

Don’t miss the opportunity to check the manufacturer’s manual guide. They mentioned how many hours you need to wait. Average it takes 24 hours, but follow the instructions as they said. 

Note: If you want to remove the old silicone caulking, use a brush and alcohol for rubbing it thoroughly. 

Is It Possible to Put New Caulking Over Old Silicone Caulking?

Caulking is an inexpensive and easy way to seal water leakage, surface gaps, and prevent growing mold. If you want to apply new caulking, you might remove old caulking. 

However, you don’t always need to remove old caulking for applying the new caulking. But it will be best practice to remove the first one before putting in the second layer on silicone caulk. Because silicone itself is non-sticky, which is pointless to add a second layer to it. 

You can solve it by applying a wider bead. Adding a wider bead can cover the old caulking and stick it into the uncaulk area. Before that, clean the surface and surrounding areas with alcohol. Test a sample area adding a few caulking. If you see they stick enough with the surface, apply it in the entire area using a caulking gun.

Final Words

Painting over silicone caulking isn’t a big deal, you need to finish the job carefully for the desired result. Our research covers the best result on how to paint over silicone caulking. We believe homeowners and handymen will get a proper combination of painting over silicone caulk. 

If you like a paint can over spray paint, use an oil-based paint and brush to finish it. Must follow the manufacturer’s manual and let the paint have enough time to dry completely. 

Related Posts:

  1. How To Remove Mold From Silicone Caulking
  2. Best Spray Paint for Glass

How Many Coats of Primer On Cabinets (Laminate, Kitchen & Bathroom)

Painting your home’s interior furniture needs a lot of attention – As you can lengthen the lifespan by applying primer as an undercoat. How many coats of primer you will be necessary depends on the objects and your goal. 

Generally, one or two coats are sufficient for you when painting cabinets. Most of the time, one coat of primer is enough to protect your cabinet. But, if you have a darker cabinet, you must need to apply two coats. 

Moreover, how many coats of primer on cabinets need depends on the materials, paint colors and the primer. You have to consider them before putting primer. Applying primer before painting helps the surface soak the paint properly and looks better for a longer time. The Darker surface needs more of it for a satisfying result. 

Keep Reading to know how many coats of primer you need to apply on your cabinets.  

Why Wood Cabinets Need The Attention of Primer?

The Primer helps the surface to adhere to the paint properly. When you’re applying it to cabinets, you need to think of it made with wood or not. 

So, before painting a wooden surface, you must prime it. If you don’t prime the wood cabinets, the wood will dry before the paint does its work. Soon you will see many problems are occurring Like:

  1. The paint will starting to peel
  2. Appear differently spotted 
  3. Showing damage on cabinets 
  4. Changing the cabinets natural color

It’s necessary to take a day (24 hours) for priming your wooden cabinet. If you keep yourself patient, you will achieve a good result in the end. 

Do I Need to Apply One Coat of Primer on my Wooden Cabinet? 

You can use a single coat of primer for priming white surfaces or any light color surfaces. Applying a high-quality one coat primer is enough for the paint to adhere perfectly to a light color cabinet. 

When you are finishing applying primer, give it time to adhere and dry properly. Generally, it takes 24 hours to dry completely. We saw many homeowners talk about it, and they share that they saw a better result after applying paint a day later more than rushed into painting. 

If you don’t prime the cabinet correctly, how much quality paint you apply will come out poor. So, it’s essential to priming your cabinet perfectly. If you are applying a light paint, then a single coat of primer is enough. Give at least 24 hours to dry the primer, then start to paint your cabinet. 

Do I Need to Apply Two Coats of Primer on my Wooden Cabinet? 

Darker cabinets do paint absorption at different rates. If you own one, you should think of applying two coats of primer before starting to paint. Because the darker surface most often soaks up the first primer – when you use the second coat, it will refill the primer again. 

Many darker colors are existing in cabinets like espresso, cherry, marble elegance, black & brown. If you are completely sure you have a darker cabinet, don’t think twice about using two primer coats. 

The first coat takes 30 minutes to dry depending on the surface level. If you don’t want to take any risk, give another 30 minutes for drying. After that, apply the second coat of primer and again wait minimum 24 hours before painting.

What will Happen If you’re Applying Three or More?

Adding three coats of primer wouldn’t give you an extra advantage. Using more can cause a lot of troubles. Primer mainly used to ease your painting job, but excessive use of it will ruin all of your efforts.

Some critical issues that can be happened on your kitchen cabinet for excessive use of primer include:

  1. The longer dry time period
  2. Start to show crack on primer
  3. Paint will poorly adhesive 

Publicly a few homeowners said they got an excellent result after applying three coats of primer. We find out they achieve this result accidentally. Luckly, two coats are enough to shine a darker kitchen cabinet. More than that can need more attention. 

Note: Applying three or more coats of primer adds an extra layer and resists drying primer and adhesive paint. 

Do you Need to Sand After Finishing the Priming? 

Sanding is necessary when you apply the primer with a brush or roller. Because certain brushstrokes or solid droplets can appear anywhere on your cabinets, it can mess the beauty of your cabinets. 

When you finish the priming job and make sure it dry properly, start to sand using a fine-grit sanding paper to make it smooth. 

Note: If you use a spray primer, you don’t need to follow the sanding process. Since you can apply the spray primer without having any brush. 

How Many Coats of Paint Need to Apply After Priming Cabinets?

After waiting 24 hours of drying the primer, you need to apply two more paint coats to your kitchen cabinet. Why two coats? Using one coat doesn’t look good (Blotchy) on the cabinet. 

Take 2-3 hours of time between two coats, and this is all because the chemical reaction of paints needs time to properly solvent. And each side of the cabinet door takes 24 hours to completely dry. For better drying, expose the cabinet and keep a fan in front of it. 

When you apply the second coat of paint, you will see all the painted curves and errors of the first coat will vanish. The last thing is don’t let anyone hang too much with the cabinets until they dry completely. 

Note: Two coats of paint is enough to look great in your cabinet. If you want to play a more secure paint job, you can apply the third coat. Again, the time spent will be the same as before. 

Do You Need to Skip Primer on Cabinet If You Use Self-Priming Paint?

When paint and primer is one, it’s called “self-priming paint”. They are thicker and solid on average. They are budget-friendly and work best in lighter colors. 

Just apply one coat you will finish the priming and paint. Though, many people think it is a time and money saving idea. In reality, it’s a poor activity for anyone. 

Priming and painting on cabinets are used for two different purposes. Primer helps to adhere the paints more correctly, where the paint provides a finishing touch with color and texture. Professional painters are more cautious about it. 

If you are a do-it-yourself painter, be calm and apply the primer and paint differently for better results.

Final Words

How many coats of primer on cabinets you want to apply depends on the surface color. It doesn’t matter if you’re a novice or professional, you have to act smartly or you can surely damage your kitchen cabinet. 

Remember what we try to tell you, two coats are essential for a darker cabinet, whether one for a lighter one. Please don’t take it in a hurry, give it a full day to dry before adding the paints layer, or result in blotches. 

Now do the perfect priming and enjoy the painting job!!

Related Posts:

  1. Best Paint Sprayer For Kitchen Cabinets

Spray Gun Painting Techniques Beginner to Pro

Traditionally rollers and brushes have always been trusted, comfortable means for painting, but now the time is for spray guns. You can paint in half the time with professional looking smooth finish only with spray guns. Spraying is the answer to the necessity of modern times by saving time and effort with effective results. A spray gun works great for coating uneven surfaces like door frames and window shutters, and also works great on large flat surfaces. Even though it is really easy to operate spray gun for painting, it is better to know the dos and don’ts of the spray gun painting techniques. You can certainly start working with a spray gun right away, but the more practice and experience, the better the results.  

Keeping that in mind, here are some great spray gun painting techniques to assist during your painting projects.     

Do Perfect Practice  

If it’s your first time painting or just started to do paint jobs, it is wise to practice first before working with a spray gun. Practicing will make you comfortable and confident in your painting techniques and during spraying job you’ll know what to expect.  

Choose a large flat surface area as your practice range. Follow the user’s manuals instructions carefully and load the spray gun with water. Then practice your spraying techniques on the practice area. Keep trying different patterns for painting until you are satisfied with the results.   

Preparation  

Before painting, there’s a need for some preparation first which will lead to a successful paint job.  

Checking the Temperature 

The ideal temperature for spraying is between 45-75 degrees. Too cold weather will clog the paint inside the gun, and too hot weather will dry the paint too quickly and the surface will not have soaked the paint well. The best painting season is between spring and summer.  

Covering Painting Area  

To avoid making a big mess, cover the surrounding area and furniture where you will be painting. Use drop cloths, plastics sheets, painter’s tapes or paper to protect floors. Windows and trim. There will be less chance of accidents if you can remove all the furniture and objects from the painting area.  

Wearing Protective Gear 

Always wear gloves, masks and safety glasses during painting. It’s even better to wear a respirator to protect yourself from harmful fumes and paint particles.  

Mixing the Paint  

The paint should be mixed well to prevent clogging while spraying. Different types of paint require different approaches to the thinning process, even though normally you can thin most paints with water. However, oil-based paints need to be thinned with mineral based thinning solution. If you have confusion, consult the user’s manual for guidance.  

Important Painting Techniques  

  • To get an even coat, always hold the spray gun in motion with long straight strokes. Start moving the gun before pulling the trigger and continue your stroke after releasing the trigger.  
  • Hold your arm straight to keep a uniform distance between 8-12 inches from the nozzle to the surface. Maintain the spray gun at right angles to the surface panel so that there’s no heavy spray on one side and overspray on the other end. Avoid tilting the gun upward or downward, rather move the gun side to side in a straight line. 
  • The overlap between strokes should be about 50% which ensures an even amount of paint on the surface. To achieve the proper overlap, the center of the spray pattern should be aimed at the edge of the previous stroke. When spraying on broad open surfaces, it’s better to spray the outside edges first, then the middle.  
  • To achieve the spray pattern you want, test and adjust the spray equipment. If the pattern is too narrow, too much paint will be applied to the surface and runs. But if the pattern is too wide, there will be a gap area needing coverage. Look for light spots or missed areas and make sure to touch up with brushes or rollers.  
  • Do the corners first and finish later the large flat surfaces. To properly spray inside corners such as where two walls meet, aim the spray gun directly into the corner and spray evenly and in one pass.  
  • While spraying, only work within the area you can easily reach by holding your gun position steady. Don’t angle the tip at the end of your reach to spray further, rather move your whole body.  
  • Paint buildup at the tip may affect the spray pattern, so clean the paint sprayer and tips between each application with a rag soaked with paint thinner or another solvent. But never use your fingers unprotected to clean tips, that way you can inject yourself with paint.  
  • Apply multiple thin coats of paint, instead of one or two thick coats for the best finish. Some use back brushing or back-rolling, which is, brushing or rolling in the sprayed on finish to get a more even coat and better penetration. It’s better to back brush stain applications on unfinished or previously stained wood and highly recommended while applying primers as well.  

Cleaning  

To ensure the longevity and functionality of the spray gun, it is crucial to clean the device every time you use it. Empty the paint container, fill it with water or paint thinner and then flush it through your paint sprayer container until it runs clear. Use water to clean for water-based paints like latex and use paint thinner to clean oil-based paints like lacquer. Then take apart the whole gun, tips and filters and soak them in the solution. Gently rub the parts with a rag or brush to remove the extra paint, dirt, grime stuck there. Make sure to fully dry the parts and then reassemble.  

Conclusion  

So, these are the basic, most common techniques for spray gun painting. It may seem intimidating with preparation, painting and cleaning all put together, but trust that it is actually pretty easy and simple to follow the steps. And if you have doubts, just follow the user’s manual instructions.  

Your painting session doesn’t have to be a bore and a chore! Use these spray gun painting techniques and make it an easy and pleasant experience to remember.  

Related Posts:

  1. Best Indoor Paint Sprayers for Interior Walls
  2. How to Paint a Fence with a Sprayer

How to Use a Paint Sprayer with Air Compressor

For painting projects, rollers and brushes may seem like easy, safe choices but paint sprayers are an even better choice for their practical use. You will be able to finish a painting in half time with more smooth, even coating with a professional looking result. In this case, paint sprayer with air compressor comes in handy. It effectively saves your money and time while at the same time bypassing the pollution that is generally brought about by aerosol propellants.

Sprayers with air compressor models are the most popular among the professional painters and hobbyists alike. Even though attaching an air compressor to a paint sprayer can sound tricky and complex, it is not that difficult to maneuver. With proper guidelines and understanding, anyone can easily and comfortably be able to use air compressed sprayers. Hopefully, this article will help you understand the basic workings of air compressor and how to use a sprayer with air compressor.  

Why You Need an Air Compressor with a Paint Sprayer ?

An air compressor provides the necessary pressure needed for the painting. The air compressor helps the paint sprayer with the right pressure to release the precise paint flow effectively. To achieve the right pressure for the paint flow, sprayers are equipped with certain pressure generation tools and minimizes any paint wastage. The volume of air used in a sprayer is significantly lower than that used in airless paint sprayers. That means the models using an air compressor will cost slightly lower than the airless models. Apart from its low cost energy saving benefits, the sprayer with air compressor delivers fine quality and smooth finishes for your painting projects. It also ensures easy and even application of paint during spraying. Thus, you can achieve professional level results without having to hire an expert for the job. 

Preparing the Paint Sprayer  

To ensure effective use of a paint sprayer with an air compressor, just spraying the surface is not enough. There are some initial preparations needed, such as preparing the sprayer and the air compressors as well. Here follow the steps below for a professional spraying job. 

Select the Right Paint and Thinner 

Compressed air sprayers are compatible with most paints, but latex, acrylic or oil-based paints are most suitable and heavily used with it. Paint thinning means mixing paint with suitable thinner so that it can flow freely. 15%-20% thinning is good enough for a good flow.  

Prepare the Surface Area to Be Painted 

Before painting, make sure to clear the surface area and there is enough ventilation. You can use cloths, plastic sheets, painter’s tape, mask or newspaper to cover furniture and floor surfaces. Otherwise, the paint will be spread all over the place due to over spray.  

Putt on Protective Gear 

Safety precautions should always come first. Wear gloves, masks and safety glasses. If you have an allergy or severe health problems, wear a respirator to avoid inhaling the fumes and paint particles.  

Prime the Surface 

The painting surface needs to be dry, oil free and rust free and it can be smoothed down by sanding, grinding, and brushing. Adding solution with water, wash the surface thoroughly to remove any dirt, oil and dust. After drying, apply a layer of primer over the surface to get a good finish after spraying the paint.  

Prepare the Air Compressor  

Once you are ready to paint, turn on the air compressor, adjust the regulator between 12 and 25 PSI (pounds per square inch) and attach the air hose. Examine the compression chamber to make sure that the pressure is set at the correct level. Practice some painting techniques and sweeping motion to get a feel of the balance and weight.  

Pour a Small Amount of Paint Thinner 

Normally, there’s a reservoir in the sprayer for adding the thinner which is placed at the bottom. Fill the cup with the paint you have already thinned and attach it securely to the sprayer. 

Prime the Sprayer 

After attaching, squeeze the primer to check whether the paint comes out of the nozzle or not. At first, air will come out for a couple minutes then, it will spray paint. If there’s a problem with the flow of the thinner, then check the spray for leakage and fix it accordingly.  

Painting  

Using a paint sprayer with air compressor is a pretty simple process. With everything already properly attached, the air compressor and the sprayer will do the job for you. Hold the spray gun at least 8-10 inches away from the surface you are painting and maintain a fluid up and down, back and forth sweeping motion. Keep the sprayer moving continuously, spraying the paint in straight, smooth strokes to avoid drips and runs. Continue until you finish painting the whole surface.  

Tips  

  • Wear protective gear while spraying 
  • Practice spraying water on paper to avoid unexpected situations  
  • Spray either vertically or horizontally, but not both on the same project 
  • Start the sprayer in motion before pulling the trigger to avoid thick spots on the painting surface  
  • Release the trigger before stopping the motion of the sprayer  
  • Mix your paint well before using to avoid clogging 
  • Use sprayer with air compressor for painting large, multiple surfaces painting fast  
  • Always read the user’s manual carefully and follow the instructions   

Conclusion  

An air compressor is a necessity for efficient use of a paint sprayer. It helps in generating the exact amount of pressure that is required by your device. By doing this, not only it eliminates wastage but also conserves energy. One of the key benefits is that it regularly delivers finer quality and even finishes for your painted surface. The best sprayer for painting will improve your productivity and guarantee perfect work for both small scale and large scale projects. Here, along with the benefits of air compressors to sprayers for painting, the process of using a sprayer with an air compressor has been elaborated.  

No matter how difficult it seems, actually using a sprayer with air compressor is a pretty easy job. With time and practice, you can certainly become a pro in no time. Just have confidence and faith in yourself. Happy painting!  

Related Posts:

  1. Best HVLP Paint Sprayers

How to Paint a Fence with a Sprayer

Fences are the first thing people notice about your house while visiting. Even just passing by random strangers create a preconceived notion of you depending on your upkeep of the fence. A painted sturdy fence gives a completely different message from that of an old rundown fence. Why keep your old fence in shambles when you can make it as good as new with just a coat of paint?  

And here comes the question of the method of painting. Rollers or sprayers? Compared to rollers, paint sprayers have a greater coverage and flawless finish with less time and effort. Simply, they are the more logical choice for efficient and effective painting. Therefore, painting the fence with a sprayer will give you a professional result, saving a lots of time and effort.    

Prepping  

Professional painters call the process of scraping, cleaning and covering for paint jobs “prepping.” You need to take the preparations seriously for a good result.  

  • Best time for outdoor painting is summer, as the temperature and humidity remains moderate. Too much heat dries paint quickly without soaking the surface and too cold temperature takes time to dry paint and attract bugs and dirt in the meantime. Also, avoid windy days to prevent paint drifting into unwanted areas.   
  • Remove grass and plants growing near and around the fence to keep the paint off from spraying. Spread plastic on the ground under the fence to protect the lawn. Move any outdoor furniture away from the surrounding area and allow plenty enough space for your tools and equipment.  
  • Cover all nearby shrubs, bushes, plants or surfaces you want to protect with large plastic tarps to prevent from oversprayUse painter’s tape to keep paint out of ornament, latches, handles and other hardware. Let your neighbor know about spraying and take permission if you need access to their yard. Be sure to protect their items, landscaping and house the same way. 
  • Remove all loose nails and screws and use a brush to remove any dust, cobwebs or debris from the surface. If you are repainting, scrape off any loose peeling or chipping paint with a paint scraper. To avoid rough areas or splinters, rub the fence with sandpaper and smooth the whole surface. Wash the fence thoroughly with a pressure washer and cleaning solution and allow the fence to dry completely before painting.  

Safety Precautions  

Sprayers operate under very high pressure, so simple directing the paint sprayer at exposed skin can penetrate the top layer of skin even if there is no visible cut or scrape. To avoid such tragic happenings, wear lightweight coveralls, a spray hood, safety goggles, and masks. In case of having allergies or severe health problems, wear a respirator to avoid inhaling the fumes and paint particles. Remember safety always comes first.  

Setting up the Sprayer 

There are different sprayers available on the market adhering to different needs. Paint also differs according to the fence material. For wooden fence, acrylics or oil-based outdoor paints provide excellent protection but for metal fence and gates, enamel paint is more suitable. It’s better to apply primer before spraying to achieve that superior finish.  

The paint also needs to be thinned before spraying. Use water for water-based paints and paint thinner for oil-based paints to make the paint slightly diluted. Mix the paint and put the mixture into your sprayer.  

Choose the spray tips best suited to your project, as different nozzles have different functions and coverage. Use big nozzles for spraying large surface area and use smaller precise ones for spraying into cracks or crevices.  

Spraying  

Hold your sprayer upright and keep the distance of 6-8 inches between the nozzle and the surface while spraying. Spray paint the fence with long straight strokes. For horizontal panels, use up and down motions and for vertical ones, use back and forth style motion. Start moving the gun before pulling the trigger and continue your stroke after releasing the trigger to avoid over spray.  Avoid making arcs at the end of each stroke, which may result in getting paint in undesired places. 

Make sure to paint every surface as you go and use a brush to paint the small spaces between panels and posts. Once the whole coat is applied, follow up with a paint brush or roller to even out or touch up any thicker sections or drips. Let the paint dry and cure, and look for inconsistencies in the finishing. It the paint is little thin in places, spray paint another layer to give a smooth finish. 

Cleaning  

Wait until the paint has completely dried out, and then remove the covers from shrubs, bushes and plants on both sides of the fence. Replace any lighting fixtures that you removed before painting and return any furniture or other items back to their proper place. Clear out any debris, dirt and extra paint from the surrounding area.  

Cleaning the sprayer after use is essential to achieve smooth finishing and for maximum gun performance in the longer run. Cleaning a sprayer process may seem lengthy but actually a straightforward and easy process. First, detach the cup or bucket of paint from the spray gun and empty the extra paint. Clean the cup with warm water to get rid of any leftover paint. According to the manual provided with the sprayer, carefully disassemble the gun, tips and filters. Soak the parts in water and rub them gently with rugs or brush to get rid of the added paint, dirt, grime stuck there. Make sure to thoroughly dry the parts and then reassemble. 

Conclusion  

See, it is not that hard to paint a fence with a sprayer. Anyone can easily do the spraying if they follow the steps correctly and get excellent results even without being a pro. The trick is to choose the time for painting wisely so that you don’t lose time over bad weather or leave work in middle of painting. Cover the area and items, wear safety gear, prepare the sprayer and paints, and get ready to start painting the fence.  

Related Posts:

  1. Spray Gun Painting Techniques Beginner to Pro 

How to Clean Airless Paint Sprayer

High quality airless paint sprayers are the easiest tool for fast and effective painting. The secret to a functional and longer lasting sprayer is ensuring proper care and maintenance. The most important job is to clean your sprayer properly after every paint job. But for the first timers it might be confusing how to clean because you are dealing with many different parts. Fear not! Even though each model might differ slightly, the main components are generally the same. Once you have done it a few times, you will get used to the process and it’ll feel like a straightforward routine. 

While cleaning an airless paint sprayer it’s better to take apart the device to get rid of the paint and grime stuck inside and outside. The 3 main parts of the sprayer are the whole device, the nozzle and the gun. At first, keep the tool assembled to clean the majority of the paint, but later take apart the gun and nozzles for easy cleaning.  

Water Or Paint Thinner?  

It can be confusing for newbies to choose from what to clean with – water or paint thinner? But there’s a simple solution. Use tap water (lukewarm even better) to clean water-based paints like latex and use paint thinner to remove oil-based paints like lacquer.  

Although never confuse between these 2 types because it can damage the whole device. And, don’t use heavy corrosive liquids like lacquer thinner, which could damage internal parts of the sprayer. 

Preparation  

The things you will need for cleaning: 

  • Water 
  • Paint thinner 
  • Buckets 
  • Paintbrush 
  • Gloves  
  • Rags 

You need one bucket filled with water or paint thinner and one empty bucket to empty the device into. Trim the length of your old paintbrush to one inch for scrubbing the dirt. Before cleaning, turn the power off of the device and also turn pressure to the lowest setting and trigger the gun to relieve pressure. When cleaning your paint gun, you should be wearing gloves, this way your hands will be protected from chemical thinners and hardeners.   

How to Clean Water-Based Paint ?

Take a bucket with water and put the suction of the airless sprayer in it. Allow it to draw water in. Taking an empty second bucket, spray the remaining liquid until you get a clear and clean spray. Use both the prime mode and spray mode to push out the remaining paint. In this way, no paint is wasted.  

Disassemble the gun and take the suction strainer, the main filter and the gun filter, then place them in the empty bucket to soak in the water.  Put on a pair of gloves and start swiping away the remaining paint. For the stubborn leftovers, use an old stiff brush and scrub away gently. Put some lacquer thinner on a clean cloth rag and rub the over sprayed paint off of the frame and body of the paint sprayer. If the sprayer is to be stored, especially over winter where it might freeze, run a small amount of paint thinner (never lacquer thinner) through the sprayer to remove any water which could freeze. Once all the parts are completely free of paint, wipe off the water with a clean dry cloth until all the parts are completely dry again.  

How to Clean Oil-Based Paint ? 

Cleaning oil-based paint from the sprayer is the same process as water-based paint cleaning as mentioned above, just use paint thinners instead of water. Avoid harsh/heavy liquids like lacquer or acetone. Run paint thinner through the sprayer until the thinner comes of the sprayer clean. Do not run the same thinner through the sprayer more than once. Take the sprayer apart and soak all of the parts in paint thinner. Do notplace the entire gun in the solvent because this can be abrasive, only let the filters should ideally soak. Rub them or scrub down with brush gently if necessary to remove any last vestiges of paint. Rinse the filter in paint thinner and allow the filter to air dry. Finally, reassemble the sprayer. 

Maintenance and Storage  

Besides cleaning the sprayer thoroughly, you need to do some maintenance too. The essential part is to take care of the piston and packing kit. The pump system is particular to specific brands so always read the user’s manual to check what needs to be oiled and how often. If you don’t want unexpected cleaning and repair cost, keeping it clean is the absolute requirement.  

You may not need to use the airless sprayer regularly and there’s a fair time gap between your painting projects. If you do not properly prepare your airless paint sprayer for storage, you will often bring it out to use and not be able to get it to spray. That’s why storing the sprayer is vital to maximize the life of your sprayer.  

Use pump preserver / protector products like pump armor, liquid shield, mineral spirits and mineral spirits with engine oil only in the pump; do not run the material through the hose and gun. If the sprayer will be stored in freezing temperatures, choose a pump preserver that will not freeze.   

Additional Tips  

  • Carefully read the user’s manual and follow the instruction  
  • Clean the equipment between coatings 
  • Not all paints and coatings are compatible with each other  
  • Store your airless indoors in a climate controlled area for best results 
  • Do not allow water to freeze in the sprayer, hose or gun  
  • Never leave the airless sprayer under pressure  

Conclusion 

Airless paint sprayers can become clogged when paint left in the sprayer thickens or dries. That’s why cleaning is so important to keep the sprayer from clogging. No clogging means even and smooth spraying job and easier to clean the inside of the sprayer. The cleaning task may seem daunting, but the job itself is not that hard. Just following this easy process you can be free from all the dirt and paint and have a squeaky clean sprayer. So, don your work gloves and get ready to clean!  

Related Posts:

  1. Best Airless Paint Sprayers