Category Archives: Painting Guides

Should You Use 2 Coats Of Primer On Cabinets?

Are you thinking about painting your cabinets with two coats of primer? There are many benefits to using two coats of primer on your cabinets, but is it necessary?

One of the main benefits of using two coats of primer is that it seals the wood surface. This will protect it from water, fading, and fading caused by sunlight. If you want your cabinets to look their best for a long time, it’s important to seal them with a primer.

Another benefit to using two coats of primer is that it gives your cabinets a smoother finish. A smooth finish can make your cabinets look more polished and expensive. It also helps keep paint from chipping off the surface.

If you’re unsure if two coats of primer are necessary, ask a professional painter or cabinet maker. They would be able to give you an accurate answer based on the type of paint and cabinet that you’re painting.

What Are the Benefits of Using Two Coats of Primer?

Two coats of primer can help protect your cabinets from moisture, dirt, and other debris that can damage the finish. It also provides a smoother surface for the paint to stick to, which can help prevent brush strokes and uneven coverage.

What Factors Can Affect the Decision?

Factors that can affect the decision include the type of primer you use, the kind of paint you use, and the condition of your cabinet. For example, if you have a dark-colored cabinet and plan on using a light-colored primer, you may want to consider using two coats instead of one.

What Are the Pros and Cons of Using Two Coats of Primer?

The pros of using two coats of primer are that it protects your cabinets from moisture, dirt, and other debris that can damage the finish. It also provides a smoother surface for the paint to stick to, which can help prevent brush strokes and uneven coverage.

How Do I Paint a Cabinet?

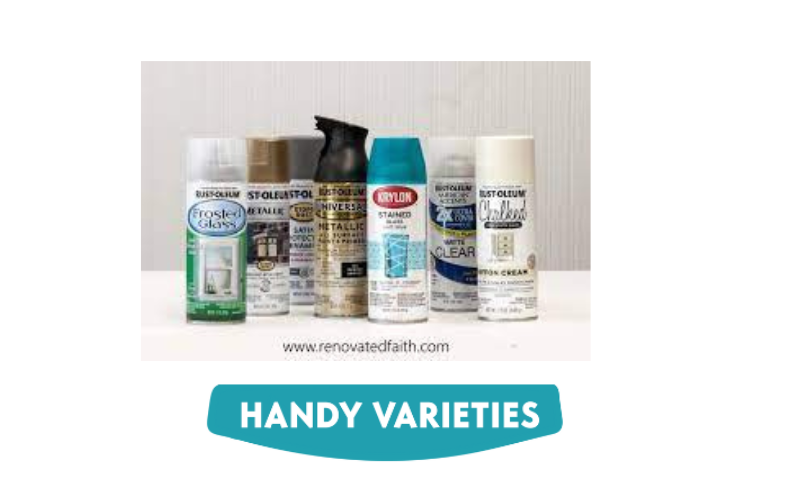
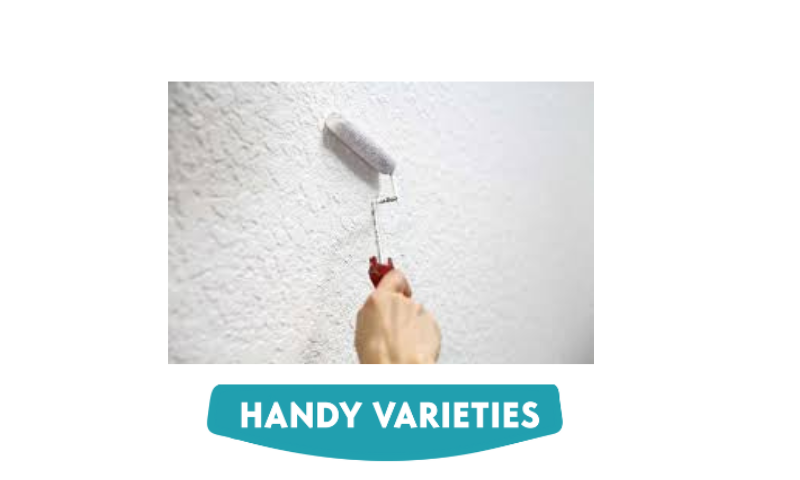
Painting a cabinet can be done in several ways. Depending on your preference, you can use a brush or roller to apply the primer and paint. You can also choose to use an all-in-one spray primer and paint system.

We hope this article has helped you make an informed decision about whether or not to use two coats of primer on your cabinets. With proper preparation and knowledge, you can achieve a beautiful finish for your cabinets in no time.

How many layers of primer do you need for cabinets?

Are you looking to know how many layers of primer you need for cabinets? Primer is a key ingredient in creating a smooth finish on your cabinets. It helps to reduce the visibility of imperfections and provides lasting protection for the wood.

The amount of primer you need will vary depending on the type of wood your cabinets are made from and the size of the surface. For most standard cabinet doors, you’ll need two layers. However, if your cabinets are made from wooden panels or if they have a large surface area, you may need three or even four layers. 

Whatever number of layers you need, make sure to use a high-quality primer that meets your cabinet’s specific needs. With proper preparation and a good seal coat, your cabinets will look great and stay in great condition for years to come.

What is Primer?

Primer is a thin, water-based product that coats the wood surface and helps to protect it from water, dirt, and other elements. It is used on all types of wood, including cabinets, floors, and furniture.

What Are the Benefits of Primer?

Primer can help reduce the visibility of imperfections in the wood, making it appear smoother and more uniform. It also helps to protect the wood from water, dirt, and other elements.

How Many Layers of Primer Do You Need?

The amount of primer you need depends on the type of wood you are priming and how thick you want the finish to be. Generally speaking, you should start with 2 or 3 layers of primer and then add additional layers as necessary.

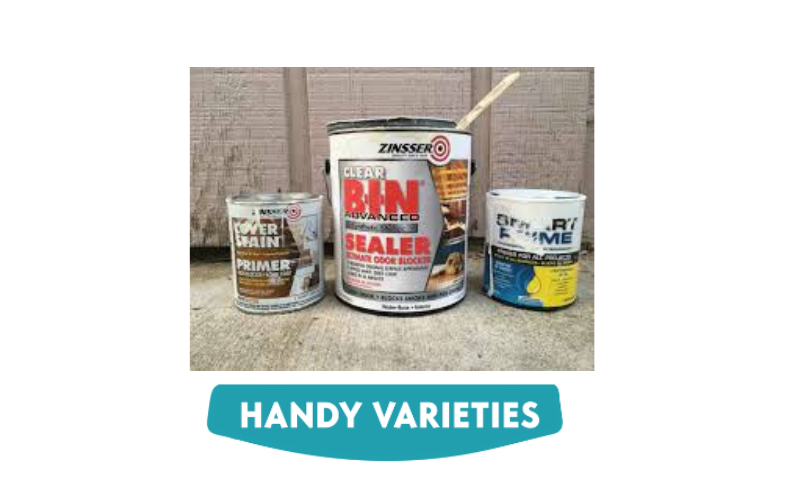
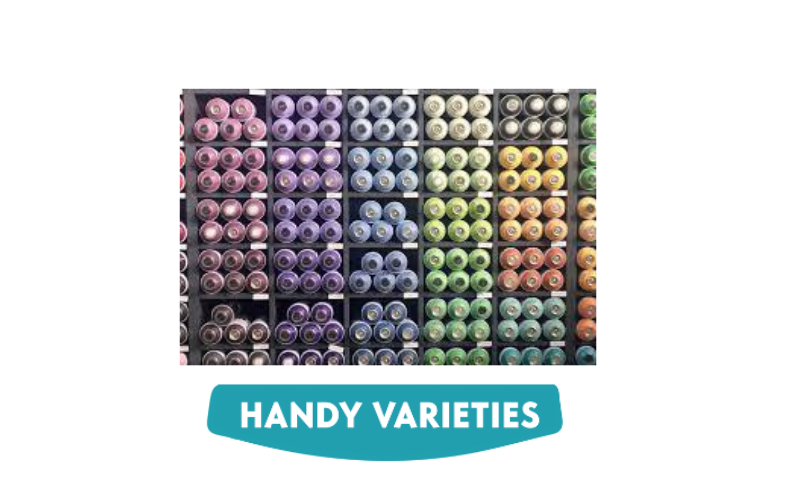
What Type of Primer Should I Use?

There are several types of primers available, including water-based, solvent-based, and oil-based primers. Each type has its own benefits and drawbacks, so it’s important to choose the right one for your project.

What Are the Best Practices for Priming Cabinets?

The best practices for priming cabinets include using a brush or roller to apply the primer evenly across the surface of the wood, using a high-quality primer that is specifically designed for wood surfaces, and letting it dry completely before applying any additional coats.

We hope this article has helped you understand how many layers of primer you need for cabinets and what types of primers are best for your project. Remember to use a high-quality primer that is specifically designed for wood surfaces and follow all the best practices for priming cabinets.

Is it worth doing two coats of primer?

Are you considering doing two coats of primer? It’s a great way to get the most out of your paint job. But is it worth it?

Primer is a very important step in painting. It helps the paint stick to the surface and protects it from moisture and other elements. Two coats of primer can make a big difference in the durability of your paint job.

But there are also some drawbacks to doing two coats of primer. Primer can be expensive, it can take a long time to dry, and it can be difficult to remove later on if necessary. So weigh the benefits against the costs before you decide whether or not to do two coats of primer on your next project.

What Is Primer?

Primer is a type of paint that’s designed to help bonds between the paint and the surface of a wall or object. It’s often used to help protect the surface from scratches and other damage while the paint is drying.

What Are the Benefits of Primer?

Primer can help protect the surface of a wall or object from stains and water damage, while also helping to reduce the amount of time needed for the paint to dry. It can also reduce the amount of sanding needed after painting.

What Are the Drawbacks of Primer?

Some people feel that primer can be too thick and can cause staining on certain surfaces, such as tile or stone. Also, it can be difficult to remove primer once it has been applied, so you may need to use a cleaner or a different type of primer in some cases.

How Does Primer Work?

Primer is typically applied in one or two coats, depending on the type of primer you’re using. After applying primer, you should allow it to dry completely before painting.

Is It Worth Doing Two Coats of Primer?

It all depends on your needs and preferences. If you have a lot of staining or other problems with primer, you may want to consider doing two coats. On the other hand, if you don’t have any problems with primer, you may not need to do two coats.

Overall, it’s important to consider your needs and preferences when deciding whether or not to do two coats of primer. It all depends on your individual situation and what you’re looking for in a paint job.

Does wood need 2 coats of primer?

Do you need to paint the wood before you stain it? If so, you’re not alone. Many homeowners have questions about what they need to do to get the best results from their projects. In this essay, we’ll answer the question: Does wood need 2 coats of primer?

Primer is a very important step in the painting process. Primer coats help to protect the wood from moisture and other elements that can damage it over time.

If you only have one coat of primer, the wood will still be protected. However, if you want to get the best results from your project, you’ll need to apply 2 coats of primer. 

This will make sure that the paint sticks to the wood properly and that any imperfections or scuffs on the surface are covered. 

In short: If you’re painting wood, always apply 2 coats of primer before staining it.

What is Primer?

Primer is a chemical that helps prepare surfaces for painting or staining. It is also used to seal and protect surfaces from stains and water damage.

What is Wood Primer?

Wood primer is a specially formulated primer designed for use when painting or staining wood surfaces. It helps to protect the wood from dirt and moisture, and also helps to give a smooth finish to the surface.

What Are the Benefits of Wood Primer?

When using a primer, can help to protect your wood from water damage, and it also gives a smooth finish to the surface. Additionally, it can help to make the wood easier to paint or stain.

What Is the Best Way to Apply Wood Primer?

The best way to apply wood primer is by using a spray application method. This can be done with a brush or roller, but it’s important to use a primer that is specifically formulated for wood surfaces.

What Are the Pros and Cons of Wood Primers?

The pros of using a primer are that it helps to protect your wood from water damage and gives a smooth finish to the surface. The cons are that it can be difficult to remove once it has been applied, and it can also be expensive.

What Are the Dangers of Using Too Much Wood Primer?

Overapplication of wood primer can cause issues such as peeling or separation, as well as discoloration and warping of the wood surface. It’s important that you use enough primer to cover the entire surface, but not too much that it causes issues.

Does wood need 2 coats of primer? The answer is yes if you want the best results from your project. While primers can be expensive and difficult to remove, they are necessary for protecting your wood from water damage and giving it a smooth finish.

Do cabinets need 2 coats of paint?

Are cabinets in your home in need of a second coat of paint? This is an important question to ask, as it can make a huge difference in the look and feel of your home. In this essay, we’ll explore the topic of doing cabinets need 2 coats of paint.

It’s important to remember that not all cabinets are created equal. Some may only need a single coat of paint, while others may require two. It all comes down to the type of cabinet, the quality of the paint, and the weather conditions in your area. Here’s a quick guide to help you decide:

If your cabinet is made from wood, stain it first with a light coat of wood stain. This will help to protect the wood and make it look more like it does in the store.

If your cabinet is made from a thin plastic or metal material, it might not require any paint at all. Just clean with mild soap and water and dry completely. If there are any visible scratches or dents, you’ll need to repair them before painting.

If your cabinet is made from a heavier material like oak or maple, you should give it a second coat of paint even if it doesn’t have any major blemishes. This will protect the finish and make it look more polished. 

So there you have it – do cabinets need 2 coats of paint? The answer is typical, yes, but it all depends on the specific circumstances involved. Always consult with a professional before making any changes to your home’s interior.

What is the Purpose of the Second Coat of Paint?

The purpose of a second coat of paint is to provide an extra layer of protection and durability to a surface. It also provides a uniform finish that can make a room look more organized and inviting.

What Are the Benefits of Second Coat of Paint?

Aside from providing an extra layer of protection and durability, a second coat of paint can also make a room look more organized and inviting. It can also add a new look to the room and help to mask any imperfections or scratches on the surface.

What Types of Material Should I Choose for the Second Coat of Paint?

There are several types of materials that can be used for a second coat of paint, including water-based, oil-based, and latex-based paints. Each type has its own benefits and drawbacks, so it’s important to choose the right type for the job.

How Do I Apply a Second Coat of Paint?

Applying a second coat of paint is similar to applying the first coat. You should start by cleaning the surface with soap and water, then taking care to remove any dirt or debris from the surface. Once the surface is dry, you can start applying the paint by using a brush or roller.

What Are the Risks Involved in Applying a Second Coat of Paint?

Applying a second coat of paint can be dangerous if not done correctly. There are several factors that can affect the outcome, such as the type of paint used, how thickly it’s applied, and how long it’s left before it’s removed. It’s important to take precautions to ensure that you get a perfect finish every time.

Do cabinets in your home need a second coat of paint? While there are risks involved in applying a second coat, it can make a huge difference in how your home looks and feels. With proper preparation and safety precautions, you can get a perfect finish every time.

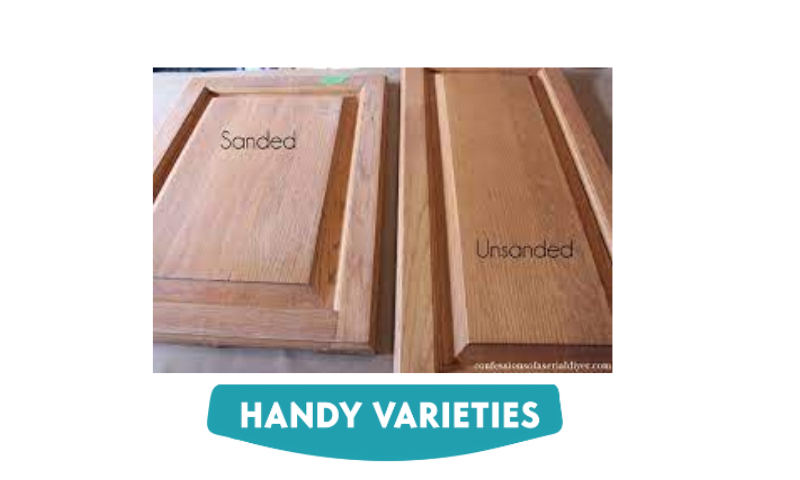
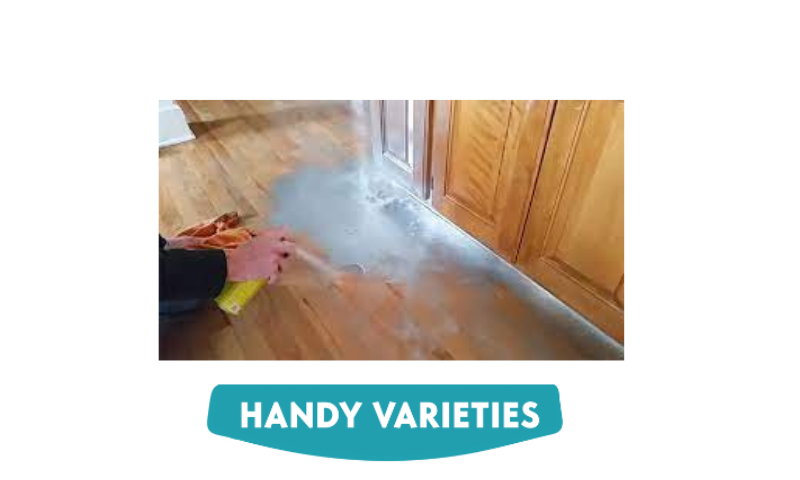
Do I need to sand between coats of primer on cabinets?

Are you looking to know if you need to sand between coats of primer on cabinets? It can be a tricky question, but don’t worry – we’re here to help.

Primer is a key step in creating a durable finish on cabinets. However, if the primer is not applied evenly or if it’s not sanded properly, it can cause the paint to peel and crack. Therefore, it’s important to test the primer on a small section of your cabinet first to see how well it adheres and if sanding is necessary.

If you do decide to sand between coats of primer, be sure to use fine-grit sandpaper and follow the manufacturer’s instructions. Remember to allow the primer to dry completely before applying the paint.

What Is Primer?

Primer is a protective coating used on wood and other materials to help preserve the surface and provide a smooth finish. It’s often used along with other coats of paint to keep the wood looking good.

What Is the Purpose of Primer?

Primer is designed to protect the wood from water, dirt, and other elements that can damage it over time. It also helps to provide a smooth surface that can be easily painted on top of it.

How Does Primer Protect Cabinets?

Primer helps to protect cabinets from water, dirt, and other elements that can damage the surface. It also helps to provide a smooth surface that can be easily painted on top of it.

What Are the Benefits of Using Primer on Cabinets?

Primer helps to protect cabinets from water, dirt, and other elements that can damage the surface. It also helps to provide a smooth surface that can be easily painted on top of it.

What Are Some Tips for Preparing Cabinets for Primer?

There are a few tips you should follow when preparing your cabinets for primer. First, make sure that the cabinets are free of dust and debris. Second, clean the surface with warm soapy water and a soft brush. Third, allow the primer to dry before applying it.

Now you know if you need to sand between coats of primer on cabinets! The answer is yes – it’s important to sand between coats so that the primer has room to work. Follow these tips and you’ll be ready to go!

How many coats of primer are enough?

Have you ever wondered how many coats of primer are enough for your home? If so, you’re not alone. Many homeowners are unaware of the correct number of coats that should be used to properly protect their home from the elements.

What is Primer?

Primer is a liquid or powder that is used to help seal surfaces before painting or other finishing treatments. It can also be used to help protect surfaces from the elements.

How Do We Apply Primer?

Primer is typically applied by brush or spray, but can also be applied with rollers or rollers with a brush attachment. It should be applied in several thin layers to ensure even coverage.

What Are the Benefits of Primer?

Primer is an essential part of any paint job, as it helps to seal the surface and prevent water and dirt from damaging the paint job. It also helps to create a smooth and even finish on the surface, which is important for making a good paint job.

How Many Coats of Primer Should I Use?

The number of coats of primer you should use depends on the type of paint you use, as well as the type of surface you are priming. Generally, two coats of primer are enough to provide adequate protection for most surfaces.

What Are Some Tips for Applying Primer?

When applying primer, it’s important to use a good quality primer and follow all instructions provided by the manufacturer. It’s also important to allow time for the primer to dry before painting, and to make sure each coat is evenly applied.

Conclusion

We hope this article has given you all the information you need to know about primer and how many coats are enough. We also hope that it has helped you understand how primer can help protect your home from the elements and create a smooth and even finish on your surfaces.


How To Get Rid Of Smell From Reglazing Tub?

Have you ever had a problem with your reglazing tub? If so, you’re not alone. It’s a common issue that can be difficult to get rid of. In this article, we’re going to teach you how to get rid of that unpleasant smell from your reglazing tub.

The first step is to try using a commercial cleaner. Many of these cleaners are designed specifically for cleaning reglazing tubs and they will work well to get rid of the smell. However, if the smell still persists after using the cleaner, you may need to take further action.

One option is to use a vacuum cleaner with a high-powered filter. This will help to remove any particles that may be contributing to the smell. Another option is to use an enzyme cleaner. These cleaners are specially designed to remove odors and they are quite effective at doing so. Just be sure to test the product before using it on your reglazing tub, in case there are any adverse effects.

Whatever approach you take, be sure to clean your reglazing tub regularly so that the odor doesn’t persist. If you have any other questions or concerns, don’t hesitate to contact a professional.

What Causes Reglazing Tub Smells?

Smells can come from many sources, including dirt and soap residue, mold and mildew, and even bacteria. The source of the smell may not be obvious, so it’s important to check the tub and surrounding areas for any signs of these issues.

How Do You Get Rid of Reglazing Tub Smells?

There are several steps you can take to get rid of the smell. You can try using some all-natural products, such as baking soda and vinegar or try some commercial products, such as air fresheners or scented candles.

What Are Some Tips for Getting Rid of Reglazing Tub Smells?

Here are some tips for getting rid of reglazing tub smells:

  1. Make sure the tub is completely dry before you use it.
  2. Use mild soap or detergent when cleaning the tub and surrounding areas.
  3. Be sure to clean the tub surface with warm water and a cloth after each use.
  4. Make sure to regularly clean the air vent and the exhaust fan in the bathroom.
  5. Keep the bathroom humidity low by using a dehumidifier or air purifier.
  6. Consider replacing the reglazing tub with a new one if it’s still smelling after trying the tips above.

What Are Some Home Remedies for Removing Reglazing Tub Smells?

There are several natural remedies that can help eliminate odors in your reglazing tub, such as baking soda, vinegar, essential oils, and cinnamon powder. You can also use air fresheners or scented candles to mask the smell and make it more pleasant to use the tub.

What Are Some Tips for Cleaning Reglazing Tub Surfaces?

To clean the reglazing tub surface, start with a mild soap or detergent and a clean cloth or sponge. Make sure to rinse thoroughly with water before you wipe down the surface with a dry cloth or towel.

2-3 times per week is ideal for cleaning and reglazing tub surfaces.

What Are Some Tips for Preventing Reglazing Tub Smells in the Future?

To prevent reglazing tub smells in the future, make sure to keep your bathroom humidity low, use mild soap or detergent when cleaning, and regularly clean the air vent and exhaust fan in the bathroom.

How long does bathtub reglazing smell last?

Bathtub reglazing has become a popular method of restoring the look and feel of your bathroom. However, what many homeowners don’t realize is that the process of reglazing a bathtub can leave behind a strong smell. In fact, some people say the smell can last for up to a week.

So, how long does bathtub reglazing smell last? The answer is that it depends on a variety of factors, including the type of bathtub reglaze used and the environment in which it’s being stored. However, generally speaking, most bathtub reglazes will dissipate within a few days.

What Causes Bathtub Reglazing Smell?

The majority of the smell from bathtub reglazing comes from the chemicals used during the process. These chemicals can linger in the air for some time after the job is complete. Additionally, some metals used in the process can also leave behind a strong smell.

How Long Does Bathtub Reglazing Smell Last?

The smell from bathtub reglazing can last for several days to several weeks. It depends on the type of chemicals used and the materials used in the reglazing process.

What Can I Do to Eliminate the Smell?

The best way to eliminate the smell from bathtub reglazing is to use an odor eliminator and ventilation fans to help dissipate the smell. Also, be sure to clean the area after the job is completed to remove any residual chemicals.

How Long Does Bathtub Reglazing Smell Last?

The smell from bathtub reglazing can last for several days to several weeks. It depends on the type of chemicals used and the materials used in the reglazing process.

Bathtub reglazing can leave behind a strong smell, but there are ways to reduce this odor and make your bathroom more comfortable and pleasant to use. Be sure to use an odor eliminator and ventilation fans after the job is complete, and be sure to clean the area thoroughly after the work is done.

What is the smell after bathtub reglazing?

Have you ever wondered what the smell is after a bathtub reglazing? It’s a common question and one that can be difficult to answer. There are a few factors that can contribute to the smell, including the type of adhesive used and the amount of fumes released.

In general, there is a chemical smell associated with reglazing. This smell typically comes from the adhesive or the fumes released during the process. Some people say that the smell smells like paint or varnish, while others find it odorless. It’s important to remember that everyone’s sense of smell is different so you may not be able to detect it at all.

What is the Smell of Bathtub Reglazing?

The smell of bathtub reglazing is typically a combination of chemical smells from the glaze and water-based cleaners, as well as an unpleasant odor from the old glaze.

What Causes the Smell of Bathtub Reglazing?

The smell of bathtub reglazing is caused by several factors, including the type of glaze used, how it was applied, and how long it was left on the surface of the tub.

How Do I Get Rid of the Smell After Bathtub Reglazing?

Removing the smell after bathtub reglazing is usually a simple process. You can use a mild detergent to remove any excess glaze and then use ammonia-based window cleaners to remove any water-based cleaner residue.

What Are Some Tips for Removing the Smell After Bathtub Reglazing?

Here are some tips for removing the smell after bathtub reglazing:

  1. Use organic window cleaners and ammonia-based cleaners to remove any residue left behind from water-based cleaners
  2. Use a mild detergent to remove any excess glaze
  3. Use a fan to help distribute the smell away from your home
  4. If the smell is severe, you may need to call a professional.

What is the smell after bathtub reglazing? At first glance, it may seem like an unsolvable mystery, but in reality, there are several solutions available to help get rid of the smell.

Are bathtub reglazing fumes toxic?

Are bathtub reglazing fumes toxic? Many homeowners and renters are wondering whether the fumes from a bathtub reglazing are hazardous to their health. In this essay, we’ll answer the question of whether bathtub reglazing fumes are toxic.

The bathtub reglazing process is a quick and easy way to renovate your bathroom. The fumes from the resin used in the process can be harmful if you’re exposed to them for prolonged periods of time. However, most people only experience short-term side effects from exposure to bathtub reglazing fumes.

The most common side effect of bathtub reglazing fumes is eye irritation. This occurs when the fumes react with the moisture in your eyes and cause inflammation and redness. Other symptoms of exposure to bathtub reglazing fumes include headaches, nausea, and breathing problems. In very rare cases, people have died from exposure to bathtub reglazing fumes.

If you’re concerned about the health risks posed by bathtub reglazing fumes, talk to your insurance company or contractor about getting coverage for any potential health problems that may arise from exposure to the fumes.

What Are Bathtub Reglazing Fumes?

Bathtub reglazing fumes are the fumes emitted from a bathtub that is being reglazed. They can be harmful to the environment and to people’s health.

What Are the Health Effects of Bathtub Reglazing Fumes?

The fumes from a bathtub reglazed can be harmful to the environment and to people’s health. They can cause breathing problems, damage to the eyes, skin rashes, and even cancer.

What Are the Regulations on Bathtub Reglazing Fumes?

The Occupational Safety and Health Administration (OSHA) has strict regulations regarding the safe use of bathtub reglazing fumes. The regulations state that employees must wear safety glasses, face masks, and gloves when using bathtub reglazing fumes. Workers must also be aware of potential hazards in the surrounding area and be trained in how to safely handle them.

How Can I Minimize My Exposure to Bathtub Reglazing Fumes?

There are a few steps you can take to help minimize your exposure to bathtub reglazing fumes. First, make sure that your tub is properly ventilated. Second, wear proper safety equipment when working with bathtub reglazing fumes. And third, make sure that you are familiar with all of OSHA’s regulations regarding bathtub reglazing fumes.

Bathtub reglazing fumes can be harmful to both the environment and people’s health. By following OSHA’s regulations and taking proper safety precautions, you can ensure that you are not exposed to these fumes.

Can you use baking soda on a Reglazed tub?

Do you need to use baking soda on a reglazed tub? If so, then you’re probably wondering how to go about it safely and effectively. In this essay, we’ll discuss how to use baking soda on a reglazed tub and what the potential dangers are.

When it comes to reglazing a tub, there are a few things to keep in mind.  first and foremost, use caution when working with hot substances. Not only can baking soda be dangerous on its own, but it can also cause neighboring materials to heat up and potentially reach high temperatures. 

Baking soda is effective at removing baked-on stains, so be sure to test the product on a small area first before using it wholeheartedly on the tub. Additionally, be sure to rinse the tub thoroughly after using baking soda to avoid leaving any residue. Finally, be sure to read and follow all safety precautions when using this product.

What is Baking Soda?

Baking soda is a naturally occurring mineral that is used as an abrasive and cleaning agent. It is commonly used in the home for many different purposes, such as cleaning and deodorizing.

What can Baking Soda Do for a Reglazed Tub?

Baking soda can help remove some of the mineral build-ups that can occur in a reglazed tub. It is also good for removing mildew and odors from the tub.

How to Use Baking Soda on a Reglazed Tub

To use baking soda in a reglazed tub, you will need to first soak it in warm water for several hours or overnight. Then, apply it to the tub with a rag or sponge.

Potential Dangers of Using Baking Soda on a Reglazed Tub

The potential dangers of using baking soda on a reglazed tub include the possibility of damage to your tub, as well as an odor or mildew buildup.

What Else Should You Do to Protect Yourself from Baking Soda?

To protect yourself from the potential dangers of using baking soda on a reglazed tub, you should also use gloves and safety glasses when working with it. You should also always ventilate the area where you are working and be aware of any potential fumes or odors that may be released.

Now that you know how to use baking soda on a reglazed tub, you can be sure that you are using it safely and effectively. Remember to always follow all safety precautions and use common sense when working with baking soda.

How do you clean the bathtub after Reglazing?

Have you ever noticed that the bathtub could get pretty grimy after a few years of use? If so, you’re not alone. Many people have had the same problem and have been looking for a way to clean their bathtubs without having to replace them. Luckily, there is a fairly simple way to clean the bathtub after reglazing it.

The first step is to gather all of the materials you’ll need. You’ll need some liquid detergent, a toothbrush, and a scrubber. If your bathtub has a built-in scrubber, you can skip this step.

Fill a bucket with enough water to cover the bathtub and add the detergent. Swish the detergent around in the water until it’s fully mixed in.

Soak the toothbrush in the detergent and scrubbing solution for a few minutes. Rinse off the toothbrush and scrubber.

Move the scrubber into the bathtub and start scrubbing at the bottom. Work your way up until you reach the top. Be sure to stay away from any sharp areas or cracks on the tub surface.

Once you’ve scrubbed all of the surfaces, rinse off the tub with clean water and dry it off with a towel.

Your bathtub should now be clean and ready for use.

What Should I Know Before Cleaning My Bathtub?

Before you even try to clean your bathtub, you should know what products are best for the job. There are many different types of cleaners and scrubbers that can help you get rid of the grime and build-up on your bathtub.

Some of the most popular cleaners and scrubbers include 409, Mr. Clean, and Comet. You can also use a bucket and a scrub brush to clean your bathtub. However, these methods are not as effective as using one of the more popular cleaners.

What Products Should I Use?

Depending on the type of grime and dirt buildup on your bathtub, you may need to use different products. For example, if your tub is stained and has mineral buildup, you may need to use a cleaner with a mineral element to remove it.

If you have hard water, you may need to use a cleaner with a hard water breaker. 

Remember to read the product labels before using them to make sure you’re using the right product for the job.

How Do I Clean My Bathtub After Reglazing?

The most important thing to remember when cleaning your bathtub after reglazing is to use the right products for the job. Start by cleaning off any dust or debris with a vacuum or wet mop and then use a soap and water mixture to remove any residue from the tub. If the tub is really dirty, you can use a cleaner with a mineral element to remove the build-up. Remember to read the product label before using it.

What Happens If I Don’t Clean My Bathtub After Reglazing?

If you don’t clean your bathtub after reglazing, the mineral build-up can over time cause damage to the tub and even lead to leaks. Not only will this cost you money but it can also be a safety hazard if not taken care of properly.

How do you clean a newly reglazed tub?

Have you recently reglazed your tub and are looking for the best way to clean it? You’re not alone. Many people are in the same boat, wondering how to clean a newly reglazed tub.

To clean a newly reglazed tub, you’ll need to use a cleaning solution and a scrub brush. Start by pouring the cleaning solution into the tub and filling it up to the top with water. Swirl the brush around in the solution and then scrub the surface of the tub with it. Make sure to go deep into the cracks and crevices.

Once you’ve scrubbed all of the dirt and wax off of the surface, rinse the tub with water. Make sure to use a soft cloth to dry it off completely before using it again.

What Are Some Tips for Cleaning a Newly Reglazed Tub?

There are several tips and tricks you can use to clean your newly reglazed tub. Start by using warm soapy water and a soft brush to scrub the tub down. Then, use an eco-friendly cleaner like vinegar or baking soda to remove any stubborn stains. Finally, use a clean cloth to dry the tub completely.

These tips will help you clean your tub quickly and easily. If you have any questions, don’t hesitate to ask a friend or family member for help.

What Are Some Tools You Need for Cleaning a Newly Reglazed Tub?

To get the job done properly, you’ll need some of the following tools: a soft brush, a natural sponge, and a scrubber sponge. You can also use a bucket and water to clean the tub.

Once the tub is dry, you can use an old wax cloth or paper towel to remove any leftover wax from the surface. Be sure to use an eco-friendly cleaner to remove any stains that may have been left behind.


Hardening Spray

The hardening spray is a quick and easy way to protect your windows from the elements. It is a great investment for any home or business, as it can help to reduce energy costs and keep your windows looking great.

What is Hardening Spray?

The hardening spray is a water-based, fast-drying, protective coating that can be used to protect windows from the elements. It is applied by spraying it onto the glass and then letting it sit for a few minutes before wiping off any excess.

What Are the Benefits of Using Hardening Spray?

The hardening spray has several benefits, including repelling water and wind, reducing energy costs, and keeping your windows looking great. It is also an easy way to protect your windows from the elements.

How Do I Use Hardening Spray?

To use hardening spray, you will need to first clean the glass with mild soap and warm water. Then, brush a small amount of hardening spray onto the glass and let it sit for a few minutes before wiping off any excess.

What Are Some Tips for Using Hardening Spray Correctly?

Here are some tips for using hardening spray correctly:

  • Always use protective gloves when applying the hardening spray. • Allow the hardening spray to sit on the glass for at least five minutes before wiping off any excess. • Have a paper towel or soft cloth handy in case of any overspray. • Keep the area clear of debris and dirt to prevent clogging up the spray nozzle. • Make sure that you are using the correct type of hardening spray for your application.

Does spray paint harden?

Spray paint is a popular medium for artists and DIY enthusiasts. It offers a quick and easy way to create a unique piece of art or decor. However, there are some questions that people have about spray paint and its durability. Can spray paint harden over time? And if so, how long does it take?

The answer to the first question is yes, spray paint can harden over time. Weathering and oxidation will cause the paint to become less flexible and more brittle. As a result, the paint will start to crack and chip off of surfaces. Depending on the type of spray paint and the conditions in which it’s used, it can take anywhere from a few days to a few months for this process to happen.

The answer to the second question is that it depends on the type of spray paint and how frequently it’s used. Generally speaking, acrylics (paints made of water) tend to dry out more quickly than oils (paints made from solvents). This means that acrylics may harden within a day or two while oils may take weeks or even months. Again, this all depends on the specific product and how often it’s used.

Does Spray Paint Harden?

Yes, spray paint does harden over time. This is due to the chemical reaction of the paint with the air and the substrate it is applied to. It can also be due to exposure to sunlight or heat.

How Long Does Spray Paint Last?

In ideal conditions, spray paint can last up to two years. However, in reality, it can last up to five years or more depending on the type of paint and how it is stored.

What Are the Best Materials for Spray Paint?

The best materials for spray paint are latex paints, alkyds, and enamels. These materials offer the best durability and color quality.

What Are Some Tips on How to Properly Care for Spray Paint?

To ensure that your spray paint lasts as long as possible, it’s important to keep it out of direct sunlight and away from heat sources. Also, make sure that you clean your brushes regularly and store them in a container that is airtight.

Spray paint can be a great medium for creating unique pieces of art or decor but it’s important to take proper care of it. By following the tips outlined above, you can ensure that your spray paint lasts as long as possible.

What can I spray on plastic to make it stronger?

Plastic is a great material for so many things, but it can be easily damaged if not taken care of. If you’re looking to make your plastic items last longer, you should consider what to spray on them. Here are a few of the most popular options:

  1. WD-40 – This lubricant can help protect the plastic from becoming brittle and cracking. It also helps to resist corrosion, making it a good choice for items that will be in contact with water, like raincoats or boat hulls.
  2. Silicone spray – This type of spray is great for protecting objects from scratches and other damage. It also makes the plastic more resistant to heat and cold, making it a good choice for items that will be stored in cold environments or used in hot weather conditions.
  3. Mineral oil – This type of oil is typically used to lubricate gears and other moving parts. It can also be used to protect plastic surfaces from becoming brittle or cracking.

What Can I Spray On Plastic To Make It Stronger?

There are many different types of sprays that can be used to make plastic stronger. Examples include silicone sprays, mineral oil sprays, and water-based sprays. You can also use oil-based sprays as well as degreasing sprays.

What Are Some Benefits Of What To Spray On Plastic To Make It Stronger?

Spraying on a strong material can help protect the plastic from breaking down, making it more durable and less prone to cracking or chipping. It can also increase the surface area of the plastic which makes it more difficult for dirt, debris, or other substances to get stuck to the surface.

What Are Some Things That Can Get Stuck To Plastic?

Dirt, lint, pet hair, germs, and other substances can all get stuck to plastic if not taken care of properly. Using a spray with a strong, solvent-based formula can help dissolve the buildup and help keep your plastic looking clean and fresh.

What Are Some Commonly Used Sprays For Plastic?

Cleaning sprays can be used to help break down dirt and debris that gets stuck to the surface of plastic items. These sprays typically have a strong solvent-based formula which helps dissolve the buildup and keep your plastic looking clean and fresh.

How Do I Know What To Use?

You should always use the right type of spray for the job. Read the label and make sure you are using the correct type of spray for the task at hand.

What to spray on plastic to make it stronger? We hope this article has helped you understand what you can spray on plastic to make it stronger and how to effectively do so. With the right type of spray for the job and some knowledge about what not to use, you can ensure that your plastic lasts longer and looks better.

How do you harden spray paint fast?

Hardening spray paint is a great way to protect your painted surfaces. It can help prevent rust, dirt, and water damage, making your paint job last longer. Follow these easy steps to harden your spray paint:

  1. Mix equal parts water and vinegar in a spray bottle.
  2. spray the mixture onto the surface you want to protect.
  3. Let the paint dry completely.
  4. Repeat the steps for any other areas you want to protect.

What Is Hardening Spray Paint?

Hardening spray paint is a special type of paint that is designed to protect surfaces from rust, dirt, and water damage. It is typically used on exterior surfaces such as metal, wood, and brick.

How Do You Harden Spray Paint?

To harden spray paint, you need to apply it thinly and evenly over the surface. Allow it to dry completely before adding a second coat.

What Are the Benefits of Hardening Spray Paint?

Hardening spray paint can help protect your painted surfaces from rust, dirt, and water damage. It also makes it easier to clean and maintain your painted surfaces.

What Are Some Tips for Hardening Spray Paint?

Here are some tips for hardening spray paint:

  1. Apply the paint thinly and evenly.
  2. Allow it to dry completely before adding a second coat.
  3. Don’t forget to protect any porous surfaces with primer or sealant before painting.
  4. Clean your brushes regularly to avoid clogging with paint residue.
  5. Store your spray paint in a cool, dry place away from direct sunlight and humidity levels.

What Are Some Alternatives to Hardening Spray Paint?

Other options include waxing, waxing, and buffing, or sanding and priming before painting.

HARDENING SPRAY PAINT IS A GREAT WAY TO PROTECT YOUR PAINTED SURFACES FROM RUST, DIRT, AND WATER DAMAGE – MAKE SURE TO USE THE RIGHT PRACTICE TO GET THE BEST RESULTS!

How long does it take for aerosol paint to harden?

Are you looking for an answer to the question, “How long does it take for aerosol paint to harden?” You’re not alone. Hundreds of homeowners and business owners are looking for an answer to this question.

The answer to this question depends on a few factors. The most important factor is the type of aerosol paint that you are using. Some paints harden quickly while others take longer.

If you are using a fast-hardening paint, it will typically harden within minutes. If you are using a slower-hardening paint, it may take hours or even days for it to fully harden.

Another factor that can affect how long it takes for aerosol paint to harden is the temperature. Higher temperatures will speed up the process while lower temperatures will slow it down.

Regardless of the factors involved, it is always a good idea to test a small area of your paint before fully hardening it. This will help you to determine how long it will take for the full coat to harden.

What is Aerosol Paint?

Aerosol paint is a type of paint that is sprayed from a pressurized canister. The paint is made up of an oil base, and it comes in a variety of colors and finishes.

How Does Aerosol Paint Work?

When you shake or tap the canister, the air is forced into the canister and then the paint is atomized into small particles. This creates a thin film of paint that is sprayed evenly across the surface of the object.

How Long Does It Take for Aerosol Paint to Harden?

The time it takes for aerosol paint to harden depends on several factors, including the type of paint, temperature, humidity, and how long you allow the paint to dry before you use it. Generally, it takes between 5 and 15 minutes for the paint to harden completely.

What Factors Affect the Time it Takes for Aerosol Paint to Harden?

The temperature, humidity, and length of time that the paint is left to dry all play a role in how long it takes for aerosol paint to harden. If you are painting a large area or if you are working in a humid environment, it may take longer for the paint to harden.

What Can I Do to Speed Up the Hardening Time of Aerosol Paint?

There are a few things you can do to speed up the hardening time of aerosol paint. First, make sure that the temperature and humidity in your home are controlled properly. Second, make sure that you allow the paint to fully dry before using it. Finally, if possible, use spray cans instead of aerosol cans so that you can control the amount of air used during application.

We hope this article has given you a better understanding of how long aerosol paint takes to harden and what you can do to speed up its process. Remember, each situation will be different so always follow the instructions on the can when applying aerosol paint.

Does spray paint need a hardener?

Spray paint is a great way to create art, but it can be difficult to get a good, clean finish without the use of a hardener. In this essay, we will discuss the different types of spray paint and the different types of hardeners available to help you achieve the perfect finish.

What is a Hardener?

A hardener is a chemical compound that is added to spray paint to make it more durable and create a better bond between the paint and the substrate. Hardeners can be classified into two main groups: solvents and Hardeners.

Solvent Hardeners

Solvent hardeners are made up of organic and inorganic molecules, and they dissolve in oil-based paint systems. They work best when used with spray paint that has a low viscosity, such as European or American lacquers.

Examples of solvent hardeners include mineral spirits, turpentine, and benzene.

Hardener Hardeners

Hardener hardeners are made from either chemical compounds or mixed with plasticizers to make them less viscous. They help to create a tougher bond between the paint and substrate, which is why they are often used in applications where a high level of durability is required, such as automotive painting. 

Some common Hardeners include butyl acetate, paraformaldehyde, vinyl acetate resin, and ethylene glycol monobutyl ether.

What Are the Different Types of Spray Paint?

There are five main types of spray paint: Acrylic, polyurethane, enamel, lacquer, and epoxy. Each type has its own benefits and drawbacks.

How Do I Choose the Right Hardener?

Choosing the right hardener for your spray paint depends on your specific needs. It’s important to research each type of paint and determine which one best suits your project.

What Are the Benefits of Using a Hardener?

A hardener can help to make your spray paint more durable, improve its adhesion to surfaces, and even extend its shelf life. It can also reduce the amount of cleanup required after application.

What Are Some Tips for Using a Hardener?

Here are some tips for using a hardener:

  1. Always test a small area before applying the full can,
  2. Use an applicator,
  3. Allow the hardener to dry completely before touching it,
  4. Apply in small amounts,
  5. Don’t over-apply,
  6. Avoid getting it on your hands or clothing,
  7. Don’t inhale the fumes from the hardener,
  8. Wear rubber gloves when handling the hardener,
  9. Store in a cool, dry area out of reach of children and pets,
  10. Don’t use near any open flames or heat sources,
  11. Read and follow all safety instructions included with the product,
  12. Dispose of used cans properly,
  13. Be sure to follow all local regulations regarding the disposal of hazardous materials.

If you’re looking for a way to improve the durability of your spray paint job, a hardener may be the solution you’re looking for. Browse our selection of hardeners to find the perfect one for your project.

Now that you know how to choose and use a hardener correctly, you’re ready to start creating some awesome art!

How do you harden paint at home?

Are you looking for ways to harden your paint at home? You’re not alone. Many homeowners are looking for ways to make their paint last longer and look better. Here are a few tips to help you:

1. Use Protective Coating

One of the best ways to make your paint look and last longer is to use a protective coating. This type of coating helps to protect the surface from scratches and other damage. It also helps to keep the paint looking new for longer periods of time.

2. Use a Hardener

Another way to make your paint last longer is to use a hardener. This will help to thicken the paint and make it more durable. You can find hardeners in many stores, or you can DIY one by using a mix of equal parts water and white vinegar.

3. Clean Paint Regularly

One of the most important things you can do to make your paint last is to clean it regularly. Not only will this keep it looking clean, but it will also prevent dirt, dust, and other particles from sticking to the surface. Make sure you clean all areas where the paint meets wood or other surfaces regularly.

What Are the Benefits of Hardening Paint?

Hardening paint helps to extend the life of your paint and protects it from damage. It also helps to ensure that your paint lasts longer and looks better.

How Do You Harden Paint?

There are several ways to harden paint at home. You can use a hardener, which is a special additive that is used to make your paint harder, or you can use a chemical called gloss enhancer, which is designed to help your paint look shinier and more reflective.

What Are Some Home Remedies for Hardening Paint?

There are several natural home remedies that can be used to make your paint harder. These include using lemon juice, baking soda, egg whites, milk, and vinegar. You can also try using an oil-based primer before applying the paint.

How Do You Test Your Paint for Hardening?

Testing your paint is key when it comes to figuring out if you need to add a hardener or not. You can do this by applying some drops of water to a small area of the paint and seeing if it bubbles or leaves a mark. If the paint is hardening, you will need to uhardening sprayhardening sprayse a hardener.

What Are Some Tips for Maintaining a Hardened Paint Finish?

To maintain your hardened paint finish, you should clean it regularly, especially if you are using a gloss enhancer or hardener. You should also make sure that the surface is kept dry and free of dust and grit.

Conclusion

We hope this article has helped you learn how to harden the paint at home. With the right knowledge and some simple tricks, you can enjoy long-lasting and beautiful paint for years to come.


Best Gold Spray Paint

Are you looking for the best gold spray paint for your project? You’ve come to the right place. In this article, we’ll discuss the best gold spray paints available on the market today.

First, we’ll discuss what factors to consider when choosing gold spray paint. These include coverage, durability, and price. Coverage refers to how much paint can cover a surface. Durability refers to how well the paint stands up to wear and tear. Price is always an important factor, but it’s not the only one. You need to consider other factors such as brand reputation, color selection, and availability.

After discussing the different factors to consider, we’ll provide you with a list of the best gold spray paints on the market today. We’ve included both name-brand and off-brand products, so you can find something that meets your needs.

Finally, we’ll give you some tips on using gold spray paint. These include using the proper tools and techniques, as well as taking care while painting. So, whether you’re looking for the best gold spray paint for your next project or just trying to find the best option for your personal needs, we hope you find this article helpful.

What Is the Best Gold Spray Paint?

The best gold spray paint is one that is water-based, high-quality, and durable. It should also be suitable for exterior projects and have an easy application process.

What Are the Benefits of Using a Gold Spray Paint?

Gold spray paint is great for decorating any surface, from wood to metal, and it can be used to create a variety of finishes. It is also durable and can be used to protect other surfaces from wear and tear.

What Are the Various Types of Gold Spray Paint?

There are several types of gold spray paint available on the market today, including water-based, oil-based, and latex-based paints. Each type has its own benefits and drawbacks, so it’s important to choose the one that is best suited for your project.

How to Choose the Best Gold Spray Paint for Your Project?

When choosing a gold spray paint for your project, it’s important to consider its properties and suitability for the intended surface. As well, you should consider the cost, availability, and application instructions before making your purchase.

What Are the Benefits of Using a Water-Based Gold Spray Paint?

A water-based gold spray paint is ideal for outdoor projects as it is water-resistant and durable. It also has a low odor and low toxicity, making it safe to use on most surfaces.

We hope you learned why water-based gold spray paint is ideal for outdoor projects and what factors to consider when choosing one. From durability to cost, there is a perfect gold spray paint for any project!

Which gold spray is best?

Are you looking for the best gold spray to remove tarnish, rust, and dirt? You’re not alone. Hundreds of people just like you are looking for a solution to keep their gold jewelry looking its best.

So which gold spray is the best?

There are a lot of gold sprays on the market, but it can be hard to decide which one is right for you. That’s why we’ve gathered information about the top five gold sprays and how they work.

1. Otter Solvents Gold Cleaner and Polish 

This gold spray is best for removing tarnish, rust, and dirt. It also has a smooth shine, so your jewelry will look like new. 

2. Gold Bond Ultimate Cleaner 

This gold spray is great for removing grease and fingerprints, as well as tarnish and rust. It also leaves a beautiful shine on your jewelry. 

3. Brownells Gunsmithing Gold Cleaner 

This gold spray is perfect for cleaning brass, chrome, and stainless steel parts. It also removes tarnish, rust, and built-up grease. 

4. JB Weld Plastic Repair Gold Spray 

This gold spray is perfect for repairing small plastic parts that have been damaged by water or oil. It leaves a beautiful finish that will protect your plastic parts from future damage. 

5 . Meguiar’s Gold Class Auto Detailing Clay Bar 

This gold spray is perfect for removing stubborn dirt, dust, and wax from car surfaces. It also leaves a beautiful shine.

What is Gold Spray?

Gold spray is a form of chemical oxidation that is used to remove tarnish, rust, and dirt from gold jewelry. It works by penetrating the surface of the metal and reacting with the molecules to create a protective layer.

What Are the Benefits of Using Gold Spray?

There are many benefits to using the gold spray. It can help to protect your jewelry from damage, it can also help to restore the shine and luster of your pieces, and it can also help to make your jewelry more attractive.

What Are the Different Types of Gold Spray?

There are several types of gold spray available, each with its own unique qualities and benefits. These include oxalic acid, citric acid, sodium bicarbonate, and others.

What Are the Best Gold Spray Products?

The best gold spray products vary depending on your needs. Some people prefer to use cold-processed products, while others prefer warm-processed products.

How Do I Use Gold Spray?

Once you have decided on a product, you will need to apply it to your jewelry in a controlled manner. This means that you should not apply too much product at once and that you should not apply it in direct sunlight or near heat sources.

Now you know all about the different types of gold spray products, their benefits, and how they are used. We hope that this article has helped you find the best gold spray for your needs.

How do you get shiny gold spray paint?

Are you looking for ways to get shiny gold spray paint? If so, you’re not alone. Many people are looking for ways to get the most out of their spray paint without feeling like they’re being taken advantage of. Here are a few tips to help you get the gold you desire.

First, make sure that you choose the right spray paint. Some paints are shinier than others and will require more coats to achieve the desired effect. If youre is not sure which paint to buy, look for a brand that is known for its gold spray paint.

Second, be prepared to work hard. Spray painting can be a bit tedious, and it may take several coats of paint to achieve the desired effect. Be patient and keep applying pressure to the can as you spray in order to create a thick coat of paint.

And finally, let your art take center stage. Although it may be tempting to add too much gold to your painting, resist the temptation. A little bit of gold goes a long way and will give your painting a polished look.

What Is Shiny Gold Spray Paint?

Shiny gold spray paint is a type of spray paint that has a metallic finish. It is usually used on metals such as silver, gold, and bronze.

What Are The Benefits Of Getting Shiner Gold Spray Paint?

There are many benefits to getting shinier gold spray paint. It can help you make your projects look more expensive than they actually are, it can help you save time by reducing the time it takes to paint, and it can also help protect your project from fading and corrosion.

What Are The Steps To Getting Shiny Gold Spray Paint?

There are a few steps to getting shinier gold spray paint. You’ll need to start by choosing a color, then you’ll need to mix the paint, and then you’ll need to shake the can for the proper amount of time before using it.

How Do You Get Shiny Gold Spray Paint?

Depending on the brand of spray paint you choose, there may be different ways to get it. Some brands may be available in stores, while other brands may be available online.

Getting shiny gold spray paint is not as hard as it seems. With the right knowledge and the right products, you can get the most out of your projects without feeling like you’re being taken advantage of.

Is gold paint real gold?

Are you looking for the answer to the question: Is Gold Paint Real Gold? You’re not alone. Many people are wondering the same thing. In this essay, we’ll explore what makes gold paint different from real gold.

Gold is a precious metal that has been used throughout history as money, jewelry, and other decorative items. The metal is often found in the form of coins and jewelry. Paint made of gold is often used to decorate objects like walls, furniture, and cars. 

The main difference between gold paint and real gold is that the metal in gold paint doesn’t exist in its pure form. Gold paint usually contains a small number of other metals like copper and zinc. These other metals make the paint more affordable and easier to distribute. 

Despite these differences, many people still believe that gold paint is actually made out of real gold. This belief may be based on the fact that most gold paint contains a small amount of metal. If you were to take a sample of this paint and test it for purity, you would likely find that it isn’t really made out of gold at all.

What is Gold Paint?

Gold paint is a type of paint that contains a small amount of real gold mixed into it. It can be used to paint walls, furniture, and other items.

What are the Differences between Gold Paint and Real Gold?

The main difference between gold paint and real gold is the amount of gold in each item. Gold paint usually contains only a small amount of real gold, while real gold can contain up to 99% gold content.

What are the Benefits of Using Gold Paint?

The main benefit of using gold paint is that it can be used to paint items that are more durable than regular wall paints. It is also easier to clean and maintain than other types of paints.

What Are the Drawbacks of Using Gold Paint?

The main drawback of using gold paint is that it can be more expensive than other types of paint. Additionally, it may not be suitable for certain types of surfaces such as drywall or wood floors.

How Can I Tell if My Gold Paint is Real Gold?

If you want to be sure that your paint is real gold, then you should look for a label on the packaging that states it contains at least 99% real gold. Additionally, you should also look for high-quality ingredients in the paint, such as titanium dioxide and zinc oxide.

In this essay, we explored what makes gold paint different from real gold and how to tell if your paint is real gold. We hope that this information has been helpful in your quest to find out if your paint is real gold.

What is the difference between gold leaf and gold spray paint?

Have you ever wondered what the difference is between gold leaf and gold spray paint? Gold spray paint is a popular choice for many projects and can be used to create unique and beautiful designs. In this article, we’ll answer the question: What is the difference between gold leaf and gold spray paint?

Gold leaf is a type of gold decoration that is made from a thin sheet of gold that has been beaten into a thin sheet. It is then coated with a clear lacquer or varnish to protect it and make it look glossy. Gold leaf can be used for a variety of projects, including furniture, wall art, and even home appliances.

Gold spray paint, on the other hand, is a type of paint that comes in an aerosol can. It is usually used to add color to surfaces, such as walls or ceilings. Gold spray paint can be used in a variety of colors and can be more affordable than gold leaf.

What is Gold Leaf?

Gold leaf is a type of metallic decoration that is made from gold foil. It is usually applied in sheets, then pressed into patterns or shapes to create attractive designs.

What is Gold Spray Paint?

Gold spray paint is a type of paint that allows you to create intricate designs quickly and easily. It is made from pigmented solvents and contains an acrylic resin base that allows it to bond with a variety of surfaces.

What Are the Benefits of Gold Spray Paint?

Gold spray paint offers several advantages over traditional methods of decorating such as a gold leaf. It can be used to create intricate designs quickly, it is more durable and it can be applied to a variety of surfaces such as wood, glass, plastic, and metal.

What Are the Different Types of Gold Spray Paint?

There are several types of gold spray paint available including metallics, pearls, glitters, and holsters. Each type has its own unique benefits and can be used to create unique designs.

How to Use Gold Spray Paint?

To use the gold spray paint, apply it evenly over the desired area and allow it to dry completely before moving on to the next step. Once dry, you can add additional layers or details using different colors or patterns. Use caution when applying the paint as it can be harmful if not used properly.

What Are the Pros and Cons of Gold Spray Paint?

The pros of gold spray paint include its durability, strength, ability to bond with various surfaces, and its ability to create intricate designs quickly and easily. The cons include the potential for overspray and the need for additional coats for coverage and it may not be ideal for certain materials such as wood or plaster due to its properties.

Is gold spray paint waterproof?

Are you looking for the best way to paint a wood surface without damaging it? Gold spray paint is an excellent way to achieve this goal.

Gold spray paint is a type of paint that is made out of metal oxide. This type of paint is extremely durable and can last for a long time without degrading. 

One downside to gold spray paint is that it can be difficult to clean. If you make a mistake while painting, be sure to clean the area quickly so that the paint doesn’t dry. 

In conclusion, gold spray paint is an excellent option if you want to avoid damaging your wood surface. Just be sure to clean the area quickly if you make a mistake.

What is Gold Spray Paint?

Gold spray paint is a type of paint that is made up of fine particles of gold and other metals that are sprayed onto surfaces to give them a metallic appearance. It is commonly used for decorating metals, wood, and other surfaces.

What Are the Benefits of Using Gold Spray Paint?

Gold spray paint can be used to give any surface a bright and shiny appearance, as well as protect it from water and other elements. It is also easy to apply and clean up, making it an ideal option for DIY projects and home decorating.

How Do I Use Gold Spray Paint?

To use gold spray paint, simply apply a liberal amount of the product onto the surface you are painting. Then, using a brush or roller, apply the product in gentle strokes until you have reached the desired coverage. It is important to be sure to cover the entire surface evenly with the product.

What Are The Advantages of Using Acrylic Paint With Gold Spray Paint?

Acrylic paint is a great choice for painting with gold spray paint because it provides excellent coverage and adhesion. It also provides extra protection against water and other elements, making it an ideal choice for outdoor projects.

What Are Some Tips To Prevent Damage From Using Gold Spray Paint?

One way to prevent damage from using gold spray paint is to wear protective gloves while applying it. Also, be sure to use a separate pad or piece of paper to spread the product onto the surface so that it does not get on your hands or clothes.

Gold spray paint is an excellent way to give any surface a bright and shiny appearance without damaging it. It is also easy to use and clean up, making it an ideal choice for DIY projects and home decorating. We hope this article has given you a better understanding of gold spray paint and how to use it safely and effectively.

Do you need a primer for gold spray paint?

Are you looking to use gold spray paint to finish your paint job? Before you jump into the process, it’s important to understand the basics of using gold spray paint.

What is Gold Spray Paint?

Gold spray paint is a type of paint that is formulated with a special metallic wax base. It comes in a variety of colors and can be used for a variety of purposes, including finishing a paint job.

What are the Benefits of Using Gold Spray Paint?

Gold spray paint is durable, easy to use, and cost-effective. It also has a high gloss finish and can be used on a variety of surfaces, including wood, metal, and plastic.

What is the Best Way to Use Gold Spray Paint?

The best way to use gold spray paint is to prime it and then apply it in one coat with a fine misting or stream of water. This will help ensure an even finish and reduce the potential for streaking or uneven coverage.

What Are the Potential Hazards of Using Gold Spray Paint?

The biggest hazard of using gold spray paint is that it can be toxic if inhaled or ingested. Make sure you wear gloves and goggles when handling the paint and be sure to ventilate the area while working with it.

What Are the Best Practices for Using Gold Spray Paint?

The best practices for using gold spray paint include wearing protective clothing, following all safety rules, and being sure to read and follow the instructions on the can or bottle before using it.

Conclusion

Now that you understand what gold spray paint is, its benefits, potential hazards, best practices, and more, you can confidently use it to finish your next paint job.


Cordless Paint Sprayers

Is your business looking to buy a cordless paint sprayer? You’re in the right place. This guide will help you understand what a cordless paint sprayer is, how it works, and why it’s a good investment for your business.

A cordless paint sprayer is a device that uses compressed air to atomize the paint. They are popular for small businesses that need to cover large areas quickly, or for homeowners who want to do quick touch-ups on their houses.

There are two main types of cordless paint sprayers: handheld and fixed-position. Handheld sprayers are the most popular because they are portable and easy to use. They have a trigger and a wand that you hold in your hand. Fixed-position sprayers are more accurate, but they require some setup time. They typically have a stand that you mount onto the wall and a wand that attaches to the stand.

Cordless paint sprayers are a good investment for businesses of all sizes. They offer fast and efficient coverage, making them perfect for jobs like painting and carpentry. They also make it easy to cover large areas quickly. Plus, they’re affordable and easy to use, so you won’t have to waste time learning how to use them.

If youre interested in buying a cordless paint sprayer, be sure to consult with a specialist. They can help you find the right device for your business and recommend accessories if necessary.

What is a Cordless Paint Sprayer?

A cordless paint sprayer is a device that allows you to paint walls, ceilings, and other surfaces without the need for an electrical outlet. This can be an advantage if you are working in areas that don’t have an electrical outlet or if you are painting outdoors.

How Does a Cordless Paint Sprayer Work?

The cordless paint sprayer works by using compressed air to atomize the paint on the surface of the object being painted. This process creates a fine mist of paint and allows you to cover large areas quickly and efficiently.

What Are the Benefits of a Cordless Paint Sprayer?

The main benefit of a cordless paint sprayer is that it allows you to work in areas that don’t have an electrical outlet, such as outdoors or in areas with poor electrical infrastructure. It also allows you to work faster and more efficiently than traditional methods of painting.

What Are the Challenges of a Cordless Paint Sprayer?

One of the main challenges of using a cordless paint sprayer is that it can be difficult to control the amount of pressure used when atomizing the paint. This can lead to unevenly applied paint, which can be annoying for customers.

What Are the Best Features to Look for in a Cordless Paint Sprayer?

When shopping for a cordless paint sprayer, look for one that has adjustable pressure settings, a variable boom length, and easy-to-use controls. Additionally, make sure the unit comes with an air filter and is easy to clean.

In this guide, we’ve discussed what cordless paint sprayers are, how they work, and why they’re worth investing in for your business. We’ve also covered some of the best features to look for when shopping for one.

What is the best cordless car paint sprayer?

Are you looking for the best cordless car paint sprayer? You’re not alone. Hundreds of people just like you are looking for a reliable and efficient paint sprayer that is easy to use and doesn’t break down too often.

Here are five of the best cordless car paint sprayers on the market today:

  1. Bosch 12 Amp Cordless Paint Sprayer 
  2. Dewalt DCP728C2 10-Inch Primary Electric Paint Sprayer 
  3. Porter-Cable PC236 12V Max 4- Gallon Paint Sprayer 
  4. SKIL 9161-02 10-Inch Variable Pressure Air Paint Sprayer 
  5. HONDA GC22000 2300 PSI 2 Cycle Gas Powered Power Tool

Each of these paint sprayers has its own unique features and benefits that make them a great choice for those looking for an efficient and easy-to-use option. Let us review each one in more detail so you can decide which one is right for you.

The Bosch 12 Amp Cordless Paint Sprayer is one of the best cordless car paint sprayers on the market because it’s easy to use and doesn’t require a lot of pressure to work. This makes it a great option for those who are new to using paint sprayers or those who are looking for an easier option that doesn’t require a lot of finesse. The Bosch also features an automatic shut-off system that helps prevent over-spraying and accidental fires.

The Dewalt DCP728C2 10-Inch Primary Electric Paint Sprayer is another great option for those looking for an efficient and easy-to-use a paint sprayer. This model comes with two nozzles – one for large areas and one for smaller areas – making it perfect for both general paintings needs as well as detailed work. Additionally, the Dewalt has an auto shut-off system that helps prevent over-spraying and accidental fires, making it a safe option for users of all levels of experience.

The Porter-Cable PC236 12V Max 4- Gallon Paint Sprayer is another reliable and efficient option that is perfect for larger projects. This model features a wide variety of features, including variable pressure control, a non-clogging filter, and an ergonomic design that makes it easy to use even with extended periods of use. The Porter-Cable also comes with a 12-month warranty, ensuring that youre fully protected if something goes wrong with the product.

The SKIL 9161-02 10-Inch Variable Pressure Air Paint Sprayer is another great option if youre looking for an easy-to-use and powerful paint sprayer. This model features three different nozzles – high pressure, medium pressure, and low pressure – making it perfect for a variety of applications from general painting to smaller details like trim work or woodworking. Additionally, the SKIL has a pressure-sensitive trigger that makes it easy to adjust the sprayer to the perfect level of pressure for your needs.

The HONDA GC22000 2300 PSI 2 Cycle Gas Powered PowerTool is another great option if youre looking for a powerful and efficient paint sprayer that is easy to use. This model comes with two nozzles – one for large areas and one for smaller areas – making it perfect for general painting needs as well as detailed work. Additionally, the HONDA has a pressure-sensitive trigger that makes it easy to adjust the sprayer to the perfect level of pressure for your needs. The Honda also features an automatic shut-off system that helps prevent over-spraying and accidental fires.

So which of these five best cordless car paint sprayers is right for you? The Bosch 12 Amp Cordless Paint Sprayer is a great option for newbies or those who are looking for an easier option that doesn’t require a lot of finesse. The Dewalt DCP728C2 10-Inch Primary Electric Paint Sprayer is another great option if you’re looking for an efficient and easy-to-use paint sprayer. The Porter-Cable PC236 12V Max 4- Gallon Paint Sprayer is another reliable and efficient option that is perfect for larger projects. The SKIL 9161-02 10-Inch Variable Pressure Air Paint Sprayer is another great option if you’re looking for an easy to use and powerful paint sprayer. And finally, the HONDA GC22000 2300 PSI 2 Cycle Gas Powered PowerTool is a great option if you’re looking for a powerful and efficient paint sprayer that’s easy to use.

What Should I Look for in a Cordless Car Paint Sprayer?

When looking for the best cordless car paint sprayer, there are a few things you should consider. The first is the size of the sprayer. The larger the sprayer, the more paint it can hold. The second thing to consider is the quality of the sprayer. A good cordless car paint sprayer will be made of high-quality materials and be easy to use.

What Factors Should I Consider When Shopping?

When shopping for a cordless car paint sprayer, there are several factors you should consider. These include the size of the sprayer, the type of material it can handle, and the amount of pressure it can produce. Make sure to read reviews and compare different models to find the one that best fits your needs.

Finding the best cordless car paint sprayer can be a daunting task. We hope this article has helped you understand what to look for and how to find one that fits your needs.

What are the 4 types of paint sprayers?

Do you have a question about paint sprayers? If so, you’re not alone. Hundreds of people just like you are looking for answers about the different types of paint sprayers. Here are four of the most common paint sprayers:

  1. The HVLP (high-volume, low-pressure) sprayer is a popular option for smaller jobs. This type of sprayer uses a lower pressure to apply paint evenly and quickly.
  2. The backpack sprayer is popular for larger jobs. This type of sprayer attaches to your back with straps, so you can move it around easily.
  3. The Germicidal Pesticide (GP) backpack sprayer is ideal for spraying pesticides.
  4. The C-5 liquid boom turn/reach/pack rear wheel drive painter is perfect for bigger jobs or for use in tight spaces.

There are four types of paint sprayers available: electric, pneumatic, airless, and wand. Each type has its own set of benefits and drawbacks. It’s important to choose the right paint sprayer for the job at hand.

What Are the Benefits of Each Type of Spray Gun?

The electric spray gun is easy to use and has a wide range of pressures and settings. It is also lightweight and portable, making it ideal for jobs around the home or office. The pneumatic gun is more powerful and can be used to apply thicker layers of paint. The airless gun is ideal for applying thin layers of paint with precision and accuracy. The wand spray gun is ideal for applying thin layers of paint in tight spaces.

What Are the Different Types of Paint Sprayers?

There are various types of paint sprayers available, such as airless, pneumatic, electric, and wand. Each type has its own set of benefits and drawbacks.

How Do I Choose the Right Paint Sprayer for My Application?

Choosing the right paint sprayer for your application depends on a number of factors, such as your budget, desired performance, and application requirements.

What Are the Best Practices for Using a Paint Sprayer?

The best practices for using a paint sprayer include cleaning and maintaining your sprayer regularly, following the manufacturer’s instructions, and using appropriate safety equipment.

We hope you now have a better understanding of what types of paint sprayers are available, their benefits, and how to choose the right one for your application. We also hope you now have some best practices to help ensure a safe and successful painting project.

Which is the best paint sprayer to buy?

Are you looking for the best paint sprayer to buy? Choosing the right paint sprayer can be a daunting task. There are so many different types of sprayers out there, and it can be difficult to know which one is best for your needs. In this article, we will discuss the different types of paint sprayers and what makes them the best.

Paint sprayers come in a variety of different styles and sizes. If you are just starting out, it might be helpful to consider a handheld paint sprayer. These sprayers are lightweight and easy to use, making them great for beginners. If you need something that is a bit more powerful, however, you might want to consider a power paint sprayer. These sprayers are heavier, but they make it possible to cover larger areas with paint quickly.

There are also different types of paint sprayers based on the type of paint they use. You can find paint sprayers that use gas or air propellants, and each type has its own advantages and disadvantages. Gas-powered paint sprayers are generally more powerful than air-powered paint sprayers, but they require more attention to maintain them and can be more difficult to operate. Air-powered paint sprayers, on the other hand, are less powerful but easier to use and less expensive to buy.

The best way to find the perfect paint sprayer for your needs is to experiment with different models until you find one that works well for you. Ultimately, the best way to choose a paint sprayer is by trying one out in person.

What is a Paint Sprayer?

A paint sprayer is a device that is used to apply paint or other materials to surfaces. It consists of a wand, nozzle, and pressure hose that allows you to spray paint in different directions and in different quantities.

Types of Paint Sprayers

There are several types of paint sprayers available, including water-based, oil-based, and hybrid sprays. Each type has its own advantages and disadvantages, so it’s important to research the different types before making a purchase.

Benefits of Each Type of Sprayer

Water-based paint sprays are easy to use and clean up, but they don’t last as long as oil-based or hybrid sprays. Oil-based sprays have a longer-lasting effect but they can be more difficult to clean up. Hybrid sprays offer the best of both worlds by combining the benefits of both water-based and oil-based paints.

What Makes One Type of Sprayer Better than Another?

The type of material you are spraying affects how well the sprayer works. So, if you are painting a wall with oil-based paint, you will want an oil-based sprayer. If you are painting with a hybrid paint, you will want a water-based sprayer. Each type of paint has its own pros and cons, so it’s important to research the different types before making a purchase.

Which Type of Sprayer Is Right for You?

If you are just starting out with painting, then an oil-based sprayer is probably best for you. If you are experienced and have experience with other types of sprayers, then a hybrid or water-based sprayer may be better suited for your needs. It all depends on what kind of application you are looking for.

Choosing the right paint sprayer can be confusing and overwhelming. We hope this article has helped to shed some light on which type of sprayer is right for you.

Is a handheld paint sprayer worth it?

Are handheld paint sprayers worth it? That is the question many homeowners ask when considering a new painting project. In this essay, we will look at the pros and cons of using a handheld paint sprayer.

The biggest pro of using a handheld paint sprayer is that they are faster and more efficient than traditional painting methods. They are also great for small jobs, such as touch-ups or repairs.

However, handheld paint sprayers have their downsides. First, they can be less accurate than regular painting tools. This means that the end product may not look as good. Additionally, they can be difficult to control, which could lead to unintentional over-spraying.

Ultimately, it depends on what you are looking for in a painting tool. If you want to save time and hassle, a handheld paint sprayer may be the best option for you. However, if you want a high-quality finish, a traditional brush or roller may be better suited.

What are the Pros of Using a Handheld Paint Sprayer?

The biggest pro of using a handheld paint sprayer is that it allows you to cover large areas quickly and efficiently. It also allows you to cover several surfaces in one shot, which is great if you are working on a large project.

What are the Cons of Using a Handheld Paint Sprayer?

The biggest con of using a handheld paint sprayer is that it can be messy and cumbersome to use. You also have to be very careful when using a handheld paint sprayer, as it can be difficult to control the amount of paint that comes out.

What to Look for When Buying a Handheld Paint Sprayer?

When buying a handheld paint sprayer, you should look for one that is easy to use and ergonomic. You should also look for one that has an adjustable nozzle and a regulator that can help you adjust the amount of paint coming out of the nozzle.

Overall, a handheld paint sprayer is worth it if you are looking for an efficient way to cover large areas quickly and efficiently. However, be sure to do your research and make sure you get the right product for the job.

Is airless or HVLP better?

Are you looking for the best airless or hvlp sprayer for your project? Finding the right sprayer for your needs can be a challenge. In this article, we’ll compare the two most popular types of sprayers: airless and hvlp. We’ll explore the differences between the two types, the advantages, and disadvantages of each, and how to choose the one that is best for you.

What Are Airless Sprayers?

Airless sprayers are used for small-scale projects that require a finer mist than a traditional hvlp sprayer. They are also more cost-effective, as they don’t require any gas or electricity.

What Are Hvlp Sprayers?

Hvlp sprayers are used for large-scale projects that require a more powerful mist than an airless sprayer. They are also more cost-effective, as they don’t require any gas or electricity.

What Are the Advantages of Airless Sprayers?

The advantages of airless sprayers include their small size, low cost, and ease to use. They also have no moving parts, making them more reliable and less likely to break down.

What Are The Advantages of Hvlp Sprayers?

Advantages of hvlp sprayers include their larger size, higher cost, longer lifespan, and ability to shoot a wider range of angles than an airless sprayer. They also have more power and can shoot farther distances.

How to Choose the Right Airless or Hvlp Sprayer?

Choosing between an airless sprayer or hvlp sprayer depends on your project and budget. Consider what type of project you’re working on and how much budget you have. Also consider factors such as durability, power, range, and ease of use.

Conclusion

Airless or hvlp sprayers are both great options for projects of all sizes and budgets. We hope this article has helped you to decide which type is best for you and your project.


Best Spray Paint For Glass

Getting the best spray paint for glass can be a daunting task. There are many factors to consider when choosing the right paint for glass and it can be difficult to know what to look for. Luckily, we have put together a list of the best spray paints for glass that are available on the market today.

Some of the best spray paints for glass are Rust-Oleum Universal Metallic, Krylon Fusion, and Hancock Fabrics All-Weather Paint. These paints are perfect for creating a metallic finish on glass. They will give your glass a look that is both beautiful and durable.

If you want to create a more traditional paint finish, then the Rust-Oleum Universal Metallic or Krylon Fusion Spray Paints are perfect for you. These paints have a wide variety of colors and can be used to paint any surface. They also have a high level of durability, making them perfect for use on glass.

If you want to avoid using any solvents, then the Hancock Fabrics All-Weather Paint is perfect for you. This paint is made with non-toxic ingredients and can be used on most surfaces. It has a matte finish that is perfect for creating a clean look on your glass.

Overall, the best spray paint for glass is a personal decision. Some people prefer metallic finishes while others prefer more traditional paint finishes. Whatever your preference, there is spray paint for glass that will fit the bill.

What Makes Spray Paint for Glass Best?

The best spray paint for glass is one that offers a wide range of colors, is easy to use, has a long-lasting finish, and is compatible with glass.

What Are the Different Types of Paint for Glass?

There are several types of paint for glass, including acrylic, latex, and alkyd. Each type has its advantages and disadvantages and should be chosen based on your specific needs.

What Are Some Tips for Choosing the Best Paint for Glass?

When choosing the best spray paint for glass, consider the type of glass you’re painting, its thickness, and the desired finish. Also, be sure to choose a paint that is compatible with glass and has a long-lasting finish.

How Do I Choose the Right Application Techniques?

When applying paint to glass, it’s important to use a technique that is appropriate for the type of paint you’re using. For example, a spray gun should be used when painting on flat surfaces while an airless sprayer should be used when painting on curved or textured surfaces.

How Do I Care For My Paint Job Once It’s Done?

After applying for your paint job, it’s important to protect it from water and dust by using a protective coat or sealer. It’s also important to clean off any overspray from your surface before applying another layer of paint.

Getting the best spray paint for glass is not as hard as it seems. We hope this article helped you understand how to choose the right paint and application techniques so you can get your job done right.

Will any spray paint work on the glass?

Have you ever been curious about whether any spray paint would work on glass? You’re not alone. Many people have the same question and are looking for an answer. In this article, we’ll explore the topic of spray paint on glass and provide tips to help you make an informed decision.

First, it’s important to know that most paint won’t work on glass. The paint will bead up and Bubbles will form, making the finish look terrible. Some paints will work better than others, but they all have one common downside: they’re not weatherproof. If the weather is rainy, windy, or cold, the paint will start to chip and peel off the glass.

So what kind of paint is safe to use on glass? The answer is that there is no one-size-fits-all answer to this question. In general, any type of oil-based paint can be used on glass. However, there are a few exceptions to this rule. Acrylics and enamels are usually not recommended for use on glass because they can cause damage if applied improperly. Additionally, some window cleaners are designed specifically for use on glass and should not be used with other types of cleaners or painted surfaces.

Now that you know which types of paints are safe to use on glass, it’s time to learn how to apply them! First, make sure that your painting surface is clean and dry. Next, measure out the amount of paint that you need and spread it evenly over your surface using a brush or your fingers. Be careful not to apply too much pressure when applying the paint; you want it to be easy to control and spread evenly over the surface.

 Finally, let the painting dry completely before applying any sealants or topcoats. If you do not follow these steps, the paint will not adhere to the glass and will eventually start to peel off.

What is Spray Paint?

Spray paint is a type of paint that comes in a can or a bottle and is designed to be used with a spray gun or airless sprayer. It is used to paint objects such as wood, metal, plastic, and glass.

How Does Spray Paint Work?

When you use spray paint on glass, it works by adhering to the surface of the glass with a layer of paint. It is important to note that the paint will not stick to any other surface, so if you’re painting glass that is not smooth, you may need to use another type of paint.

What Are the Advantages of Using Spray Paint on Glass?

One advantage of using spray paint on glass is that it is easy to use and can be done quickly and easily. It also provides a high level of coverage, which means that it can cover large areas quickly and easily.

What Types of Glass Are Suitable for Spray Paint?

Generally, any type of glass that is clear or translucent is suitable for spray painting. However, some types of glass may be more suitable than others. For example, certain types of laminated glass are less prone to damage from spray paint than other types of glass.

How Do You Apply Spray Paint to Glass?

To apply spray paint to glass, you will need to use a spray gun or airless sprayer. Make sure that you choose the correct type of spray paint for the job and that you follow the instructions on the can or bottle carefully.

What Are the Disadvantages of Using Spray Paint on Glass?

There are several disadvantages of using spray paint on glass that should be considered before deciding to use it. For example, it can be difficult to get an even coat when spraying, it can be expensive and time-consuming to clean up, and it may not be able to withstand high temperatures or weather conditions.

What Are the Options for Cleaning and Protecting Glass With Spray Paint?

Cleaning and protecting your glass with a sealer or wax can help prevent damage from UV rays and other factors, such as wind and rain. In addition, many companies also offer special cleaning kits that are designed for use with spray paint.

In conclusion, we hope this article has provided you with all the information you need about whether any spray paint will work on glass and what types of glass are suitable for it. While there are some disadvantages associated with using it, it can be a great way to give your home or business an artistic touch if used correctly.

Does Krylon spray paint work on glass?

Have you ever wondered if Krylon spray paint works on glass? Krylon spray paint is one of the most popular brands of spray paint in the world. It is used in a variety of projects, from home decor to car repairs.

Theoretically, Krylon spray paint can be used on glass. However, because glass is so thin, the paint will not adhere to the surface. If you’re looking to protect a piece of glass from scratches or other damage, using a protective coating is a better option. 

If you’re just looking for a quick way to add some color to your glass project, Krylon spray paint may not be the best option.

What is Krylon Spray Paint?

Krylon spray paint is a water-based paint that comes in a variety of colors, patterns, and finishes. It is designed to be easy to use, and it can be used on a variety of surfaces.

What are the Benefits of Using Krylon Spray Paint on Glass?

Krylon spray paint is ideal for use on glass because it is water-based, which means it is more durable and easier to clean than other types of paint. Additionally, it is also resistant to harsh chemicals and sunlight.

What are Some Tips for Using Krylon Spray Paint on Glass?

Several tips should be followed when using Krylon spray paint on glass. These include using the right amount of paint, using the correct type of brush, and waiting for the paint to dry before touching it.

Krylon spray paint is a great choice for projects that need to be done quickly and easily. It is durable, easy to use, and resistant to harsh chemicals and sunlight. With the right tips and precautions, Krylon spray paint can be used on glass without any issues.

What kind of paint do you use on glass?

What kind of paint do you use on glass? This is a common question among homeowners and renters. There are many different types of paint available, each with its advantages and disadvantages. In this essay, we will discuss the different types of paint available and their pros and cons.

The two most common types of paint for glass are water-based and oil-based. Water-based paint is generally easier to apply and is less expensive than oil-based paint. However, water-based paints can be less durable and often require more frequent touchups. 

Oily paint is also available as an option for glass painting. This type of paint is more durable than water-based paints, but it can be more difficult to apply. Oily paints also tend to be more expensive than water-based or solvent-free paints.

When choosing paint for glass, it is important to consider the type of glass being painted, the conditions under which the glass will be used, and the desired finish. 

Type of Glass: Water-based and oil-based paints are both available for use on glass. Water-based paints are generally easier to apply and are less expensive than oil-based paints. However, water-based paints can be less durable and often require more frequent touchups. 

Oil-based paint is also available as an option for glass painting. This type of paint is more durable than water-based paints, but it can be more difficult to apply. Oily paints also tend to be more expensive than water-based or solvent-free paints. 

Condition of Glass: For indoor use, water-based or solvent-free paint is typically preferred because they are less likely to cause damage in high-traffic areas. For outdoor use, oil-based paint is typically preferred because it is more weather resistant. 

Finish Desired: When choosing a paint for glass, it is important to consider the desired finish. Water-based paints can provide a glossy finish while oil-based paints provide a semi-gloss or matt finish.

What Kinds of Paint Can You Use on Glass?

There are several types of paint available for glass surfaces, including lacquer, acrylic, latex, and water-based paints. Each type has its advantages and disadvantages.

Pros and Cons of Each Type of Paint

Lacquer is a durable, highly reflective paint that is easy to apply and clean up, but it can be more expensive than other types of paint. On the other hand, acrylic paint is easy to apply, but it can be more expensive than other types of paint. Water-based paints are easy to apply and clean up, but they can be more expensive than other types of paint.

What Are the Best Applications for Each Type of Paint?

For a reflective surface, such as glass, lacquer is the best choice. It is resistant to scratches, dirt, and water and can be easily cleaned with soap and water. For a durable surface, such as glass doors or windows, acrylic paint is the best choice. It is easy to apply and clean up and is resistant to scratches, dirt, and water. For an affordable and quick application, water-based paint is the best choice. It is easy to apply and clean up and is resistant to scratches, dirt, and water.

What kind of paint do you use on glass? There are many options available for your home’s glass surfaces, each with its advantages and disadvantages. In this essay, we discussed the different types of paint available and their pros and cons. We also discussed what kind of application is best for each type of paint.

Can rustoleum spray paint be used on glass?

Are you looking for the best way to paint glass? One of the easiest and most cost-effective ways is using Rustoleum spray paint. In this article, we will discuss how can rustoleum spray paint be used on glass.

First, you will need to determine the type of glass you are painting. There are three types of glass that Rustoleum spray paint can be used on: clear, colored, and frosted. Clear glass is the easiest to work with because it is transparent. You can also use Rustoleum spray paint on colored glass, but it will change the color of the glass. Frosted glass is a bit more difficult to work with because it has a coating on the inside that makes it difficult to paint. 

Now that you have determined the type of glass you will be working with, you need to prepare your surface. Depending on how you are going to use Rustoleum spray paint, you will need different preparation steps. If you are just painting a surface without any details or designs, then you can just mist the surface with Rustoleum and let it dry. 

If you are going to be adding details or designs to your project, then you will need to use a different preparation method. You can either brush or spray Rustoleum over the desired areas and then let it dry. Bear in mind that if you are using a brush, make sure that your brush is wet before applying Rustoleum so that the paint sticks to the bristles properly. 

Once your surface is prepared as desired, it is time to start painting! Start by spraying Rustoleum over the entire surface in light coats until everything is COVERED. After each coat of Rustoleum has dried for about five minutes, continue spraying additional light coats until all areas have been painted. Be sure not to over-paint or your project will become stained.

When your project is finished, allow it to dry completely before removing any excess Rustoleum with a cloth or a brush. Remember to use caution when spraying Rustoleum; it is a powerful paint and can easily cause injury if not used properly.

What is Rustoleum?

Rustoleum is a brand of spray paint that is made of rust-resistant and durable materials. It is one of the most popular brands of spray paint in the market.

What Does Rustoleum Spray Paint Do?

Rustoleum spray paint is designed to provide durable and long-lasting protection for various surfaces such as wood, steel, and plastic. It can also be used to create a variety of decorative effects on various surfaces.

How Can Rustoleum Spray Paint Be Used on Glass?

Rustoleum spray paint can be used to paint glass surfaces such as windows, mirrors, and other glass surfaces. It can also be used to create a variety of decorative effects on glass surfaces.

With the right technique, Rustoleum spray paint can be used to paint glass surfaces. It is an effective way to protect glass from the elements and create a variety of decorative effects.

How do you get spray paint to stay on the glass?

Have you ever wondered how to get spray paint to stay on the glass? It can be a challenge, but it can be done. In this article, we will discuss the different techniques that you can use to get your spray paint to stick to the glass.

One of the most common ways to get spray paint to adhere to glass is to use a primer. Primers are usually a combination of oil and powder and are used to fill in any cracks or holes on the surface of the glass. Once the primer is applied, you can then spray paint. However, if you want your paint to stay on for a longer period, you will need to use a sealant. Sealants are usually a liquid that is used to protect surfaces from water and other chemicals. Once you have applied the sealant, your painting will be protected from fading and water damage.

How Do You Use a Primer?

Primers are used to make the surface of the glass more receptive to the spray paint. They help the paint adhere better and last longer. They also help make the surface of the glassless porous so that the paint doesn’t soak into the surface.

How Do You Use a Primer and a Clear Coat?

To use this technique, you will need two separate primers and two separate clear coats. First, you will need to apply one primer to the glass. Then, you will apply one clear coat to the primer and allow it to dry completely before applying another primer. Once the second primer is dry, you can apply the second clear coat and allow it to dry completely before applying the third clear coat.

How Do You Use a Clear Coat with a Base Coat?

To use this technique, you will need two separate primers and two separate clear coats. First, you will need to apply one primer to the glass. Then, you will apply one clear coat to the primer and allow it to dry completely before applying another primer. Once the second primer is dry, you can apply the second clear coat and allow it to dry completely before applying a base coat.

How Do You Use a Base Coat with a Clear Coat?

To use this technique, you will need two separate primers, two separate clear coats, and two separate base coats. First, you will need to apply one primer to the glass. Then, you will apply one base coat to the primer and allow it to dry completely before applying another base coat. Once the second base coat is dry, you can apply the second clear coat and allow it to dry completely before applying a third base coat.

How Do You Use a Clear Coat without a Base Coat?

To use this technique, you will need two separate primers, two separate clear coats, and two separate base coats. First, you will need to apply one primer to the glass. Then, you will apply one base coat to the primer and allow it to dry completely before applying another base coat. Once the second base coat is dry, you can apply the second clear coat and allow it to dry completely before applying a third base coat.

Conclusion

This article has discussed how to get spray paint to stay on glass using five different techniques. We hope this article has given you an understanding of how each of these techniques works and how they can be used in your projects.


How Many Coats Of Primer On Cabinets?

Are you looking to paint your cabinets but are wondering if you need more than one coat of primer? You’re not alone. Many homeowners are just as confused as you are about the right amount of primer required for painting cabinets.

In general, you should use two coats of primer when painting cabinets. However, there are a few factors to consider before determining how many coats of primer you need: the type of paint you are using, the surface texture of your cabinets, and the climate where you live.

If you are using a traditional paint like base or enamel, then you will need at least three coats of primer to ensure that the paint will adhere well to the cabinet surface. On the other hand, if you are using a more translucent paint like acrylics or watercolors, only two coats of primer will be necessary. 

Another factor to consider is the surface texture of your cabinets. If your cabinet’s surface is composed of multiple layers of wood that have been sanded and finished separately, then you will need more than one coat of primer to ensure complete coverage. On the other hand, if your cabinet’s surface is just one layer of wood with no finish or sanding, then two coats of primer should be enough. 

Finally, consider your climate. In climates where it rains a lot or there is a lot of humidity in the air, it is important to use additional coats of primer because moisture can cause the paint to peel off after it has been applied. In these cases, three or four coats of primer may be necessary.

Overall, two coats of primer are usually enough to cover a cabinet surface. However, if you are using a more sensitive paint or if the surface texture of your cabinets is particularly complex, then you may need additional coats of primer.

What is Primer?

Primer is a base coat of paint that helps to seal the wood surface and provide a smooth finish for painting. It also acts as a barrier between the wood and the paint.

What is the Purpose of Primer?

Primer provides a protective barrier that prevents water, dirt, and other debris from damaging the wood surface. It also helps to reduce the amount of time needed to paint the cabinet.

How Many Coats of Primer Should I Use?

There is no set number of coats that you need to use on cabinets, but it is typically recommended that you use two coats of primer for best results. You should apply each coat lightly and let it dry before applying the next coat.

What Are the Benefits of Using Primer?

Primer provides a protective barrier that prevents water, dirt, and other debris from damaging the wood surface. It also helps to reduce the amount of time needed to paint the cabinet.

How Do I Apply Primer to Cabinets?

To apply primer, start by brushing a thin coat onto the surface of the cabinet using an angled brush or roller. Let it dry completely before applying another coat.

Is one coat of primer enough for cabinets?

Are you looking to prep your cabinets before painting? You may be wondering if one coat of primer is enough for cabinets. In this essay, we’ll discuss the importance of priming cabinets before painting and how to get the job done.

Priming can help your paint adhere to the surface, preventing it from chipping or peeling. Additionally, priming may help to reduce the amount of staining and fading that may occur after painting. However, there are a few things to keep in mind before priming your cabinets. 

Firstly, make sure that your cabinet doors fit snugly against the sides of the cabinet. If they don’t fit properly, the primer may not be able to reach all of the areas that need protection. Secondly, make sure that your cabinet surfaces are clean and free of any water or oil spots. If there are any grease or oil residues on the surface, they will block the primer from bonding to the wood. 

When it comes to priming cabinets, there is no one right answer. It’s important to experiment a little and sees what works best for your particular situation. By following these simple tips, you’ll be able to prep your cabinets for painting without any trouble.

What Is Primer?

Primer is a water-based paint designed to seal porous surfaces such as wood and metal. It is used before painting to provide a better bond between the two layers of paint.

What Is the Role of Primer in Preparing Cabinets?

Primer is used to prepare the surface of the cabinet so that the paint will stick better and last longer. It also helps protect the surface from damage caused by water or other substances during painting.

What Does One Coat of Primer Do?

One coat of primer can provide up to 30 minutes of protection against moisture and UV rays. It also helps create a smooth finish that is easy to clean and maintain.

Is One Coat of Primer Enough for Cabinets?

One coat of primer is usually sufficient to prepare the surface of your cabinets. However, some primers contain additional ingredients that may require additional coats. It is important to read the label carefully before using it on your cabinets.

What Are the Benefits of Priming Cabinets Before Painting?

Priming cabinets before painting can help protect them from damage, reduce staining, improve adhesion, and increase the longevity of your paint job. Additionally, it can help save time and money by reducing the amount of sanding and painting required.

Preparing your cabinets for painting is an important step in ensuring a long-lasting finish. We hope this essay has given you an idea of how to properly prep your cabinets for painting and provided some helpful tips along the way.

Do you sand between primer coats on cabinets?

Are you wondering if you need to sand between primer coats on cabinets? It’s a common question, and the answer depends on your project. In this essay, we’ll discuss the basics of why you need to sand between primer coats and how to do it.

Primer is a key component of painting, and it’s essential that the paint adheres to the surface of your cabinets correctly. When you sand between primer coats, you’re removing any potential bumps or imperfections in the finish. This helps the paint to stick better and create a smoother surface.

There are two types of sandpaper that you can use between primer coats: medium and fine. The difference between the two is based on how much sanding you’ll need to do. If you only need to remove small imperfections, use fine sandpaper. If you have a lot of bumps or roughness, use medium sandpaper. 

There are a few things to keep in mind when sanding between primer coats:

-Always wear protective gear, including gloves and a mask, when sanding. 

-Never use an electric sander on wood surfaces.

-Make sure the surface you’re working on is completely dry before proceeding.

-Never attempt to sand through a primer coat.

What is Primer Coat?

A primer coat is a solvent-based applied coating that seals the wood surface from moisture and dirt. It is used to protect wood from water, dirt, and other environmental elements.

Why Do You Need to Sand Between Primer Coats?

The purpose of sanding between primer coats is to remove excess moisture and dust from the wood surface. This will allow the primer coat to adhere more securely to the wood and provide a better finish.

What Types of Sanding Do You Need to Do Between Primer Coats?

The type of sanding you need to do between primer coats depends on the type of primer you are using and the type of finish you are applying. Generally, you will need to use fine-grit sandpaper or an orbital sander to remove excess moisture and dust particles.

What Tools Do You Need for Sanding Between Primer Coats?

To sand between primer coats, you will need some basic hand tools, such as a sanding block, sandpaper, and an orbital sander. You can also use a vacuum for dust removal and a paintbrush to apply the primer coat.

How to Do Sand Between Primer Coats?

Here are some steps for how to sand between primer coats:

  1. Block sand with fine-grit sandpaper or an orbital sander until the surface is smooth and free of dust.
  2. Vacuum any dust away from the surface and wipe down with a damp cloth.
  3. Apply the primer coat with a paintbrush or roller.
  4. Allow the primer coat to dry before moving on to the next step.
  5. Sand with fine-grit sandpaper or an orbital sander until the surface is smooth and free of dust again.
  6. Vacuum any dust away from the surface and wipe down with a damp cloth.
  7. Apply the finish coat with a paintbrush or roller.
  8. Allow the finish coat to dry before moving on to the next step.
  9. Sand with fine-grit sandpaper or an orbital sander until the surface is smooth and free of dust again.
  10. Vacuum any dust away from the surface and wipe down with a damp cloth once more before moving on to the next step.
  11. Apply any sealants or waxes as desired before moving on to the next step.
  12. Finish with any final touches, such as painting or staining the surface as desired.

Are 3 coats of paint too much for cabinets?

Are you looking to repaint your kitchen cabinets? It’s an important decision and one that requires careful consideration. Here are some questions we’ll answer about how many coats of paint you need for your kitchen cabinets.

How Thick Should the Paint Be?

When it comes to painting your kitchen cabinets, the thickness of the paint will affect how many coats you need. Generally speaking, for a standard home paint job, you’ll need three coats of paint. But remember that this depends on the type of paint, the surface texture, and other factors. If you’re unsure about whether or not you need three coats, ask a professional.

What’s the Surface Texture?

Another factor to consider is the surface texture of your kitchen cabinets. If they’re made from wood, then you may only need two coats of paint. But if your cabinets are made from plastic or another material that’s more porous, then you may need three coats. Again, ask a professional for an estimate based on your specific situation.

Will the Weather Affect How Many Coats I Need?

One final consideration is weather conditions. If it’s wet outside or there’s any moisture buildup on your cabinet surfaces, then you’ll likely want to add a coat or two of sealant to protect the paint from fading and peeling in areas where moisture is present. Again, ask a professional for estimation before starting any painting project.

So, If you’re thinking of painting your kitchen cabinets, be sure to ask yourself these questions and factor in the surrounding conditions before making a decision.

What Types of Paint Should I Use?

When painting kitchen cabinets, you want to choose a type of paint that is durable and will resist water and dirt. You also want to make sure that the paint has good coverage, so you don’t need to apply multiple coats.

How Many Coats of Paint Should I Use?

Depending on the size of your kitchen cabinets, you may need to apply two or three coats of paint. Generally speaking, two coats are sufficient, but three coats is always better safe than sorry.

How Many Hours Does Each Coat Take?

Each coat takes approximately 30 minutes to an hour to dry. This means that if you have four coats, the total time will be four hours.

How Much Does Painting a Kitchen Cabinet Cost?

The cost of painting a kitchen cabinet can vary depending on the size of the job and the type of paint used. Generally speaking, a small job can cost between $200 to $300 while a large job can cost from $500 to $800 or more.

What Are the Benefits of Painting Kitchen Cabinets?

Painting your kitchen cabinets can give them a fresh new look that will help them last longer and look great for years to come. It is also a great way to update your kitchen decor without having to replace the entire cabinet set.

Painting your kitchen cabinets is an important decision and one that requires careful consideration before you start. We hope this article has provided you with the information you need to make an informed decision about whether or not to repaint your kitchen cabinets.

How long should primer dry cabinets?

Do you have a question about how long primer should dry in a cabinet? You’re not alone. Hundreds of people just like you have questions about how long primer should dry in a cabinet.

The answer is, it depends. Primer should dry in a cabinet within 24 hours, but it can take up to 10 days. 

The reason why primer takes so long to dry is that it’s a water-based product. Water molecules are smaller than paint molecules, and they move around more easily. This means that primer will take longer to dry because the water can evaporate and leak out of the cracks in the cabinet walls.

If you’re having trouble with primer staying in a cabinet, there are a few things you can do. One is to seal the cracks with caulk or silicone. Another is to use an airtight closure like a screw-on cover.

What is Primer?

Primer is a thin layer of paint that is used to seal and protect the wood surface from damage. It also provides a smooth finish on the wood.

What Does Primer Do?

Primer provides a protective layer on the wood surface that helps to keep the wood from getting damaged or worn by the elements. It also provides a smooth finish on the wood.

What Are Some Tips For How Long Primer Should Dry In A Cabinet?

Generally, you will want to allow the primer to dry for at least 12 hours before applying any other layers of paint or stain.

What Are The Benefits Of Using Primer In A Cabinet?

Primer provides a protective layer on the wood surface that helps to keep the wood from getting damaged or worn by the elements. It also provides a smooth finish on the wood.

What Are The Drawbacks Of Using Primer In A Cabinet?

Primer can be messy, difficult to clean, and can stain surfaces if not applied properly. Also, it can be difficult to remove if it gets on your hands or clothes.

We hope this article has answered your question about how long primer should dry in a cabinet. We’ve discussed what primers are, what they do, some tips for how long primers should dry in a cabinet, and some of the drawbacks of using primers in cabinets.

Should you do 2 coats of primer on the cabinets?

Are you looking for the best way to prime wood cabinets? You’re not alone. Many homeowners are looking for a way to make their wood cabinets look like new again. But are two coats really necessary?

The answer to this question depends on a few factors, including the type of wood your cabinets are made from and the condition of the surface they’re mounted to. 

If your cabinets are made from solid wood, then two coats of primer may be enough. However, if your cabinets are made from a composite material (like laminate), then you may need to use a three-coat primer. 

If you’re mounting your cabinets to a smooth surface (like tile or stone), then using two coats of primer is generally enough. But if your cabinets are mounted to an uneven or textured surface, like particle board or MDF, then you may need to use a three-coat primer in order to achieve an even finish. 

 So before you buy any new cabinet hardware, be sure to test it out on some scrap wood first. This will give you the best idea of how much primer you’ll need and whether or not two coats will do the job.

What Is Priming?

Priming is a special process used to protect and prepare wood for painting. It helps to seal the wood, creating a barrier between the paint and the wood surface.

What Are The Benefits Of Priming Wood Cabinets?

Priming wood cabinets can help protect them from moisture, dust, and other elements that can damage the finish on the cabinets. It also helps create a smooth, clean surface that is easier to paint.

How Is Priming Done?

Priming can be done using a variety of different techniques. You can use spray or brush-on primer, or you can use a spray or brush-on satin finish.

What Are The Different Types Of Primers For Wood Cabinets?

There are several types of primers available for wood cabinets. These include water-based primers, oil-based primers, satin-finish primers, and latex-based primers.

What Should I Look For In A Primer For Wood Cabinets?

When looking for a primer for wood cabinets, you should consider its durability, ease of use, and cost. You should also look for a primer that is compatible with your paint and finish choice.

Conclusion

Priming wood cabinets is an important step in making them look like new again. We hope this article has helped you understand the process and what to look for in a primer for wood cabinets.


Do You Have To Prime Drywall Before Painting

It can be tricky to know whether or not you have to prime drywall before painting. Luckily, we’ve got you covered! In this post, we’ll discuss whether or not you need to prime drywall before painting, and provide some tips on how to do it.

Priming a drywall surface helps to prevent the paint from sticking to the wall, and also creates a smoother surface for painting. There are a few different ways to prime a drywall surface:

-Spray on a layer of primer before painting. 

-Use an adhesive that is specifically designed for priming drywall.

-Apply primer over a layer of wet plaster or joint compound. 

-Mix equal parts white vinegar and water and apply it to the surface to be painted.

Priming will help to prevent the paint from sticking to the wall, and it also makes the wall more receptive to being painted. However, not all walls need priming to be painted; it depends on the type of paint that you’re using and how well it adheres to drywall. In addition, some paints may require special primers to work properly. Talk with your painter about what needs to be done before painting for the job to proceed smoothly.

Do You Have To Prime Drywall Before Painting?

Yes, you do need to prime drywall before painting. Priming drywall will help to prevent moisture and other materials from seeping into the wall and causing damage.

How Do I Primer Drywall?

There are a few different ways to prime drywall. One option is to use a silicone primer. Another option is to use a traditional primer. Either option can be applied using a sprayer or a brush.

What Is The Difference Between A Silicone Primer And A Traditional Primer?

A silicone primer is a type of primer that is made of silicone. Silicone primers are less likely to clog pores in the drywall, which makes them ideal for use on porous surfaces like drywall. They also last longer than traditional primers and are easier to apply.

What Are Some Tips For Preparing For Painting?

Here are a few tips for preparing for painting:

  1. Make sure that you have all of the materials that you need.
  2. Make sure that the area that you are painting is clean and free of any debris.
  3. Make sure that the surface that you are painting is level.
  4. Make sure that the surface that you are painting is well-covered.
  5. Make sure that the surface that you are painting is protected from the elements.
  6. Make sure that the paint that you are using is compatible with the surface that you are painting.
  7. Make sure that you have adequate ventilation in the area.
  8. Make sure that you have adequate light in the area.
  9. Make sure that you are well-trained in how to use the equipment that you are using.
  10. Make sure that you have a friend or family member to help you if necessary.

In conclusion, priming a drywall surface helps to prevent the paint from sticking to the wall and also creates a smoother surface for painting. There are a few different ways to prime a drywall surface, and each option has its advantages and disadvantages. Ultimately, it is important to consult with a painter before painting to ensure that the job proceeds smoothly.

Priming drywall before painting will help to prevent moisture and other materials from seeping into the wall and causing damage. Be sure to check with your contractor or painter to see if they have any additional tips that you may need to follow.

Can you paint straight onto drywall?

Are you considering painting your walls straight onto drywall? While this may seem like a quick and easy solution, there are a few things to consider before you start. In this article, we will discuss the pros and cons of painting straight onto drywall and give you some tips on how to do it safely.

Straight painting onto drywall can be a quick and easy solution, but there are a few things to consider first. First, ensure the surface is clean and free of oils, dust, or dirt. Next, be sure to prepare the wall by sanding it down to the drywall surface (if necessary). Finally, paint using low-viscosity paint that is compatible with drywall.

What are the Pros and Cons of Painting Straight Onto Drywall?

The pros of painting straight onto drywall include the fact that it is a quick and easy solution. Painting directly onto the drywall is also a cost-effective way to update your walls. However, there are a few cons to consider. First, painting straight onto drywall can be a risky proposition. If you make any mistakes, the paint could easily get wet and cause damage. Additionally, straight painting can be difficult if you have a lot of curves or angles on your wall. If you are unable to paint smoothly, the results may not be satisfactory.

How to Paint Straight Onto Drywall Safely?

There are a few tips that will help you paint straight onto drywall safely. First, ensure the surface is clean and free of oils, dust, or dirt. Next, prepare the wall by sanding it down to the drywall surface (if necessary). Finally, use low-viscosity paint that is compatible with drywall. By following these tips, you can ensure a successful and safe painting experience.

How to Paint Straight Onto Drywall Safely

To paint straight onto drywall safely, follow these tips:

1. Prep the Wall:

Before you start painting, make sure to prep the wall by cleaning it and sanding it down. This will help to ensure that the paint goes on smoothly and does not get wet.

2. Use Good Paint:

Make sure to use good quality paint that is compatible with drywall. If you use paint that is not compatible, the paint could easily start to peel off the wall.

3. Use Protective Coating:

Before you start painting, apply a protective coating to the wall. This will help to prevent the paint from getting wet and causing damage.

4. Check the Finished Product:

Once the paint is dry, check the finished product to make sure that it is correct. If there are any problems, such as paint chips or water spots, then remove them.

Painting straight onto drywall is a quick and easy solution, but be sure to take precautions to ensure that the paint goes on smoothly and does not get wet.


Can you paint over drywall without a primer?

Many homeowners are interested in painting over drywall without primer. There are a few reasons for this. Primer can be expensive, it can be difficult to apply, and it can be time-consuming.

If you’re considering painting over drywall without primer, there are a few things to keep in mind. First, ensure the surface is clean and free of dust or debris. Next, be sure to use high-quality paint that will adhere to the drywall. Finally, be sure to apply the paint evenly and carefully.

What is Drywall?

A drywall is a type of wallboard that is made of paper and other materials. It is often used in place of real brick or stone in new construction. The drywall is solid and can be painted or covered with wallpaper.

What are the Advantages of Painting Over Drywall Without Primer?

There are many advantages to painting over drywall without primer. Primer can be expensive, it can be difficult to apply, and it can be time-consuming. Painting over drywall without primer is also easier and faster.

Some of the benefits of painting over drywall without primer include:

-Drywall is a very strong material, but paint can easily remove it. Painting over drywall without primer will protect your home from damage caused by the paint.

-Primer can be difficult to apply evenly and correctly. Paint will adhere to the surface better if it is applied without a primer.

-If you’re painting over a large area, it can be time-consuming to apply primer and then paint. Painting over drywall without a primer will save you time and energy.

How Can I Paint Over Drywall Without a Primer?

There are a few ways to paint over drywall without primer. One way is to use a sealant that will coat the surface of the drywall and protect it from paint. Another way is to use high-quality water-based paint that will adhere to the drywall. The best way to find out if a particular type of paint will adhere to drywall is to try it on a small area first.

What are the Disadvantages of Painting Over Drywall Without Primer?

The main disadvantage of painting over drywall without primer is that it can be difficult to correct mistakes. Also, if the paint is not applied properly, then the drywall may not be protected.

Can I Paint Over Drywall Without a Primer if I am Experienced?

Yes, you can paint over drywall without primer if you are experienced. However, it is important to note that you may not be able to correct mistakes if they are made. If you’re painting over a large area, it is best to use a primer first.

What is the Best Way to Apply Paint Over Drywall Without Primer?

The best way to apply paint over drywall without primer is to use a brush. You should also use a primer if you are painting over drywall without a primer. If you use a brush, make sure to apply the paint evenly and carefully.

Painting over drywall without primer is a great way to update your home without spending a lot of money. However, be sure to consider the disadvantages before you start painting.


What happens if I don’t prime my walls before painting?

Painting your walls is a great way to add some personality and life to your home. However, before you start painting, it is important to prime the walls. prime the wall means covering the wall with a layer of paint that will help to prevent the paint from peeling or chipping. If you do not prime your walls, the paint may start to peel after a few weeks or months, and the paint will also chip more easily.

What is The Purpose of Priming The Walls?

Priming the walls is important to prevent the paint from peeling or chipping. Priming also helps to create a smoother surface on which to paint. If you do not prime the walls, the paint may start to peel after a few weeks or months, and the paint will also chip more easily.

When Should I prime my Walls?

The best time to prime your walls is before you start painting them. However, you can also prime the walls if you are going to be painting over a previous coat of paint.

What are Some Common Reasons Why Walls May Need Priming?

Walls may need priming if they are newly painted, if the paint has been damaged in some way, or if the wall is subject to high humidity levels.

How Do I Prime The Walls?

There are a few different ways that you can prime the walls. One option is to use a spray primer. Another option is to use a sealant. You can also prime the walls using a brush or a roller.

Which Type of Primer Should I Use?

There is no one answer to this question. You should use the primer that is most suited to the type of paint that you are using. Some primers are designed to be used with spray paint, while others are designed to be used with brush or roller techniques.

Are There Any Side Effects To Prime The Walls?

There may be some side effects to priming the walls. These side effects depend on the type of primer that you use and on your skin and hair type. However, most people do not experience any side effects from priming the walls.

What are the Side Effects of Not Priming The Walls?

Not priming the walls can lead to peeling paint, chipped paint, and worse. By priming the walls, you can help to prevent these issues from happening.

Tips: 8 Tips for Priming Your Walls

  1. Make sure that the walls are clean and free of any debris.
  2. Choose the right primer or sealant for the type of paint that you are using.
  3. Prime the walls in the correct order – first, apply a coat of primer, then a coat of paint.
  4. Wait at least 24 hours before painting the walls.
  5. Allow the primer to dry completely before painting.
  6. Keep the walls clean and dry to prevent paint from chipping.
  7. Avoid painting near windows or doors, which are high-humidity areas.
  8. Check with the manufacturer of the paint for specific instructions.


Is primer necessary on new drywall?

The new drywall is a popular material that is used in many homes and businesses. The new drywall is made of gypsum and other materials, which makes it stronger and more durable. However, there is a new drywall primer that is needed to make the new drywall work properly.

Primer is a substance that is used on new drywall to help the wall adhere to the surface it is being built on. Without primer, the new drywall may not stick to the wall and may eventually fall. Primer also helps to resist moisture and other damage. If you are thinking of using new drywall in your home or business, be sure to get a primer kit and apply it before beginning construction.

What is The New Drywall Primer?

The new drywall primer is a substance that is used to make the new drywall work properly. The primer makes the new drywall stick to the wall, which makes it stronger and more durable. The primer also helps to resist moisture and other damage. 

How is The New Drywall Primer Used?

Primer is used in two ways. The first way is to apply it before you begin construction. When you are putting up the new drywall, you will need to apply a coat of primer to the wall. Then, you will need to wait until the primer has dried before you start building on it. 

The second way that primer is used is when you are repairing or replacing old drywall. If you are doing a renovation, and you find that there is damage on the walls, you can use a primer to help repairs stick better. Lastly, if you are replacing old drywall with new drywall, make sure to get a primer kit so that the new drywall will adhere properly.

What is The Purpose Of The New Drywall Primer?

The purpose of the new drywall primer is to make the new drywall stick to the wall. This makes the new drywall stronger and more durable, which is why it is often used in homes and businesses. The primer also helps to resist moisture and other damage.

What are the Risks of Not Using The New Drywall Primer?

If you don’t use the new drywall primer, the new drywall may not stick to the wall. This can cause it to fall, which is a risk in any renovation project. Additionally, if you are repairing or replacing old drywall, without the primer the repairs may not hold. Finally, if you are using new drywall in place of old drywall, without the primer the new drywall may not adhere to the surface well.

How Much Does The New Drywall Primer Cost?

The new drywall primer cost depends on the brand and the size of the container. However, the cost of the primer is often less than the cost of replacing the wall.

What Are The Advantages Of Using The New Drywall Primer?

The advantages of using the new drywall primer include the following:

  1. The new drywall primer makes the new drywall stronger and more durable.
  2. The new drywall primer makes the new drywall stick to the wall.
  3. The new drywall primer is less expensive than replacing the wall.

The new drywall primer is a substance that is needed to make the new drywall work properly. The primer makes the new drywall stick to the wall, which makes it stronger and more durable. The primer is less expensive than replacing the wall, and the advantages of using the primer include the following.


Is it better to roll or spray primer on new drywall?

New drywall is a great way to update your look, but before you start painting or installing flooring, be sure to primer the wall. Priming will help the paint and flooring stick to the wall and improve the overall look and durability of your new drywall installation.

There are two main types of primers: roll and spray. Roll primers are applied with a roller, while spray primers are applied using an aerosol can. Both methods work well, but there are some important differences to consider before you make your decision.

Roll primers are cheaper and easier to use, but they also require more time and manpower than spray primers. They’re also less effective at coating the entire wall, so be prepared to apply several coats if you want a solid finish.

Spray primers, on the other hand, are more expensive but offer a better overall result. They coat the wall in one go and provide a more durable finish that will last longer than roll primer. However, they can be more difficult to use – especially if you have large areas to cover – so be prepared for some trial and error before getting the perfect result.

What is The Primer That You Should Use For New Drywall?

There are a few primers that you can use for new drywall. Some primers are designed to help the paint and flooring stick to the wall. Other primers are designed to protect the wall from moisture and other damage.

What are The Benefits of Priming New Drywall?

The benefits of priming new drywall include increased durability, improved paint, and flooring adherence, and a more finished look.

Which Primer Should You Use For New Drywall?

If you are using a primer designed to help the paint and flooring adhere to the wall, then you should use the primer. If you are using a primer designed to protect the wall from moisture and other damage, then you should use the primer.

What Should You Do If You Don’t Have The Primer That You Need?

If you don’t have the primer that you need, then you can use another primer that is designed for new drywall. However, be sure to test the primer before you use it on the wall.

Priming your new drywall installation is important for a finished look and increased durability. Be sure to choose the primer that is right for your needs and test it before you use it on the wall.


Do You Have To Sand Primer Before Painting Metal

Many people think that you have to sand the primer off of metal before you paint it. However, this is not always the case. In fact, there are times when you can paint over the primer without sanding it off.

The key to deciding whether or not you need to sand the primer off of metal is to consider what type of paint you are using. If you are painting with traditional oil-based paint, you will need to sand the primer off of the metal. However, if you are using water-based paint, you can skip the sanding step.

If you are unsure whether or not you need to sand the primer off of metal, it is always best to consult a professional. They will be able to tell you which type of paint and how much sanding is necessary.

What are the Cases When You Can Paint Over The Primer?

There are a few cases where you can paint over the primer without sanding it off. These cases include:

-When you are painting a new area on the metal that has not been painted before.

-When you are painting over a preexisting coat of paint.

-When the primer is made of a material that will not discolor or fade under the paint.

What are the Cases When You Have To Sand The Primer Off?

There are also a few cases where you have to sand the primer off. These cases include:

-When you are using traditional oil-based paint.

-When you are using water-based paint that will not adhere to the metal.

-When the primer is made of a material that will discolor or fade under the paint.

What are the Reasons for Sanding The Primer Off?

There are a few reasons for sanding the primer off. These reasons include:

-To improve the adhesion of the paint to the metal.

-To remove any roughness or blemishes on the metal.

-To create a smooth surface on which to paint.

Easy Tips for Painting Metal

If you’re painting metal, there are a few things you should keep in mind. First, if you’re using an oil-based paint, you’ll need to sand the primer off before painting. However, if you’re using a water-based paint, you can skip that step. Second, if you’re unsure whether or not you need to sand the primer off, it’s always best to consult a professional. They’ll be able to tell you which type of paint and how much sanding is necessary. Finally, there are a few cases where you can paint over the primer without sanding it off. These include when you’re painting a new area on the metal that hasn’t been painted before or when you’re painting over a preexisting coat of paint.

If you are new to painting metal, follow these three easy tips for a successful outcome.

  1. Make sure that the metal is clean.
  2. Use a good primer.
  3. Use a good paint.

How do you prepare primed metal for painting?

Painting over metal is a great way to protect it and add a new layer of protection to your metal. However, before painting, you need to prep the metal. Preparing the metal means cleaning it and priming it.

To clean the metal, use a wire brush to remove any dirt, dust, or rust. Then use a degreaser to remove any oil or grease. Finally, use a polish to shine the metal. 

To prime the metal, you need to coat it with a primer. There are many types of primers available, but the most common is spray paint. Primers protect the metal from oxidation and corrosion. 

When you are ready to paint, first clean your brushes and Palette Knife. Then apply the primer to your entire surface using a brush. Make sure to cover all of the areas that you plan on painting. 

Next, apply your paint using a brush or palette knife. You can use any type of paint that you want—even acrylics! Just be sure to follow the manufacturer’s instructions for application and coverage. 

When you are finished painting, simply wash your brushes and Palette Knife in warm water and soap, then rinse them off thoroughly.

What is the Difference Between Preparing and Painting Metal?

Preparing metal means cleaning it and priming it. Priming metal means filling in any imperfections on the metal so that the paint will adhere to it better.

What Are the Steps for Preparing Metal for Painting?

There are three main steps to preparing metal for painting: cleaning, priming and painting.

How Can You Clean Metal?

You can clean metal with a variety of methods. Some popular methods are using water, soap and a scrub brush. You can also use a wire brush to remove any dirt, dust, or rust.

How Do You Primer Metal?

There are many types of primers available, but the most common is spray paint. Primers protect the metal from oxidation and corrosion.

What Are the Steps for Painting Metal?

There are three main steps to painting metal: cleaning, priming and painting.

How Can You Prime Metal?

Priming metal means filling in any imperfections on the metal so that the paint will adhere to it better. You can prime metal with a number of methods, including spray priming, foam priming, and brush priming.

What is the Difference Between Preparing and Painting Metal?

Priming metal means filling in any imperfections on the metal so that the paint will adhere to it better. Preparing metal means cleaning it and priming it. Painting over metal is a great way to protect it and add a new layer of protection to your metal. However, before painting, you need to prep the metal. Preparing the metal means cleaning it and priming it.

How Can You Paint Metal?

Painting over metal is a great way to protect it and add a new layer of protection to your metal.

Preparing metal for painting is essential for a great finish. With these steps, you will be able to paint over metal with confidence. What other ways do you protect your metal? We’d love to hear from you.


Should I sand between primer coats on metal?

There are a few different factors that you should take into account when deciding whether or not to sand between primer coats on metal. First, you’ll want to make sure that the material that you’re sanding is strong enough to handle the sanding process. Second, you’ll want to make sure that the sanding won’t cause any damage to the underlying metal. Finally, you’ll want to make sure that the sanding process is done properly so that the finished product looks consistent.

What is The Purpose of Sanding Between Primer Coats?

Sanding between primer coats on metal helps to smooth out the surface of the metal so that it is easier to paint or stain. This is especially important on metal that is going to be used in a harsh environment, such as metal that is used in construction. By sanding between the coats, you’re also reducing the amount of time that it takes to finish the job.

How Often Should I Sand Between Primer Coats?

There is no one answer to this question since it will depend on the specific material that you’re sanding, the hardness of the metal, and how well you’re sanding. However, generally speaking, you should sand between primer coats every two or three months.

What are the Risks of Not Sanding Between PrimerCoats?

If you don’t sand between primer coats, you run the risk of creating bald spots or other inconsistencies on the surface of the metal. Additionally, if you sand too much, you can damage the underlying metal. Finally, not sanding can also lead to paint or stain bubbling or peeling.

How to Sand Between Primer Coats on Metal Properly?

There is no one perfect way to sand between primer coats on metal, since it will depend on the type of material that you’re working with and your own personal technique. However, there are a few tips that will help you get started.

For example, start by using a moderate amount of sandpaper in order to smooth out any rough patches. Then, use a finer sandpaper to smooth out any areas that were roughed up by the first round of sanding. Finally, make sure that your strokes are even and consistent so that you avoid damaging the metal.

What is The Difference Between a Fine and a Coarse Sandpaper?

A fine sandpaper is typically used for sanding between primer coats on metal. This type of sandpaper has small grains that are very close together. A coarse sandpaper is typically used for sanding large areas. This type of sandpaper has larger grains that are spread out more.

How Should I Sand Between Primer Coats On Metal?

You should sand between primer coats on metal using a consistent, even pressure. You should also use a clean sandpaper each time that you sand between primer coats. Finally, you should use a light touch when sanding so that you don’t damage the underlying metal.

Sanding between primer coats on metal can help to smooth out the surface of the metal and make it easier to paint or stain. Make sure to use a consistent, even pressure, use a clean sandpaper each time, and use a light touch when sanding.


Should you sand your primer before painting?

Do you want to make sure that your primer is properly sanded before painting? Here’s what you need to know!

Primers are designed to help paint adhere to the surface it’s being applied to. If the primer isn’t sanded properly, it can cause paint to stick too firmly to the surface and be difficult to remove. This can lead to uneven coloration and peeling, both of which you probably don’t want on your walls!

So before you start painting, make sure that your primer is sanded down as smooth as possible. It’ll make your job a lot easier and ensure that your walls look great!.

What is The Purpose of a Primer?

Primers are used to increase the adhesion of the paint to the surface that it will be applied to. This will make the paint last longer and resist chipping and peeling.

What is The Difference Between a Primer and a Paint?

A primer is a product that is applied before you paint. A paint is the actual paint that you will use on the surface that you are painting.

What is The Purpose of a Sandpaper?

A sandpaper is used to sand the primer before you apply the paint. This will make the primer adhere better to the surface that you are painting.

What is The Difference Between a Fine and a Coarse Sandpaper?

A fine sandpaper is used to sand the primer. A coarse sandpaper is used to add more texture to the surface that you are painting.

When it comes to painting your home, you need to make sure that your primer is properly sanded before painting. This will ensure that the paint will adhere better to the surface and last longer.


Do you need to sand after priming?

Many homeowners choose to sand after priming their home. This is often done in an effort to achieve a smoother finish. However, is this necessary?

Priming your home is the process of filling in any small holes or cracks in the surface of your wall or door. This is done to ensure that the paint will adhere to the surface, and that any imperfections will be covered. 

Once primed, it’s typically safe to walk on the surface. However, if you plan on staining or painting over the area, it’s important to sand down any patches or rough spots first. Doing so will ensure that the paint has a smooth surface to adhere to. 

If you don’t need to sand after priming, you may save time by skipping this step altogether. However, if you do decide to sand, be sure to use a coarse sandpaper instead of a fine one. This will help avoid any scratches or gouges in your paint job.

What is The Purpose of Sanding After Priming?

The purpose of sanding after priming is to remove any excess sealant that may have been applied. This will allow the paint to flow more easily and to create a smoother finish. Additionally, sanding after priming can remove any small bumps or imperfections that may be on the surface.

Why Might I Choose To Not Sand After Priming?

There are a few reasons why someone might choose to not sand after priming. First, if the primer is applied correctly, sanding after priming may cause more damage than necessary. Secondly, if the surface that is being primed is very rough, sanding may not be the best option. In these cases, a smoother finish may be achieved by using a sealant instead.

Is Sanding After Priming Necessary?

In most cases, sanding after priming is not necessary. If the surface is very rough, or if the primer was not applied correctly, then a smoother finish may be achieved by using a sealant instead. However, if the surface is smooth and the primer was applied correctly, then there is no need to sand after priming.

If you are unsure whether or not to sand after priming, it is best to consult with a professional. However, in most cases, sanding after priming is not necessary.


Can I skip sanding if I use primer?

Many homeowners choose to prime their wood before they start sanding. Priming helps to seal the wood and prepares it for the sanding process. However, there may be a time when you don’t have time to sand the entire project. In this case, you can skip the sanding process and primer the wood. Just be sure to follow the manufacturer’s instructions for priming and sanding.

What is Priming?

Priming is a process of sealing the wood from the outside. This helps to prevent the wood from absorbing water and dirt. Priming also makes the wood more resistant to damage from water, oil, and other chemicals. 

How Does Priming Work?

Priming begins by applying a coating of paint or an adhesive to the surface of the wood. Next, the wood is sanded to a smooth finish. Finally, a clear sealant is applied and the wood is allowed to dry.

When Should I Prime My Wood?

You should prime your wood if you want to prevent water and dirt from damaging the project. Priming also makes the wood more resistant to damage from water, oil, and other chemicals. 

How Often Should I Prime My Wood?

You should prime your wood every time you sand it. However, you may only need to prime it once if your project doesn’t contain any big knots or crevices.

When Should I Prime My Wood?

You should prime your wood before you start sanding. This will help to prevent the wood from absorbing water and dirt. It also makes the wood more resistant to damage from water, oil, and other chemicals.

Can I Skip the Sanding Process and Primer the Wood?

Yes, you can skip the sanding process and primer the wood. Priming will help to seal the wood and prepare it for the sanding process. Just be sure to follow the manufacturer’s instructions for priming and sanding.

What are the Advantages of Priming?

The main advantage of priming is that it will prevent the wood from absorbing water and dirt. Additionally, priming can make the wood more resistant to moisture damage.

What are the Disadvantages of Priming?

The main disadvantage of priming is that it can make the wood more prone to water damage. Additionally, primer can also cause some minor discoloration and a decrease in the wood’s strength.

Priming is a great way to prepare your wood for the sanding process. By skipping the sanding process, you can save time and money.


What happens if you don’t sand before primer?

If you don’t stand before primer, you may be missing out on a big tax deduction! When you or your tax preparer files IRS form 8917, you can deduct a portion of your total expenses for qualifying home improvement projects. This includes expenses for sanding and priming your floors.

If you don’t sand before primer, your floors will likely be less desirable to potential buyers and may cost you more in the long run. By sanding your floors before priming, you’re giving your floor a smooth surface which will make it easier to clean and also look nicer. 

If you’re thinking of doing some home improvement projects but aren’t sure if sanding or priming is required, consult with a qualified professional. They can advise you on the best course of action for your particular situation.

What is The Deduction Limited Per Tax Year?

The most that you can deduct during a tax year is $500 for the tax year 2019. If you spend more than $500, then that amount can not be deducted. Also, the excess cost can not be carried over to the next year. This means that you need to account for every penny that you spend when you’re preparing your tax returns.

What is The Home Improvement Project That Qualifies for The Deduction?

The home improvement project that qualifies for the deduction is any project that is related to your home. This includes projects that are for the improvement of your home’s exterior, interior, or structural components.

What Are Some Examples Of Home Improvement Projects?

Some examples of home improvement projects that may qualify for the deduction are caulking and painting your walls, installing new flooring, and repairing your roof.

What Are The Limitations On The Home Improvement Project Deduction?

The limitation on the home improvement project deduction is that the project must be done to improve your home’s exterior, interior, or structural components. You cannot claim the deduction if the project is done for the purpose of increasing the value of your home.

What Should You Do If You Need To Deduct More Than The Limit Of $500?

If you need to deduct more than $500, you should contact your tax preparer to see if they can help you get the full amount of the deduction. You can also find additional information online.


How Old Do You Have To Be To Buy Spray Paint In California?

California has some of the most restrictive laws when it comes to purchasing spray paint. For example, you must be at least 18 years old to purchase spray paint in most places in California. However, there are a few exceptions. For example, you can purchase spray paint for use in a hobby or for artistic purposes if you are at least 16 years old.

If you are under the age of 18, you may be able to get spray paint from a manufacturing or distribution company. You must have written proof of your age and the company must agree to sell you the product.

How Old Do You Have To Be To Buy Spray Paint In California?

In California, you must be at least 18 years old to purchase spray paint. Some exceptions to this rule include:

You are 18 years of age or older and are purchasing spray paint for your personal use

And you are 18 years of age or older and are a full-time student, and the spray paint is for academic purposes

You are 18 years of age or older and are a part-time student, and the spray paint is for academic purposes

Moreover, You are 18 years of age or older and are a military member, and the spray paint is for military purposes

You are 18 years of age or older and are a law enforcement officer, and the spray paint is for law enforcement purposes

You are 18 years of age or older and are a member of the media and the spray paint is for reporting purposes

What Are The Other Exceptions To The Age Requirement?

There are a few other exceptions to the age requirement. These include:

You are 16 years of age or older and are purchasing spray paint for your personal use

You are 16 years of age or older and are a full-time student, and the spray paint is for academic purposes

Also, you are 16 years of age or older and are a part-time student, and the spray paint is for academic purposes

You are 16 years of age or older and are a military member, and the spray paint is for military purposes

And you are 16 years of age or older and are a law enforcement officer, and the spray paint is for law enforcement purposes

-You are 16 years of age or older and are a member of the media and the spray paint is for reporting purposes

Why do you need ID for spray paint?

When you are looking to buy spray paint, you may be wondering why you need identification. After all, who buys spray paint without an ID? Well, in some cases, you may need identification to purchase spray paint.

If you are a retailer, for example, you may need to show identification to prove that you are over the age of 18. This is because spray paint is considered a controlled substance. If you are not over the age of 18, you will likely be required to show identification before purchasing spray paint.

Another reason why you may need to show identification when buying spray paint is if the product contains hazardous chemicals. In some cases, these hazardous chemicals can only be used by people who have a certificate of safety from the manufacturer. Again, if you do not have this certificate of safety, you will likely not be able to purchase the product.

So, in short, when you are looking to buy spray paint, be sure to have your ID with you. This will help prove your age and make sure that you are using the product safely.

What is The Reason You May Need Identification To Purchase Spray Paint?

There are a few reasons that you may need identification to purchase spray paint. The first reason is that some states have laws that restrict the sale of spray paint to adults. If you are not an adult, then you may not be able to purchase the spray paint.

Another reason why you may need identification to purchase spray paint is if the product contains hazardous chemicals. In some cases, these hazardous chemicals can only be used by people who have a certificate of safety from the manufacturer. Again, if you do not have this certificate of safety, you will likely not be able to purchase the product.

So, in short, when you are looking to buy spray paint, be sure to have your ID with you. This will help prove your age and make sure that you are using the product safely.

What is The Second Reason That You May Need Identification To Purchase Spray Paint?

Another reason that you may need identification to purchase spray paint is because some stores may require proof of age. For example, some stores may require a driver’s license or an ID card to purchase spray paint. If you do not have this type of identification, you may not be able to purchase the spray paint.

What is The Third Reason That You May Need Identification To Purchase Spray Paint?

The third reason that you may need identification to purchase spray paint is because some stores may require a photo ID. For example, some stores may require a passport or a driver’s license to purchase spray paint. If you do not have a photo ID, you may not be able to purchase the spray paint.

What Should You Do If You Cannot Find The ID That You Need To Purchase Spray Paint?

If you cannot find the ID that you need to purchase spray paint, then you may need to look for a different store. Alternatively, you may be able to purchase the spray paint without the ID. However, this will likely be more expensive.

In some cases, you may need identification to purchase spray paint. However, there are a few different ways that you can get the ID that you need. Be sure to check with the store before you purchase the spray paint.

How old do you have to be to use spray paint?

Whether you’re a homeowner looking to repaint your walls or a business owner who wants to spruce up your storefront, spray paint is a great way to get the job done. But before you can start spraying, you need to know a few things. Specifically, you need to know how old you need to be to use spray paint.

According to the Federal Poison Control Center, Spray paint can be dangerous if it is ingested. That means that even if youre only using the paint for decorative purposes, you need to be aware of the dangers posed by spray paint and take precautions to avoid poisoning yourself.

The general rule is that you need to be at least 18 years old to purchase spray paint and use it in a responsible way. However, there are a few exceptions to this rule. For example, if you are under the supervision of a parent or guardian, they may be able to purchase and use spray paint for you. Additionally, some art and craft stores may allow minors (up to 18 years old) to purchase spray paint and use it in a responsible manner.

Here are the answers to some of the most common questions about spray paint and age:

What is the legal age to buy spray paint in the United States?

The legal age to buy spray paint in the United States is 18 years old. However, there are some states that have a higher age limit, such as Alabama, where the legal age is 21 years old.

What is the legal age to use spray paint in the United States?

The legal age to use spray paint in the United States is 18 years old. However, there are some states that have a higher age limit, such as Alabama, where the legal age is 21 years old. 

What are the exceptions to the rule that you need to be at least 18 years old to use spray paint?

There are a few exceptions to the rule that you need to be at least 18 years old to use spray paint. For example, if you are under the supervision of a parent or guardian, they may be able to purchase and use spray paint for you. Additionally, some art and craft stores may allow minors (up to 18 years old) to purchase spray paint and use it in a responsible manner.

What is the legal age to use spray paint in the United States?

The legal age to use spray paint in the United States is 18 years old. However, there are some states that have a higher age limit, such as Alabama, where the legal age is 21 years old.

What is the legal age to use spray paint in Canada?

The legal age to use spray paint in Canada is 18 years old. However, there are some provinces that have a higher age limit, such as Quebec, where the legal age is 19 years old.

What is the legal age to use spray paint in the United Kingdom?

The legal age to use spray paint in the United Kingdom is 16 years old. However, there are some areas of the UK, such as Scotland, that have a higher age limit, which is 18 years old.

So, what does this all mean for you? If you are 18 years old or older, you can legally purchase and use spray paint in the United States. Additionally, you are allowed to use spray paint from the age of 16 years old in the United Kingdom, although some areas have a higher age limit. Keep these things in mind if you are looking to use spray paint in any of these countries.

How can a minor get spray paint?

It’s no secret that spray paint is one of the most popular and dangerous types of graffiti. It’s also one of the easiest to get your hands on. A minor can easily purchase spray paint in many stores, and because it’s classified as a juvenile item, the store doesn’t have to adhere to strict regulations when selling it.

Here are some ways that a minor can get their hands on spray paint:

1. A minor can get spray paint from their parents or guardians.

2. A minor can get spray paint from a friend or acquaintance.

3. A minor can get spray paint from a store.

What are the consequences of getting spray paint?

Getting spray paint is a serious crime. If a minor gets spray paint and uses it to write graffiti, they could be charged with vandalism, a felony. If a minor gets spray paint and uses it to damage property, they could be charged with crimes against property, such as burglary or theft.

What are some ways to prevent a minor from getting spray paint?

1. Talk to your children about the dangers of spray paint.

2. Make sure your children know the consequences of getting spray paint.

3. Keep spray paint out of the reach of your children.

If you know of someone who has gotten spray paint, please talk to them about the consequences of using this dangerous graffiti. We hope that this article has helped you to understand the dangers of spray paint and how to prevent a minor from getting their hands on it.

Is it illegal to spray paint in California?

Are you planning on painting your house or building in California? If so, be aware that it is illegal to spray paint in the state of California. This is due to the fact that the paint can cause environmental damage. You could be fined or even arrested if you are caught spraying paint in a prohibited area.

What is The Reason It Is Illegal To Spray Paint In California?

The main reason that it is illegal to spray paint in California is because the paint can cause environmental damage. The paint can coat the trees and other plants, which can then cause a problem. Not only that, but the paint can also get into the water supply and create problems for the environment.

Are There Any Exceptions To The Rule That It Is Illegal To Spray Paint In California?

There are a few exceptions to the rule that it is illegal to spray paint in California. These exceptions include buildings that are used for agricultural purposes or buildings that are in a state of disrepair. Additionally, you are allowed to spray paint if you are using a temporary spray paint marker.

What Are The Penalties For Spray Painting In California?

The penalties for spray painting in California can vary, but most cases will involve a fine. In addition, you may have to clean up any environmental damage that you have caused. If you are caught spray painting in a prohibited area, you could also be arrested.

Can I Paint My House In California Without Breaking The Law?

Unfortunately, you may not be able to paint your house in California without breaking the law. You will need to follow the regulations that are in place, which usually involve getting a permit. Without a permit, you could be fined or even arrested.

If you are planning on painting your house or building in California, be aware of the laws that prohibit the use of spray paint. Make sure to consult with an attorney or your local government before you take any action.

Do you have to be 21 to buy spray paint in California?

California law states that you must be at least 21 years of age to purchase spray paint in the state. This means that anyone who is under the age of 21 is not allowed to purchase spray paint in California.

What is The Age Requirement For Spray Paint In California?

The age requirement for spray paint in California is 21 years of age. This means that anyone who is under the age of 21 is not allowed to purchase spray paint in California. 

Is The Age Requirement For Spray Paint In California Valid Everywhere?

The age requirement for spray paint in California is valid only in the state of California. This means that if you are traveling to or from California, you are still able to purchase spray paint without having to meet the age requirement.

Are There Any Exceptions To The Age Requirement For Spray Paint In California?

There are a few exceptions to the age requirement for spray paint in California. These exceptions include:

  1. If you are a resident of California and are at least 18 years of age
  2. And If you are a military member stationed in California
  3. If you are a law enforcement officer who is acting in the course of duty

What If I Am Over The Age Of 21 And I am Still Unable To Purchase Spray Paint In California?

If you are over the age of 21 and you are still unable to purchase spray paint in California, you can still purchase paint from a store that is not located in California. You will need to show identification that shows you are over the age of 21, and the store owner may ask you to prove your age by having a driver’s license, state ID, or passport.

What If I am a Resident of California And I am Still Unable To Purchase Spray Paint In California?

If you are a resident of California and you are still unable to purchase spray paint in California, you can still purchase paint from a store that is located in another state. However, you must still meet the age requirement for the state that the store is located in. You will need to show identification that shows you are over the age of 21, and the store owner may ask you to prove your age by having a driver’s license, state ID, or passport.

Can I Buy Spray Paint In California If I am Not 21 Years of Age?

No, you cannot buy spray paint in California if you are not 21 years of age.

Is egging a car illegal in California?

It’s no secret that California is a hotbed for car egging. What started as a prank to scare drivers has turned into a dangerous game that is costing innocent people their lives.

Egging a car is a crime in California, punishable by up to six months in jail and a $1,000 fine. So why do people continue to do it?

Some people claim that egging cars is funny. But for the drivers who get targeted, it’s anything but funny. They’re left with shattered windows and terrified passengers. In some cases, the eggs have even come directly through the windshield and into the driver’s face.

There’s also the risk of getting arrested. If you’re caught egging a car in California, you could be subject to criminal charges and spend time behind bars. That’s something that nobody should have to worry about on summer break.

So please don’t egg any cars this season – it’s not only dangerous, it’s illegal too.

Is egging a car illegal in California?

Yes, egging a car is illegal in California. The California Penal Code states that “any person who maliciously damages or destroys any property, with the intent to intimidate or terrorize any person, is guilty of a misdemeanor.” This includes egging cars.

What are some consequences of egging a car in California?

In California, egging a car can lead to a misdemeanor charge, as well as fines and jail time. Additionally, egging a car can also lead to the loss of your driver’s license.

Is egging a car legal in other states?

It appears that egging a car is not illegal in all states. However, it is still a dangerous and illegal act to commit in California. If you have been charged with egging a car in California, it is important to talk to an experienced criminal defense lawyer.

Conclusion

Egging a car is a dangerous and illegal act in California. If you have been charged with this crime, it is important to speak to an experienced criminal defense lawyer.

How To Clean Spray Paint Caps?

Whether you are a homeowner or a business owner, cleaning spray paint caps can be a huge hassle. Not only do they smell terrible, they can also be a safety hazard. In this article, we will show you how to clean spray paint caps easily and safely.

First, remove the cap from the can. Next, use a cloth or a piece of paper to clean the inside of the can. Make sure to get into all the nooks and crannies. Finally, wipe off the outside of the can with a dry cloth or paper towel.

What is a Spray Paint Cap?

A spray paint cap is a small, metal cap that is used to seal the end of a spray paint can. It is often painted bright colors so that it stands out.

What are the Effects of Spray Paint on Caps?

The effects of spray paint on caps can vary depending on the type of paint and the temperature at which it was used. In most cases, the paint will cause the cap to corrode and become unusable.

How to Clean a Spray Paint Cap?

The best way to clean a spray paint cap is to use a mild soap and water. Make sure to rinse it thoroughly and dry it off.

How do you clean clogged spray paint caps?

There is nothing worse than trying to clean a clogged spray paint cap only to find that the paint won’t come off. Not only is it a pain to try to get the paint off, but it can also be dangerous. Chances are, if you’ve had this problem before, you know that the paint is also coming off your hands and clothes. Here are 10 tips on how to clean a clogged spray paint cap:

1. Try using boiling water. Boil some water in a pot and pour it over the cap. Let it sit for about 30 seconds before trying to remove the cap. If the paint doesn’t come off easily, try boiling for a longer period of time or adding more water.

2. Use a can of compressed air. Open the can and hold it over the cap. Pump the can until it is fully inflated, then release it quickly over the cap. Be careful not to hit the paintbrush with the can! This method is usually most effective when used on small caps.

3. Pour some acetone into a small bowl or cup. Dip a cloth into acetone and wring out the excess. Cleaning with acetone will also remove any wax buildup around the cap, making it easier to remove paint later on.

4. Use a plunger. Fill up the plunger with water and place it over the cap. Push and pull until all of the paint comes off in one go (it may be helpful to put something underneath the cap to catch any drips). If the paint doesn’t come off easily, try using more water or acetone.

5. Use a can of compressed air and a brush. Open the can of compressed air and attach the brush to the end of the hose. Hold the can over the cap and pump until the paint is blown off in one go (be careful not to hit the paintbrush with the can).

6. Use boiling water and a toothbrush. Fill up a pot with water and place it on the stove. Swish the toothbrush around in the water until it is wet, then put the cap on top of the toothbrush. Twirl the toothbrush around for about 5 minutes, then remove the cap and scrub at the paint with your fingers. Be careful not to let any water get into your eyes!

7. Pour some white vinegar into a bowl or cup. Dip a cloth into vinegar and wring out the excess. Cleaning with vinegar will also remove any wax buildup around the cap, making it easier to remove paint later on.(note:be sure to rinse off all of the vinegar after you finish cleaning)

8. Use a can of compressed air and a toothbrush. Open the can of compressed air and attach the brush to the end of the hose. Hold the can over the cap and pump until the paint is blown off in one go (be careful not to hit the paintbrush with the can).

9. Use a plunger. Fill up the plunger with water and place it over the cap. Push and pull until all of the paint comes off in one go (it may be helpful to put something underneath the cap to catch any drips). If the paint doesn’t come off easily, try using more water or acetone.

10. Use a can of compressed air and a brush. Open the can of compressed air and attach the brush to the end of the hose. Hold the can over the cap and pump until the paint is blown off in one go (be careful not to hit themakeup with them CAN).

Can you use acetone to clean spray paint caps?

There are many things that you can use acetone for, but one of the most common uses is to clean spray paint caps. Acetone is a very strong solvent, and it can be used to remove paint, sealant, and other contaminants from the cap.

What is Acetone?

Acetone is a strong solvent that can be used to clean various parts of a spray paint can. It is also a common degreaser and can be used to clean various surfaces.

How Do I Use Acetone To Clean The Caps?

To use acetone to clean the caps, you will need to unscrew the can, remove the cap, and place the cap in a bowl filled with acetone. You can then scrub the cap with a brush or your fingers. Finally, you can rinse the cap in clean water and screw it back on to the can.

What Are The Risks Of Cleaning The Caps With Acetone?

There are a few risks that you should be aware of when using acetone to clean the caps. First, acetone can be harmful if it is breathed in. Second, acetone can damage the paint on the can. Finally, acetone can also damage the metal can itself.

Tips: 7 Quick Tips for Cleaning Spray Paint Caps With Acetone

1. Make sure that you have enough acetone to clean all of the caps that you need to clean.

2. Be careful not to breathe in the acetone fumes.

3. Be sure to rinse the caps clean after cleaning them with acetone.

4. Do not use acetone to clean paint that is not meant to be cleaned with acetone.

5. Be sure to store the acetone away from heat and light.

6. Avoid using acetone on aluminum cans. Aluminum can harm the acetone in the solution.

7. If you experience any problems while cleaning the caps with acetone, stop and consult a professional.

Can you reuse spray paint caps?

Do you often find yourself tossing out spray paint caps? If you do, you’re not alone. Many people believe that it’s wasteful to throw out spray paint caps, especially when they can be reused. In this article, we are going to explore the benefits of reusing spray paint caps and whether or not you can do so.

Reusing spray paint caps can save you money in a few ways. First, you can save on the cost of new spray paint cans. If you have a lot of spray paint caps that you dont need, you can recycle them and use the same can multiple times. This is especially helpful if you are a student or budget-conscious individual. Second, if youre a hobbyist who paints frequently, reusing spray paint caps can help to conserve your paint supplies. Third, if youre an artist or craftsman who uses spray paint for decoration or crafting purposes, reusing spray paint caps can help to reduce waste and save on costs associated with buying new supplies.

There are some caveats to consider before recycling your spray paint caps. For one thing, it is important to make sure that the product is safe to reuse before disassembling it. Many sprays contain toxic chemicals that could be harmful if ingested or inhaled. Additionally, some products (such as enamels) require special care when recycled in order to prevent damage or contamination. Finally, it is important to keep in mind that not all brands of spray paint are interchangeable – check the label before recycling any type of cap!

In short, there are many reasons why it is beneficial to reuse your spray paint caps. If you find yourself tossing them out frequently, consider alternatives such as recycling them or using them multiple times with fresh cans of paint.

Can You Reuse Spray Paint Caps?

Yes, you can reuse spray paint caps. However, there are a few guidelines that you should follow in order to do so safely. First and foremost, make sure that the paint that is inside the cap is dry. If the paint is wet, it can be dangerous and you may end up with a fire. Second, make sure that the cap is secure. If the cap is not secure, it may fall off while you are using the paint and be a safety hazard. Finally, avoid using the caps if they are cracked or have any damage. If you follow these guidelines, you should be able to reuse your spray paint caps without any problems.

What are the Benefits of Reusing Spray Paint Caps?

There are a few benefits to reusing spray paint caps. For one, it can be a more environmentally-friendly option. Rather than throwing out spray paint cans and caps, you can simply recycle them. Secondly, it can save you money. If you have a lot of spray paint caps, it may be cheaper to buy a new can of paint than to reuse a few caps. Third, it can be a safer option. If the paint is inside the cap and is dry, there is less of a risk of a fire. Finally, it can be a more efficient option. When you reuse a spray paint cap, you are using less paint than if you were to buy a new can of paint.

Reusing spray paint caps is a safe and environmentally-friendly option. Make sure to follow the guidelines listed in this article in order to avoid any accidents.

How do you clean acetone spray paint caps?

Most people know that acetone is a strong solvent that can be used to clean many things. However, many people may not know that acetone can also be used to clean spray paint caps. In this article, we will show you how to clean acetone spray paint caps using a safe and effective method.

The first step is to gather the necessary supplies. You will need a bottle of acetone, a cloth or paper towel, and a piece of metal that is at least the size of the spray cap. Once you have gathered your supplies, take the metal object and place it on top of the spray cap. Then pour acetone into the bottle until it covers the metal object. 

Once you have filled the bottle up to the top, remove the metal object from the cap and place it in front of your face. Doing this will allow you to apply pressure with your hands to force acetone down into all of the crevices on the cap. Be sure to work quickly as acetone can damage plastic quickly. 

Once all of the crevices are clean, use a cloth or paper towel to dry off the acetone spray paint cap. You can then put the spray cap back on the paint can and continue using it as usual.

What is an Acetone Spray Paint Cap?

A acetone spray paint cap is a small, plastic cap that is used to hold the paint when it is being sprayed. Acetone is a solvent that can be used to clean many things, but it is particularly effective at cleaning spray paint caps.

How Do You Clean Acetone Spray Paint Caps?

To clean acetone spray paint caps, you will need:

-Acetone spray paint

-A cap holder

-A cloth or paper towel

-Water

To clean acetone spray paint caps, follow these steps:

1. Pour acetone into the cap holder to cover the metal object.

2. Apply pressure with your hands to force the acetone down into all of the crevices on the cap.

3. Let the acetone soak into the cap and sealant.

4. Rinse off the cap with water and dry it off.

Instructions:

1. Start by removing the cap from the paint can.

2. Pour acetone into the cap holder until it is full.

3. Hold the cap holder over the paint can and spray the acetone onto the cap.

4. Wipe the acetone off of the cap with a cloth or paper towel.

5. Rinse the cap with water and replace it onto the paint can.

6. Repeat steps 3-5 until all of the acetone is gone.

7.dry the cap with a cloth or paper towel.

This is a safe and effective way to clean acetone spray paint caps. If you are ever in a situation where you need to clean acetone spray paint caps, be sure to try this method.

Does acetone ruin clear plastic?

There are many myths surrounding the effects of acetone on clear plastic. Some people believe that acetone can cause permanent damage to clear plastic. However, the reality is much different. Acetone can actually be a useful tool for cleaning clear plastic.

When acetone is used to clean clear plastic, it attacks the dirt and contaminants on the surface of the plastic. This process causes the contaminants to become loose and easier to remove. Additionally, acetone can remove any oils or residue that may have been left on the plastic by other cleaners.

Overall, acetone is a good choice for cleaning clear plastic. It can remove dirt and contaminants easily, and it doesn’t damage the surface of the plastic.

What is Acetone?

Acetone is a solvent that is used to dissolve plastic materials. It is also used in nail polish remover and other household cleaning products.

What are the Effects of Acetone on Clear Plastic?

There are many myths surrounding the effects of acetone on clear plastic. Some people believe that acetone can cause permanent damage to clear plastic. However, the reality is much different. Acetone can actually be a useful tool for cleaning clearplastic.

When acetone is used to clean clear plastic, it attack the dirt and contaminants on the surface of the plastic. This process causes the contaminants to become loose and easier to remove. Additionally, acetone can remove any oils or residue that may have been left on the plastic by other cleaners.

Overall, acetone is a good choice for cleaning clear plastic. It can remove dirt and contaminants easily, and it doesn’t damage the surface of the plastic.

Can Acetone Damage Clear Plastic?

Acetone can damage clear plastic if it is used in high concentrations or if it is left on the plastic for a long period of time. However, acetone is not the only culprit here. Other factors, like the temperatures that the plastic is exposed to, play a role as well.

If you are cleaning clear plastic, it is important to use the right concentration of acetone and to avoid contact with the plastic for long periods of time. Otherwise, acetone can damage the clear plastic surface.

Acetone is a common household cleaner. However, it should be used with caution when it comes to the effects that it can have on clear plastic.

How do you remove dried paint from spray tips?

If you’ve ever had to remove dried paint from your spray tips, you know that it can be a pain. In this article, we’ll show you how to remove dried paint from spray tips using the best methods.

The first step is to determine what caused the paint to dry on the tip. Was it something like a windy day? Was the paint left on too long after being applied?

If you can’t determine the cause, you can try using a cleaning agent. Some popular options include acetone or ethanol. However, both of these methods are risky because they can ruin your spray tips. Instead, we recommend using a non-toxic cleaner like hydrogen peroxide.

Once you’ve cleaned the tip, it’s time to remove the dried paint. The best method depends on the type of paint and how dried it is. For example, if the paint is dry and brittle, you may need to use sandpaper or a grit block to get it off. If the paint is more liquidy and easy to remove with water, you may be able to just use soap and water.

How to Remove Dried Paint From a Spray Tip

The first step is to make sure that the tip is completely dry. To do this, you can use a hairdryer or a heat gun.

Next, you’ll need to remove the dried paint. To do this, you can use a variety of methods. If the paint is dry and brittle, you may need to use sandpaper or a grit block. If the paint is more liquidy and easy to remove with water, you may be able to just use soap and water.

After removing the dried paint, you’ll need to clean the tip again. This time, we recommend using a non-toxic cleaner like hydrogen peroxide.

How to Remove Dried Paint From a Spray Tip with Vinegar

If you don’t have a heat gun or a hairdryer, you can also use vinegar to remove dried paint from a spray tip. Just mix equal parts of vinegar and water in a spray bottle, and use the spray to apply the vinegar to the tip. After a few minutes, you can use a soft cloth to clean the tip.

If you have any questions about how to remove dried paint from a spray tip, don’t hesitate to contact us.

How to Remove Dried Paint From a Spray Tip with Baking Soda

Another option is to use baking soda to remove dried paint from a spray tip. Just mix 1 cup of baking soda with 3 cups of water in a bowl, and use the wet mixture to apply it to the tip. Let the baking soda sit on the tip for a few minutes, and then use a soft cloth to clean it.

How to Remove Dried Paint From a Spray Tip with a Cotton Swab

If all else fails, you can use a cotton swab to remove dried paint from a spray tip. Just wet the swab, and apply it to the tip. Try to avoid getting the swab too close to the nozzle, as this can cause damage. After a few minutes, you can use a soft cloth to clean the tip.

How To Spray Paint Football Helmet?

There are many ways to spruce up your football helmet, and one of the easiest is to spray paint it. Not only is it a great way to add some personality to your helmet, but it can also help make it more resistant to weathering.

Before you start, make sure your football helmet is clean and free of any dust or dirt. Then, follow these simple tips to spray paint your helmet: 

– Start by spraying a light coat of paint over the entire surface of the helmet. 

– Be sure to cover all the cracks, crevices, and spots that may be prone to fading. 

– Once the paint is fully dry, apply a second coat of paint in different colors or patterns. 

– Let the finished product dry for at least 24 hours before wearing it in order to ensure maximum protection.

Here are the steps you need to follow to spray paint your football helmet:

1. Choose the right color

Before you start spraying, you need to choose the right color. You can either choose a color that is similar to the color of your helmet or you can choose a brighter color that will be more visible.

2. Prep the helmet

Before you start painting, you need to ensure that the helmet is properly prepared. This means that you need to clean it and remove any debris.

3. Paint the helmet

Once the helmet is prepared, you can start painting it. You will need a spray paint, primer and paint. Make sure to apply the paint evenly and carefully to avoid damaging the helmet.

4. Finish the helmet

Once the paint is dry, you can finish the helmet by adding any additional details ornaments. This could include writing on the helmet, adding decals or painting the horns.

If you are looking for a way to spruce up your football helmet, spraying it with paint is a great option. Not only is it easy to do, but it can also be a fun project that you can complete in a short amount of time. Do you have any tips on how to spray paint football helmets? We’d love to hear from you.

Can I spray paint my football helmet?

Football is one of the most popular sports in the world. And with good reason – it’s a really fun and exciting game to watch. But did you know that you can spray paint your football helmet to customize it to your own style? In this article, we’re going to discuss the benefits of spraying paint on your football helmet and give you instructions on how to do it.

There are a few reasons why you might want to spray paint your football helmet. Maybe you just want to add a personal touch to your game. Or maybe you want to show your team spirit in a unique way. Whatever the reason, spraying paint on your football helmet can be really fun and interesting. Here are some of the benefits of spraying paint on your football helmet:

1) You Can Customize Your Helmet To Fit Your Style

One of the great things about spray painting your football helmet is that you can customize it to fit your own style. You can add designs or words that represent you or your team, or you can create a unique look that stands out from the rest. This is a great way to show off your personality and add some extra pizzazz to your game.

2) You Can Add A Unique Look To Your Helmet That Will Stand Out

When people see your spray painted football helmet, they will definitely take notice. It will be something different and new that they have never seen before, which will draw attention to you and your game. This is a great way to make a statement and show off your skills as an athlete.

3) You Can Improve Your Game With Customized Equipment

Besides just looking cool, spray painting your football helmet can also help improve your skills as an athlete. By adding some personal flair and individuality to your game, you can boost your performance in several ways. First of all, it will give you an edge over other players who may not have customized their equipment as much as you have. And secondly, it can help you focus better when playing the game because everything around you is unique and interesting.

So if you’re thinking about spraying paint on your football helmet, be sure to check out the instructions below. We’ll walk you through the process step-by-step so that you can create a custom helmet that will be a hit with everyone who sees it.

What are the Benefits of Spray Painting Your Football Helmet?

There are a lot of benefits to spray painting your football helmet. First of all, it can add a bit of personality and style to your helmet. Second, it can protect your helmet from scratches and dents. And finally, it can make your helmet more weatherproof. So if you’re ever looking for ways to improve your game or just add some fun and excitement to it, spray painting your football helmet is a great way to do it.

How Do I Spray Paint My Football Helmet?

Follow the instructions that come with your spray paint kit. First, clean the helmet with a mild soap and water solution. Then, apply a protective coat of paint to the helmet using a spray gun. Be sure to evenly apply the paint across the helmet. Finally, allow the paint to dry before using the helmet.

What Should I Do if I Get a Bit of Paint on My Face or Eyes?

If you get a bit of paint on your face or eyes, don’t worry – just rinse the paint off with water. And if the paint is really stubborn, you can use a mild eye or face wash to remove it. If the paint is really hard to remove, you can go to a hospital or doctor for further treatment.

Spray painting your football helmet is a great way to customize your helmet and protect it from scratches and dents. And if you get a bit of paint on your face or eyes, just rinse it off.

What kind of paint should I use on a football helmet?

Are you looking for a way to protect your football helmet from paint damage? If so, you may want to consider using a paint that is specifically designed for football helmets. There are a few different types of football helmets that use different types of paint, so it is important to know which paint is best suited for which type of helmet.

One type of paint that is often used on football helmets is paint that is designed to resist chips and cracks. This type of paint is often used on the exterior of helmets and can be either painted or printed. Another type of paint that is often used on football helmets is paint that provides protection from UV rays. This type of paint is often used on the interior of helmets and can be either painted or printed.

If you are unsure which type of paint to use, it is best to contact a professional painter or helmet manufacturer. They will be able to advise you on the best option for your specific helmet and will be able to help you avoid any potential damage caused by improper painting techniques.

What Are The Different Types Of Football Helmets?

There are a few different types of football helmets that use different types of paint. The most common type of football helmet is the plastic helmet. This type of helmet uses a type of paint that is designed to resist damage from scratches and dirt. The second most common type of football helmet is the metal helmet. This type of helmet uses a type of paint that is designed to resist chips and cracks. The third most common type of football helmet is the carbon fiber helmet. This type of helmet uses a type of paint that is designed to resist UV rays.

What Is The Purpose Of The Paint On A Football Helmet?

The paint on a football helmet is designed to protect the helmet from damage. The paint is resistant to scratches and dirt, and it also helps to protect the helmet from the sun. And the paint is also designed to resist chips and cracks.

What Are The Different Types Of Paint That Are Available For Football Helmets?

There are a few different types of paint that are available for football helmets. The most common type of paint is the paint that is designed to resist damage from scratches and dirt. Other types of paint are available for football helmets that are made out of other types of materials, like metal and plastic.

What Are The Different Types Of Helmet Paint That Are Available?

There are a few different types of helmet paint that are available. Some types of paint are designed to resist damage from scratches and dirt, while other types of paint are designed to resist UV rays.

Knowing which type of paint is best suited for your football helmet is important. Make sure to consult with a paint specialist if you have any questions about which paint to use on your helmet.

Can you paint a helmet with spray paint?

Some people are wondering if they can paint a helmet with spray paint. The answer is yes! But be sure to use a protective coating, as the paint can easily chip or peel off. And don’t forget to use a respirator while painting—the paint fumes can be hazardous.

Can You Paint A Helmet With Spray Paint?

Yes, you can paint a helmet with spray paint. The paint will not chip or crack, and the paint will last for a long time. However, be sure to use a protective coating to avoid the paint from peeling off. And always wear a respirator when painting with spray paint fumes.

Is The Paint Safe To Use On A Helmet?

The paint is safe to use on a helmet. The paint will not damage the helmet, and the paint will not cause any irritation.

Will The Paint Chip Or Crack?

The paint will not chip or crack. The paint will last for a long time, and the paint will be resistant to water.

How Long Will The Paint Last?

The paint will last for a long time. The paint will resist water, and the paint will not chip or crack.

How long does spray paint take to dry on a football helmet?

Whether you’re a football coach, parent, or just someone who loves the game, you know that helmets can get pretty wet during games. And, of course, when they’re wet, the paint on the helmets can start to peel.

This is especially problematic when it comes to spray paint, which can take a while to dry. In this article, we’re going to discuss how long spray paint takes to dry on a football helmet.

First, it is important to understand that the paint on a football helmet is not just for decoration. It is there to protect the player from injuries. So, when the paint starts to peel, it can compromise the safety of the player.

Second, even if the paint does not start to peel immediately, it will start to fade and crack over time. This is especially true if the helmet is exposed to sunlight or other harsh elements.

So, overall, it is safe to say that spray paint takes a while to dry on a football helmet. However, there’s no need to worry. Just be sure to clean the helmet regularly so that the paint doesn’t start to peel in the first place.

How Long Does Spray Paint Take To Dry On A Football Helmet?

Spray paint typically takes about two hours to dry on a football helmet. However, this time can vary depending on the weather conditions and the type of spray paint that you’re using.

What If The Weather Conditions Are Poor?

If the weather conditions are poor – that is, it’s wet and humid – then the paint may take longer to dry. This is because the spray paint will be absorbed by the wet surface and will take longer to dry.

What If I Use A Different Type Of Spray Paint?

Sometimes people use a different type of spray paint that doesnt dry as quickly. In this case, the paint may still be on the helmet two hours after it has been sprayed.

However, if the paint starts to peel, then you should take the helmet off and clean it properly.

What If The Helmet Is Worn In Games?

Worn helmets can also cause the paint on the helmet to peel. If this happens, you may need to replace the helmet.

So, overall, it is safe to say that spray paint takes a while to dry on a football helmet. However, theres no need to worry. Just be sure to clean the helmet regularly so that the paint doesnt start to peel in the first place.

In general, knowing how long spray paint takes to dry on a football helmet can help you avoid problems. By following the instructions in this article, you should be able to dry the paint on your helmet in a timely manner.

Do you need to sand a helmet before painting?

Helmets are important when you are painting, and they can help to protect your head and ears. However, if you are going to be sanding your helmet before painting it, you may want to sand it first. This will help to prevent any damage to your helmet.

What is The Purpose of Sanding A Helmet Before Painting?

The purpose of sanding a helmet before painting is to remove any surface dirt or dust. This will help to prevent any damage to your helmet while you are painting. Additionally, it will also help to give your helmet a smooth finish.

How Do I Sand A Helmet Before Painting?

There are many different ways to sand a helmet before painting. Some people use a sandpaper while others use a dremel. You will need to find a method that is comfortable for you and that will remove the surface dirt and dust from your helmet.

What are the Risks of Not Sanding A Helmet Before Painting?

There are risks associated with not sanding a helmet before painting. If you do not sand the helmet, the dirt and dust will get into the paint and will cause the paint to chip or peel. Additionally, if the helmet is not sanded properly, it may not fit properly when you are painting it. This could cause your helmet to fall off your head or to become crooked.

Sanding a helmet before painting can help to protect your head and ears while you are painting. Make sure to find a method that is comfortable for you and that will remove the surface dirt and dust.

Does painting a helmet weaken it?

There has been a lot of discussion lately about whether or not painting a helmet will weaken it. This is a question that many riders are asking, as they are worried about the safety of their headgear.

While it is true that painting a helmet will weaken it, this does not mean that the helmet is not safe. The paint will simply not protect the helmet against impact. In fact, painting a helmet can actually increase its safety by increasing the visual contrast between the rider and the environment.

So, while painting a helmet may weaken it slightly, it is still a very effective way to protect yourself from injury.

What is The Debate Over Painting A Helmet?

The debate over painting a helmet comes down to a question of safety. Some riders believe that painting a helmet will weaken the material, and this could lead to it breaking.

Others believe that the paint will increase the visual contrast between the rider and the environment, which could lead to a safer ride.

 whichever side of the debate you stand on, it is important to understand that painting a helmet is not a guarantee of safety.

How is The Paint Affecting The Helmet?

The paint that is used to paint a helmet is a very thin layer. This layer is applied to the helmet to make it look nicer, and it also protects the helmet from the elements.

However, the paint is not strong enough to protect the helmet against impact. In fact, if a rider falls and their helmet hits the ground, the paint can be chipped off of the helmet.

This means that painting a helmet does not weaken it, it just increases its safety by making it more visible to other riders and drivers.

Has Anyone Experienced A Defective Helmet After Painting It?

There have been cases where people have experienced defective helmets after they have painted them. In these cases, the paint has worn away, and the helmet has been less than safe to wear.

It is important to note that this is a rare occurrence, and the majority of helmets that arepainted are still safe to wear. However, it is always important to research the safety of the product that you are buying.

Despite the debate, it is still advisable to paint a helmet as this will help to protect it from the elements and make it look nicer. However, be sure to keep in mind the potential dangers that may come with painting a helmet.

What type of paint can be used on helmets?

Many riders choose to repaint their helmets every season to keep them looking new and fresh. But what type of paint can be used on helmets?

What Type of Paint Can Be Used On Helmets?

Many riders choose to repaint their helmets every season to keep them looking new and fresh. However, any type of paint can be used on helmets.

What are Some Precautions That Must Be Taken When Painting Helmets?

When painting helmets, it is important to take some precautions in order to protect your head. Here are a few tips:

-Wash your hands thoroughly before painting your helmet

-Use a special paint designed for helmets

-Test the paint on a small area first

-Avoid spraying the paint directly onto your head

How Often Should Helmets be Repainted?

It is recommended that helmets be repainted every season to keep them looking new and fresh.

How To Remove Spray Paint From Laminate Floor?

There are a few ways to remove spray paint from laminate flooring. Each has its own set of pros and cons. We’ll outline the steps you need to take to remove spray paint from laminate flooring using the least damaging method.

Method 1: Washing the Area with Soapy Water and Brushing

Washing the area with soapy water and brushing can remove most types of spray paint. Make sure to use a stiff-bristled brush, as scrubbing will scratch the surface of the flooring. Stir the soapy water frequently to avoid staining your flooring.

Pros: This method is easy and painless. It also removes most types of spray paint.

Cons: Scrubbing can damage the laminate flooring. Soapy water can also leave a residue that is difficult to clean.

Method 2: Sandpaper and Cleaner

If scrubbing does not work, try using sandpaper and cleaner. Start by sanding off any dried paint on the surface of the flooring. Use a cleaner to remove any residual sandpaper particles.

Pros: This method is more gentle than scrubbing and it can remove most types of spray paint.

Cons: This method may not be effective on certain types of spray-paint. It also requires some patience and a bit of skill.

Method 3: Degreasing and Coatings

If sanding or cleaning does not work, try using degreasing and coatings. Degreasing removes the topcoatingsand sealers that were applied to the flooring after the original spray pain was applied. Apply a coating of wax, polyurethane, or another solution to the area that was sprayed with paint. Allow the coating to dry before attempting to remove the paint.

What is the least damaging way to remove spray paint from laminate flooring?

The least damaging way to remove spray paint from laminate flooring is to use a wet cloth. Wet a cloth with cool water and wring it out. Wipe the surface of the laminate floor with the wet cloth. Be sure to work in a circular pattern to avoid streaking. Let the laminate floor dry.

What are the pros and cons of using a wet cloth to remove spray paint from laminate flooring?

Pros:

-The wet cloth method is the least damaging way to remove spray paint from laminate flooring.

-It is effective at removing most types of spray paint.

-The wet cloth method is fast and easy.

Cons:

-The wet cloth method can cause damage to the surface of the laminate floor.

-Some types of spray paint may not be removable with a wet cloth.

-The wet cloth method may leave a residue on the surface of the laminate floor.

How do you get spray paint off the floor?

Most of us know that getting spray paint off the floor is a pain. And it’s not just because it’s a mess – it’s also a safety hazard. If you’re like most people, you don’t want to get spray paint all over your clothes, your floors, and your furniture.

Here are a few tips to help you get spray paint off the floor:

1. Use a Paint Roller

Rolling paint off the floor is the fastest and most effective way to remove it. Just be sure to cover the entire area you want to clean – this will prevent overspray.

2. Use a Wet Floor Method

If you don’t have access to a paint roller, try using a wet floor method. Put a layer of water on the floor, then sprinkle the paint over the top. Let the paint absorb into the water before rubbing it off with a cloth or a scrub brush.

3. Use a Steam Cleaner

If you don’t have time or access to a wet floor method, try using a steam cleaner. Fill the cleaner’s tank with water, turn it on to medium heat, and start cleaning. Make sure to cover the entire area you want to clean.

4. Use a Pressure Washer

If all else fails, use a pressure washer. Be sure to wear protective equipment, and be careful not to hit any windows or walls.

These are just a few of the many ways you can get spray paint off the floor. If you have any other tips, please let us know in the comments below. And if you ever find yourself with a spray paint problem, don’t hesitate to reach out to our team – we would be happy to help.

Does acetone damage laminate flooring?

If you’re like most homeowners, you’re probably concerned about the potential damage that acetone can do to your laminate flooring. Although acetone is a common household cleaner, it can also damage laminate flooring if you use it incorrectly. In this article, we’ll explain how acetone damages laminate flooring and give you tips on how to prevent this from happening.

First and foremost, don’t use acetone to clean your laminate flooring if you have a pet or if there is any visible moisture on the surface. Acetone is a very effective cleaner, but it can also damage the flooring if it comes in contact with water or other liquids. Instead, use a mild soap and water solution or an anti-microbial cleaner designed specifically for laminate flooring.

If you do damage your laminate flooring while cleaning it with acetone, don’t panic. Just be sure to properly clean the area where the damage occurred and avoid using acetone in that area again. If needed, you can try using a milder cleaner instead of acetone to clean the flooring.

What is Acetone?

Acetone is a common household cleaner that is used to remove grease, wax, and other residues from surfaces. It can also be used to clean laminate flooring.

How Does Acetone Damage Laminate Flooring?

When acetone is used to clean laminate flooring, it can damage the flooring by breaking down the adhesive that holds the wood together. This can cause the wood to become loose and may even start to fall apart. Additionally, acetone can also damage the finish on your flooring if it gets wet.

What are the Effects of Acetone on Laminate Flooring?

Acetone is a very dangerous solvent, and it can damage laminate flooring if it is used incorrectly. Acetone can dissolve the adhesive that is used to hold the laminate boards together, and it can also damage the flooring itself. If acetone is used to clean laminate flooring, it is important to follow all of the safety guidelines that are specific to this type of flooring.

How Can I Protect My Laminate Flooring from Acetone Damage?

There are a few things that you can do to protect your laminate flooring from acetone damage. First, make sure that you use the correct solvent. Acetone is a very dangerous solvent, and you should never use it on laminate flooring if another solvent is available. Second, be sure to wear gloves when you are cleaning your flooring. Third, use a vacuum cleaner with a hose attachment to clean your flooring. Finally, avoid using acetone if possible. If you do need to use acetone, be sure to use it in a well-ventilated area and wear protective gear.

Although acetone can damage laminate flooring if used incorrectly, there are a few precautions that you can take to protect your flooring. Be sure to use the correct solvent, wear gloves when cleaning your flooring, and avoid using acetone if possible.

Will vinegar remove paint from laminate?

There are a lot of myths surrounding the use of vinegar to remove paint from laminate surfaces. However, vinegar is actually a very effective way to remove paint from laminate.

The first step is to make a paste out of vinegar and water. Apply the paste to the paint-covered laminate and let it sit for a few minutes. Then, use a clean cloth or sponge to scrub the surface until the paint is removed. 

Vinegar is a powerful cleaner, so be sure to use it with caution if you are trying to remove paint from delicate surfaces. Keep in mind that vinegar can also damage laminate surfaces if it is not used correctly.

What is Vinegar?

Vinegar is a type of alcohol. It is typically white in color and has a strong smell. Vinegar is used as a vinegar substitute, a food preservative, and a cleaning agent.

How Does Vinegar Work to Remove Paint?

Vinegar works to remove paint by breaking down the resin that is responsible for the paint’s stickiness. This allows the paint to be washed away with soap and water.

Is Vinegar Safe to Use on Laminate?

Yes, vinegar is safe to use on laminate. However, it is important to follow the instructions that are provided with the vinegar. Failure to do so could result in damage to the laminate.

Vinegar is a very effective way to remove paint from laminate surfaces. Follow the instructions that are provided with the vinegar in order to avoid any potential damage to the laminate.

What dissolves dried spray paint?

Dried spray paint can be a pain to remove – but there are a few tried and true methods that can help dissolve the paint. For most cases, boiling water can be effective – but be careful not to overheat the can, as this could also cause the paint to break down and become more difficult to remove. Additionally, a strong detergent can help dissolve the paint – but be aware that it may also damage your surface. Finally, a caustic agent such as lye can also help dissolve the paint – but be very careful, as this can also cause damage to your surface.

What Are Some Ways to Dissolve Dried Spray Paint?

1. Use a commercial paint remover.

2. Use a mild dishwashing detergent.

3. Boil water and pour it over the paint.

4. Use a strong detergent and scrub the paint off with a stiff brush.

5. Use lye (a caustic agent) to dissolve the paint.

6. Use a hairdryer.

What Are the Risks of Trying to Dissolve Dried Spray Paint on My Own?

There are a few risks when trying to dissolve dried spray paint on your own. First, you could end up cooking the paint and causing damage. Second, you could end up with a lot of paint residue on your hands and clothes – which can be difficult to get rid of. Third, you could end up with a lot of toxic chemicals in your home if you attempt to dissolve the paint with lye. Finally, you could end up damaging your surface if you use too much pressure when scrubbing the paint off.

Should I Call a Professional to Dissolve Dried Spray Paint?

Yes, if you’re not comfortable trying any of the methods listed above or if you have any doubts about them. A professional will be able to do a better job of dissolving the paint and won’t risk damaging your surface.

How Long Will It Take to Dissolve Dried Spray Paint?

It will usually take a few tries to dissolve dried spray paint. Depending on the method that you use, it could take between a few minutes and a few hours.

Does WD-40 remove spray paint?

Are you looking for a product to remove spray paint? WD-40 is a great option! WD-40 is a product that is made to remove a variety of objects and surfaces. It can be used on a variety of surfaces, including paint.

When it comes to removing spray paint, WD-40 is a great option. It is a product that is made to remove a variety of objects and surfaces. Spray paint can be difficult to remove, but WD-40 can do the job. 

Remove spray paint with WD-40 by spraying it onto the surface that you want to clean. Work the product into the surface and then wait until it has had a chance to work its way into the cracks and crevices. Once it has done its job, rinse the area with water to remove the WD-40 and the paint.

What is WD-40?

WD-40 is a product that is made to remove a variety of objects and surfaces. It is also a great choice for removing spray paint. Spray paint can be difficult to remove, but WD-40 can do the job.

How Does WD-40 Work?

WD-40 works by breaking down the paint that is on the surface that it is being used on. This will then allow you to remove the paint.

What Can WD-40 Remove?

WD-40 can remove a variety of objects and surfaces. This includes spray paint.

Is WD-40 Safe to Use?

Yes, WD-40 is safe to use. It is made with a variety of ingredients that are safe for use.

WD-40 is a great product to use in order to remove spray paint. It is safe to use and will work to break down the paint that is on the surface.

What home remedy removes spray paint?

If you have spray paint on your skin, there is a good chance that you can remove it with a home remedy. In this post, we will discuss three different home remedies that can remove spray paint from your skin.

The first home remedy is to use soap and water. Soak the area in soap and water for a few minutes, then rinse it off. This will remove the paint from the skin. 

The second home remedy is to use a butter knife. Start by scraping the paint off of the skin with the butter knife, then rinse it off. This will also remove any oil or wax that was applied to the paint. 

The third home remedy is to use vinegar. Pour vinegar onto a cloth and rub it over the paint surface. Wipe it off with a wet cloth. Vinegar will react with the oil and wax in the spray paint, which will remove it from your skin.

What is The Home Remedy to Remove Spray Paint?

The home remedy to remove spray paint from your skin is a mixture of vinegar, water, and baking soda. Soak the area in the mixture for a few minutes, then rinse it off.

What are The Precautions When Using The Home Remedy to Remove Spray Paint?

The precautions when using the home remedy to remove spray paint are to mix the ingredients carefully and to avoid getting the mixture in your eyes or mouth.

How Effective Is The Home Remedy to Remove Spray Paint?

The home remedy to remove spray paint is generally very effective in removing the paint from your skin. However, it is important to note that the mixture can also cause irritation and redness in the skin.

If you have spray paint on your skin, try using one of the three home remedies discussed in this post. Be sure to mix the ingredients carefully and to take the necessary precautions to avoid any potential side effects.

Will Magic Eraser remove spray paint?

Are you thinking about removing spray paint from your walls? If so, you may be wondering if the magic eraser will work. The answer is yes, the magic eraser can remove spray paint. However, there are a few things to keep in mind before using the magic eraser to remove spray paint.

First, make sure you have the right product. Magic erasers are specifically designed to remove paint. If you try to use it on other surfaces, the eraser may not be strong enough and it may damage the surface.

Next, be careful when using the magic eraser. The eraser can cause some damage if it is used incorrectly. Be sure to hold the eraser at a slight angle and use moderate pressure when removing paint. Do not use excessive force or apply pressure for more than a few seconds at a time.

If you’re thinking about removing spray paint from your walls, the magic eraser is a good option. Just be careful and take precautions before using it.

Can The Magic Eraser Remove Spray Paint?

Yes, the magic eraser can remove spray paint. However, there are a few things to keep in mind before using the magic eraser to remove spray paint. First, make sure that the spray paint is dry. Second, make sure that the surface that you are going to be using the magic eraser on is clean. Finally, be sure to wear gloves and protect your eyes and skin from the spray paint.

What Are The Precautions That You Need To Take When Using The Magic Eraser To Remove Spray Paint?

When using the magic eraser to remove spray paint, you will need to take a few precautions. First, make sure that the surface that you are going to be using the magic eraser on is clean. Second, be sure to wear gloves. Third, be sure to protect your eyes and skin from the spray paint. Fourth, be sure to wait until the spray paint is completely dry before using the magic eraser.

What Are The Disadvantages To Using The Magic Eraser To Remove Spray Paint?

There are a few disadvantages to using the magic eraser to remove spray paint. First, the magic eraser is not as effective as other methods of removing spray paint. Second, the magic eraser can damage the surface that you are using it on. Third, the magic eraser can be difficult to use on certain surfaces. Fourth, the magic eraser can be expensive.

The magic eraser can be a great option for removing spray paint from your walls. Make sure to follow the precautions that are outlined in this article before using the magic eraser to remove spray paint.

Does white vinegar remove spray paint?

Spray paint can be a pain to remove, especially from surfaces like laminate floors. But with a little elbow grease and the right tools, it’s definitely possible. One method that many people swear by is using white vinegar. Simply apply the vinegar to the affected area with a cloth and scrub until the paint comes up. You may need to do this several times to get all of the paint off. Remember to rinse the area thoroughly afterward to avoid any damage to the wood.

How To Open Rustoleum Spray Paint?

When it comes to DIY projects, Rustoleum is a staple in many homeowners’ arsenals. But how do you open Rustoleum spray paint cans? And more importantly, what are the dangers of doing so?

The answer to both questions lies in the can’s safety features. When you open a Rustoleum spray can, the propellant gas is released and this can cause serious injury if it comes into contact with your skin. Additionally, Rustoleum spray paint is known to contain lead and other harmful chemicals, so always take precautions when using it – keep yourself and your surroundings safe.

Here are the steps:

1. Remove the top of the can with a can opener.

2. Turn the can upside down and unscrew the cap.

3. Remove the lid and use a funnel to pour the paint into a container.

4. Wash your hands and face after opening the can.

5. Be careful not to inhale the paint fumes.

What is a Rustoleum Spray Paint Can?

A Rustoleum spray paint can is a metal can with a cap that screws off. It is designed for home use and is meant to be opened with a can opener. The paint is poured into a container with a lid, and then the lid is screwed on.

What are the dangers of opening a Rustoleum spray paint can?

The dangers of opening a Rustoleum spray paint can include inhaling the paint fumes, which can cause respiratory problems, and getting the paint on your skin. Paint can also get into your eyes and cause blindness.

How Do You Open a Rustoleum Spray Paint Can?

There are two methods: using a can opener or turning the can upside down and unscrewing the cap. The can opener is easier, but the can should be turned upside down to avoid getting paint on the top of the lid.

What Are the Dangers of Opening a Rustoleum Spray Paint Can?

The dangers of opening a Rustoleum spray paint can depend on how you do it. If you use a can opener, there is a risk of cutting your hand. If you turn the can upside down and unscrew the cap, you run the risk of inhaling paint fumes. In either case, it is important to wash your hands and face after opening the can.

How do you open Rustoleum paint?

Whether you know it or not, you need to open rustoleum paint. What does that mean? It means it’s time to make sure your paint is opening. It doesn’t matter how great your paint or hardware is. If it can’t deliver on what your customers want or need, they won’t hesitate to leave and find someone who can.

Opening rustoleum paint is a pretty straightforward process. All you need to do is unscrew the cap and unscrew the top. To get to the pigment, you will need to use a brush or your hands. Be sure to wash your hands after opening the paint so you don’t contaminate it with harmful chemicals.

Here are the questions we will be answering:

How Do You Open Rust Oleum Paint?

You can open rustoleum paint by using the included instructions or by following a step-by-step video.

How Do You Get To The Pigment In Rust Oleum Paint?

The pigment is located in the top of the can. To get to it, you will need to unscrew the cap and unscrew the top.

What Are The Benefits Of Opening Rustoleum Paint?

Here are the top benefits of opening rustoleum paint:

1. It saves you time.

2. It saves you money.

3. It saves you space.

4. It saves you hassle.

5. It saves you a mess.

6. It saves you time and hassle.

7. It allows you to deliver on what your customers want or need.

If you are new to the ‘how do you open rustoleum paint?’ world, don’t get overwhelmed! We are here to help. What ways do you save time when opening rustoleum paint? We’d love to hear from you.

How do you remove the Rustoleum spray lid?

When removing a rustoleum spray lid, one should always be careful to avoid injury. Rustoleum spray lid is a sharp object that can easily cause injury if not handled carefully.

First, use a Phillips head screwdriver to pry the top off the spray can. Then, using a blunt object such as a nail, pry the lid off of the can. Be very careful not to puncture the can or injure yourself in the process.

Once the lid is off, use a can opener to remove the can from the lid.

How Do You Remove Rustoleum Spray Lid?

There are a few ways to remove rustoleum spray lid.

1: Use a can opener

If the rustoleum spray lid is still in good condition, one can use a can opener to remove it. Simply place the can opener on the lip of the can and twist the can opener handle to pierce the lid. Once the lid is punctured, twist the opener handle to remove it.

2: Use a knife

If the rustoleum spray lid is not in good condition, one can use a knife to remove it. Simply place the knife on the lip of the can and twist the knife handle to pierce the lid. Once the lid is punctured, twist the knife handle to remove it.

3: Use a wire whisk

If the rustoleum spray lid is not in good condition, one can use a wire whisk to remove it. Simply place the wire whisk on the lip of the can and twist the whisk handle to pierce the lid. Once the lid is punctured, twist the whisk handle to remove it.

What Are Some Rustoleum Spray Lid Tips?

Always be careful when removing rustoleum spray lid. Following these tips will help you avoid injury:

1: Avoid using a can opener that is not the correct size for the can.

2: Avoid using a knife that is not sharp enough.

3: Avoid using a wire whisk that is not strong enough.

Safe and easy removal of the rustoleum spray lid is possible with a little bit of effort. Follow these tips and you will be safe and able to remove your rustoleum spray lid without any trouble.

How do you remove spray paint caps?

If your property is covered in spray paint, you may be wondering how to remove the cap without damaging the paint. Luckily, there are a few ways to do this.

1. Use a can of compressed air. This will break the cap off and release the paint.

2. Use a wire whisk. This will agitate the paint and loosen the cap.

3. Use a knife or scissors to cut around the cap. Be careful not to cut into the paint.

4. Use a hair dryer. This will heat up the paint and cause it to break off the cap.

5. Use a chisel. This will create a hole in the cap and the paint will pour out.

How Do You Remove A Spray Paint Cap?

There are a few ways to remove a spray paint cap: using a can of compressed air, using a plunger, using boiling water, using a hair dryer, or using a sandpaper block.

What Are The Pros And Cons Of Each Method?

The pros of each method vary, but the most common pro is that they work. The cons of each method vary, but the most common con is that they can damage the paint.

Which Method Should You Use?

The method you should use depends on the situation. If the paint is just on the cap, using a can of compressed air is the best option. If the paint is on the can or the surface, using a plunger is the best option. And if the paint is on the surface and the cap is stuck, using boiling water is the best option. If the paint is on the surface and the cap is loose, using a hair dryer is the best option. If the paint is on the surface and the cap is broken, using a sandpaper block is the best option.

There are a few ways to remove a spray paint cap, but the best method depends on the situation. Be sure to use the right method for the right situation.

How do you open a spray can nozzle?

In this post, we are going to discuss how to open a spray can nozzle. Spray cans are one of the most popular items for recreation, and they are also used in a variety of ways. However, opening a spray can can be a bit of a challenge, especially if you are not used to using a can opener. By following these simple steps, you can open a spray can nozzle in no time.

To open a spray can nozzle, first remove the cap. Many spray can caps have aPhillip’s head or a hexagon shape on them. If the cap does not have a removable part, Pry it off using a flathead screwdriver. Once the cap is off, unscrew the nozzle from the can body using a Phillips-head screwdriver. Make sure to keep the threads clean so that you do not strip them. Finally, replace the nozzle onto the can body and screw it back in place.

What is a Spray Can Nozzle?

A spray can nozzle is a device that is used to open a spray can. It is a small, handheld device that has a number of different uses. For example, a spray can nozzle can be used to mist items, such as plants or insects. It can also be used to fill a spray bottle with liquid.

How Do You Open A Spray Can Nozzle?

There are a number of different ways to open a spray can nozzle. Here are the steps:

1. Remove the cap from the spray can.

2. Place the nozzle of the spray can opener on the top of the can lid.

3. Place the lever on the side of the spray can opener above the nozzle on the can lid.

4. Push down on the lever to open the spray can.

5. Hold the spray can opener in one hand and the can in the other hand.

6. Keep your fingers away from the nozzle.

7. Use the spray can opener to remove the lid from the can.

8. Pour the contents of the can into a container.

9. Replace the lid on the can and screw the cap on top.

10. Store the spray can opener in a safe place.

By following these steps, you can open a spray can nozzle in no time. If you ever have trouble opening a spray can, be sure to try using a spray can opener.

How do you open a closed can of paint?

When it comes to opening a can of paint, many people might think that it’s a difficult task. However, this is not always the case. In this article, we are going to teach you how to open a closed can of paint without any damage or fuss.

The first step is to identify the lid of the can. Once you have located the lid, use a sharp object like a knife or a screwdriver to pierce it in several places. This will allow you to twist the lid off easily. 

Once the lid is off, you will be able to see the paint inside the can. To get rid of any excess paint, use a brush or your fingers. Just make sure that you avoid getting any paint on your hands or clothes.

Here are the steps that you need to take:

1. Figure out the lid’s position

The first step is to figure out the lid’s position. This is done by locating the two ears on the lid. Once you have located them, you will need to line them up with the two notches on the can’s body.

2. Remove the lid

Now that you have located the lid, you need to remove it. To do this, use a flat object to pry it off from the can. Be sure to be careful not to damage the can in the process.

3. Remove the lid’s seal

Now that the lid is free, you need to remove the seal. This is done by pressing down on one end of the seal and then pulling it off.

4. Remove the paint

Now that the lid, seal and paint are all free, you can start to remove them. To do this, use a flat object to scrape off the paint. Be sure to wear gloves if you are going to be doing this.

By following these simple steps, you will be able to open a closed can of paint without any issues. If you have any questions, feel free to ask them in the comments section below.

How do you open an aerosol can that won’t spray?

Aerosols are a huge part of modern life and we use them all the time. But there is one particular type of aerosol that can be a pain in the neck – the one that won’t spray. If you’re ever stuck trying to open an aerosol can that just won’t spray, check out these instructions.

What Is An Aerosol Can That Won’t Spray?

An aerosol can that won’t spray is usually caused by a malfunctioning valve. To open one of these cans, you first need to remove the cap. To do this, twist the can until it loosens and then pull it off. Be sure to remove the cap completely before trying to open the can – otherwise, you might end up with a mess on your hands.

If the can won’t budge no matter how much you twist or pull, your best bet is to get a can opener. These devices are available at most convenience stores and they work by slicing through the top of the can. Once the lid is off, you can reach in and try to fix the valve.

How to Open an Aerosol Can That Won’t Spray?

If your aerosol can won’t spray, the first thing to do is check the valve. If it’s defective, you’ll need to replace it. To do this, remove the cap and unscrew the valve. Be careful not to lose any of the parts – they’re very important. Once the valve is unscrewed, you’ll need to remove it. Place it on a clean surface and remove the O-ring. If the O-ring is damaged, replace it. Finally, replace the valve and screw it back onto the can.

If you ever find yourself struggling to open an aerosol can that just won’t spray, be sure to check the valve first. It might just be a simple fix – and it might save you some embarrassment.

Why is spray paint locked up?

It’s no secret that spray paint is one of the most popular art materials. It’s easy to find, affordable, and can be used in a variety of ways. But what many people don’t know is that spray paint is also one of the most dangerous.

The reason spray paint is so dangerous is because it contains lead and other chemicals that can be harmful if ingested or if it comes into contact with the skin. In fact, even small amounts of spray paint can be dangerous, and can cause serious health problems if inhaled or ingested.

So why is spray paint locked up? Because its just too dangerous to be left out in the open where people can access it. In some cases, schools have strict rules about how much spray paint students are allowed to have on hand, in order to make sure that no one gets hurt.

Why Is Spray Paint So Dangerous?

Spray paint is a chemical that can easily create a dangerous and toxic environment. When sprayed, the paint can quickly spread across a surface. This can result in a dangerous chemical reaction that can cause serious injuries.

How Can Spray Paint Be Dangerous?

Spray paint can cause a number of injuries, including chemical burns, skin exposure, and accidental poisoning. In some cases, the paint can even explode, causing serious injury.

As you can see, spray paint is a powerful medium that can be used in a variety of ways. But because of its dangerous properties, it needs to be handled with care. If you or someone you know is injured as a result of using spray paint, don’t hesitate to call an ambulance or contact the police.

What Can You Do If You Are Injured by Spray Paint?

If you are injured by spray paint, you may be able to file a lawsuit. You may also be able to file a claim with the insurance company that you have coverage through. In either case, you should contact an experienced attorney as soon as possible.

Spray paint can be dangerous and can cause a number of injuries. Make sure to stay safe and avoid getting injured by using this popular art material.

How do you open a tight spray bottle?

When it comes to opening a tight spray bottle, it can be a challenge. Many people struggle with this task, and it can be frustrating. Here are a few tips to help you open a tight spray bottle easily: 

Here are a few tips that will help you succeed:

1. Get a good grip

To open a tight spray bottle, you need to get a good grip. This is why it is important to have a good grip when opening any bottle or container. If you can get a good grip on the bottle, it will be much easier to open it.

2. Use a twisting motion

When you twist the bottle, it will open up. You will need to do this in a circular motion.

3. Apply pressure

When you open the bottle, you will need to apply pressure. You can do this by pressing down on the bottle with your hand or by using a tool.

4. Tips for cleaning a tight spray bottle

If you are ever struggling to open a tight spray bottle, it is important to clean it. You can do this by using a cleaning agent or by using hot water and dish soap.

How To Extract Paint From A Spray Can?

A lot of people ask how to extract paint from a spray can. There are a few different ways to do it, so we’re going to cover all of them in this article.

The most common way to do it is to pour a pot of boiling water over the can and let it sit for a few minutes. The paint will start to come out of the can and you can then just pour it all out.

Another way is to use a plunger. Put the can in the plunger and push and pull until the paint comes out. Be careful not to break the can! 

If neither of those methods work, you can try using a vacuum cleaner. Put the can in a plastic bag and put it on the vacuum cleaner. The paint will come off easily this way.

Whatever method you choose, be sure to wash the can and your hands thoroughly afterwards.

How Do You Remove Paint from A Spray Can?

There are three main ways to remove paint from a spray can: with a paper towel, with a straw, and with boiling water.

Method 1: With A Paper Towel

1. Wet the paper towel and place it over the can.

2. Squeeze the paper towel to extract the paint.

3. Discard the paper towel.

Method 2: With A Straw

1. Wet the straw and place it over the can.

2. Squeeze the straw to extract the paint.

3. Discard the straw.

Method 3: With Boiling Water

1. Fill a pot with water and bring it to a boil.

2. Dip the can into the boiling water for a few seconds.

3. Remove the can and dry it off.

whichever method you choose, make sure to wash your hands and the can thoroughly afterwards.

There are three main ways to remove paint from a spray can, and each one works differently. Which method do you prefer? We would love to hear from you in the comments below!

Can you turn spray paint into regular paint?

There are many things that you can turn into regular paint with a little effort. In this article, we will be discussing how you can turn spray paint into regular paint.

To start, you will need some basic supplies: a can of spray paint, an old brush, and some water. You will also need to mix the paint with water in a ratio of 1 part paint to 3 parts water. 

Once you have all of your supplies ready, carefully pour a small amount of paint into the brush and start painting on your canvas or object. Make sure to use light pressure and go slowly so that the paint can flow smoothly. 

Once your painting is finished, take a look at it and make any necessary adjustments. If you want your spray paint painting to be more like regular paint, you will need to add more water until the desired consistency is reached.

What Kind of Paint Can You Turn Into Regular Paint?

You can turn spray paint into regular paint with many different types of paint. This includes regular paint, Acrylic paint, and even watercolor paint. It really all depends on the type of paint and how much water you add to it.

How Much Paint Does It Take To Turn Spray Paint Into Regular Paint?

It usually takes a few cans of regular paint to turn a spray can into regular paint. You will need to add water until the paint is thick and flows smoothly.

What Are The Steps To Turn Spray Paint Into Regular Paint?

The steps to turn spray paint into regular paint are as follows:

1. Remove the spray paint from the can.

2. Mix the regular paint with water until you have a smooth, thin mixture.

3. Apply the mixture to the surface that you want to paint.

4. Let the paint dry.

Turning spray paint into regular paint is a simple process that can give you a better finish on your projects. Be sure to mix the regular paint with water before applying it to the surface to avoid streaks or drips.

How do you empty the contents of aerosol cans?

Aerosol cans are a common sight around the house, but many people are unaware of the importance of emptying them properly. Not only can this lead to a dangerous environment, but it can also be costly. In this article, we will explore the different ways to empty an aerosol can, and provide some tips for avoiding costly mistakes.

The first step is to open the valve on top of the can by pressing down on it with your thumbs until it pops open. 

Next, pour out all of the contents into a bowl or another container. Be careful not to pour any liquid into the air vents on the side of the can. 

Remove the tab from the can and discard it. 

Close the valve by pressing down on it until it snaps into place. 

Wash your hands and any surfaces that may have been contaminated with aerosol spray.

Inkjet cartridges:

1. Remove the ink cartridge by prying it off of the printer head with a screwdriver or other sharp object. Do not touch the inside of the cartridge, as this could cause a fire.

2. Pour out all of the ink into a bowl or another container, taking care to avoid any liquid that may have leaked onto the printhead.

3. Remove any clogged print heads by using a syringe or other appropriate tool to remove excess ink from between them and the cartridge housing. This step is especially important if you are using an inkjet printer that uses refills rather than cartridges.

4. Rinse all of the components of your printer with water, including the printhead and cartridge housing, and dry them thoroughly before re-inserting them into your machine.

5. Close the valve on top of the cartridge by pressing down until it snaps into place.

Once you have emptied your aerosol can, it is important to clean any surfaces that may have been contaminated with spray. This includes floors, countertops, and other areas where the aerosol might have landed. Be sure to use a cleaning agent that is designed specifically for aerosol cans, such as oven cleaner or bleach. For more stubborn stains, you may also need to try a harsher cleanser. Be sure to read the directions that come with the cleaning agent before using it, in order to avoid any adverse effects.

What is an Aerosol Can?

An aerosol can is a container that is used to spray a liquid. They are most commonly used in the household to spray insecticides but can also be used to spray cleaning products and other items.

What are the Different Types of Aerosol Cans?

There are two main types of aerosol cans – pull tab cans and inkjet cartridges. 

How do I Empty an Aerosol Can?

In order to empty an aerosol can, you will first need to determine the type of can it is. Most aerosol cans have a valve on the top that must be opened in order to release the contents. There are also canisters that use a pull tab to remove the content. In either case, there are several steps that must be followed in order to empty them properly.

What are the Dangers of Not Emptying an Aerosol Can?

Not emptying an aerosol can can lead to a dangerous environment. Not only can this lead to health concerns, but it can also be costly. In addition, aerosols can be very dangerous if they are inhaled. If you are unsure of how to empty your can, it is best to contact a professional.

What are Some Tips for Avoiding costly Mistakes when Emptying anAerosol Can?

If you are using an inkjet cartridge to empty an aerosol can, be sure to remove any clogged print heads by using a syringe or other appropriate tool. In addition, be sure to rinse all of the components of your printer with water before reinserting them into your machine. Finally, close the valve on top of the cartridge by pressing down until it snaps into place.

How Do You Empty an Aerosol Can?

To empty an aerosol can, first remove the cap. Next, turn the can upside down and unscrew the bottom. Finally, remove the contents by pouring it out. Be sure to avoid any liquid that might have leaked onto the printhead.

Can you puncture a spray paint can?

So you’ve been told that you can deduct your tuition and fees from your taxes – but what about those pesky holes in your walls? Turns out, you can still take a deduction for your post-secondary education expenses!

Can I Puncture A Spray Paint And Claim A Deduction?

Yes, you can puncture a spray paint can and claim a deduction for your post-secondary education expenses! This is because the tuition and fees deduction Form 8917 is a form that allows you to deduct a portion of your qualifying post-secondary education during a given tax year.

To be eligible to deduct your tuition and fees, you must meet the following requirements:

-You must have been enrolled in a qualifying educational program.

-Your education must have been completed at an educational institution that is an eligible educational institution.

-The program of instruction must have been for one or more courses of study leading to a degree, diploma, or certificate from an eligible educational institution.

-You must have been required to pay the tuition and fees in connection with your enrollment.

-The tuition and fees must have been paid in full.

-You cannot deduct any amounts that you paid for room and board, books, or other materials.

-You cannot deduct any amounts you paid to a student loan company.

To determine whether you are an eligible student, the IRS considers many factors, including your level of education, income, family status, and assets. If you have questions about whether your education qualifies for the tuition and fees deduction or about how to calculate the amount of your deduction, speak with a tax professional.

What is The Tuition and Fees Deduction Form 8917?

The tuition and fees deduction Form 8917 is a form that allows you to deduct a portion of your qualifying post-secondary education expenses. This is a form that you must complete if you have incurred tuition and fees related to an educational program that you have completed at an eligible educational institution.

What is the maximum amount I can deduct on my taxes?

The maximum amount you can deduct on your taxes for tuition and fees paid in connection with an education program that you have completed at an eligible educational institution is $4,000.

What is The Deduction Limited Per Tax Year?

The most that you can deduct during a tax year is $4,000 for tax year 2019. If you spend more than $4,000, then that amount can not be deducted. Also, the excess cost can not be carried over to the next year.

What Are The Other Requirements For Claiming The Tuition and Fees Deduction?

In order to claim the tuition and fees deduction, you must meet the following requirements:

-You must have been enrolled in a qualifying educational program.

-Your education must have been completed at an educational institution that is an eligible educational institution.

-The program of instruction must have been for one or more courses of study leading to a degree, diploma, or certificate from an eligible educational institution.

-You must have been required to pay the tuition and fees in connection with your enrollment.

-The tuition and fees must have been paid in full.

-You cannot deduct any amounts that you paid for room and board, books, or other materials.

-You cannot deduct any amounts you paid to a student loan company.

What is The Tuition and Fees Deduction Form 8917?

The tuition and fees deduction Form 8917 is a form that allows you to deduct a portion of your qualifying post-secondary education expenses.

What is The Deduction Limited Per Tax Year?

The most that you can deduct during a tax year is $4,000 for tax year 2019. If you spend more than $4,000, then that amount can not be deducted. Also, the excess cost can not be carried over to the next year.

Can you open a spray paint can and use the paint?

A lot of people are curious about whether or not they can open a spray paint can and use the paint. The answer is yes, you can! However, there are a few things to keep in mind before you start.

First, you’ll need to be aware of the safety guidelines for using paint. Make sure to use it in a well-ventilated area and avoid contact with your skin. Second, make sure that the can is properly empty before you try to open it. You don’t want any paint flying out and getting onto yourself or your surroundings. Finally, be careful when using the spray paint – it can be dangerous if used incorrectly. If you have any questions about using paint, be sure to ask your parents or an adult beforehand.

Do I Need A License To Use A Spray Paint Can?

You don’t need a license to use a spray paint can, but you may need a permit if you are using the spray paint in a public place. Make sure to check with your local government to find out the regulations in your area.

What is The Maximum Amount Of Paint That I Can Use?

You are limited to using 2 gallons of paint per day. You are also limited to using a specific type of paint, which is Acrylic, Enamel, or Latex.

What Are The Risks Of Using A Spray Paint Can?

There are a few risks that you may be exposed to when using a spray paint can. For example, you may be exposed to paint fumes, which could be harmful if you are not properly breathing while using the paint. You may also be exposed to lead, which is found in some types of paint. Make sure to read the label of the paint before using it, and be sure to wear a mask if you are painting in an area with high levels of lead.

Overall, using a spray paint can is safe as long as you take the proper precautions. Just be sure to follow the instructions that come with the paint can and heed any warnings that are present.

How do you open an already used paint can?

Are you struggling to open a newly purchased paint can? Maybe you’ve tried everything and can’t seem to get the lid off. You may be wondering what you can do to fix the problem. Thankfully, there are a few simple steps you can take to open an already used paint can.

Before starting, make sure that the paint can is clean and free of any debris. If the lid is stuck on securely, using a putty knife may be your best bet. Pry the lid off of the can using gentle pressure and use a towel to clean up any mess made. Make sure to hold onto the sides of the lid while doing this so that it doesnt fall back onto the can once it’s removed.

If none of these options work, you may need to enlist the help of a professional. Opening a paint can is a delicate process and mistakes can easily be made.

Here are a few tips for opening an already used paint can:

1. Use a can opener

If you have a can opener, this is the easiest way to open the can. Just be sure to use the correct size can opener for the can.

2. Use a spoon

If you don’t have a can opener or don’t want to use it, you can try using a spoon. Just place the spoon over the top of the lid and push down until the lid pops off.

3. Use a paper clip

If you still can’t get the lid off, you can try using a paper clip. Just place the paper clip over the lid and hold it down until it pops off.

4. Use a screwdriver

If you don’t have any of the above options and you have a screwdriver, you can try using it. Just place the screwdriver over the lid and twist it until it pops off.

If you are having trouble opening a newly purchased paint can, don’t worry – there is a solution. These tips should help you open the can easily. Do you have any other tips for opening an already used paint can? Let us know in the comments below!

Can I cut open an aerosol can?

If you are like most people, you probably have a can of aerosol spray in your home. But what you may not know is that aerosols are classified as hazardous materials by the EPA. This means that you can’t just cut open the can and start using the spray. You need to follow the proper steps in order to get the most out of your aerosol.

To start, you need to know the properties of aerosols. Aerosols are composed of a mixture of air and liquid, and they are released into the air as a spray. This means that aerosols are very small droplets. Because of this, they can be harmful if they come in contact with your skin or eyes.

Aerosols also have a high pressure. This means that the liquid inside the can is forced out through the spray nozzle very quickly. This high pressure also makes aerosols difficult to break open. In fact, most cans of aerosol spray are designed to resist breaking open even when hit with a hammer or other hard object.

So how do you open an aerosol can? The best way is to use a special tool called an atomizer cap opener. Atomizer cap openers are specifically designed to remove the caps from aerosol cans without damaging them. You can find these tools at most hardware stores and some supermarkets. Once you have your atomizer cap opener, all you have to do is put it over the nozzle of the can and twist it until it comes off.

What is The EPA Classification For Aerosols?

Aerosols are classified by the EPA as hazardous materials. This means that you can’t just cut open the can and start using the spray. You need to follow the proper steps in order to get the most out of your aerosol.

What are The Steps That I Need To Take To Use The Aerosol?

First, make sure that you have the proper permit. Then, follow the safety instructions that are printed on the can. Finally, use the aerosol as directed on the label.

Conclusion

Following these simple steps will help you get the most out of your aerosol.