Category Archives: Painting Guides

Best Gold Paint

If you’re looking to buy gold paint for your home, you’ve come to the right place. In this guide, we’ll discuss the best gold paints on the market and how they can help you create a beautiful and unique look in your home.

First, it’s important to choose the right paint. There are a number of different types of gold paints on the market, and each has its own unique benefits. Some paints are more opaque, while others are more transparent. Opaque paints will create a more solid look in your paintwork, while transparent paints can be used to create a more delicate look.

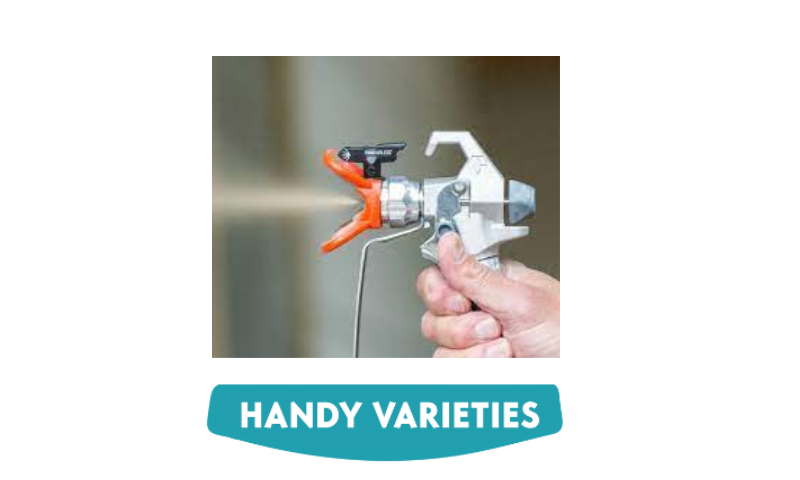
Once you’ve chosen the right paint, it’s time to apply it. It’s important to use a good quality brush when applying gold paint, as cheap brushes will leave visible brush strokes in your paintwork. Apply the paint evenly throughout the area you want to highlight, and be sure to wait until it has completely dry before moving on to another area.

If you’re looking for a beautiful way to add some gold touch to your home, don’t hesitate to try out one of these best gold paints on the market.

What Is Gold Paint?

Gold paint is a type of paint that comes in many different shades, from bright yellow to silver-grey. It can be used for a variety of projects, including wall murals, furniture refinishing, and even decorative accents around the house.

What Are the Best Gold Paints?

There are many different types of gold paints on the market today, and they come in a wide range of shades and finishes. Some of the best gold paints available include metallic finishes, antiquing paints, and even water-based options.

What Are the Benefits of Buying Gold Paint?

Buying gold paint is a great way to add a touch of elegance to any room of your home. It can also be used to create a more subtle or sophisticated look, depending on the shade and finish chosen. Additionally, it’s a cost-effective way to update any room in your home.

How Do I Buy Gold Paint?

There are several different ways you can buy gold paint. You can purchase it from a store or online, purchase it in bulk from a paint supply store, or order it directly from the manufacturer. Additionally, you can find many brands offering free samples and special discounts for loyal customers.

What Are Some Tips for Using Gold Paint?

When applying gold paint, it’s important to pay attention to the details. Make sure to use a good quality primer and base coat before applying the paint, as well as a good quality brush and roller. Additionally, it’s important to take care when cleaning up any leftover paint. For best results, use a damp cloth and warm water to clean up any messes.

Buying gold paint is an easy way to bring some elegance and sophistication to your home. With so many options available, there’s sure to be something that fits your needs and style perfectly. We hope this guide has helped you find the perfect gold paint for your home!

What is the most realistic gold paint?

Are you looking to buy gold paint? If so, you’re in the right place. In this essay, we’ll answer the question: What is the most realistic gold paint?

Realistic gold paint is a type of metallic paint that is highly reflective and looks like real gold. It is available in various shades and has a smooth finish.

Realistic gold paint is a popular choice for decorating rooms, and it is also often used in art. It is easy to apply and has a long-lasting effect.

There are many different brands of realistic gold paint, but the best ones are usually expensive. Before you buy it, make sure to research the different options available and choose the one that is best for you.

What Type of Gold Paint is Most Realistic?

The most realistic gold paint is metallic spray gold paint. It has high reflectivity and a smooth finish.

What Are the Benefits of Buying Realistic Gold Paint?

The benefits of buying realistic gold paint include its high reflectivity and its smooth finish. It also has a long lifespan and can be easily washed off if needed.

How to Buy Realistic Gold Paint

The most popular way to buy realistic gold paint is to visit a local hardware store or online retailer. You can also purchase it from specialty paint stores or online.

That’s our essay on what is the most realistic gold paint. We hope you learned about the different types of gold paint, how to buy it, and its benefits.

What is the best gold acrylic paint?

Are you looking to buy the best gold acrylic paint? You’re not alone. Many people are searching for the perfect gold acrylic paint to decorate their homes.

There are a few things to consider when choosing the best gold acrylic paint. First, you’ll want to make sure that the paint has high quality. Second, you’ll want to find a paint that is easy to use and will produce good results. Finally, you’ll want to consider the price of the paint.

If you’re looking for the best gold acrylic paint, we recommend checking out our top picks below. These paints will provide high-quality results and are easy to use. Additionally, they tend to be priced fairly.

What is the Best Gold Acrylic Paint?

The best gold acrylic paint is one that is durable, easy to use, and has high-quality pigments. It should also be resistant to chipping, cracking, and fading.

What Are the Benefits of Gold Acrylic Paint?

Gold acrylic paint has many benefits, such as being resistant to water, UV rays, and other elements. It also has a smooth finish that is easy to clean and maintain.

What Are the Best Brands of Gold Acrylic Paint?

Some of the best brands of gold acrylic paint include Behr Premium Plus, Sherwin-Williams Premium Plus, and Valspar Premium Plus.

How Do I Apply Gold Acrylic Paint?

The best way to apply gold acrylic paint is by using a sponge brush or roller. Make sure to clean your brush before and after each application.

What Are the Best Tips for Using Gold Acrylic Paint?

The best tips for using gold acrylic paint include following the manufacturer’s instructions, cleaning your brush regularly, and using a primer before applying the paint.

We hope you now have a better understanding of what the best gold acrylic paint is, how to apply it properly, and what tips you should follow when using it.

Is gold leaf better than gold paint?

Are you looking for a way to add shine and luster to your home without using a lot of gold paint? You’re in the right place. In this essay, we’ll discuss the different ways that you can use gold leaf to get the same look as gold paint.

Gold leaf is a beautiful way to add a touch of luxury to any room in your home. Not only is it elegant, but it also has a long history of being used as a decorative element. If youre looking for an economical way to achieve the same look as gold paint, the gold leaf may be the perfect option for you. 

In addition to its beauty, gold leaf is also very durable. It can stand up to a lot of wear and tear, making it a great choice for areas that are regularly exposed to moisture or light. Finally, if youre looking for something that will last for years, the gold leaf may be the best option for you.

What is Gold Leaf?

Gold leaf is a thin, delicate piece of metal that is used to decorate or enhance objects. It is usually plated with a gold or silver layer and is usually used in fine arts and architecture.

What Are the Different Ways to Use Gold Leaf?

There are several ways you can use gold leaf. You can use it as an accent on items such as furniture or walls, or you can use it as a base coat to create a more solid or permanent finish. It can also be used to create intricate patterns and designs.

What Are the Benefits of Using Gold Leaf?

Gold leaf has many benefits, including its ability to add shine and luster to objects, its durability and resistance to weather, and its ability to create intricate designs and patterns.

What Are Some Tips for Applying Gold Leaf?

When applying gold leaf, it is important to use proper techniques. Make sure you are using the proper amount of glue, wax, or resin to ensure that the leaf stays attached and won’t come off during application. Also, make sure you are using a clean surface and that you are taking the necessary precautions while working with gold leaf.

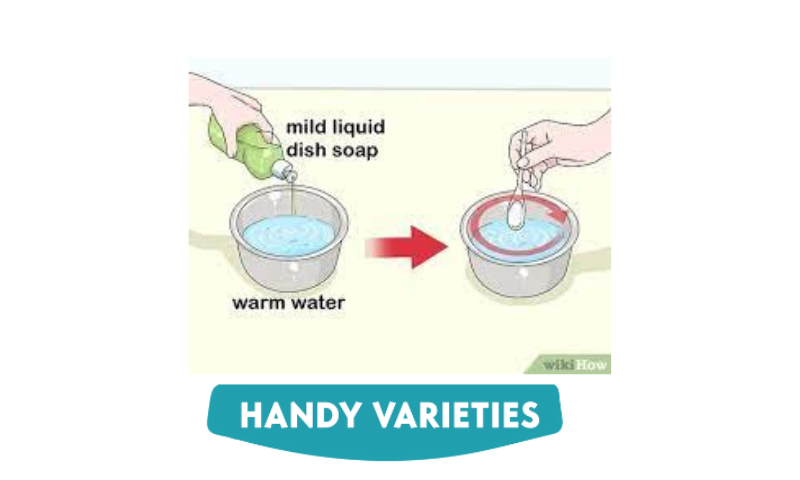
How Do I Clean Gold Leaf?

Cleaning gold leaf is easy if you follow these tips: use warm water, mild soap, and a soft cloth to wipe down the surfaces that have been coated with gold leaf. Make sure you are using enough water so that any dust or debris will be removed. Also, make sure you are using gloves when handling the gold leaf so that it doesn’t get on your hands or clothes.

We hope this essay has given you some insight into how you can use gold leaf to create a similar look to gold paint. Remember that there are many ways to do this, so don’t be afraid to try something new!

Is there real gold paint?

Have you ever wondered if there is real gold paint? It’s a common question among homeowners and DIYers, but the answer is actually quite simple. In this essay, we will discuss whether there is real gold paint. fully quite complicated. Gold is a very rare metal, so finding it in paints and other materials is usually only a fraction of what is claimed. 

For example, gold flakes are common in many paints and other products, but only about 2% of these flakes are actually gold. The remaining 98% of the flakes are made up of other materials like clay and sand. Even if all of the gold flakes were to be extracted from the paint, it would only amount to about 2.5 grams (0.07 ounces) per gallon of paint. So even if you were to find a golden paint that was 100% made up of gold flakes, it would still be a very small quantity! 

There are also various additives that can be used to make paint or varnish look like it contains more gold than it actually does. Some additives, like copper sulfate, can cause the paint to turn green when exposed to light. So if you’re looking for a golden paint that’s 100% real, your best bet is probably to avoid products with additives and look for brands that just list “gold” as one of their ingredients on the label.

What is Real Gold Paint?

Real gold paint is actually an alloy of gold, silver, and other metals that is used in interior and exterior applications. The main benefit of using real gold paint is that it has a natural look, which can help to create a more elegant and sophisticated feel in a room.

What Are the Benefits of Real Gold Paint?

There are several benefits to using real gold paint, including its natural look, durability, and cost-effectiveness. Additionally, real gold paint can help to create a more luxurious and sophisticated feel in a room.

What Are the Different Types of Real Gold Paint?

There are several different types of real gold paint, including metallic, pearlized, and semi-transparent paints. Each type has its own unique benefits and drawbacks, so it’s important to do your research before choosing a type of paint.

How to Test If There Is Real Gold Paint?

You can test if there is real gold paint by looking at it under a magnifying glass or by using an atomic absorption spectrometer. If you are not sure if the paint is real gold, it is best to consult a professional before using it in any type of application.

What Are the Pros and Cons of Using Real Gold Paint?

While there are many benefits to using real gold paint, there are also some cons to consider. For example, real gold paint can be more expensive than other types of paint, as well as more difficult to apply. Additionally, it may not be suitable for certain types of applications due to its natural properties.

In conclusion, there is no need to wonder if there is real gold paint. There are several types of real gold paints available and each one has its own unique benefits and drawbacks. It’s important to do your research before choosing a type of paint for your project.

How long does Golden paint last?

Are you looking to know how long does golden paint last? You’re not alone. Many homeowners are looking for ways to extend the life of their paint and protect their investment.

Golden paint is a popular type of household paint that is made with a high-quality pigment and a durable, water-based base. It is often used to paint walls, ceilings, and floors in homes and office buildings.

According to the Golden Paint Manufacturers Association, a typical room can be painted with 2-3 coats of gold paint. However, if you are painting a large area or if the surface is extremely dry, you may need to apply up to 5 or 6 coats.

Even with regular maintenance, golden paint should last between 10 and 12 years in a normal climate. If the paint is exposed to direct sunlight or high temperatures, it may not last as long. In extreme cases, golden paint can even start to chip and peel.

How Long Does Golden Paint Last?

Golden paint can last for many years if it is properly maintained. Proper maintenance includes cleaning the surface regularly, using the right type of cleaner, and using a good quality sealer over the paint.

What Are Some Tips For Long-Lasting Golden Paint?

Here are some tips for extending the life of your golden paint:

  1. Clean Regularly
  2. Use The Right Cleaner
  3. Use A Good Quality Sealer
  4. Protect The Paint With A Coating
  5. Keep It Out Of The Sun
  6. Use Proper Storage
  7. Consider Using A Different Type Of Paint
  8. Monitor The Color And Coverage Of The Paint
  9. Check For Any Issues With The Paint
  10. Monitor The Environment Around The Home Or Office
  11. Consider Replacing Old Or Damaged Paints
  12. Consider Removing Stains And Spots Before Painting
  13. And, consider Getting An Estimate For Repainting
  14. Consider Replacing Old Light Fixtures And Ceiling Fans
  15. Consider Replacing Old Windows And Doors
  16. Also, consider Replacing Old Flooring Or Carpets
  17. Consider Replacing Old Curtains And Blinds
  18. Consider Replacing Old Mirrors And Cabinets
  19. Moreover, consider Replacing Old Furniture
  20. Consider Replacing Old Electrical Wiring And Fixtures
  21. Consider Replacing Old Electrical Outlets
  22. And consider Replacing Old Plumbing Fixtures
  23. Consider Replacing Old Heating Fixtures
  24. Consider Replacing Old HVAC Systems
  25. Then, consider Replacing Old Electrical Outlets
  26. Consider Replacing Old Appliances
  27. Consider Replacing Old Lights
  28. Also, consider Replacing Old Smoke Detectors
  29. Consider Replacing Old Fire Alarms
  30. Consider Replacing Older Electronics

31 . Consider Replacing Older Electrical Outlets

32 . Consider Replacing Older Plumbing Fixtures

33 . Consider Replacing Older Heating Fixtures

34 . Consider Replacing Older HVAC Systems

35 . Consider Replacing Older Furniture

36 . Consider Replacing Older Windows And Doors

37 . Consider Replacing Older Flooring Or Carpets

38 . Consider Replacing Older Curtains And Blinds

  1. Consider Replacing Older Mirrors And Cabinets

40 . Consider Replacing Older Computers

41 . Consider Replacing Older Electrical Wiring And Fixtures

42 . Consider Replaces Older Electrical Outlets

43 . Consider Replaces Older Plumbing Fixtures

44 . Consider Replaces Older Heating Fixtures

45 . Consider Replaces Older HVAC Systems

46 . Consider Replaces Older Electrical Outlets

47 . Consider Replace All Light Fixtures

48 . Consider Replace All Ceiling Fans

49 . Consider Replace All Windows

50 . Consider Replace All Doors

51 . Consider Replace All Flooring

52 . Consider Replace All Curtains

53 . Consider Replace All Mirrors

54 . Consider Replace All Cabinets

55 . Consider Replace All Furniture

56 . Consider Replace All Smoke Detectors

57 . Consider Replace All Fire Alarms

58 . Consider Replace All Appl

What is real gold paint?

Are you looking to add some real gold to your home? You’re not alone. Thousands of homeowners around the world are turning to this unique paint for its rich color and unique look.

What is Real Gold Paint?

Real gold paint is a premium, high-quality paint that contains real gold flakes and is designed to mimic the look of a real gold leaf. It’s made up of a special base coat and top coat that gives it a metallic look and a high sheen.

What Makes Real Gold Paint Unique?

The key feature of real gold paint is its rich color and unique metallic look. It can be applied over any other paint or stain and will give your home that extra touch of luxury.

How Does Real Gold Paint Compare to Other Paints?

Real gold paint is not meant to be used as an alternative to traditional paints or stains. It’s intended for use on wood, metal, and stone surfaces, so it does have its own unique set of benefits.

What Are the Benefits of Adding Real Gold Paint to Your Home?

Adding real gold paint to your home can give it a luxurious, luxurious look without the high cost or maintenance of real gold leaf. It’s also easier to maintain than traditional paint, so you can rest assured that your home will look great for years to come.

What Are the Steps for Adding Real Gold Paint?

The steps for adding real gold paint are simple. You’ll need to prepare the surface you want to paint with a base coat and top coat, then apply the real gold paint over the top.


Is One Coat Of Primer Enough

Are you wondering if one coat of primer is enough to cover up a patchy finish? You’re not alone. Many people are just starting to learn the basics of painting and are looking for answers.

The answer is, it depends. 

If the patchy finish is very light and limited to a small area, a single coat of primer may be enough to cover it up. However, if the finish is more severe or widespread, you’ll likely need to apply a second coat of primer. 

It’s important to remember that patchy finishes can easily be fixed with a little bit of paint. If you need to apply a second coat of primer, be sure to use a quality product that will cover the finish well.

What is Primer?

Primer is a thin, liquid base coat that helps create a smooth, uniform finish on your walls and ceiling. It also helps to protect the surface from water and other contaminants, as well as provide a base for the paint to adhere to.

What Does Primer Do?

Primer acts as a barrier between the paint and the surface, helping it stick to the wall or ceiling. It also helps to reduce the appearance of any imperfections in the surface, such as dirt, stains, and cracks.

How many primers Do I Need?

When painting a large area like a wall or ceiling, you should start with two coats of primer. A single coat may not be enough for large surfaces. For smaller areas like windows and doors, one coat should be enough.

How Do I Apply Primer?

You can use a brush or roller to apply primer onto your walls or ceilings. Be sure to cover all areas of the wall or ceiling with primer. Let it dry for at least 30 minutes before painting over it with paint.

What Are the Benefits of Primer?

Primer can help reduce the appearance of imperfections in your walls or ceilings, making them look smoother and more even. It can also help protect the surface from water damage, as well as provide a base for your paint to stick to.

What Should I Avoid When Applying Primer?

Avoid using too much primer on your walls or ceilings, as this can cause drips and uneven coverage. Also, make sure to sand down any rough spots or areas that could easily trap dirt and dust. Finally, never use oil-based primer on surfaces that are sensitive to chemicals such as glass or metals.

Can I Paint Over Primer?

Yes! You can paint over your primer as many times as you’d like before applying your final coat of paint. This will allow you to create different looks with your room simply by changing up your colors and shades of paint.

Can I get away with one coat of primer?

Are you a DIYer looking to get away with just one coat of primer? You’re not alone. Thousands of DIYers are trying to save money and time by skipping the second coat of primer. In this essay, we’ll discuss the pros and cons of skipping the second coat of primer, as well as how to get away with just one coat of primer. What is Primer?

Primer is a thin, water-based paint that helps to bond the top coat of paint to the surface underneath it. It’s typically used on porous surfaces like wood or masonry, but can be used on other surfaces as well. Why Do We Use Two Coats of Paint?

Primer is a thin paint, so it needs to be applied in two coats in order to achieve the desired result. One coat of primer will not adequately protect the surface against moisture and other environmental factors. Conversely, two coats of primer will fully cover the surface and provide maximum protection. Why Would I Skimp on the Second Coat of Primer?

There are several reasons why someone might choose to skip the second coat of primer: 

-They’re on a budget and don’t want to spend money on something they won’t use 

-They’re trying to save time by skipping the second coat 

-The surface they’re painting is not particularly porous or difficult to paint 

-They’re using a high-quality paint that doesn’t require a second coat of primer What Are The Pros and Cons of Skipping the Second Coat of Primer?

The pros of skipping the second coat of primer are that it can save you money and time. By only applying one coat, you’re reducing the amount of material you need to purchase. Additionally, by painting over already primed areas, you’re preventing water and other environmental factors from damaging your finished project. On the other hand, skipping the second coat can lead to inconsistency in your finish. If your first coat is too thick or too thin, it will show through as different shades on different parts of your project. In order to avoid this problem, it’s important to apply the primer evenly and thinly throughout your project. How Can I Get Away with Just One Coat of primer?

There are a few ways to achieve the same results as if you had applied two coats of primer:

-Use a high-quality, water-based paint that doesn’t require a second coat of primer

-Apply primer directly to the surface you’re painting, rather than spraying it on

-Use a special priming compound that allows you to skip the second coat. However, these compounds are usually more expensive than traditional primers. What are Your Thoughts on Skipping the Second Coat of primer?

Are you a DIYer who usually applies two coats of primer? Or have you tried skipping the second coat and found that it works just as well? Let us know in the comments below.

What Are the Benefits of Skipping the Second Coat of Primer?

Skipping the second coat of primer can save you time and money. Not only is it cheaper than buying two coats, but it also helps keep down your printing costs as well. Additionally, it can help extend the life of your paint job by reducing the amount of wear and tear on your walls.

What Are the Drawbacks of Skipping the Second Coat of Primer?

The biggest drawback to skipping the second coat of primer is that it can leave a noticeable “wet” or “chalky” finish on your walls. This is because primer typically contains a lot of abrasive ingredients that can be difficult to remove once you’ve applied the top coat. Additionally, if you don’t use a good quality primer, it can also cause your walls to crack and peel over time.

How Can I Get Away With Just One Coat of Primer?

If you want to get away with just one coat of primer, there are a few things you can do to help reduce the amount of wear and tear on your walls. You can use a high-quality primer, use a gentle finishing wax, and clean your walls regularly. Additionally, you can choose a primer that contains less abrasive ingredients, such as water-based paints.

Getting away with just one coat of primer can be a great way to save money and time while keeping your walls looking great. However, it’s important to remember that without proper prep work and proper primers, you can run into problems down the road. We hope this essay has helped you understand more about primers and getting away with just one coat of primer.

Do you need one coat or two coats of primer?

Are you wondering if you need one coat or two coats of primer? There are a few factors that can help you decide. In this article, we’ll discuss the questions to ask yourself before buying a primer. What is Primer?

Primer is a type of spray paint that is used to make surfaces more receptive to being painted. It helps the paint adhere to the surface, reduces the chance of peeling, and provides a smooth surface for the paint to sit on.

How many primers Do I Need?

There is no one answer to this question. You’ll need to consider the type of paint you’re using, the surface you’re painting, and the amount of coverage you want. 

If you’re using water-based paint, one coat will be enough. If you’re using an oil-based paint, two coats are recommended. 

Additionally, if the surface is especially dry or brittle, a third coat may be necessary. 

What Factors Should I Consider?

When deciding how much primer to buy, there are a few things to consider: 

-The type of paint you’re using: Water-based paints require less primer than oil-based paints. 

-The condition of the surface: Abrasive surfaces need more primer than smooth surfaces. 

-The amount of coverage you want: One coat will usually be enough for most projects, but if you want a more polished finish, two coats may be necessary.

-The temperature: Cold surfaces need more primer than warm surfaces.

-The time of year: In cold weather, the primer will freeze and crack, so it’s important to use a heat-resistant type of primer.

What Are the Most Common Mistakes People Make with Primer?

One of the most common mistakes people make when using a primer is not following the instructions that came with the product. Primer is a very sensitive product and can be easily ruined if not used correctly. Follow the instructions carefully and you’ll be sure to get great results.

What Type of Primer Should I Use?

The type of primer you choose depends on your project and the materials you are using. Popular types of primers include oil-based primers, water-based primers, and latex-based primers.

How Do I Apply Primer?

Applying primer is easy! Simply shake the can vigorously, spray it on an area large enough to cover the area you are working on, then wait for it to dry.

What Do I Need to Know About Two Coats of Primer?

Two coats of primer are usually recommended if you are painting a large area. This will ensure that the finish is smooth and resistant to wear and tear.

What Are the Benefits of Using Two Coats of Primer?

Two coats of primer can help protect your painting from water, dirt, and other elements that may damage your painting over time. It also provides a stronger base for the paint to adhere to and reduces the risk of peeling.

As you can see, there are many factors to consider when deciding if you need one coat or two coats of primer. We hope this article has helped you decide if you need one or two coats of primer for your next painting project.

Can I use two coats of paint instead of primer?

Are you looking to paint your walls with two coats instead of one? This is a common question and one that has many people wondering if it’s possible. The answer is, in a word, yes. 

Primer is designed to protect the surface you are painting from getting wet and dirty. When you put two coats of paint on top of the primer, all of the protective properties of the primer are negated. This means that the first coat will be just as wet as if you had used one coat of paint and the second coat will be just as thick as if you had used a full layer of primer. 

If this sounds like something you want to try, there are a few things to keep in mind. First, make sure that your walls are completely dry before beginning. Second, use caution when handling your paint because two coats can be much more intense than one. Lastly, be sure to remove any excess paint with a brush or roller after each coat has been applied in order to avoid running into problems with peeling or cracking later on.

What do I need to know before painting with two coats?

Before painting with two coats, it’s important to read the product label to determine the type of paint and how much to use. It’s also important to make sure the surface is clean and free from dirt, dust, and other debris.

Will two coats of paint give me the same look as one coat?

While two coats of paint may not give you the exact same look as one coat, it will still give you a similar result. Two coats of paint will provide a more even and consistent finish than one coat.

What are the advantages of using two coats instead of one?

Two coats of paint will result in a more even coverage, which can help hide any imperfections or imperfections in the original wall surface. It can also help protect against water damage and fading.

What can I do to ensure my painted walls look great?

To ensure your painted walls look great, it’s important to clean the surface thoroughly with a soft cloth and water before painting. It’s also important to make sure the surface is free from dust, dirt, and other debris.

How long does it take to paint with two coats?

Painting with two coats typically takes about twice as long as one coat of paint. This can vary depending on the type of paint and how thickly you apply it.

Painting with two coats instead of one can give you a more even and consistent finish on your walls. With the right preparation, it’s possible to get great results without having to waste time or money on sanding and priming.

Is 1 coat of primer enough on new drywall?

Are you looking for the answer to the question, “Is 1 coat of primer enough on new drywall?” Well, the answer is yes. In this article, we will discuss why 1 coat of primer is enough on new drywall.

Drywall is a type of construction material that is used to create walls, ceilings, and partitions. It is made from gypsum plaster and other materials and can be painted or left unfinished. primer is a thin, smooth coating that is applied to the surface of drywall before painting or other finishes. Primers are designed to protect the wall surface from moisture and other damage.

According to the National Gypsum Association, a primer should be applied to new drywall if it is:

-Thinned with water

-Fixed with joint compound

-Less than 12 inches wide

-Less than 6 feet long 

Primers should not be applied if any of the following are true:

-The drywall is less than 1/2 inch thick 

-and the drywall is more than 6 feet long 

-The drywall is more than 12 inches wide 

If you choose to apply a primer, make sure that you follow the instructions that are included with your product. Some primers come with a sealant that must be applied after the primer has been applied in order to provide an optimal finish.

Why does Drywall need to be Primed?

The drywall needs to be primed before it can be painted or sealed. Without primer, the paint or sealant will not adhere properly and may come off in the future.

How to Apply Primer?

The first step in applying primer is to clean the surface of the drywall with a damp cloth or sponge. Then, apply a thin layer of primer using a brush or roller.

What benefits of Primer?

Primer provides a protective barrier between the drywall and any paint or sealant that is applied later. This helps protect the drywall from damage and prolongs its lifespan.

How to Tell if a Coat of Primer is Enough?

To tell if a coat of primer is enough, you should examine the wall carefully for any signs of peeling, bubbling, or discoloration. If there are any signs of these issues, then you should apply another coat of primer.

In conclusion, 1 coat of primer is enough on new drywall. It provides a protective barrier between the drywall and any paint or sealant that is applied later and helps protect the drywall from damage and prolongs its lifespan.

How long after priming can I paint?

Are you a homeowner looking to learn how long after priming can I paint? You’re in the right place. In this essay, we’ll discuss the various factors that affect how long after priming can i paint. Keep in mind that the time frame will vary depending on the paint, surface, humidity, and other factors.

How long after priming can I paint?

The answer to this question depends on a few factors, including the type of paint, the surface it’s being applied to, and the specific conditions in which it’s being used. In general, you can typically start painting after approximately two hours have passed since priming. However, there are always exceptions – so always consult your manufacturer’s instructions for specific product information.

In general, you should always wait at least 24 hours after priming before painting. This allows the paint to dry properly and prevents any potential accidents.

What is Priming?

Priming is the process of preparing a surface for a finish by coating it with a sealant or primer coat. It’s usually done before painting, but it can also be done after painting if desired.

How Long After Priming Can I Paint?

The answer to this question depends on a number of factors, such as the type of primer you use, the size of the surface, the type of paint you use, and the weather conditions when you’re painting. Generally, it’s best to wait at least 24 hours after priming before painting.

Factors That Affect How Long After Priming Can I Paint?

There are a number of factors that affect how long after priming can I paint, including the type of primer I use, the size of the surface, the type of paint I use, and the weather conditions when you’re painting. Generally, it’s best to wait at least 24 hours after priming before painting.

What Types of Paint Should I Use?

The type of paint you use depends on several factors, including the type of surface you’re painting, the size and type of finish you want on your walls, and what type of environment you’re in when you’re painting. Generally, it’s best to wait at least 24 hours after priming before painting.

What Types of Finishes Should I Use?

The type of finish you use depends on several factors, including the type of surface you’re painting, the size and type of finish you want on your walls, and what type of environment you’re in when you’re painting. Generally, it’s best to wait at least 24 hours after priming before painting.

Conclusion

How long after priming can I paint? This is a topic that can be confusing and difficult to understand. We hope this essay has provided you with an understanding of how long after priming can i paint and what factors affect how long after priming can i paint.


The Pressure Washer Shuts Off When Trigger Is Pulled

Have you ever experienced a pressure washer that shuts off when you pull the trigger? It’s a common problem that can be difficult to diagnose and fix. In this article, we’ll discuss what causes the pressure washer shuts off when the trigger is pulled, how to solve the problem, and how to prevent it in the future.

What Causes Pressure Washer Shuts Off When Trigger Is Pulled?

There are several potential causes of this problem, such as a blocked hose, an over-pressurized hose, a worn-out or broken pump, or a clogged filter.

What Can You Do to Resolve This Problem?

The first thing to do is check the hose for blockage. If the hose is blocked, you can use a snake or other device to clear it. If that doesn’t work, you can also try using a different hose or replacing the old one with a new one.

How to Prevent This Problem in the Future?

To prevent this problem from happening in the future, make sure all hoses are free of debris and that all parts are in good working order. Also, make sure that the pump is not over-pressurizing the hose, and that the filter is not clogged.

We hope this article has helped you understand what causes the pressure washer shuts off when the trigger is pulled, how to resolve it, and how to prevent it in the future. Remember to check all hoses and parts for debris and wear and make sure that everything is in good working order.

Why does my pressure washer cut out when I pull the trigger?

Have you ever experienced a pressure washer cutting out when you pull the trigger? If so, you’re not alone. Many homeowners experience this problem and it can be frustrating. In this essay, we’ll discuss the reasons why your pressure washer may be cutting out when you pull the trigger. We’ll also provide some solutions so that you can troubleshoot the issue and get your pressure washer back up and running.

Most pressure washers have a cutoff valve that shuts off the flow of water when the pressure reaches a certain level. When this valve is blocked, water can’t flow through the pump, which will cause the machine to shut down. There are a few different reasons why this valve might be blocked. 

One common culprit is debris in the water line. If there’s gunk buildup in the lines, it will block the flow of water. You can try using a plunger to dislodge any obstructions and fix them up with a bit of plumber’s putty if necessary. 

Another common culprit is sediment buildup in the pump. This sediment can get lodged in the cutoff valve, which will cause it to malfunction. To fix this problem, you’ll need to remove all of the sediment from the pump and clean it thoroughly. 

Sometimes, however, even after cleaning everything up there may be simply too much debris present for the cutoff valve to handle. In this case, you’ll need to replace your machine’s cutoff valve altogether. While this isn’t an easy task, it’s definitely one that you should consider if your pressure washer is cutting out on you regularly.

If you’re experiencing problems with your pressure washer, don’t hesitate to give us a call. We can help you troubleshoot the issue and get your machine back up and running as quickly and efficiently as possible.

What Causes a Pressure Washer to Cut Out When You Pull the Trigger?

There are several potential causes for a pressure washer cutting out when you pull the trigger. The most common is that the water supply is too low or too high. Other causes include the water supply is blocked or dirty, the water delivery system being clogged, or the engine being blocked by debris.

What Can You Do to Prevent This from Happening Again?

To prevent this from happening again, make sure that you have sufficient water pressure and that there are no obstructions in the water line. Also, check the water supply and make sure that it is not too low or too high. Lastly, make sure that the water delivery system is free of debris and that it is not blocked.

What Are Some Other Causes of a Pressure Washer Cutting Out When You Pull the Trigger?

There may be other causes of a pressure washer cutting out when you pull the trigger. These include worn or damaged parts, a clogged filter, or an air blockage in your hose or wand.

What Are Some Tips for Avoiding This Problem?

To avoid this problem in the future, make sure that you have sufficient water pressure and that there are no obstructions in the water line. Also, check the water supply and make sure that it is not too low or too high. Lastly, make sure that the water delivery system is free of debris and that it is not blocked.

We hope this essay has helped you understand why your pressure washer may be cutting out when you pull the trigger. While there are many possible causes, we now know how to prevent this from happening again. With these tips in mind, you should be able to enjoy your power washing experience without any problems.

How do you know if your unloader valve is bad?

Have you ever wondered if your unloader valve is bad? If so, you’re not alone. Many people have questions about their unloader valves and what to do if they are no longer functional. In this essay, we will discuss the basics of unloader valves and how to tell if yours is bad.

Unloader valves are typically located on the discharge side of a water heater. When the water is heated, it expands and pushes against the unloader valve. This causes the valve to close, which stops the water from entering the boiler. If your unloader valve is not functioning properly, this could result in poor water heating or even a full tank warning. 

If you are experiencing any of these problems, it is important to take action. One way to test if your unloader valve is bad is to hold your hand over the opening and see if the water flows freely. If not, your valve may need to be replaced. In addition, you can also try replacing your thermostat or adding more antifreeze to the system in case of a freeze. If you are unsure whether or not your unloader valve is bad, please contact a professional for assistance.

What is an Unloader Valve?

An unloader valve is a device that regulates the flow of liquid or gas through a pipeline system. It is typically located at a point where a pipeline enters a storage tank or other pipeline system. The purpose of an unloader valve is to control the flow of fluid and prevent any back pressure from occurring.

What Are the Benefits of Having an Unloader Valve?

Having an unloader valve can be beneficial in many ways. It can help to protect the pipeline system from damage, reduce the amount of energy needed to pump the liquid or gas through the pipeline, and reduce the amount of time needed to move the liquid or gas from one point to another.

What Are the Signs That Your Unloader Valve Needs replacing?

If your unloader valve does not operate as it should, there are several signs to look for. These signs include low pressure, back pressure, excessive noise, and a loss of flow.

How Do You Replace Your Unloader Valve?

Replacing an unloader valve can be a complex task, but it can be done with some patience and careful planning. It is recommended that you contact a professional for help with this task as it can be dangerous if not done properly.

What Are the Alternatives to an Unloader Valve?

If you decide that replacing your unloader valve is not a good option for you, there are other options available such as pumping systems, remote control systems, and automation systems. Each of these options has its own benefits and drawbacks, so it is important to consider all of your options before making a decision.

In conclusion, understanding how to tell if your unloader valve is bad is important in order to ensure the proper operation and safety of your pipeline system. We hope you learned what an unloader valve is, what benefits it can provide, what signs indicate that it needs replacing, and how to replace it if necessary.

How long can a pressure washer run without pulling the trigger?

Have you ever wondered if a pressure washer can run for too long without pulling the trigger? If so, you’re not alone. Many people are curious about this topic and want to know how long a pressure washer can run before it starts to lose power. What is Pressure Washer Power?

Pressure washer power is the amount of energy that a pressure washer can produce. This energy is used to power the motor and other components of the pressure washer. Pressure washer power is determined by a number of factors, including the size and type of the pressure washer, the engine/motor, and the nozzle. How Long Can a Pressure Washer Run?

There is no definitive answer to this question since it depends on a number of factors, including the type of surface being cleaned, the pressure washer’s overall condition, and how hard the user is working on the pressure washer. However, most experts agree that a pressure washer can usually run for about 25 minutes before it starts to lose power. At this point, the user will likely have to pull the trigger to stop the machine. If the pressure washer has been run for a longer period of time, the motor may start to overheat and could potentially catch on fire. Be sure to always follow the instructions that come with your pressure washer in order to avoid any risks.

How Long Can a Pressure Washer Run Without Pulling the Trigger?

Generally, a pressure washer can run for up to 15 minutes without pulling the trigger. However, it is important to check the manual or call the manufacturer for specific instructions for your specific model.

What Are Some Warning Signs That a Pressure Washer Is About to Die?

If your pressure washer starts to lose power, it may be time to check the unit for any signs of wear and tear. Additionally, you may notice an increase in noise or smell coming from the unit.

What Are Some Tips for Keeping a Pressure Washer Running Longer?

There are some tips that can help you keep your pressure washer running longer. These include checking the oil level and filters, cleaning the gun nozzle and gun hose, and maintaining proper water pressure.

We hope this article has answered your question about how long can a pressure washer run without pulling the trigger. While there are no set rules, it is important to know when it is time to check your unit for signs of wear and tear or other issues that may be causing the unit to lose power.

What is a manual trigger lock on a pressure washer?

Are you looking for a manual trigger lock for your pressure washer? If so, you’re in the right place. In this article, we’ll discuss what a manual trigger lock is, how it works, and why you might want to use one. What is a Manual Trigger Lock?

A manual trigger lock is a device that prevents unauthorized access to your pressure washer by requiring a manual action to activate it. It’s designed to prevent children or other unauthorized individuals from turning the machine on without your consent.

How Does a Manual Trigger Lock Work?

A manual trigger lock typically attaches to the pressure washer hose in some way. When the user wants to use the machine, they must first unlock the trigger lock by pulling it off of the hose. This ensures that only authorized individuals can use the machine.

Why Use a Manual Trigger Lock?

There are a few reasons why you might want to use a manual trigger lock on your pressure washer. First, it can prevent unauthorized access to your machine. If someone else is using your pressure washer without your permission, a manual trigger lock can help prevent them from turning it on accidentally.

Second, a manual trigger lock can help protect your equipment from damage. If someone else is trying to use your machine without your permission, they might accidentally damage it while they’re working. A manual trigger lock will help protect your machine from these types of accidents.

Finally, a manual trigger lock can also help protect your privacy. If you only want certain people to use your pressure washer, a manual trigger lock can help make sure that only those people have access to it.

How Does a Manual Trigger Lock Work?

A manual trigger lock consists of a lever, which must be pulled in order to turn on the pressure washer. When the lever is released, the pressure washer will turn off.

Why Should I Use a Manual Trigger Lock?

Manual trigger locks are an important safety feature for pressure washers. They provide an extra layer of protection against unauthorized access and accidental damage. They also help prevent children from turning the pressure washer on without your consent.

What Are the Benefits of Using a Manual Trigger Lock?

The main benefit of using a manual trigger lock is that it helps to protect your pressure washer from accidental misuse. It also provides peace of mind knowing that no one can turn your machine on without your consent.

What Are the Different Types of Manual Trigger Locks?

There are several types of manual trigger locks available, including lever-type and key-type locks. Lever-type locks are generally more secure and harder to tamper with than key-type locks.

In conclusion, a manual trigger lock is an essential safety feature for any pressure washer. They provide an extra layer of protection against unauthorized access and accidental damage and help prevent children from turning the pressure washer on without your consent.

How do you get rid of an airlock in a pressure washer?

Having an airlock in your pressure washer is a great convenience. It allows you to maintain the pressure in your washer as you use it, preventing it from backfilling. However, sometimes an airlock can break or become clogged, and this can be a big problem. What is an Airlock?

An airlock is a device that is used to keep the pressure in your washer consistent as you use it. It prevents backfilling and helps ensure that your pressure washer is working properly. Airlocks come in a variety of shapes and sizes, and they can be found on both electric and gas pressure washers. How do you get rid of an airlock?

If your airlock is clogged or broken, you will need to take care of the issue. You can try using a plunger to clear the airlock, or you can replace the airlock. If replacing the airlock is not an option, then you will need to reset the pressure washer. How to reset a pressure washer is beyond the scope of this article, but you can find more information on the internet.

How Do You Get Rid of an Airlock?

If you notice that your airlock has broken or is clogged, you can take action to get rid of it and prevent further damage. You can also take steps to prevent it from breaking in the first place.

What Can Happen if the Airlock Breaks?

If the airlock breaks, this can create a backfilling situation, which can cause damage to your pressure washer. Additionally, it can lead to a loss of pressure and even a fire hazard.

What Are Some Tips for Keeping an Airlock Clean?

To keep your airlock clean, it’s important to regularly check for clogs and debris build-up. Additionally, you should always use high-quality detergent specifically designed for pressure washers.

What Are Some Other Ways to Maintain the Pressure in Your Washer?

There are a few other ways you can maintain the pressure in your washer, such as using high-quality detergents and using a rinse agent. Additionally, you should always make sure that your water source is clean and free of debris.

Now you know how to get rid of an airlock in a pressure washer and what to do if it breaks or becomes clogged. We hope this helps you keep your pressure washer running smoothly and safely.

How do you clean an unloader valve?

Have you ever wondered how to clean an unloader valve? In this article, we will discuss the steps necessary to keep your unloader valve in top condition.

What is an Unloader Valve?

An unloader valve is a device that allows water to flow from one part of a pipe system to another. It is commonly found in residential and commercial plumbing systems, and it ensures that water flows smoothly from one point to another.

Why Should You Clean an Unloader Valve?

Regular cleaning of the unloader valve can help prevent potential problems such as clogging, rust, and damage from mineral deposits. It can also help improve the performance of the unloader valve and ensure that it operates properly.

What Tools Are Needed to Clean an Unloader Valve?

To properly clean an unloader valve, you will need a few basic tools such as a pipe cleaning brush, pipe joint cleaner, and a water softener. Additionally, you will need to use caution when using these tools as they can be harmful if not used correctly.

How Often Should You Clean an Unloader Valve?

Depending on your type of plumbing system, you should clean your unloader valve every few months or once per year. This will help to keep it free of dirt, debris, and other substances that can clog it up.

What Are Some Tips for Cleaning an Unloader Valve?

Here are some tips for cleaning an unloader valve: – Use mild soap and warm water – Use a pipe brush to scrub the inside of the valve – Use pipe joint cleaner to scrub the outside of the valve – Use a water softener to help remove mineral deposits – Never use any harsh chemicals or solvents – Never leave the valve open when cleaning it – Always wear gloves and safety glasses when cleaning the valve – Never touch the inside or outside of the valve with your hands – Never use a power tool to clean it – Never force the valve open or closed – Never use pressure to clean it – Always allow the water to flow freely after cleaning it – Never leave any type of cleaning solution in the system – Never use any type of abrasive materials

Conclusion

We hope this article has helped you understand how to keep your unloader valve in top shape. By following our tips and keeping your unloader valve clean, you can ensure that it will function properly and efficiently for years to come.


How To Harden Rustoleum Paint?

Do you have a rustoleum paint project that needs to be completed quickly? You’re not alone. Hundreds of people are in the same boat and looking for ways to get their projects done as quickly as possible. In this article, we’ll discuss how to harden rustoleum paint in just a few easy steps.

First, you’ll need to gather some supplies. You’ll need a pot of boiling water, a bowl of ice water, a towel, and some steel wool.

Next, take your rustoleum paint project and place it in the pot of boiling water. Make sure to cover the entire surface with the paint. Let the project sit for two minutes before taking it out and putting it in the bowl of ice water.

Now, use the towel to remove all of the excess water from the paint. Next, use the steel wool to scrub off any tough bits of paint that are left on the surface. Once everything is clean, you can start to apply your final coat of protection.

What is Rustoleum Paint?

Rustoleum paint is a durable, high-quality paint that can be used on a wide variety of surfaces. It’s made from high-quality ingredients and can be easily applied to almost any surface.

What are the Benefits of Hardening Rustoleum Paint?

Hardening rustoleum paint can help to ensure that the paint lasts longer and is more resistant to water and other elements. It also helps to protect the paint from fading over time and makes it easier to clean up after use.

What Materials Are Needed for Hardening Rustoleum Paint?

You’ll need a couple of materials to harden your rustoleum paint project, including sandpaper, turpentine, and mineral spirits. You’ll also need some type of protective masking tape or painter’s tape for the project.

How to Harden Rustoleum Paint Step by Step

Here are the steps you’ll need to follow in order to successfully harden rustoleum paint:

  1. Apply a thin layer of sandpaper to your project area.  
  2. Apply a thin layer of turpentine directly onto the sandpaper.  
  3. Let the turpentine sit for about 10 minutes before applying mineral spirits directly onto the turpentine layer.  
  4. Allow the mineral spirits to sit for about 10 minutes before wiping off with a paper towel or cloth.
  5. Wipe down with a clean cloth or paper towel if necessary and allow the project to dry completely before using.
  6. Once the project has dried, you can apply another layer of sandpaper if desired.
  7. Repeat steps 1-6 until your desired thickness has been reached.
  8. Optional step: You can use an airless sprayer or brush with an oil-based lubricant to help make the job easier and faster.
  9. Finish up by buffing off any excess dust or debris with a clean cloth or paper towel and allow the project to dry completely before using.
  10. Enjoy!

How long does it take for rustoleum to harden?

Have you ever wondered how long it takes rustoleum to harden? If so, you’re not alone. Many homeowners and builders are looking for ways to speed up the process of rustoleum hardening, which can save them time and money.

In general, it takes about two hours for rustoleum to harden completely. However, there are variables that can affect the process, such as the temperature and humidity in the room. So, it’s always best to check with your Rustoleum dealer before doing anything drastic like speeding up the process.

What is Rustoleum?

Rustoleum is a heavy-duty, non-toxic coating designed to protect metal surfaces from corrosion and rust. It is available in two forms: spray-on and liquid-on.

What Are the Benefits of Rustoleum Hardening?

Rustoleum hardens quickly and offers long-lasting protection against corrosion and rust. It is also easy to apply, which saves time and money.

How Long Does It Take Rustoleum to Harden?

It depends on the type of rustoleum you use and the temperature of the environment where it will be used. The average time to harden varies from 15 minutes to 2 hours, depending on the product used.

What Tools Are Used for Rustoleum Hardening?

There are several tools that can be used for rustoleum hardenings, such as sandpaper, pliers, a wire brush, and a bristle brush. These tools should be used in conjunction with the proper rustoleum product for optimal results.

What Are the Difficulties of Rustoleum Hardening?

Rustoleum can be difficult to clean off, especially if it has been on for a long period of time. It can also be difficult to remove from certain surfaces such as tile or concrete, as well as from certain materials such as copper or aluminum.

In conclusion, how long does it take rustoleum to harden? It depends on several factors such as the type of rustoleum used, the temperature of the environment, and how well it is cleaned off after application. With the right tools and knowledge, however, it can be done quickly and easily.

How do you make Rustoleum dry faster?

Are you looking for ways to make rustoleum dry faster? If so, you’re not alone. Many homeowners are looking for ways to speed up the drying process with rustoleum.

There are a few things you can do to make the process go more quickly. 

First, make sure that your Rustoleum is completely dry before applying any additional coats. This will help to prevent extra water from being absorbed and slowing down the drying process. 

Second, be sure to allow the paint to air-dry completely before applying another coat. This will help to reduce the amount of dirt and dust that will be created while the paint is drying. 

Lastly, use a good quality sealer when your Rustoleum is finished drying. This will help to protect the finish and stop it from oxidizing over time.

What is Rustoleum?

Rustoleum is a brand of outdoor protective coating. It is a water-based coating that is designed to protect surfaces from the elements, such as wind and rain.

How Does Rustoleum Work?

Rustoleum works by coating a surface with a polymer-acrylic emulsion. The polymer component of the emulsion acts as a barrier between the surface and the elements, while the acrylic component provides a glossy finish.

What Are Some Tips for Making Rustoleum Dry Faster?

There are several tips you can use to make rustoleum dry faster, such as using an air hose and fan, reducing the amount of time you leave it on, and letting it dry in a well-ventilated area.

What Are Some Alternatives to Rustoleum?

There are several alternatives to rustoleum, such as polyurethane and polyester coatings, as well as waxes and oils that can be used on metal surfaces.

We hope you learned how to make rustoleum dry faster with some tips and alternatives. With the right combination of methods, you can get your projects done faster and more effectively.

How do you add hardener to Rustoleum paint?

Are you looking to add a hardener to Rustoleum paint? Wondering what the best way is? In this article, we’ll cover the basics of adding the hardener to Rustoleum paint.

There are a few ways to add a hardener to your paint. The first way is to mix the hardener with the paint yourself. This is the easiest way, but it can be time-consuming and you may not get the exact mix you want. 

Another way is to buy a ready-made hardener. These are usually more expensive, but they will give you a better result than mixing them yourself. 

The final way is to use a Rustoleum hardener kit. These kits contain everything you need, including the hardener and paint. This is the best option if you don’t have any experience mixing paint or if you just want an easy solution.

What Is Hardener and What Does It Do?

Hardener is a chemical that helps bind the particles of pigment together so that it can be more easily applied. It also gives the paint a more durable and longer-lasting finish.

What Are the Benefits of Adding Hardener to Rustoleum Paint?

Adding hardener to Rustoleum paint can help increase its durability and prevent it from cracking or peeling in the future. It can also help increase the longevity of the paint by making it more resistant to UV rays and other elements.

What Are the Steps for Adding Hardener to Rustoleum Paint?

To add hardener to your Rustoleum paint, you will need to mix it with water using a mixing cup, brush, or spray bottle. You will then need to apply it evenly over the entire surface of the paint with a brush or cloth.

What Are Some Tips for Adding Hardener to Rustoleum Paint?

When adding the hardener to your Rustoleum paint, it’s important to make sure that you have enough water in your mix so that it can be easily applied. Also, make sure that you apply it evenly over the entire surface of the paint with a brush or cloth. Lastly, make sure that you allow it to dry thoroughly before applying a second coat.

What Are Some Alternatives to Adding Hardener to Rustoleum Paint?

If you don’t want to use a hardliner, there are other options available for you. You can try using an oil-based paint, which will give your project a more natural look but won’t be as durable as hardliner-based paints. You can also try using latex paints, which are water-based and easier on the environment.

We hope this article has helped you understand more about adding the hardener to Rustoleum paint and how it can help improve its durability and longevity.

Why is my Rustoleum paint not drying?

Have you ever wondered why your Rustoleum paint isn’t drying? It’s a common problem that can be frustrating to deal with. In this essay, we’ll discuss the reasons why your Rustoleum paint isn’t drying and how to fix it.

What Causes Rustoleum Paint Not To Dry?

There are several reasons why your Rustoleum paint isn’t drying. The most common culprits include a too-thin layer of paint, too much water, or too high of a temperature. Other causes include improper ventilation, too much ventilation, or improper storage conditions.

What Can I Do To Speed Up The Drying Process?

There are several things you can do to speed up the drying process, such as using less water, increasing ventilation, and using a thinner layer of paint. You can also use a thicker layer of paint, but make sure to let it dry completely before applying another coat.

How Long Does It Take For Rustoleum Paint To Dry?

Rustoleum paint can take up to 24 hours to fully dry, depending on the thickness of the layer of paint you’re using. If the paint is too thin, it might take longer for it to dry. If the paint is too thick, it might take longer for it to dry as well.

What Are The Best Practices To Follow When Using Rustoleum Paint?

The best practices when using Rustoleum paint include keeping the area well-ventilated, letting the paint dry completely before applying another coat, and not storing the cans in direct sunlight or near heat sources. You should also use only the amount of water needed for the job at hand.

We hope this essay has answered your questions about why your Rustoleum paint isn’t drying and how to fix it. Remember to follow the best practices when using Rustoleum paint and you should be able to get your project done on time.

Do you need 2 coats of Rustoleum?

Are you looking to paint a surface that’s been previously coated with rustoleum? You may be wondering if you need two coats of rustoleum to get a good, long-lasting finish. The answer is, it depends.

If the rustoleum coating is intact and hasn’t been scratched or damaged in any way, you will likely only need one coat of rustoleum. However, if the surface has been scratched or damaged, you may need to apply a second coat of rustoleum to get a good finish.

Remember to use a light touch when applying rustoleum – too much paint can cause damage to the surface. Let the paint dry thoroughly before using the surface.

What is Rustoleum?

Rustoleum is a brand of high-performance industrial coatings designed for use on metal, concrete, and more. It’s a durable, low-maintenance finish that can be used on a variety of surfaces.

What Are the Benefits of Painting With Rustoleum?

Painting with rustoleum provides a long-lasting finish that can withstand the elements without fading or cracking. It also has superior moisture resistance and durability, making it ideal for outdoor projects.

How Many Coats of Rustoleum Do I Need for a Great Finish?

Depending on the size and type of surface you’re painting, you may need two coats of rustoleum. When applying the first coat, make sure to wait until it is completely dry before applying the second coat.

What Paint Should I Use With Rustoleum?

You should use exterior-grade paint with rustoleum. This type of paint is designed to withstand the elements and provide a long-lasting finish. It’s also formulated to be water-resistant, making it ideal for outdoor projects.

What Are Some Tips for Painting With Rustoleum?

Here are some tips for painting with rustoleum:

  1. Apply the first coat of rustoleum in an even pattern.
  2. Allow the first coat to dry completely before applying the second coat.
  3. Use a roller applicator to ensure even coverage.
  4. Wait at least 24 hours between coats to allow the first coat to dry completely before applying the second coat.
  5. Make sure to sand and clean your surface after each coat of rustoleum has been applied.
  6. Apply two coats of rustoleum in a cross pattern to create a bright finish.
  7. Seal your project with a clear or matte paint to protect your finished surface from dirt and moisture damage.

What is the best way to apply Rustoleum paint?

Have you ever had a project that required you to paint something? It can be a daunting task, but with the right tools and techniques, it can be a breeze. In this article, we will discuss the best way to apply rustoleum paint.

The first step is to gather all of the materials you will need. You will need a can of rustoleum paint, a brush, and some primer. Make sure to read the instructions on the can of paint to learn about the specific requirements for applying it. 

Once you have all of your materials ready, it is time to start painting. First, spray the primer onto the surface you want to paint. Then, use the brush to apply a thin layer of paint to the area. Be sure to cover all areas that you want to be painted. Let the paint dry completely before proceeding.

If you are painting a large surface, it is helpful to divide it into several sections and do each section separately. This allows you not only to avoid over spraying but also makes it easier to clean up if something happens and you need to redo part of the painting. Once all of your sections are complete, let them dry completely before moving on to the next section.

What is Rustoleum Paint?

Rustoleum paint is a water-based paint that is easy to apply and comes in a variety of colors. It is available in a variety of finishes and is used for a wide range of projects.

How Does Rustoleum Paint Work?

Rustoleum paint works by adhering to the surface of the object being painted. It is water-based, so it can be easily washed off with soap and water if needed. It also has a high-definition finish that can last for years.

What Are the Advantages of Rustoleum Paint?

The advantages of using rustoleum paint are its durability, high-definition finish, and availability in a variety of colors. It is also easy to apply and can be easily washed off if needed.

We hope this article has helped you understand the best way to apply rustoleum paint! It is a great choice for projects that require durability, a high-definition finish, and a variety of colors.

How do you harden paint quickly?

Do you have a project that requires a hard coat of paint? You may be wondering how to make the process faster and easier. In this article, we’ll discuss the best ways to harden paint quickly.

The first step is to determine the type of paint you need to apply. Plain oil paint needs to be hardened with a coat of varnish after it’s been applied, while latex paints can be hardened with a coat of paint alone.

Once you have determined the type of paint you need, the next step is to prepare your surface. Make sure that the surface is clean and free from any oils or dirt. Next, apply a thin layer of paint to the surface. Be sure to work quickly so that the paint has time to dry.

To harden the paint, you will need to use one of two methods: heat or pressure. Heat can be applied in the form of an oven, stovetop burner, or microwave oven. Pressure can be applied with a heat gun, hair drier, or compressor.

Once you have applied heat or pressure, wait five minutes for the paint to harden. Then, rub some sandpaper over the painted surface until it’s smooth and glossy. Finally, apply a coat of varnish if necessary.

What Type of Paint Should I Use?

The type of paint you use will determine how quickly it hardens. If you’re using latex or acrylic paint, it will take longer to harden. If you’re using water-based paint, it will take less time to harden.

How Can I Apply Multiple Light Sprays?

When applying multiple light coats of paint, make sure to space them evenly throughout the surface. This will help to ensure that the paint is evenly applied and doesn’t run or drip.

How Long Should I Let the Paint Dry?

You should let the paint dry for at least 24 hours before applying a second coat. This will allow the paint to become more durable and harder.

How Can I Use a Humidifier?

A humidifier is an ideal way to speed up the drying process of your paint job. The increased moisture in the air will help to speed up the drying process and make sure that your paint job doesn’t crack or peel off.

What Should I Do if I Overdo It?

Overdoing it can cause your paint job to become too soft and porous. Make sure that your paint job is dry before proceeding with any additional coats or steps.

Conclusion

We hope this article has helped you learn how to make the process of hardening paint quicker and easier. By following these tips, you can ensure that your project comes out perfect every time!


Bathtub Reglazing Fumes Pregnancy

Are you pregnant and wondering if bathtub reglazing fumes are dangerous for you? You’re not alone. Many pregnant women are concerned about the health effects of bathtub reglazing fumes.

Bathtub reglazing fumes are a byproduct of the process of re-gluing bathroom tiles. They’re composed of a variety of chemicals, including hydrocarbons. Hydrocarbons can irritate the eyes, nose, and throat. In addition, they can be harmful to the unborn baby if inhaled.

If you are pregnant and have concerns about the safety of bathtub reglazing fumes, speak with your doctor. He or she can help you determine if there is any danger posed to your health and whether or not you should avoid the process altogether.

What Are Bathtub Reglazing Fumes?

Bathtub reglazing fumes is a chemical compound that is released when you use an acid-based glaze to seal your bathtub. The fumes can irritate your eyes and nose and could be harmful to your health if inhaled or absorbed through skin contact.

What Are the Health Effects of Bathtub Reglazing Fumes?

The health effects of bathtub reglazing fumes vary depending on the individual and the exposure level. Generally, exposure to bathtub reglazing fumes can cause irritation of the eyes, nose, throat, and skin, as well as headaches, nausea, and dizziness.

What Are Some Alternatives to Bathtub Reglazing Fumes?

There are several alternatives to using bathtub reglazing fumes, such as using a water-based glaze or a non-acidic glaze or just using a soft cloth to wipe down the tub after it has been used.

How Can I Reduce the Exposure to Bathtub Reglazing Fumes?

The easiest way to reduce your exposure to bathtub reglazing fumes is to avoid the use of acid-based glazes on your tub. If you must use an acid-based glaze, make sure that it is safe for use during pregnancy.

What Should I Do If I’m Concerned About My Exposure to Bathtub Reglazing Fumes?

If you’re concerned about your exposure to bathtub reglazing fumes, you should contact your doctor for advice. Your doctor may recommend that you take steps to reduce your exposure or wear protective equipment such as a mask or gloves when handling the glaze.

In conclusion, bathtub reglazing fumes can be harmful if they are inhaled or absorbed through skin contact. However, there are several ways that you can reduce your exposure to them, and get advice from your doctor if you’re concerned about your exposure level.

Are bathtub reglazing fumes toxic?

Bathtub reglazing fumes are a common issue for homeowners. In this essay, we will discuss the potential dangers of bathtub reglazing fumes and how to prevent them.

Bathtub reglazing fumes are composed of a variety of chemicals and particles. These fumes can be harmful if inhaled, and can even cause cancer in some cases. In order to avoid exposure to these fumes, it is important to be aware of the dangers they pose.

The most common way to inhale bathtub reglazing fumes is through the nose. If you are around the fumes while they are being created, you may be at risk for health problems. In addition, the fumes can damage your airways if you breathe them in the long-term. If you are worried about exposure to bathtub reglazing fumes, it is important to take precautions when working with the chemicals involved.

It is also important to keep any pets away from the area where the chemicals are being used. Pets can get too close to high-purity gas and chemicals, which could lead to inhalation problems or poisoning. If you have pets, it is best to keep them away from any areas where high-purity gas or chemicals are being used.

If you experience any health problems after working with bathtub reglazing fumes, it is important to contact your doctor. It may be possible that you have been exposed to harmful levels of these gases and chemicals, and your doctor will be able to help determine what steps need to be taken next.

What Are Bathtub Reglazing Fumes?

Bathtub reglazing fumes are the toxic gases produced when a bathtub is reglazed. These fumes can cause serious health issues, especially for children and seniors.

What Are the Health Effects of Bathtub Reglazing Fumes?

The most common health effects from bathtub reglazing fumes include headaches, dizziness, nausea, lack of concentration, and even respiratory issues.

What Can I Do To Reduce the Risks of Bathtub Reglazing Fumes?

There are a few steps you can take to reduce the risks of bathtub reglaze fumes. These include keeping windows closed while the tub is being resealed, ventilating the room, and using low-VOC paint and sealants.

What Are Some Alternatives to Reglazing a Bathtub?

There are some alternatives to reglazing a bathtub. These include replacing the tub or installing a new one, installing an airtight sealer on the tub, or even just refinishing the tub instead of reglazing it.

Bathtub reglazing fumes can be dangerous and should be avoided. By following these tips and using alternative methods to reglaze a bathtub, you can reduce your exposure to these toxic fumes and keep yourself and your family safe.

How long do you have to stay out of your apartment after tub reglazing?

Have you ever had to leave your apartment for an extended period of time because of a plumbing issue? If so, you know how important it is to make sure that your apartment is in good working order.

In order to avoid any further issues, it is important that you take care of any repairs or renovations that need to be done in a timely manner. Here are some tips on how long you have to stay out of your apartment after tub reglazing: 

-If the work is minor, like a loose shower head or a clogged drain, you can usually return within a few hours. 

-However, if there are more serious issues like a broken pipe or flooding, you will need to leave for at least 24 hours. 

-Make sure to keep all receipts and paperwork related to the repair in case you have to go back later.

By following these simple tips, you can avoid any potential problems and keep your apartment in good working order.

This depends on the type of tub reglazing you’re doing. Generally, you will have to stay out of your apartment for at least 24 hours after tub reglazing. But, for more complicated renovations, like a broken pipe, you will need to leave for at least 72 hours.

What Are the Symptoms of a Plumbing Issue?

Common signs of a plumbing issue include a leaky faucet, a dripping toilet, or a clogged sink. If you notice any of these symptoms, it is important to call a professional as soon as possible.

What Are the Symptoms of a Tub Reglazing Problem?

Common signs of a tub reglazing problem include bubbling or cracking in the tub, discolored water, or a lack of hot water. If you notice any of these symptoms, it is important to call a professional as soon as possible.

It’s important to make sure that your apartment is in good working order after tub reglazing. If you encounter any plumbing issues, it’s important to contact a professional plumber right away. But, even if you don’t encounter any problems, it is always a good idea to keep your apartment in good condition by taking care of minor repairs and renovations. By following these tips, you can avoid any potential problems and keep your apartment in good condition.

How long does a bathtub refinishing smell last?

Bathtub refinishing is a popular way to update your bathroom. It involves removing the old finish and applying a new one. But what happens when the new finish smells bad?

Bathtub refinishing can last anywhere from a few weeks to a few months. However, the smell will usually dissipate within a few days. If the smell persists, it might be caused by something else in your bathroom, like mold or mildew. In that case, you’ll need to call a professional to take a look.

What Causes Bathtub Refinishing Smells?

Bathtub refinishing can cause some smells because of the chemicals used to remove the old finish. These chemicals can emit odors that linger for days or even weeks after the job is done.

How Long Does Bathtub Finishing Smell Last?

Depending on the type of finish used, bathtub refinishing smelly may last for a few days to several weeks. However, it will eventually dissipate as the chemicals break down.

What Can You Do to Avoid Bathtub Finishing Smells?

To avoid bathtub refinishing smells, it’s best to use an airless sprayer and apply the finish in small areas. This will help to prevent any odors from spreading throughout the bathroom.

Bathtub refinishing can be a great way to update your bathroom, but it’s important to take precautions to make sure that the process goes off without a hitch. By following these tips, you can help to keep bathtub refinishing smells at bay.

Is it safe to take a bath in a Reglazed tub?

Are you considering taking a bath in a reglazed tub? It’s an inviting idea, but is it safe? In this essay, we’ll answer the question of whether or not it’s safe to take a bath in a reglazed tub.

Reglazing a tub is a process of restoring the original finish on the tub. This can include filling in any cracks or chips, as well as re-applying the original sealant. There are a few things to keep in mind before taking a bath in a reglazed tub.

The first thing to remember is that reglazing a tub does not change its structural integrity of the tub. So, if you’re unsure about whether or not your tub is safe, don’t take the risk and call a professional. 

Second, be sure to test the water temperature before entering the bathtub. The water should be around 104 degrees Fahrenheit for safety reasons. If it’s not hot enough, the water will cool down while you’re in the bathtub and that could cause some problems. 

Finally, always use caution when cleaning your reglazed tub. Removing any sealant may cause water damage if it’s not done correctly. Always consult with your homeowner’s insurance company before starting any repairs on your own property.

What is a Reglazed Tub?

A reglazed tub is one that has been professionally cleaned, waxed, and refinished with special penetrating agents. It has been reglazed to make it look like new.

What Are the Benefits of Taking a Bath in a Reglazed Tub?

The benefits of taking a bath in a reglazed tub include the following:

  • -It’s hygienic – the tub is cleaned and waxed, so it’s free of bacteria and germs
  • -It’s easy to maintain – you can do it yourself
  • -It’s durable – the tub lasts longer than regular ones
  • -It’s stylish – it looks great and it fits with your home décor
  • -It’s comfortable – the tub has been specially designed to be comfortable
  • -It’s easy to clean – it’s easy to keep clean
  • -It’s affordable – it’s much cheaper than hiring a professional
  • -It’s eco-friendly – it’s better for the environment than regular baths
  • -It’s healthy – it’s good for your skin and your overall health
  • -It’s luxurious – taking a bath in a reglazed tub can be an enjoyable experience
  • -It’s relaxing – it can help to relax and unwind after a busy day
  • -It’s therapeutic – it’s great for stress relief and can help reduce tension
  • -It’s fun – it can be an exciting experience when you take your bath in a reglazed tub
  • -It’s romantic – taking your bath in a reglazed tub can be romantic and intimate
  • -It’s economical – it’s an affordable way to enjoy luxury at home
  • -It’s eco-conscious – it helps protect the environment by reducing water waste
  • -It’s versatile – you can use the tub for other purposes besides just bathing
  • -It’s convenient – you don’t have to plan ahead for bathing, you can just hop into the tub when you feel like it

What Are the Risks of Taking a Bath in a Reglazed Tub?

There are some risks associated with taking a bath in a reglazed tub, including the following:

-Rashes and skin irritation – if you get rashes or skin irritation after taking a bath in a reglazed tub, there could be something wrong with the tub or its cleaning process

-Infection – if you get an infection after taking a bath in a reglazed tub, there could be something wrong with the cleaning process or the materials used

-Damage to pipes and fittings – if you damage pipes or fittings after taking a bath in a reglazed tub, there could be something wrong with its cleaning process or materials used -Leakage of water – if there is leakage of water from the tub, there could be something wrong with its construction or materials used

-Water damage – if you get water damage after taking a bath in a reglazed tub, there could be something wrong with its construction or materials used.

What chemicals are used in tub reglazing?

Are you considering reglazing your tub? You may be wondering what chemicals are used in the process. Here are some of the most common ones:

Acetone: This chemical is used to remove the old tub coating and sealant. It is also used to clean the area before the new coating is applied.

Alcohol: This chemical is used to clean the area before the new coating is applied. It helps to prevent any adhesion problems between the new coating and the old tub surface.

Ammonia: This chemical helps to break down any existing sealant or glue on the tub surface. It also repairs minor damage caused by acetone.

What Are the Chemicals Used in Tub Reglazing?

Tub reglazing typically involves two chemicals: a polymer resin and a hardener. The polymer resin is used to create a barrier between the old and new surfaces of the tub, while the hardener is used to set it.

What Are the Benefits of Reglazing a Tub?

Reglazing a tub can help protect it from damage and water damage. It can also improve its appearance, reduce mold and mildew, and make it easier to clean and maintain.

What Are the Risks Involved with Reglazing a Tub?

Not all tub reglaze products are safe for use around water, so it’s important to research the product you choose carefully. Additionally, some products contain harmful chemicals that can leach into the water or cause skin irritation.

What Are the Alternatives to Tub Reglazing?

In lieu of reglazing, you can consider replacing your tub with a new one or repairing it instead. Both options can be less expensive and more environmentally friendly than tub reglazing.

How Do I Choose Which Tub Reglazing Process to Use?

Depending on your budget and aesthetic preferences, you may want to consider either reglazing or replacing your tub. You should also consider your water quality, as some processes can be more damaging to the water than others.

Tub reglazing is an option that can help protect your tub from damage and improve its appearance. However, it’s important to research the process and products you choose carefully to ensure they are safe for use around water.

What to do after reglazing a bathtub?

Have you ever had to reglaze a bathtub? If so, you know just how difficult it can be. In this article, we’ll discuss what to do after reglazing a bathtub and how to get the job done quickly and efficiently.

When reglazing a bathtub, it is important to use the right type of glaze and the correct amount. Too much glaze can lead to bubbles and instability in the surface, while too little will leave a porous surface. To ensure a smooth, professional finish, follow these tips: 

  1. Use an approved glaze – Always use an approved glaze when repairing or reglazing a bathtub. This will ensure that the surface is corrosion-resistant and does not create any problems down the road. 
  2. Prep the surface – Make sure to clean and prep the surface before applying the glaze. This will help avoid any bumps or bubbles that could cause problems later on. 
  3. Apply slowly and evenly – Be careful not to apply too much pressure when applying the glaze; instead, smoothly work it into the surface with a brush or applicator. 
  4. Allow time for drying – It is important to allow the bathtub glaze to dry completely before using it. This will prevent any problems with instability or bubbling.
  5. Clean up afterward Once the glaze has dried, clean up any remaining messes with a brush or water hose.

Before you start reglazing a bathtub, you’ll need to remove all of the old glazes. This can be done using a scraper or grout knife. Once all of the old glazes is gone, you can start sanding the surface of the tub and polishing it with medium-grit sandpaper.

What to Do After Reglazing a Bathtub

Once the tub has been thoroughly sanded and polished, it’s time to apply the new glaze. Make sure that the new glaze is completely dry before applying it to the tub. Then, use a scraper or grout knife to spread the glaze evenly over the surface of the tub. Let the glaze set for at least one hour before using it for the first time.

How to Get the Job Done Quickly and Efficiently

If you want to get the job done quickly and efficiently, here are some tips:

  1. Use a clean brush to apply your glaze evenly over the surface of the tub.
  2. Make sure that all of the excess glaze is removed from the tub with a scraper or grout knife before you start polishing it again.
  3. Use an electric buffer on your polishing wheel to quickly buff away any unwanted glaze marks.
  4. Make sure that you use only high-quality glazes for your tub, as this will help ensure that your bathtub will last longer.
  5. Use a quality sealant when you’re finished polishing your tub and when you’re ready to start using it again.
  6. If you have any questions or concerns about your reglazed bathtub, contact us at Perfect Proglaze for help! We are here to help with any questions or concerns you may have regarding reglazing a bathtub.


How Long Do Bathtub Refinishing Fumes Last?

Bathtub refinishing is a popular way to update the look of your bathroom. It’s a relatively inexpensive way to make a big difference in the overall appearance of your bathroom.

However, there are some potential risks associated with bathtub refinishing. One of these risks is the fumes from the products used during the process.

The fumes from bathtub refinishing products can be harmful to your health. They can contain chemicals that can irritate your throat and lungs, and they may also cause headaches. In extreme cases, the fumes may even be deadly.

To minimize the potential risks associated with bathtub refinishing, it is important to take precautions. Make sure you wear a mask and protective eyewear when using the products, and stay away from open windows and doors while the refinishing is taking place.

How Long Do Bathtub Refinishing Fumes Last?

Bathtub refinishing fumes can be harmful if they are inhaled or ingested. The fumes can remain in the air for up to 24 hours after the process is complete.

How Can You Avoid Breathing Bathtub Refinishing Fumes?

You can avoid breathing in the bathtub and refinishing fumes by wearing a mask and gloves when sanding and painting. You can also open a window or use an air purifier during the process.

What Are Some Other Ways to Avoid Bathtub Refinishing Fumes?

Other ways to avoid bathtub refinishing fumes include using an exhaust system, choosing a well-ventilated area for the job, and using fans to help ventilate the area.

Bathtub refinishing is a great way to make your bathroom look newer and fresher, but it’s important to be aware of the potential risks associated with the process. By following these tips and precautions, you can ensure that you stay safe and healthy while working on your remodel project.

Is bathtub refinishing toxic?

Are you considering refinishing a bathtub? If so, you’re not alone. Bathtub refinishing is a popular home improvement project that can make a big difference in the look and feel of your home. But is refinishing a bathtub really safe?

There are a few things to keep in mind when refinishing a bathtub. First, make sure the surface you’re working on is dry before you start. If there’s moisture present, it can create dangerous(and even deadly) fumes while you’re refinishing. Second, be sure to use a good quality coat of sealant on the surface before refinishing. This will protect the finish and keep it looking new for years to come.

If you’re still worried about the safety of bathtub refinishing, don’t worry- there are plenty of other home improvement projects that are just as safe. Check out our gallery of other safe home improvement projects to get started.

What is Bathtub Refinishing?

Bathtub refinishing is a process of removing and replacing the existing finish on a bathtub or other bathtubs. It can be done to restore the tub to its original condition or to create a new look and feel for your home.

What Are the Benefits of Bathtub Refinishing?

Bathtub refinishing can improve the appearance and function of your bathtub, making it appear newer and more attractive. It can also help to protect the tub from damage and reduce water spots.

What Type of Material Should I Use for Bathtub Refinishing?

There are several types of materials that can be used for bathtub refinishing, including acrylic, polyurethane, enamel, and metal. Each type has its own advantages and disadvantages, so it’s important to consider your needs before making a decision.

What Are the Risks of Bathtub Refinishing?

Like any home improvement project, there are risks involved with bathtub refinishing. Some materials can be toxic or cause allergic reactions, while others may not be able to withstand hot water temperatures or tough scrubbing. It’s important to research all options before starting any project.

What Are the Steps for Bathtub Refinishing?

The steps for bathtub refinishing vary depending on the type of material being used. Some projects may require sanding and priming before applying paint or other finishes, while others may only require cleaning and conditioning of the tub. It’s important to follow all instructions carefully to ensure a successful outcome.

Bathtub refinishing can be a great way to update your home’s look and feel, but it’s important to understand the risks and steps involved before starting any project. Make sure you research all options and choose the right material for your needs before starting any work.

How long does a bathtub refinishing smell last?

Bathtub refinishing is a popular way to update the look of your bathroom. But what happens when the smell lasts longer than expected? Here are some tips on how to get rid of that lingering smell.

First, consider the ingredients used in the bathtub refinishing. Many contain chemicals that can linger and create a smell. If you decide to go with bathtub refinishing using these types of ingredients, be sure to ventilate the room for several hours after the job is done.

Another tip is to try using a deodorizer before your bath. This will help mask any lingering smells.

And finally, if all else fails, consider hiring a professional to help you with the odor removal process. They have more experience and will be able to get rid of the smell much faster than you can on your own.

What Causes the Smell?

The smell may be due to a variety of factors, including dirt, oil, and water trapped in the pores of the tub surface, or it may be due to residual detergent or bleach used during refinishing.

What Can I Do to Get Rid of the Smell?

There are several steps you can take to remove the smell from your bathtub refinishing. These include cleaning the tub with a solution of baking soda and vinegar, scrubbing with a non-abrasive cleaner, and allowing the tub to air out.

What Are Some Natural Remedies for Removing Smells?

Many people swear by using essential oils in their cleaning products, especially those that are antibacterial or antiviral. You can also use baking soda and lemon juice, which will help to neutralize odors.

What Are Some Chemical Remedies for Removing Smells?

The most common chemical solution used for bathtub refinishing is called Clorox® Bathroom Refresher. This solution contains chlorine dioxide, which is an effective way to kill bacteria and remove odors.

What Are Some Other Tips for Removing Smells?

There are also other tips you can use to remove the smell, such as airing out the tub, using an air freshener, and choosing a scent that is not too strong.

Bathtub refinishing can be an exciting way to update your bathroom, but if the smell lingers longer than expected, there are several tips you can use to get rid of it.

Are reglazing fumes toxic?

Are reglazing fumes toxic? It’s a common question among homeowners looking to restore their home’s appearance. The answer is not straightforward, but we’ll take a look at the facts.

Reglazing fumes are produced when a substance is burned to create heat. When that heat is applied to the glass, it causes the reglazing material to melt and reform in the shape of the glass. The fumes are created as a by-product of this process and can be harmful if inhaled.

The dangers posed by reglazing fumes depend on a few factors. The most important factor is how concentrated the fumes are; the more concentrated they are, the greater the risk of toxicity. Other factors include how often you’re burning the material and whether you’re using an adequate ventilation system. If you have any concerns about reglazing fumes, consult with a professional.

What Are Reglazing Fumes?

Reglazing fumes are a byproduct of the process of gluing and fixing broken pieces of glass back together. These fumes are produced when the glue dries and is released into the air.

What Are the Health Risks of Reglazing Fumes?

The health risks associated with reglazing fumes are largely unknown, but it’s possible that inhaling the fumes can cause irritation to the skin and eyes, as well as headaches and nausea.

What Are the Alternatives to Reglazing?

There are several alternatives to reglazing that can help reduce the risk of inhaling or absorbing fumes. These include using non-flammable glues and adhesives, using ventilation systems to ventilate rooms, and using protective masks when gluing or fixing items.

How Can I Avoid Reglazing Fumes?

The best way to avoid reglazing fumes is to make sure that you use non-flammable glues and adhesives for your projects. Also, make sure that you use ventilation systems and wear protective masks when gluing or fixing items.

What Are the Benefits of Reglazing?

Reglazing can add value to your home by restoring its appearance and making it more attractive to potential buyers. However, it’s important to be aware of the potential risks associated with reglazing fumes before you decide to do it.

Overall, reglazing fumes can have potential health risks if not done properly, so it’s important to be aware of them and take precautions to reduce them. We hope this article has given you all the information you need to make an informed decision about reglazing your home.

How do you get rid of the resurfacing smell?

Have you ever been in a room and suddenly noticed the smell of paint? It’s a common problem and one that can be difficult to get rid of. In this essay, we will discuss the causes of paint smell and how you can get rid of it.

Paint can often have a smell due to the solvents the paint is made of. When these solvents are exposed to air, they react and create a smell. This smell can be strong and linger for a long time. If you notice this smell in your home, there are a few things you can do to get rid of it.

The first thing you can do is try to identify the source of the smell. Did someone move something that had been left covered in paint? Did someone spill paint on their floor? Once you know where the smell is coming from, you can start trying to find a solution.

If you think the smell is coming from the paint itself, there are several ways to try to get rid of it. One option is to use an air freshener that contains paint-stripping chemicals. These chemicals will break down the molecules in the paint and remove the scent. You can also try scrubbing areas with special paint-scrubbing products or using a steam cleaner with special paint-removing chemicals.

If the smell is coming from something else in your home, like furniture or carpeting, there may not be a quick fix available. You may need to take steps to completely clean and repair the area affected by the odor before it dissipates on its own. For instance, if your furniture smells like paint, you may need to polish it or stain it for protection against future staining and smells.

What Causes Paint Smell?

Paint smell is caused by two main sources – volatile organic compounds (VOCs) and paint solvents. VOCs are organic compounds that can evaporate or react with other materials in the air. Paint solvents are a class of chemical compounds used in the manufacturing of paints, varnishes, and other coatings.

How to Get Rid of Paint Smell?

There are several steps you can take to get rid of the paint smell. The most important step is to open windows and doors to allow fresh air into the room. You can also use air fresheners or sprays to help mask the smell. You can also try cleaning the walls and floors with mild detergents and degreasers.

Tips for Removing Paint Smell?

There are a few steps you can take to help remove the smell from your home. The first step is to vacuum the carpet and vacuum up any debris that may have been collected on the floor. You can also use baking soda or white vinegar to help remove odors. Finally, you can use a natural cleaner like vinegar or lemon juice to help remove the smell from fabrics.

Painting your home can be a great way to spruce up your space, but it can also cause some unwanted odors. Removing these odors is not as difficult as you may think, and with the tips provided in this essay, you should be able to get rid of the paint smell in no time.

What is the smell from bathtub refinishing?

Have you ever wondered what the smell is from bathtub refinishing? Bathtub refinishing is a popular way to revamp old bathtubs and make them look brand new. But, what is the smell from bathtub refinishing?

The smell from bathtub refinishing is often referred to as a “bathroom cleanliness” smell. This smell is caused by the chemicals that are used to dry the tub after refinishing. These chemicals leave a scent that can be smelled in the bathroom for a few days afterward.

The smell from bathtub refinishing is typically a combination of chemicals, solvents, and other materials. It can also contain odors from the water itself. As mentioned earlier, the smell from bathtub refinishing can last for a few days. So, if you’re concerned about the smell of your bathroom, it’s best to call a professional to refinish your tub.

What Are the Causes of the Smell From Bathtub Refinishing?

The main cause of the smell from bathtub refinishing is the chemicals used in the process. These chemicals are used to clean and protect the surface of the tub, as well as to remove any dirt or grime.

How Can I Get Rid of the Smell From Bathtub Refinishing?

There are a few things you can do to help get rid of the smell from bathtub refinishing. You can use a natural remedy such as baking soda, or a natural scrub with salt and water. You can also use an air freshener to mask the smell.

What Else Should I Know About Bathtub Refinishing?

There are many other factors to consider when making a decision on whether to do a bathtub refinish or not. This includes the cost, how long it will take, and any potential health risks.

The smell from bathtub refinishing can be a bit overwhelming but it doesn’t have to be. With some research and effort, you can find a solution that works for you and your home.

How long can you not use the tub after Reglazing?

Have you ever wondered how long you can not use the tub after reglazing it? It’s a common question and one that many homeowners are concerned about. The answer is not as simple as you might think. Here are a few factors to consider:

-The materials that make up the tub and the adhesive used to adhere them together will affect how long the tub can be used without issue. If the adhesive is weak, for example, water can seep through the seams and cause damage.

-The surface of the tub may also play a role. If there are any cracks or chips in it, water may seep in and cause corrosion. This is especially true if the surface is porous or has large crevices.

-The type of sealant used on the tub will also affect how long it will last. Some sealants are more resistant to moisture than others and can last much longer before needing to be replaced.

What is the Definition of How Long Can You Not Use the Tub After Reglazing?

Generally, you should wait at least one week after reglazing before using your tub. This is to ensure that any potential problems with the glaze are resolved before you use it.

What Are the Risks of Not Following the Rules for How Long Can You Not Use the Tub After Reglazing?

If you don’t follow the rules for how long you can not use the tub after reglazing, you could potentially risk clogged drains or other problems.

What Are the Benefits of Following the Rules for How Long Can You Not Use the Tub After Reglazing?

Following these rules can help to ensure that your tub is in good working order and that any potential problems are resolved before you use it.

How Long Should You Wait to Use the Tub After Reglazing?

The exact length of time you should wait depends on a variety of factors, such as how often you use your tub, how often it gets cleaned, and how often it’s been used.

What Are Some Tips for Making Sure Your Tub Can Be Used After Reglazing?

Here are some tips to make sure your tub can be used after reglazing:

  1. Do a visual inspection of your tub before using it.
  2. Check for any signs of wear and tear, such as scratches or dents, and make any necessary repairs or adjustments before using it.
  3. Make sure your water supply lines are free of debris or kinks, and that there are no leaks in your plumbing system.
  4. Take care when cleaning your tub, and make sure to use cleaning products designed for this type of job.
  5. Don’t use harsh cleaners or abrasive sponges on your tub, as this could damage it.
  6. Make sure your showerhead is in good working order and that you have no clogged drains in your plumbing system.
  7. Make sure your faucets are not leaking or dripping at any point during your use of the tub.
  8. Leave enough space around your tub when using it so that people have room to move around without getting too close to it.
  9. Don’t overfill your tub with water when using it, as this could lead to problems with clogged drains or other issues down the road.
  10. Always make sure that all children and pets stay at least 10 feet away from your tub while it’s in use, and do not allow them to play near it or use it as a toy while it’s in use.
  11. Make sure all hot water lines are properly insulated and that they are not exposed to extreme temperatures while in use, as this could lead to overheating or freezing problems.

Cleaning Spray Paint Nozzles

Cleaning spray paint nozzles can be a tedious task, but it doesn’t have to be. With the right tools and technique, cleaning spray paint nozzles can be a breeze.

One of the best ways to clean spray paint nozzles is to use a cleaner with a solvent. Solvent-based cleaners are effective at removing paint, oil, and grease from the nozzle. To use a solvent cleaner, pour it into a spray bottle and shake it well before using it to clean the nozzle.

Another way to clean spray paint nozzles is to use a brush. Brush-based cleaners work well at cleaning the bristles and removing paint, oil, and grease from the nozzle. To use a brush cleaner, wet the bristles of the brush and scrub the nozzle clean.

What Are the Basics of Cleaning Spray Paint Nozzles?

The basics of cleaning spray paint nozzles include using a degreaser, warm water, and a brush or rag. You should also use mild soap and a soft cloth to clean the nozzle.

What Are the Different Types of Cleaning Spray Paint Nozzles?

There are two common types of cleaning spray paint nozzles: an electric cleaner and a manual cleaner. Each type has its own advantages and disadvantages, so you should research each type before making a decision.

How Do I Properly Clean My Spray Paint Nozzles?

To properly clean your spray paint nozzles, you should use a degreaser, warm water, and a brush or rag. You should also use mild soap and a soft cloth to clean the nozzle.

What Are Some Alternatives to Cleaning Spray Paint Nozzles?

If you don’t have access to an electric cleaner or manual cleaner, you can use warm water and a rag to clean your nozzles. You can also use chemical-free cleaners such as citrus-based cleansers or homemade cleaners.

Cleaning spray paint nozzles doesn’t have to be a difficult or time-consuming task. With the right tools and technique, cleaning spray paint nozzles can be done in just a few minutes. Now that you know what types of cleaners are available and how to properly clean your nozzles, you can start cleaning your paint nozzles in no time!

What is the best nozzle to spray paint?

Painting is an art and requires a special nozzle to get the job done. There are a variety of nozzles available for different uses, and knowing the best nozzle for your needs can make all the difference.

Here are four of the best nozzles for spraying paint:

Piston Nozzle: A piston nozzle is a perfect for detail work and delicate surfaces. It has a small, fine nozzle that is good for spraying thin layers of paint.

Spray Gun Nozzle: A spray gun nozzle is great for large areas or spraying in a straight line. It has a wide opening that allows you to cover a lot of area with each spray.

Rotary Tool Nozzle: A rotary tool nozzle is perfect for cutting and shaping objects. It has a large, round nozzle that can get into tight spaces. 

Airbrush Nozzle: An airbrush nozzle is the most popular type of nozzle. It’s versatile and can be used for a variety of tasks, including painting walls and ceilings.

What Is the Best Nozzle to Spray Paint?

The best nozzle to spray paint is one that has a large diameter and a good stream of paint. A smaller nozzle can lead to uneven results and a harder time controlling the flow of paint.

What Are Some Different Types of Nozzles?

There are several different types of nozzles, including flat nozzles, cone nozzles, fan nozzles, and rotary nozzles. Each type of nozzle has its own benefits and drawbacks, so it’s important to choose the right one for your project.

What Are Some Pros and Cons of Each Nozzle?

Each nozzle has its own advantages and disadvantages. For example, cone nozzles are great for painting details, but they can be difficult to control. On the other hand, fan nozzles can produce a wider range of colors, but they can be difficult to control.

What Are Some Tips for Using Each Nozzle?

To get the most out of each nozzle, here are some tips to keep in mind:

  1. Start off with a small amount of paint and work your way up.
  2. Use a gentle hand when using each nozzle.
  3. Try using different nozzles to create different effects on your project.
  4. Experiment with different types of paint to find the best fit for your project.
  5. Always pay attention to the instructions on the bottle or can of paint you’re using.
  6. Keep an eye on the gauge on your paint can or bottle – if it starts to run low, it’s time to replenish supplies.
  7. If you’re painting outdoors or in windy conditions, consider using a mask or respirator to protect yourself from inhaling fumes or dust particles.

What are the three types of nozzles?

Have you ever wondered what the three types of nozzles are? Nozzles are an important part of any spray application, and understanding their function and purpose is essential to making sure your project is done right.

There are three types of nozzles: straight, angled, and circular. Straight nozzles spray a fan-like pattern, angled nozzles direct the spray in one direction, and circular nozzles produce a more even pattern.

Knowing the type of nozzle you’re using is essential for accurate spraying. For straight nozzles, use an angle nozzle when spraying near a surface to create a smooth finish. When using an angled nozzle, be sure to keep the angle consistent to avoid accidental droplets. And finally, for circular nozzles, always use the smallest setting possible to get even coverage.

What Are the Three Types of Nozzles?

The three types of nozzles are streamlined, patterned, and rotary. Each type has its own unique features and benefits, so it’s important to know which one is best for your application.

How Do Nozzles Work?

Nozzles work by creating a stream of water that sprays out in a wide, directed, and even pattern. They are used for a variety of applications, from spraying pesticides to misting plants and watering gardens.

What Are the Benefits of Using Different Types of Nozzles?

Different types of nozzles offer different benefits. Streamline nozzles produce a wide, directed spray, while pattern nozzles create a more narrow stream and rotary nozzles create a more circular pattern.

What Are the Best Practices When Using Nozzles?

The best practices when using nozzles include reading the instructions for the specific nozzle you are using, ensuring that the nozzle is properly lubed, and using the right nozzle for the job.

What Are the Different Types of Nozzles?

The different types of nozzles include streamlining, pattern, rotary, and variable-pitch. Each type has its own unique features and benefits, so it’s important to know which one is best for your application.

What are the 2 types of nozzles?

Nozzles are an essential part of any spray painting project. Knowing the differences between the two types of nozzles can help you make the right choice for your project.

Piston nozzles are the most common type and work by pushing paint out of the nozzle. They’re best for applications that require a moderate amount of spray coverage, like painting a wall or applying pressure washer fluids.

Rotating nozzles work on a similar principle to a fan. They use a spinning disk to atomize the paint, which provides high-pressure spraying capabilities. This type of nozzle is ideal for big projects like painting an entire room or using high-pressure washer fluids.

What are the Two Types of Nozzles?

The two types of nozzles are flat paint nozzles and high-pressure spray nozzles.

Flat paint nozzles are the most common type and use a piston to push the paint out of the nozzle. They’re best for applications that require a moderate amount of spray coverage, like painting a wall or applying pressure washer fluids. 

High-pressure spray nozzles work on a similar principle to a fan and use a spinning disk to atomize the paint. They’re ideal for big projects like painting an entire room or using high-pressure washer fluids.

What Are the Differences Between the Two Types of Nozzles?

The main difference between the two types of nozzles is how they are used. Flat paint nozzles are best for applying thin coats of paint, while high-pressure spray nozzles are better suited for applying thick coats of paint.

How Do I Choose the Right Nozzle for My Project?

When choosing a nozzle, it’s important to consider your project and your intended result. If you’re painting a large area, then a flat paint nozzle is likely more appropriate. If you’re painting a small area, a high-pressure spray nozzle may be more appropriate.

Knowing the differences between the two types of nozzles can help you make the right choice for your project. By understanding what each nozzle is best suited for, you can choose the right one for your project.

Can you replace the spray paint nozzle?

Have you ever wondered how to replace the spray paint nozzle on your compressor? Replacing the spray paint nozzle can be a difficult and time-consuming process, but it is not impossible. In this essay, we will discuss how to replace the spray paint nozzle on a compressor.

Before you begin, make sure that you have the correct tools and supplies needed to replace the spray paint nozzle. You will need a Phillips screwdriver, a hex wrench, a wrench set, and a can of replacement spray paint. Once you have gathered your supplies, follow these steps to replace the spray paint nozzle on your compressor.

  1. Open the compressor and remove the lid.
  2. Remove the screws that hold the spray paint nozzle in place.
  3. Remove the spray paint nozzle from the compressor.
  4. Inspect the spray paint nozzle for damages or wear and tear. If there is damage, replace the spray paint nozzle with a new one. If there is no damage, reinstall the spray paint nozzle onto the compressor using the screws that were removed in step two.
  5. Reinstall the screws that hold the spray paint nozzle in place and replace the lid of the compressor.

What is the Spray Paint Nozzle?

The spray paint nozzle is a component of a compressor that sprays paint or other materials through a small orifice. It consists of a small round orifice, which is connected to a flexible tube that carries the material from the orifice to the air stream.

What Are the Steps for Replacing the Spray Paint Nozzle?

The steps for replacing the spray paint nozzle are as follows:

  1. Disconnect the compressor from the power supply
  2. Remove any debris from inside the compressor
  3. Remove any old paint from the orifice
  4. Install a new nozzle and connect it to the power supply
  5. Re-prime the compressor
  6. Start up the compressor and test its operation
  7. Clean up any remaining paint residue
  8. Return any parts leftover from the installation

What Do I Need to Replace the Spray Paint Nozzle?

You will need to purchase a new nozzle, which can be found at most hardware stores or online. You will also need to purchase some type of lubricant for the new nozzle, such as WD-40 or Vaseline. And you will also need to purchase some type of solvent for cleaning off any old paint from the orifice before installing a new nozzle.

How Do I Replace the Spray Paint Nozzle?

Replacing the spray paint nozzle is not an easy task, but it is not impossible either. The steps for replacing the nozzle are as follows:

  1. Disconnect the power supply
  2. Remove any debris from inside the compressor
  3. Remove any old paint from the orifice
  4. Install a new nozzle and connect it to the power supply
  5. Re-prime the compressor
  6. Start up the compressor and test its operation
  7. Clean up any remaining paint residue
  8. Return any parts leftover from the installation
  9. Reattach the power supply and test again
  10. Reattach the compressor to a power source and test again
  11. Return any leftover parts and clean up the area
  12. Return the compressor to its original location and test it again
  13. Enjoy your newly refreshed compressor!

What are the 4 types of paint sprayers?

Are you looking to buy a new paint sprayer? You’re not alone. Many homeowners are looking for the best option for their home projects. Here are four types of paint sprayers you may want to consider:

1. Conventional HVLP Paint Sprayer 

This type of sprayer is often used by homeowners for small projects, like painting a wall. It has a conventional design and uses a hose to direct the paint toward the target. 

2. Dual Action Paint Sprayer 

This type of sprayer is similar to the conventional HVLP, but it has two action mechanisms – one atomizes the paint while the other ejects it. This makes it perfect for larger projects where precision is required, like painting a bedroom. 

3. High-Pressure Spray Gun 

This type of sprayer is best used for large jobs, like painting an entire room or wall. It uses high pressure to create an intense stream of paint that covers a large area quickly. 

4. Airless Paint Sprayer 

This type of sprayer relies on air pressure instead of gravity to atomize the paint – making it perfect for use on delicate surfaces or with multiple colors. It’s also less messy, making it a good choice for larger projects.

What Are the Different Types of Paint Sprayers?

There are four main types of paint sprayers: airless, fixed-pressure, wand, and gravity-feed. Each type has its own advantages and disadvantages.

What Are the Benefits of Each Type?

Airless sprayers are the most popular type of paint sprayer because they are easy to use and they are great for small jobs. Fixed-pressure sprayers are more powerful and versatile but can be more expensive. Wand sprayers are more compact and easy to carry around but they can be more difficult to control. Gravity-feed sprayers are the most cost-effective option but they can be more difficult to control.

What Features Should I Look For When Buying a Paint Sprayer?

When buying a paint sprayer, you should look for features such as a large capacity tank, a wide range of pressure settings, an adjustable wand, and an extra-long hose. You should also make sure that the paint sprayer has a long-enough hose and easy-to-use controls.

How Do I Clean My Paint Sprayer?

To clean your paint sprayer, first, turn it off and unplug it from the power source before you begin. Then, use warm water and mild detergent to clean the parts. Once you’re done cleaning, make sure to dry all the parts thoroughly before you plug it back in and use it again.

How many coats of spray paint?

Are you looking to find out how many coats of spray paint are needed to cover a surface? You’re not alone. Many people are looking to get an answer to this question, and there are several ways to do so.

One way to obtain this information is to measure the size of the surface that you want to paint and divide that number by the number of coats of spray paint that you would use. For example, if you wanted to paint a surface that is 20 inches in diameter and you wanted to use three coats of spray paint, your calculation would be 20 ÷ 3 = 5. So, in this case, you would need to cover the surface with 5 coats of spray paint.

Another option is to use a spray can guide. These guides are designed to help you accurately apply your spray paint by indicating the proper distance from the object that you are painting. You can find these guides at most home improvement stores. Simply place the guide over the area that you want to paint and aim the can at the guide. Then, spray your desired amount of paint onto the area.

Whichever method you choose, it is important to take into account other factors such as weather conditions and your personal preference. By using these methods, you will be able to get an accurate answer to how many coats of spray paint are needed for a specific task.

What Is the Definition of How Many Coats of Spray Paint Is Needed?

How many coats of spray paint are needed to cover a surface is based on a variety of factors, such as the type of material you are spraying, the size and thickness of the material, and the application method used. It is also important to consider the environment in which you are applying the paint, as well as any other factors that may impact coverage.

What Do the Different Types of Paint Offer in Terms of Coverage?

There are several different types of paint available, including gloss, semi-gloss, satin, and matte finishes. Each type offers different levels of coverage and durability, depending on your needs. Also, some types offer better coverage than others.

How Do You Measure How Many Coats of Paint Is Needed to Cover a Surface?

Measuring how many coats of paint are needed to cover a surface is usually done by taking a sample piece of material and spraying it with a small amount of paint until you reach the desired coverage level. Then, you can repeat this process for different areas until you reach your desired finish.

What Does the Coverage Look Like After Each Coat Is Applied?

After each coat is applied, you can use a wet- or dry-wipe test to gauge how much paint is still needed. The wet wipe test involves taking a damp cloth or paper towel and wiping off the excess paint. The dry wipe test involves using a dry cloth or paper towel to wipe off the excess paint.

What Are the Pros and Cons of Using Different Types of Coatings?

There are pros and cons associated with using different types of coatings, such as gloss vs matte finish, semi-gloss vs satin finish, and matte vs gloss finish. It is important to consider your needs and goals when choosing which type of coating is best for your project.

Conclusion

We hope this article has helped answer your question about how many coats of spray paint are needed to cover a surface. Depending on your needs and goals, there are several different types of coating available that offer different levels of coverage and durability. It’s important to consider your needs and goals when choosing the best coating for your project.


How To Paint Over Silicone Caulking?

Are you looking to paint over silicone caulking? You’re not alone. Many homeowners are trying to find a way to remove silicone caulk from their walls and floors.

There are a few methods you can use to remove silicone caulk. Some people use a vegetable oil-based paint stripper. Others use a chemical stripper that contains hydrofluoric acid.

Most people find that using a chemical stripper is the easiest and most effective way to remove silicone caulk. Just be sure to wear protective gear, including goggles and gloves, and avoid getting the stripper on your skin or in your eyes.

If you decide to use a vegetable oil-based paint stripper, be sure to dilute it with water before using it. The paint stripper will also discolor surfaces it touches. So, if you plan to paint over silicone caulking, be prepared to clean the area afterward with a degreaser.

What Is Silicone Caulking?

Silicone caulk is a type of adhesive that is commonly used to seal cracks and gaps in walls and floors. It is a type of waterproofing material that can be difficult to remove.

What Do I Need To Remove Silicone Caulking?

If you want to remove silicone caulking, you will need to use special tools and solvents that are designed for the job. You should also wear protective clothing and eye protection when removing the silicone caulk.

What Is The Best Way To Paint Over Silicone Caulking?

There are several ways to paint over silicone caulking. You can use a primer, a water-based latex paint, a latex enamel, or an oil-based paint. Each of these methods has its own advantages and disadvantages, so it’s important to research each one before making a decision.

What Are The Risks Of Picking The Wrong Color Of Paint?

For most homeowners, picking the wrong color of paint for their project can be a costly mistake. Make sure you do your research and choose a color that will complement your project and fit in with the décor of your home.

How Do I Clean Up After Painting?

Once you’ve finished painting, it’s important to clean up any leftover paint and debris from the project area. You should also check for any spots where the silicone caulking has been removed, as this can lead to future water damage or leaks if not properly sealed.

We hope this article has given you some insight into the best way to paint over silicone caulking. Remember that there are risks involved with painting projects, and it’s always best to consult an experienced professional before starting any project.

Can you paint over silicone caulking?

Are you looking for a way to paint over silicone caulking? You’re not alone. Many homeowners are looking for ways to make their homes more beautiful and functional. Unfortunately, silicone caulking is hard to remove with traditional painting techniques.

Fortunately, there are a few solutions that you can try. One option is to use a silicone caulk remover. This type of product has been specifically designed to dissolve and remove silicone caulking. It typically comes in a spray bottle or gel form and is easy to use. Simply apply the remover to the silicone caulking and wait until it starts to work its magic. 

If you decide to use a silicone caulk remover, be sure to follow the instructions carefully. Otherwise, you may end up with a messy or damaged surface. 

In the end, it really depends on your situation and what kind of paint you want to use. But whether you choose silicone caulk removal or traditional painting techniques, be sure to consult with an expert first. They can give you specific advice on how best to proceed.

What is Silicone Caulking?

Silicone caulking is a versatile alternative to traditional caulking. It can be used to seal gaps, cracks, and crevices around your home. It is easy to apply and can be used on both indoor and outdoor surfaces.

What is the Difference Between Silicone Caulking and Regular Caulking?

Silicone caulking is typically thicker than regular caulking and is suitable for outdoor use. It also has a longer lifespan than regular caulking, making it an ideal option for long-term projects.

How Can I Paint Over Silicone Caulking?

There are a few different ways to paint over silicone caulking. You can use a primer and paint, use an adhesive primer, or use paint that contains silicone. Each method will work differently and has its own advantages and disadvantages.

What Are the Pros and Cons of Painting Over Silicone Caulking?

Painting over silicone caulking has many advantages, such as increased durability, reduced potential for mold growth, and improved appearance. However, it can be difficult to remove the silicone caulking once it has been painted over.

What Are Some Other Ways to Paint Over Silicone Caulking?

You can also try using self-leveling paint, taping off areas you don’t want to be painted, or using an all-purpose primer before painting. Each of these methods will have its own advantages and disadvantages.

Painting over silicone caulking can be a great way to improve the appearance of your home. With the right techniques, you can make sure your project is a success!

What kind of paint will stick to silicone?

Do you have a room that needs a little more pizzazz? Maybe you want to spruce up the look of your kitchen, bathroom, or bedroom. One of the best ways to do this is by painting. But, how do you know which type of paint will stick to silicone?

There are a few things to keep in mind when painting silicone surfaces. First, the paint should be water-resistant. Second, the paint should be oil-based or acrylic. Third, the paint should be designed for use on silicone. Finally, the paint shouldn’t have any harsh chemicals or solvents.

Here are a few examples of paint that will stick to silicone:

-Acrylics: acrylic paints are formulated to be used on silicone surfaces. 

-Oil-based paints: oil-based paints are known for their durability and resistance to water and other elements. They can also be used on non-silicone surfaces. 

-Watercolors: many watercolors are water-soluble, which means they can be washed away with soap and water. However, some watercolors, like gouache and watercolor pencils, are not soluble in water and will require a preliminary wash with alcohol to remove any oils from the surface.

If you’re undecided about which type of paint to use, test a small section on a non-silicone surface first to make sure the paint will work. Then, apply the paint to the silicone surface and wait for it to dry.

What Kind of Paint Will Stick to Silicone?

The right type of paint will stick to the silicone. You’ll need paint that is latex-based and contains a low amount of water. This ensures that the paint will be able to adhere to the surface of the silicone without any problems.

How Do I Choose the Right Paint for My Project?

Once you’ve determined that your paint will stick to silicone, it’s time to start shopping for the right brand and color. Make sure to read the labels and look for paints that are made specifically for use on silicone surfaces.

What Should I Do Before Painting?

Before you start painting, you should make sure your area is clean and free of dust, debris, and other contaminants. This will help ensure that you don’t get any unwanted scratches or marks on your silicone surface.

What Tools Do I Need for Painting?

You’ll need a few tools for proper painting on silicone. These include a primer, paintbrush, roller, and a respirator mask if you’re using spray paint.

How Do I Paint on Silicone?

To start painting on silicone, use a primer first. Then apply a thin layer of latex-based paint with a roller. Let it dry for at least 30 minutes before moving on to the next step.

Now that you know how to paint on silicone, you can get started on your project. Just remember to read the labels and choose the right type of paint for your project.

How do you get paint to stick to silicone?

Are you looking for ways to get paint to stick to silicone? You’re not alone. Hundreds of people are searching for the best methods to get paint to stick to silicone.

The best way to get paint to stick to silicone is by using a primer. Primers help the paint stick to the silicone and make it easier for you to apply the paint. There are a few types of primers to choose from, including water-based and oil-based primers.

Water-based primers are the cheapest option and they work well on most surfaces. They’re also opaque so you can’t see the color of the paint through them. Oil-based primers, on the other hand, are more expensive but they work better on oily surfaces. They’re also opaque so you can see the color of the paint through them.

If you want to use a spray primer, be sure to follow the instructions that come with it. Some spray primers require you to shake them before use, while others don’t. Shake them well before using them so that the primer evenly coats all of your surfaces.

Once you’ve applied the primer, you can start painting. Be sure to use a light coat of paint so that it doesn’t dry on. Once the paint is dry, you can add more layers if necessary.

What Are the Different Methods of Getting Paint to Stick to Silicone?

There are a variety of ways you can get paint to stick to silicone. The most common is using a spray adhesive, but you can also use a brush, cloth, or even a sponge.

How Do You Get Paint to Stick to Silicone?

The key is finding the right formula for your project. While some formulas are designed specifically for acrylic paint, other formulas are designed specifically for oil-based paints.

What Are the Benefits of Getting Paint to Stick to Silicone?

There are many reasons why you should get paint to stick to silicone. Primarily, it will make your project look more professional and it will also allow you to create complex designs that would otherwise be difficult or impossible with other materials.

What Are the Risks of Getting Paint to Stick to Silicone?

While getting paint to stick to silicone can be a great way to add a professional look, it does come with its own set of risks. If your silicone isn’t properly prepared, or if it’s not compatible with your paint, then your project could end up looking messy or even damaged.

Is 100% silicone caulking paintable?

Is 100% silicone caulking paintable? In this essay, we will discuss the pros and cons of using silicone caulking paint. First, let’s take a look at the benefits of silicone caulking paint. 

One of the biggest benefits of silicone caulking paint is that it is resistant to moisture and weather conditions. This means that silicone caulking paint can be used in areas where there is high water pressure or humidity, which is ideal for areas such as roofs, gables, and eaves. Additionally, silicone caulking paint is also resistant to oil and grease, which makes it ideal for use in areas where there is an increased risk of water or oil seepage. 

However, there are some drawbacks to using silicone caulking paint. First, silicone caulking paint can be difficult to apply due to its viscoelastic properties. Additionally, silicone caulking paint can be expensive compared to other types of caulking products. In addition, silicone caulking paint may not adhere as well to certain surfaces as other types of caulking products. Finally, silicone caulking paint may not be compatible with some paints and sealants.

 Ultimately, it is important to consider the pros and cons of using silicone caulking paint before making a decision.

What is Silicone Caulking Paint?

Silicone caulking paint is a product that is used to seal and waterproof porous surfaces. It is a water-based latex-free formula that dries quickly, is easy to apply, and has good adhesion.

What are the Benefits of Using Silicone Caulking Paint?

Silicone caulking paint has many benefits, including being waterproof, flexible, and durable. It also has good water resistance, which makes it ideal for use in areas that are prone to water damage such as basements or crawl spaces. It also has good adhesion and can be used for a variety of applications.

What are the Cons of Using Silicone Caulking Paint?

One of the cons of using silicone caulking paint is that it can be difficult to remove once it has dried. It also can be flammable and may not be suitable for some applications.

How to Use Silicone Caulking Paint?

To use silicone caulking paint, you will need to wet the surface to be painted, then apply the paint evenly across the area with a brush or roller. Once the paint has dried, you can use a grinder or sandpaper to smooth out any imperfections.

In conclusion, silicone caulking paint is a great product that can be used for many different applications. It has many benefits and a few cons, making it an excellent choice for sealing and waterproofing porous surfaces. With proper application, you can have peace of mind knowing your home is protected against water damage and mold growth.

Is there a primer for silicone caulk?

If you’re looking to install silicone caulk on a wall, you may be wondering if there is a primer required. In this essay, we’ll discuss why a primer is required and how to get the job done right.

Silicone caulk is a great way to seal joints in hard-to-reach places. However, because silicone is a soft material, it can sometimes fail when exposed to water and other moisture. This can lead to leaks and even structural damage. To avoid these problems, it’s important to use a primer before installing silicone caulk.

Primers are made of a harder substance that helps the silicone adhere better to the surface to which it’s being applied. Without a primer, the silicone can easily pull away from the surface it’s being applied. This can lead to leaks and other problems down the line.

There are several types of primers available on the market. If you’re looking for something specific, be sure to ask your local hardware store or home improvement store for their recommendations.

If you’re planning on installing silicone caulk in a wall, be sure to ask your contractor or home improvement store for a primer recommendation. This will help ensure a successful installation and avoid potential problems down the line.

What is Silicone Caulk?

Silicone caulking is a type of silicone sealant that is used to seal gaps and joints in tile, stone, and other types of flooring. It’s often used in bathrooms, kitchens, and other areas where water can get trapped.

Why Do You Need a Primer for Silicone Caulk?

When you’re installing silicone caulk, you need to use a primer to make sure that the caulk bonds with the surface properly and forms a strong seal. Without the primer, the caulk could seep through the surface or not bond well enough to be effective.

What Type of Primer Should I Use for Silicone Caulk?

There are two types of primers that you can use for silicone caulking: non-flammable and flammable. The non-flammable type is best for use in areas where there’s a possibility of fire or explosion, while the flammable type is best used in areas where there’s a possibility of burning or combustion.

How Do I Apply the Primer for Silicone Caulk?

To apply the primer, you’ll need to mix it with water first, then apply it with a paintbrush or roller. Make sure to apply the primer in an even layer and allow it to dry before going on to the silicone caulk.

What Are the Benefits of Using Silicone Caulk?

One benefit of using silicone caulk is that it’s easy to remove if necessary. You can simply use warm water and dish soap to loosen it up and then remove it from your surface. It also has a long lifespan, so it can be used multiple times without having to replace it as often as other types of caulking.

We hope this essay has helped you understand why a primer is needed for silicone caulk installation and how to get the job done right. By understanding the benefits and proper application of silicone caulk, you can be sure that your project will be successful.

What happens if you paint non-paintable silicone?

Have you ever wondered what happens if you paint non-paintable silicone? You’re not alone. Many homeowners have the same question and want to know if it is safe to paint non-paintable silicone.

What is Non-Paintable Silicone?

Non-paintable silicone is a type of silicone that is not meant to be painted or stained. It is typically used as a sealant for floors and walls, or as a coating for furniture and appliances.

What Are the Risks of Painting Non-Paintable Silicone?

Painting non-paintable silicone can be dangerous because it can cause the silicone to become brittle and crack under the heat of a paintbrush. Additionally, the silicone can become damaged by water or other liquids, making it difficult to clean up after painting.

Can I Paint Non-Paintable Silicone?

It is possible to paint non-paintable silicone, but it should be done with caution. It is recommended that you test a small area first, and use only low-expansion paints or water-based products. Additionally, be sure to use protective gloves and masks when painting non-paintable silicone.

What Can I Do to Protect My Walls From Paint Splatters?

To protect your walls from paint splatters, you can use wall protection film, or you can buy special spray paint that contains a protective agent. Additionally, you can use a primer before painting, which will help keep the paint from staining your walls.

How Can I Clean Up After Painting?

After painting, you should use an outdoor broom or dustpan to sweep any debris off the floor and into a garbage bag. You should also use a wet mop or damp rag to clean up any water or paint splatters that have accumulated on the floor. Finally, you should use an outdoor vacuum cleaner to clean up any dust or dirt that has accumulated on the floor.

Conclusion

We hope this article has given you some insight into what happens if you paint non-paintable silicone. While it is possible to paint non-paintable silicone, it is important to be aware of the risks involved and to follow all safety precautions when doing so.


How To Clean An Airless Paint Sprayer?

Are you looking for a step-by-step guide on how to clean an airless paint sprayer? You’re not alone. Thousands of people just like you are looking for ways to keep their paint sprayers in tip-top shape.

In this guide, we will show you how to clean an airless paint sprayer using the right tools and techniques. We’ll start by explaining what an airless paint sprayer is and what it is used for. Next, we’ll take a look at the different parts of the sprayer and explain how to clean them. Finally, we’ll give you a step-by-step guide on how to clean an airless paint sprayer.

What is an Airless Paint Sprayer?

An airless paint sprayer is a tool used to apply paint to a surface. It uses a mixture of air, water, and paint to create a mist that is then applied to the surface.

What Are the Benefits of Cleaning an Airless Paint Sprayer?

Cleaning your airless paint sprayer regularly will help keep it in tip-top shape and extend its lifespan. It will also increase the efficiency of your paint sprayer and reduce the amount of time it takes to apply paint.

What Should I Do Before Cleaning an Airless Paint Sprayer?

Before you begin cleaning your airless paint sprayer, make sure it is completely dry and free from any excess water or debris. Also, make sure your paint is completely dry before you start cleaning it.

How Do I Clean an Airless Paint Sprayer?

There are several methods for cleaning an airless paint sprayer, depending on the type of paint you use and how frequently you use the sprayer. The most common methods include using a solvent such as acetone or denatured alcohol, using a brush, or using a soft bristle brush.

Cleaning your airless paint sprayer can be done in just a few simple steps. With the right tools and knowledge, it can be a breeze!

What do you use to clean an airless paint sprayer?

Cleaning an airless paint sprayer is an important task that must be done regularly. But what do you use to clean an airless paint sprayer? There are a few methods that can be used, and each has its own set of pros and cons. 

One method is to use a solvent such as paint thinner or alcohol. This is effective at cleaning the gun, but it can also damage the plastic parts if not used correctly. Another option is to use a degreaser such as acetone or vinegar. These cleaners are less damaging, but they can take longer to work. 

Whatever method you choose, be sure to read the instructions that come with your airless paint sprayer before using any cleaner. And always wear gloves and eye protection when cleaning it in order to protect yourself from chemicals and debris.

What Is an Airless Paint Sprayer?

An airless paint sprayer is a type of sprayer that uses pressurized air to atomize paint, varnish, and other materials. It uses a system of nozzles and fittings to atomize the material into a fine mist that can be used to apply paints, varnishes, and other materials.

What Are the Benefits of Cleaning an Airless Paint Sprayer?

Cleaning an airless paint sprayer will help to keep it in good working order. Regular cleaning will help keep the sprayer running smoothly, reduce the risk of clogs, and ensure that the paint is evenly distributed for a better finish.

How Do You Clean an Airless Paint Sprayer?

Cleaning an airless paint sprayer can be done with a variety of products. Some popular options include degreasers, solvents, and detergents. It is important to use the right product for the job, so make sure to read the label before using any cleaning product on your airless paint sprayer.

What Should You Use to Clean an Airless Paint Sprayer?

Generally, you should use degreasers and solvents to clean your airless paint sprayer. These products are designed to break down dirt and grime and help to remove them from the sprayer. Also, make sure to use non-abrasive cleaners that won’t scratch or damage the paint on your airless paint sprayer.

What Are Some Tips for Cleaning an Airless Paint Sprayer?

Here are some tips for cleaning your airless paint sprayer:

  1. Always use clean water when cleaning your airless paint sprayer.
  2. Don’t use harsh detergents or abrasive cleaners on your airless paint sprayer.
  3. Make sure to rinse off all residue after cleaning your airless paint sprayer.
  4. Make sure to store your airless paint sprayer in a dry location to prevent rust and corrosion
  5. Never expose your airless paint sprayer to direct sunlight or heat sources

Cleaning an airless paint sprayer is an important task that must be done regularly. With the right products and techniques, you can ensure that your airless paint sprayer is in good working order and ready for any job you need it for.

Can you use a paint thinner to clean the airless paint sprayer?

Are you looking for ways to clean your airless paint sprayer? You’re not alone. Many homeowners are looking for ways to keep their paint sprayers clean and working at their best.

One popular way to clean an airless paint sprayer is to use a paint thinner. Paint thinners are specifically designed to clean paint and other small objects.

Paint thinners work by dissolving the surface oil on the object they are cleaning. This causes the object to become less sticky and easier to remove.

Be sure to use caution when using a paint thinner, as it can be dangerous if used incorrectly. If you have any questions about how to clean your airless paint sprayer or any other questions about home painting, please don’t hesitate to ask us at your nearest Home Depot store or online.

What is an Airless Paint Sprayer?

An airless paint sprayer is a type of paint sprayer used to apply paint to a surface without the use of a compressor or air. It uses a small, pressurized stream of water or high-pressure air to atomize the paint evenly over the surface.

What Are the Benefits of Cleaning an Airless Paint Sprayer?

Cleaning an airless paint sprayer can help reduce clogs and buildup in the machine, as well as reduce paint overspray and residue. It can also increase the lifespan of your paint sprayer by keeping it free from debris and dirt.

What Are Some Tips for Cleaning an Airless Paint Sprayer?

Here are some tips for cleaning your airless paint sprayer:

  1. Use a brush to remove any stray paint or overspray from the nozzle before starting.
  2. Use warm, soapy water to clean out any clogs or dried paint from the nozzle and body of the machine.
  3. Use a cleaner designed for airless paint sprayers to deep clean the machine.
  4. Check the nozzle and replace it if it is clogged or damaged.
  5. Use a rag or paper towel to wipe down any excess water or cleaner from the nozzle and body of the machine.

What Is the Best Way to Clean an Airless Paint Sprayer?

The best way to clean an airless paint sprayer depends on its condition and use. If it has been used frequently, then deep cleaning with a cleaner designed for airless paint sprayers is recommended. If it has not been used frequently, then simply wiping it down with a damp rag or paper towel is all that is needed.

What Are Some Safe Cleaning Agents for an Airless Paint Sprayer?

Here are some safe cleaning agents for an airless paint sprayer:

  1. Water
  2. White vinegar
  3. Household detergent
  4. Ammonia solution
  5. Non-ammonia detergent solution
  6. Oxi-clean solution
  7. Non-ammonia detergent solution with bleach
  8. Soft bristle brush
  9. Soft toothbrush
  10. Soft cloths
  11. Soft rubber gloves
  12. Fungicidal cleansers and disinfectants

Cleaning your airless paint sprayer doesn’t have to be difficult or expensive! With the right cleaning agents, solutions, and tools, you can keep your paint sprayer working at its best for years to come!

What is the easiest way to clean a paint sprayer?

Cleaning your paint sprayer is an important part of maintaining it. Not only will it help keep your equipment in good working order, but it will also help to extend its life. Here are five easy ways to clean your paint sprayer:

  1. Use a garden hose to rinse the sprayer out.
  2. Fill the sprayer with hot water and vinegar. Let it sit for a few minutes, then use a brush to scrub the inside of the nozzle.
  3. Pour a pot of boiling water over the nozzle and let it sit for several minutes. Use a stiff brush to scrub the inside of the nozzle.
  4. Pour a pot of cold water over the nozzle and let it sit for several minutes. use a stiff brush to scrub the inside of the nozzle.
  5. Pour 1/2 cup of white vinegar into each tank, turn on the sprayer, and wait 15 seconds before spraying. Use a stiff brush to scrub any build-up on the side of each tank.

What is the Easiest Way To Clean a Paint Sprayer?

The easiest way to clean your paint sprayer is to use a mild detergent or soap, followed by a rinse, and then dry thoroughly. This process can be repeated several times if necessary.

What Are The Benefits of Regular Cleaning?

Regular cleaning will help to reduce the build-up of dirt and grime on your paint sprayer, which can lead to clogged nozzles and reduced performance. Additionally, regular cleaning will help to extend the life of your paint sprayer.

What Are The Steps for Proper Cleaning?

Steps for proper cleaning include rinsing out the paint nozzle, running it under water, and then using a brush or cloth to ensure that all dirt and grime is removed. Afterward, you should use a mild detergent or soap to clean any remaining residue.

What Are The Potential Risks of Not Cleaning Your Sprayer?

Not cleaning your paint sprayer regularly can lead to clogged nozzles and reduced performance. Additionally, not cleaning can also lead to dirt and debris buildup, which can affect the performance of your paint sprayer.

How Often Should You Clean Your Sprayer?

It is recommended that you clean your paint sprayer once every few months, or as needed depending on how often you use it. Additionally, you should check the nozzles for clogs and replace them if necessary.

Cleaning your paint sprayer is an important part of maintaining it. By following the steps outlined above, you can ensure that your paint sprayer is in good working order and that it will last for many years to come.

Can you clean the airless sprayer with water?

Do you have an airless sprayer that needs to be cleaned? You’re not alone. Many people have the same problem and are looking for solutions.

There are a few ways to clean an airless sprayer with water. The easiest is to pour a bucket of water over the sprayer and turn it on. This will cause the water to flow through the sprayer and clean it.

If you don’t have a bucket, you can use a plunger. Put the plunger over the spout of the sprayer and push and pull it until the water comes out. Be sure to hold onto the trigger when you do this so that you don’t get water inside the sprayer.

Another way to clean an airless sprayer is to use a hose. Turn on the water and let it run until it’s flowing freely through the hose. Then, connect the hose to the sprayer and turn it on. The pressure from the water will force debris out of the sprayer.

What Causes An Airless Sprayer To Get Dirty?

An airless sprayer can get dirty for a variety of reasons, including dirt, oil, or debris. Any time you use an airless sprayer, it’s important to keep it clean.

What Are Some Tips To Help Keep An Airless Sprayer Clean?

There are a few tips you can use to help keep your airless sprayer clean and running smoothly. These include regularly cleaning the nozzle, lubing the gun and pump, and checking the pressure gauge.

What Products Do You Need To Clean An Airless Sprayer?

Depending on the type of sprayer you have, you may need different products to clean it. For example, if your sprayer is made of plastic, you may need a product specifically formulated for plastic. If it’s made of metal, you may need a cleaner specifically formulated for metal.

How Do You Clean An Airless Sprayer With Water?

To clean an airless sprayer with water, first, make sure there is no soap or detergent in the gun. Then, fill a bucket with warm water and add a few drops of dish soap or detergent. Next, use a soft-bristled brush to scrub down the nozzle and gun. Make sure to use gentle strokes so as not to damage the nozzle or gun. Once the nozzle and gun are clean, rinse them with warm water and then dry them with a paper towel or cloth. Finally, check the pressure gauge to make sure it’s at the proper pressure, and then re-lubricate the gun and pump if needed.

What Are The Benefits Of Cleaning An Airless Sprayer With Water?

Cleaning an airless sprayer with water can help reduce dirt buildup on the nozzle and gun while also helping to keep them cleaner longer. It can also help reduce the risk of clogged nozzles and pumps by allowing them to dry out faster after they’ve been used.

Cleaning an airless sprayer with water can be a great way to keep it running smoothly and reduce the risk of clogs and dirt buildup. We hope this article has given you some insight into how to keep your airless sprayer clean and running efficiently.

What is the best solvent to clean a spray gun?

Cleaning a spray gun can be a daunting task, but it doesn’t have to be. In this article, we are going to discuss what is the best solvent to clean a spray gun and how to do it.

The most common solvent for cleaning a spray gun is alcohol. Alcohol is a very effective solvent and it is safe to use. However, you should be aware that alcohol can be dangerous if it gets into your eyes. Additionally, alcohol can damage the plastic and metal parts of the gun. So, make sure to use caution when using alcohol to clean your spray gun. 

Another common solvent for cleaning a spray gun is acetone. Acetone is also a very effective solvent and it is safe to use. However, acetone can be dangerous if it gets into your eyes. Additionally, acetone can damage the plastic and metal parts of the gun. So, make sure to use caution when using acetone to clean your spray gun.

There are a few different solvents that are good for cleaning spray guns. Depending on the type of paint you are using and the type of gun you have, you may need a different solvent. Some of the popular solvents include acetone, denatured alcohol, and mineral spirits.

How to Clean a Spray Gun with the Right Solvent

The best way to clean your spray gun is to use the right solvent for the type of paint you are using and the type of gun you have. Start by cleaning the gun with the solvent, then rinse off any excess solvent before using water to rinse it off.

What Are the Benefits of Cleaning a Spray Gun With the Right Solvent?

Cleaning a spray gun with the right solvent will help protect your gun from wear and tear and will also help to extend its lifespan. It will also help to prevent paint from sticking to your gun and will help to keep it looking its best.

Cleaning a spray gun can be a daunting task, but it doesn’t have to be. In this article, we discussed what is the best solvent to clean a spray gun and how to do it. We also discussed some of the benefits of cleaning your spray gun with the right solvent.

Can I run water through the paint sprayer?

Have you ever wondered if you can run water through the paint sprayer? It’s a common question that many people have, and it can be a bit of a mystery.

Running water through the paint sprayer can cause problems with the machine. The water can cause the paint to thicken, clog the nozzle, or even damage the machine itself. So, it’s important to be sure that you can do this before you try it.

If you’re not sure whether or not you can run water through your paint sprayer, consult your owner’s manual or look online for advice. In most cases, running water through a paint sprayer is safe if done correctly, but always be cautious.

What is Water Running Through the Paint Sprayer?

Water running through the paint sprayer is a common practice in many industries, such as painting, auto body repair, and drywall installation. It’s used to help thin out the paint and reduce clogging in the gun.

What Are the Benefits of Water Running Through the Paint Sprayer?

Water running through the paint sprayer can help reduce waste and save money. It also helps to thin out the paint, which makes it easier to apply and reduces clogging in the gun.

What Are the Risks of Water Running Through the Paint Sprayer?

There are some risks associated with water running through the paint sprayer, such as clogged nozzles, broken parts, and overspray. It’s also important to make sure that your paint is compatible with water running through it.

How Do I Run Water Through the Paint Sprayer?

There are a few steps you should follow when running water through the paint sprayer. First, make sure that your paint is compatible with water running through it. Then, test your nozzles to make sure they’re free of debris and clogs. Finally, make sure to clean your gun regularly to prevent clogs and clogged nozzles.

Conclusion

We hope this article has answered your question about whether or not you can run water through the paint sprayer. We discussed what water running through the sprayer is, its benefits, risks, and how to run it safely.


What Causes Paint To Wrinkle?

Have you ever wondered why paint wrinkles? It is a common question among homeowners. In this article, we will answer the question of “what causes paint to wrinkle” and provide some helpful tips on how to remedy the problem.

Paint is a very thin layer of paint that is applied to the surface of a wall or object. Thin paint can be easily damaged by humidity, sunlight, and other factors. When these factors damage the thin layer of paint, it causes the paint to wrinkle.

There are several things you can do to prevent or remedy paint wrinkle problems:

  1. Be sure to clean your walls and surfaces regularly. This will remove any dirt or contaminants that could damage the paint layer.
  2. Apply a coat of polyurethane or other sealants after painting to protect the surface from moisture and sunlight.
  3. Use high-quality paints that are made for exterior use. These paints often have thicker layers of paint and are less likely to cause wrinkles in the finish.
  4. Avoid using water-based paints on exterior surfaces. These paints are often more susceptible to moisture damage and will result in paint wrinkles.
  5. Take care when handling your painter’s tape and other painting materials. Avoid touching the paint directly and be sure to wear a painter’s hat and gloves when working with paint.
  6. If you notice paint wrinkles, don’t panic! There are several steps you can take to try to remedy the problem. First, try applying a coat of sealant or polyurethane to the affected area. If that doesn’t work, try painting over the wrinkled area with a new coat of paint that is made for exterior use. If that doesn’t work, you may need to hire a professional to repair the paint. At Painting.com, we have a wide selection of paints and sealants that are perfect for exterior use. Give us a call at 1-800-Paint-USA to find the perfect solution for your needs.

What Causes Paint to Wrinkle?

Paint can wrinkle for a variety of reasons, such as humidity, temperature changes, sunlight, and other environmental factors. However, the most common cause of paint wrinkles is moisture.

What Are the Causes of Paint Wrinkles?

Paint wrinkles can be caused by a number of factors, such as humidity, temperature changes, sunlight, and other environmental factors. Additionally, there are other causes of paint wrinkles, such as improper storage of paint, inadequate ventilation in the environment, and improper application of paint.

How to Prevent Paint Wrinkles?

There are several tips and tricks that can help prevent paint wrinkles. These include storing paint in a cool, dry environment; making sure the paint is applied evenly; and using a brush with an angled tip that prevents the paint from running or pooling. Additionally, it is important to use a good-quality primer before applying any paint.

What Can I Do If My Paint is Wrinkled?

If your paint is wrinkled, there are several things you can do to remedy the situation. You can try cleaning the surface with a damp cloth and mild detergent or use a paste wax designed for paint protection. Additionally, you can apply a coat of non-toxic furniture polish or a non-toxic wax designed for protecting against UV rays.

We hope this article has answered your question of “what causes paint to wrinkle” and provided you with some helpful tips on how to prevent and remedy the problem.

How do you fix wrinkled paint?

Have you ever had paint that is so wrinkled that it looks like it has been in the sun too long? It can be frustrating to try and fix, but there are ways to get your paint back to looking its best. Here are a few tips to help get your paint looking wrinkle-free:

  1. Start with a clean surface. If your paint is covered in dust, dirt, or other material, it will be much harder to fix. Clean the surface before you start painting to make sure everything is smooth and free of obstructions.
  2. Use water-based paint. Water-based paints are less likely to cause wrinkles than oil-based paints, so they are a good option if you want to avoid wrinkles.
  3. Use a brush with soft bristles. Hard bristles can cause paint to crack and become wrinkled, so use a soft brush when applying the paint.
  4. Apply the paint slowly and evenly. Too much paint at once can cause wrinkles, so be careful not to apply too much pressure when you’re painting. Apply the paint in small layers instead of spraying it on all at once.
  5. Let the paint dry completely. Once the paint is applied, let it dry completely before you start to worry about wrinkles. If the paint is too wet, it will wrinkle when it dries.
  6. Use a paint touch-up kit. If you need to fix small areas of wrinkled paint, a touch-up kit can be a great option. These kits usually come with a brush, paint, and instructions, so you’ll be able to correct your mistakes quickly and easily.

What Causes Wrinkled Paint?

There are a few factors that can cause wrinkled paint. These include age, weather, and moisture. Age is the biggest factor, as paint can become brittle and crack when it is old. Weather can also play a role in causing wrinkled paint, as sudden changes in temperature can cause the paint to shrink or expand. Moisture is another factor that can cause wrinkled paint, as it can cause the paint to swell or shrink.

How Can You Get Rid of Wrinkled Paint?

There are several steps you can take to get rid of wrinkled paint. These include cleaning the surface of the paint, applying a penetrating sealant, and using a primer and topcoat. Each of these steps will help to reduce the amount of wrinkling and make the paint look fresher and better.

What Products Can You Use To Fix Wrinkled Paint?

There are several products you can use to fix wrinkled paint. These include acrylic primers, penetrating sealants, and topcoats. Each of these products has its own benefits and drawbacks, so it’s important to do your research before choosing one.

What Tips Should You Follow To Get The Best Results?

When trying to fix wrinkled paint, it’s important to follow a few steps. These include cleaning the surface of the paint, applying a penetrating sealant, and using a primer and topcoat. It’s also important to use the right type of product for your specific situation.

What Are Some Other Ways To Fix Wrinkled Paint?

If you don’t want to use any products at all, there are some other ways you can get rid of wrinkles in your paint. These include sanding down the surface of the paint, using a belt sander or buffer, or using a hand-held buffer with an abrasive pad.

We hope this article helped you understand how to fix wrinkled paint! With some effort and patience, you should be able to get your paint back to looking its best in no time.

Why is my paint wrinkling up?

Have you ever wondered why paint is wrinkling up? It can be a frustrating experience for any homeowner, but it doesn’t have to be. In this article, we’ll discuss the causes of paint wrinkling and how to prevent it.

What Causes Paint to Wrinkle?

Paint can wrinkle for several reasons. The most common cause is due to temperature changes, such as when you walk into a room. Other reasons include fluctuating humidity levels, exposure to sunlight, and even changes in the paint’s formulation.

What Can I Do to Prevent Paint from Wrinkling?

There are several steps you can take to prevent paint from wrinkling. These include storing your paint in a cool, dry environment, using an appropriate brush and roller, and using quality paint that is formulated for exterior use.

How Can I Correctly Apply Paint After It Wrinkles?

Once your paint has wrinkled, it’s important to take steps to correct the problem. You can use a product called Micro-Mist Fixative to help keep the paint from spreading out or flaking off. You can also use a roller that is specifically designed for use on exterior surfaces.

Now that you understand the causes of paint wrinkling and how to prevent it, you can be sure that your home is protected from any potential damage. With the right precautions taken, you can ensure that your paint lasts for years to come.

Can you paint over wrinkle paint?

Are you looking for a way to paint over wrinkles paint? If so, you’re in the right place. In this article, we’ll discuss the best ways to paint over wrinkle paint and why it’s important.

To begin, let’s take a look at the different types of wrinkle paint. There are three main types: flat, textured, and dimensional. Flat wrinkle paint is the most common and it’s made up of tiny little dots. Textured wrinkle paint is made up of small bumps and valleys and it’s ideal for areas that need a more realistic look. Dimensional wrinkle paint is made up of large dots and it’s best for areas that need a more cartoon-like appearance.

Now that we know what type of wrinkle paint is available, we need to know how to apply it. The best way to do this is to use a brush. Start by applying the paint to the areas that you want to cover with wrinkles. Next, use your fingers to create the wrinkles in the paint. Finally, smooth out any bumps or valleys with a brush or your fingers.

There are two main ways to finish your project: you can either allow the paint to dry completely or you can seal it with a finishing spray or liquid sealer. Dried-out paints will look less realistic and they may crack if you try to move them or stretch them later on in the project. Sealed paints will stay looking new for longer but they may not be as flexible as unpainted materials so be careful when handling them afterward.

So, what are you waiting for? Let’s take a look at some examples of how to paint over wrinkle paint.

What is Wrinkle Paint?

Wrinkle paint is a type of acrylic paint that has been specially formulated to reduce or eliminate the appearance of wrinkles, creases, and other surface irregularities. It’s often used on fabrics and other types of surfaces.

How Do You Paint Over Wrinkle Paint?

Picking paint for wrinkle paint is different than picking one for regular paint. You should always check the label to make sure it’s compatible with wrinkle paint. You may also want to consider using an airless sprayer to apply the paint.

What Should You Look for When Picking a Paint for Wrinkle Paint?

There are a few things you should look for when picking paint for wrinkle paint. You should check the label to make sure it’s compatible with wrinkle paint. You should also consider the type of finish you want – satin, semi-gloss, or gloss – and the consistency of the paint.

What Are the Benefits of Painting Over Wrinkle Paint?

Painting over wrinkle paint can help reduce or eliminate the appearance of wrinkles, creases, and other surface irregularities. It can also give your items a professional touch that can help them last longer and look more attractive.

What Are Some Tips for Painting Over Wrinkle Paint?

Here are some tips for painting over wrinkle paint:

  1. Start with an even base coat of wrinkle paint.
  2. Ensure you have enough time to wait for the wrinkle finish to dry before proceeding with your next steps
  3. Use a good quality brush and make sure to use enough coats
  4. Allow enough time for each coat to dry before applying the next
  5. Use a light hand when applying the finish coat

Painting over wrinkle paint can be a great way to give your items a professional touch without having to replace them entirely. We hope this article has given you all the information you need to get started on your painting project!

How do you fix a wrinkled base coat?

Are you having trouble fixing a wrinkled base coat? You’re not alone. Many people have the same problem and don’t know how to fix it. Here are a few tips to help you out:

  1. Make sure your paint is completely dry. If it’s not, your base coat will start to crease and wrinkles will form.
  2. Use a dedicated smoothing tool to apply your base coat. A toothbrush or a sponge won’t do the trick, and you won’t get the same results.
  3. Apply pressure when you smooth your coat. This will help it stick to the surface and reduce the chance of wrinkles forming.
  4. Let your paint dry completely before applying your top coats or any other protection. If you don’t, your top coat will bond to the wrinkles and they’ll be even harder to fix.

What Causes Wrinkles in Base Coats?

There are several possible causes for a wrinkled base coat, including improper application, temperature changes, and water exposure.

What Steps Can You Take to Fix a Wrinkled Base Coat?

The first step is to remove the wrinkles by tapping the base coat against a clean surface until the wrinkles are gone. Then, apply a thin layer of wax or polish to the surface.

What Products Can Help Fix a Wrinkled Base Coat?

There are several products available that can help fix a wrinkled base coat. These include waxes, polishes, and sealants.

What Tips Should You Follow When Fixing a Wrinkled Base Coat?

Keep in mind that the more you work on the base coat, the better it will look. Also, be gentle when applying products, and do not overdo it.

We hope this article has helped you understand how to fix a wrinkled base coat and how to take care of it properly. Remember, it’s always best to consult with your car dealership if you have any questions or concerns about your car’s finish.

How do you remove ripples from the paint?

Are you looking for ways to remove ripples from the paint on your car? You’re not alone. Many car owners are looking for ways to fix the ripples in their paint without having to spend a lot of money. Here are a few tips to help you remove ripples from the paint:

1. Use a foam roller. 

A foam roller is a great tool for removing ripples from the paint. Simply place the foam roller on the paint and press down firmly. Be sure to use enough pressure so that the ripples are removed. Repeat this process until the desired results are achieved.

2. Use a plunger. 

If using a foam roller isn’t giving you the desired results, try using a plunger. Fill the plunger with water and place it on top of the paint. Push and pull the plunger until all of the ripples have been removed. Be careful not to over-pump the water, or you may end up damaging your car’s finish.

3. Use a sandpaper disk. 

If using a plunger or foam roller isn’t giving you satisfactory results, try using a sandpaper disk instead. Sandpaper disks can be purchased at most hardware stores or home improvement stores. Simply place the sandpaper disk on top of the paint and apply pressure with your hand or an object such as a piece of wood.

What Causes Ripples in the Paint?

Ripples in the paint are usually caused by sunlight, heat, and rough surfaces. These can all lead to damage to the paint surface and eventually ripples.

What Are Some Simple Tips to Remove Ripples From the Paint?

There are several simple tips that you can use to remove ripples from your paint. These include using a buffer or polisher, waxing the surface, and using fine-grit sandpaper.

What Are Some More Advanced Ways to Remove Ripples From the Paint?

If you want a more advanced way to remove ripples from your paint, you can use an orbital buffer or an oscillating polisher. These tools will give you more control over the polishing process and can help you get rid of those pesky ripples.

What Else Can You Do To Fix Ripples In the Paint?

If you want to keep your paint looking its best, there are a few extra steps you can take to ensure that it stays that way. These include using waxes and sealants, as well as regularly cleaning and maintaining your car.

We hope this article has helped you understand how to remove ripples from the paint on your car. With some simple tips and some more advanced methods, you can get rid of those pesky ripples and keep your car looking great!

How do you get rid of paint ripples?

Have you ever noticed a paint job that wasn’t quite right? Maybe it was just a little bit off, or perhaps it was more noticeable than you expected. Whatever the case may be, you may have noticed paint ripples.

What Are Paint Ripples?

Paint ripples are the result of uneven layers of paint on a surface. They can be caused by multiple coats of paint, too much or too little pressure when applying the paint, and even temperature differences between the surface the paint is being applied to and the surrounding air.

Why Do You Get Paint Ripples?

Paint ripples are usually caused by a variety of factors, including temperature differences between the surface the paint is being applied to and the surrounding air, too much or too little paint pressure, and multiple coats of paint.

There are several ways to get rid of paint ripples. These include sanding down the affected area, using an anti-glare or matte finish, and using an anti-skid finish or wax.

What Are Some Ways to Fix Paint Ripples?

Once you’ve gotten rid of the ripples, you can use a variety of techniques to fix them. These include using an anti-skid finish, using an anti-glare or matte finish, and using wax.

What Are Some Tips for Painting Walls?

When painting walls, it’s important to pay attention to temperature differences between the surface you’re painting and the surrounding air. Make sure to use enough coats of paint and apply them in a steady, even manner to ensure an even finish. It’s also important to use enough pressure when applying the paint so that it doesn’t feel too thin or too thick.

Conclusion

We hope this article has given you a better understanding of why you get paint ripples and how to get rid of them. From tips for painting walls to removing them with products, we hope this article has helped you find the best solution for your situation.


How Many Coats Of Primer For Cabinets?

Are you looking to know how many coats of primer are needed for cabinets? If so, you’re not alone. Many homeowners are trying to figure out the right amount of primer for their cabinets.

According to the National Home Improvement Show, you’ll need two coats of primer for every 100 square feet of the cabinet surface. So, if your cabinets are measuring 300 square feet, you’ll need 600 coats of primer.

Remember that primer needs time to dry before you can paint. So, plan on spending a few hours sanding and priming your cabinets before painting.

What is Primer?

Primer is a thin layer of paint designed to protect the surface of a surface from water and dirt while allowing it to bond with the underlying surface. It is usually applied before painting a surface and helps to reduce the amount of time needed for the paint to dry.

What Is the Best Primer for Cabinets?

There are many primers available for use on cabinets, but some are better than others. The best primer for cabinets is one that is formulated specifically for use on wood surfaces.

How Many Coats of Primer Do I Need?

The amount of primer needed for your cabinets depends on several factors, such as the type of wood used in your cabinets, how thick you want your primer to be, and how many coats you want to put on the surface. It is best to test a small area first to get an idea of how much primer is needed.

What Are the Benefits of Using a Primer?

Primer is an essential tool in preventing damage to your cabinets and can help make them look more beautiful and longer-lasting. It also protects the surface from water, dirt, and other materials that can damage or stain the surface. Additionally, it can help reduce dust and dirt buildup, making your cabinets look cleaner for longer.

What Are Some Tips for Applying Primer?

When applying primer, it’s important to be patient and take your time. Make sure you cover the entire surface with enough coats to ensure that it adheres properly and that it is completely dry before moving on to the next step. Additionally, it’s important to wear gloves when applying primer so that you don’t accidentally end up with an oil-based primer on your hands.

Sealants can also be applied after priming to help protect the surface from water damage or staining.

Do you sand between coats of primer on cabinets?

Are you looking to do a project and need to know whether you should sand between coats of primer? There are a few things to consider before deciding if you should sand between coats of primer. Primers are designed to provide a smooth surface for the paint to adhere to, but if the primer is sanded too much it can create imperfections in the finish. If you decide to sand between coats of primer, make sure to use fine-grained sandpaper and work in small increments.

What is Primer?

Primer is a substance used to help protect the wood or other substrate from moisture, dust, and other contaminants. It also helps to seal the wood, making it easier to paint over.

What is Sanding Between Coats of Primer?

Sanding between coats of primer is the process of removing any imperfections from the previously-primed surface so that the second coat of primer can be applied evenly and smoothly.

What are the Benefits of Sanding Between Coats of Primer?

Sanding between coats of primer can help ensure that the second coat will be applied evenly and smoothly, as well as making it easier to paint over. It can also help to reduce the amount of needed sanding later on in the project.

What Should I Consider Before Sanding Between Coats of Primer?

Before starting any project, it’s important to research the type of primer that you’re using and make sure it’s compatible with your project. You should also research the best way to sand between coats of primer and make sure you have the right materials for the job.

How Do I Know When to Sand Between Coats of Primer?

There are a few signs that can help you determine when it’s time to sand between coats of primer. These include checking for any imperfections in the surface, checking for any discoloration in the primer, and checking for any warping or cracking in the wood.

We hope this article has answered your questions about whether or not you should sand between coats of primer on your next project! If you have any additional questions or comments, feel free to let us know!

Do you need 2 or 3 coats of paint on the cabinets?

Are you planning on painting your kitchen cabinets? You may be wondering if you need 2 or 3 coats of paint. Here’s what you need to know about the right amount of paint for your cabinets.

To start with, your cabinets are made from different types of wood, so the paint you use will affect the finish differently. If your cabinets are made from a soft wood like pine, you’ll likely need 2 to 3 coats of paint. If your cabinets are made from hard woods like oak or maple, you may only need 1 or 2 coats of paint. 

Another thing to consider is the size and shape of your cabinets. If they’re small and shallow, you may only need one coat of paint. But if your cabinets are large and deep, you may need two or three coats. 

So whether you need one or two coats of paint, make sure to read the instructions on the can of paint and follow them precisely. Doing this will ensure that your cabinet finish looks good and lasts for years to come.

What is the Right Amount of Paint for Kitchen Cabinets?

The right amount of paint for kitchen cabinets depends on a variety of factors, including the type of finish, the type of material, and the size of the cabinet. Generally, two coats of paint are sufficient to cover all surfaces and provide protection against water and wear.

What Should I Look for When Choosing the Right Amount of Paint?

When choosing the right amount of paint, it’s important to consider the type of finish you want and the size and shape of your cabinets. You should also consider the type of materials used in your cabinets, such as wood or metal.

How Many Coats Should I Use?

Generally speaking, two coats are sufficient for most kitchens. However, if you have particularly porous or absorbent cabinets, you may need three coats to ensure full coverage.

What Should I Avoid When Painting Cabinets?

Avoid using too much water or too much thinner when painting cabinets. Also, don’t forget to clean any dust off your cabinets before painting to avoid streaks or smudges.

What Are the Benefits of Painting Cabinets with Two Coats?

Painting cabinets with two coats provide a better finish than one coat alone and helps to protect against water and wear. It also provides a better bond between the paint and the surface.

If you’re considering painting your kitchen cabinets, it’s important to consider a variety of factors, such as the type of finish, size, and shape of cabinets, the material used in the cabinet, and the amount of paint needed. We hope this article has helped you understand how to paint your cabinets with the right amount of paint for your needs.

Do I need two coats of primer?

Are you considering applying two coats of primer on your next home improvement project? It may seem like a simple task, but it’s not always as easy as it seems. In this article, we’ll explore the basics of primer, the pros and cons of using it, and how to get the most out of it.

Primer is a product that is typically applied to wood or other porous surfaces before painting or other types of staining. Its main purpose is to provide a barrier between the substrate and the paint or stain and to help the paint or stain adhere to the substrate. 

There are many different types of primer, but all of them share some common properties. They all have a thick consistency, they all require multiple applications, and they all have a tendency to dry quickly. 

The biggest difference between primers comes down to their purpose. Primers intended for paint are formulated to be water-resistant and to resist chalking, staining, and peeling. In contrast, primers intended for woodworking are designed specifically for use on wood and other porous substrates. 

There are some exceptions to these general rules, but they are relatively rare. If you’re unsure if you need a primer for your project, it’s usually safest to go with one of the more water-resistant options.

There are a few things to keep in mind when using primer. First, make sure that the surface that you’re priming is free of any oil, paint, or other contaminants. This will cause the primer to not adhere properly and may lead to problems later on.

Second, make sure that the primer is evenly applied. Over-application can cause the primer to dry too quickly and create unsightly cracks and peeling.

Finally, be patient. Primers tend to dry quickly, but they can take a few hours to fully adhere and settle into the substrate. If you apply the primer too soon, you’ll likely end up with incomplete coverage and uneven results.

What is Primer?

Primer is a thin, water-based sealant that is used to protect surfaces from water, dirt, and other contaminants. It also helps to improve adhesion and reduce dust.

What Are the Benefits of Primer?

Primer can help to protect surfaces from water and dirt, reduce dust and improve adhesion. It also helps to reduce the appearance of scratches and chips on surfaces.

What Are the Cons of Primer?

Primer can be hard to remove and can leave a sticky residue that can be difficult to clean off. It can also be expensive and difficult to find in some areas.

How to Apply Primer?

The primer should be applied with a brush or roller and then misted with water to help it stick to surfaces. It should then be allowed to dry completely before applying any other paint or stains.

What Should I Look For in a Primer?

When looking for a primer, you should look for one that is made from high-quality materials, such as acrylic or urethane, is water-based, and has a low odor. You should also look for one that has been approved for use on your specific type of surface.

So now you know the basics of primer and how to apply it properly. We hope this article answered all your questions about primer, its benefits, and cons, as well as what to look for in a primer for your next home improvement project.

Are 3 coats of paint too much for cabinets?

Are 3 coats of paint too much for cabinets? Many homeowners ask this question because they are unsure of how much paint is needed to cover the surface. In this essay, we will discuss the answer to this question.

First, it is important to understand that the paint must be applied in a thin layer in order to achieve the desired results. Too much paint will not only cover the surface with a thick coat but may also cause damage to the wood. 

Second, factors such as the quality of the paint, the type of wood, and how often the cabinet will be used will affect how much paint is needed. For example, wood that has been treated with sealants or waxes will require more coats of paint than untreated wood. 

Finally, if you are unsure about how much paint is needed, it is always best to consult a professional. They are familiar with different types of paints and can help you determine how much is necessary.

What Are the Different Types of Paint?

There are many types of paint, each with its own characteristics and coverage. Some are more durable than others, so it’s important to choose the right one for the job.

How Much Paint Should I Use?

The amount of paint needed will vary depending on the type of surface you are painting. Generally speaking, 1 to 2 coats are enough to cover most surfaces.

How Much Paint is Too Much?

If you are unsure about how much paint you need, it’s best to start with a light coat and add more if necessary. Too much paint can cause streaks and can also weaken the finish of your cabinet surface.

What Are the Benefits of Using 3 Coats?

Using 3 coats of paint can be beneficial if you want a stronger, longer-lasting finish. It can also be beneficial if you want to cover a large area quickly and efficiently.

What Are the Drawbacks of Using 3 Coats?

The biggest drawback to using 3 coats is that it can be more expensive than using 1 or 2 coats and it can also take longer to complete the job. Additionally, it can be difficult to get a consistent finish with 3 coats.

As you can see, there are pros and cons to using 3 coats of paint on cabinets. In order to make an informed decision, it’s important to understand the type of paint you’re using, how much is needed, and the advantages and drawbacks of using more than one coat.

What is the best way to apply primer to cabinets?

Primer is an essential part of any home renovation project. It holds the paint or stain in place and prevents it from drying out, making it easier to apply. But what is the best way to apply primer to cabinets?

One popular technique is to use a foam roller. Rolling the primer into the wood creates a smooth surface that is less likely to trap moisture and the cabinets will look freshly painted every time. If you’re using a spray primer, be sure to shake it well before each application and avoid spraying near windows or doors.

What Types of Primers Can Be Used on Cabinets?

There are several types of primers that can be used on cabinets. These include water-based, oil-based, and hybrid primers. Each type has its own advantages and disadvantages.

The best way to apply primer to cabinets is by brush or roller. Brush application is best for small areas, while roller application is better for larger areas.

How Long Does it Take to Apply Primer to Cabinets?

It usually takes about 30 minutes to an hour to apply primer to cabinets. Make sure to give yourself enough time so that the primer can dry properly before you move on to the next step.

Primer is an essential part of any home renovation project. It holds the paint or stain in place and prevents it from drying out, making it easier to apply. There are several types of primers that can be used on cabinets, and each type has its own advantages and disadvantages. The best way to apply primer to cabinets is by brush or roller. Make sure to give yourself enough time so that the primer can dry properly before you move on to the next step.

How long after priming can you sand cabinets?

Are you looking to refinish your kitchen cabinets? You’ve come to the right place. We’ll discuss the best time to sand and prime kitchen cabinets.

Sanding cabinets is a task that many homeowners complete after priming. The goal is to smooth out any bumps or imperfections on the surface. 

After priming, it’s important to sand the cabinets in order to remove any excess primer. Too much primer can cause the wood to become rough and uneven. 

If you’re looking to refinish your cabinets, we recommend waiting at least two weeks after priming before sanding. This will give the primer time to bond firmly to the surface of the wood.

What is the Best Time to Sand and Prime Kitchen Cabinets?

The best time to sand and prime your kitchen cabinets is after they have been polyurethane-coated, or after they have been painted. This gives the best results, as the polyurethane will help protect the wood from damage.

If you are refinishing your cabinets, we recommend waiting two weeks after priming before sanding.

What is the Best Method for Sanding Kitchen Cabinets?

You can use a power sander or an orbital sander for sanding kitchen cabinets. For a power sander, start with medium-grit sandpaper and work your way up to fine-grit sandpaper. For an orbital sander, start with coarse-grit sandpaper and work your way up to fine-grit sandpaper.

When sanding cabinets, be sure to wear gloves and eye protection. Also, be sure to take care not to damage the finish on the cabinets.

What is the Best Method for Priming Kitchen Cabinets?

The best method for priming kitchen cabinets is with high-quality primer and paint. For a high-quality primer, use one that is made specifically for indoor use. For high-quality paint, choose one that is made specifically for indoor use.

After priming, it’s important to coat the entire cabinet with a good layer of paint. This will protect the surface from moisture and wear.

How Long After Priming Can You Sand Kitchen Cabinets?

You can sand your kitchen cabinets after they have been primed, but it’s best to wait at least 24 hours before doing so. This allows the primer to fully dry and set in the paint properly.

Conclusion

We hope this article has given you all the information you need to know about when it’s best to sand and prime kitchen cabinets. Remember, it’s always best to follow the manufacturer’s instructions for your specific project.


Does Vinegar Remove Paint From Leather

Have you ever tried removing paint from leather? It can be a challenging task, but it can be done if you have the right tools and know-how. In this article, we’re going to answer the question: does vinegar remove paint from leather?

First, you will need to gather your supplies. This includes cloth, some vinegar, and a leather surface. If the paint is especially thick, you may also need sandpaper or a scrub brush.

Next, wet the cloth and place it over the paint area. Gently rub the cloth against the leather until all of the paint is removed. Be sure to work in a circular motion to avoid scratching or damaging the leather.

Next, pour vinegar over the area and gently scrub with the cloth again. Be sure not to splash vinegar on yourself or your clothing. Repeat this process until all of the paint is gone.

Once the paint is removed, rinse the leather with clean water and dry it off. Be sure not to apply too much pressure while drying, as this could damage the leather.

Vinegar may not be the best choice for every paint job, but it can be a valuable tool in removing stubborn paint from leather.

What Are Some Ways to Remove Paint From Leather?

There are a few different ways to remove paint from leather, including using wax or solvent, sanding, and electro-cleaning.

What Are Some Advantages of Using Vinegar to Remove Paint From Leather?

Vinegar is a cheap and easy way to remove paint from leather, and it can be used on both suede and nubuck leather. It also works well on dark-colored leathers and stains.

How Do You Apply Vinegar to Leather?

To apply vinegar to leather, you should soak the leather in clean water for a few minutes, then apply a mixture of one part vinegar and three parts water (never use more than one part vinegar). Allow the leather to soak for an hour or two, then use a soft brush or sponge to remove any excess liquid.

What Are Some Disadvantages of Using Vinegar to Remove Paint From Leather?

Vinegar can damage your leather if used incorrectly, so be sure to follow the instructions above. Also, it can take longer than other methods to remove paint from leather.

What Are Some Tips for Removing Paint From Leather With Vinegar?

The best way to remove paint from leather is by using a wax or solvent first, followed by a thorough cleaning with soap and water. Try not to use too much vinegar, as it can damage the leather if not used correctly. Also, make sure to let the leather dry completely before applying any other type of polish or conditioner.

How do you remove dried paint from leather?

Have you ever tried to remove dried paint from leather? If not, you’re not alone. Many people have experienced the frustration of trying to remove dried paint from their leather goods.

The first step is to identify the source of the paint. If it’s dried paint from a brush, you can try using a hairdryer to heat up the area and loosen the paint. If it’s dried paint from an aerosol can, you will need to use a cleaner and solvent to break down the dried paint.

Once you’ve identified the source of the paint, you will need to remove it. You can use various methods, including rubbing with a cloth, boiling water, or using a hair dryer on high heat. Make sure to take caution when applying these methods – too much heat can damage your leather goods.

What Causes Dried Paint to Form on Leather?

Leather is a natural material, which means it has its own natural oils and waxes that help protect it from water and other elements. When leather is exposed to water, it can become damaged and can even start to rot if it is not cared for properly.

Removing dried paint from leather can be tricky, but there are several methods that can help you get the job done. Some of the most popular methods include using baking soda, cleaning with vinegar, rubbing with a solution of equal parts water and lemon juice, and using an enzyme-based cleaner.

Make sure to consult the product instructions before using any of these methods, as not all of them will work with all types of dried paint. Contact a professional if you’re having trouble removing dried paint from your leather goods.

What Are Some Methods for Removing Dried Paint From Leather?

Depending on the type of dried paint that you’re removing, there are different methods you can use to get the job done. For example, if you’re removing iron-based paint, you can use a mild steel wool solution or a detergent-based cleaner. If you’re removing oil-based paint, you can use a mild steel wool solution, a detergent-based cleaner, or an enzymatic cleaner.

What Are Some Tips for Removing Dried Paint From Leather?

To get the best results when removing dried paint from leather, it is important to follow some simple tips. For example, always use clean cotton cloths when cleaning leather products, use gentle pressure when rubbing or brushing away dried paint, and make sure to wear gloves when using any type of chemical-based remover.

What Are Some Other Ways to Care for Leather?

Aside from removing dried paint from your leather goods, there are other ways you can care for them to keep them looking great and protect them from damage. For example, you can apply a leather conditioner to help keep your leather soft and supple, and use a leather protector spray to protect it from water and other elements.

How do you remove dried paint from faux leather?

Have you ever tried to remove dried paint from faux leather? It can be a daunting task, but if you follow the steps in this article, you will be able to get the job done.

The first step is to moisten the surface you are working on. If the paint is dry, a damp cloth will work best. If the paint is still wet, you can use a mild detergent or soap. Just be sure to rinse the surface clean after you are done cleaning it. 

Next, you will need some scrubbing pads or a brush. Scrub the paint off in a circular motion with the pads or brush. Be sure to use plenty of water to help keep your faux leather clean and free from dried paint. 

Remember to rinse your hands and surfaces clean after you are finished cleaning them.

What Is Faux Leather?

Faux leather is a synthetic material that is often used for clothing, furniture, and accessories. It is usually made of polyester or other synthetic fibers and has a suede or leather-like texture.

How Do You Remove Paint From Faux Leather?

You can remove paint from faux leather by using a variety of techniques, including sanding, scraping, and wiping off with a damp cloth or sponge.

How Do You Clean Faux Leather?

To clean faux leather, use a mild detergent and water or a special leather cleaner. Make sure to rinse the item thoroughly and let it dry thoroughly before using it again.

What Are Some Tips For Removing Dried Paint From Faux Leather?

If the paint is still wet, you can try using a plastic bag and a brush to gently agitate the paint away from the surface of the faux leather. If it’s dried, you can try using a scraping tool or an abrasive pad to remove the paint.

Removing dried paint from faux leather may seem like a daunting task, but with the right tools and techniques, you can get it done. We hope this article has provided you with some helpful tips, products, and advice on cleaning and removing dried paint from faux leather.

How does vinegar remove dried paint?

Are you looking for ways to remove dried paint from a wall? You’re not alone. Many homeowners are looking for a quick and easy way to remove dried paint from the walls of their homes. One popular option is vinegar. Here’s how it works:

First, make a mixture of equal parts white vinegar and water in a spray bottle.

Spray the vinegar mixture onto the dried paint on the wall.

Wait 10 minutes, then rinse the area with cool water. 

Finally, use a clean cloth to remove any remaining vinegar residue.

Vinegar is a quick and easy way to remove dried paint from your walls. It’s also safe and easy to use, so you can be sure it will leave your walls clean and free of dried paint.

What Causes Paint to Dry?

Paint can dry for a variety of reasons, including temperature, humidity, and sunlight. In addition, the type of paint you use can also play a role in how quickly it dries.

How Can Vinegar Remove Paint?

Vinegar has many natural properties that can help remove paint from walls. It is acidic, which can break down the bonds between the paint and the surface it is on. Additionally, it is able to penetrate the surface and loosen up the dried paint.

What Are Some Other Removing Methods for Paint?

There are many other ways to remove dried paint from walls besides using vinegar, such as sanding it off, using cleaning products, or using special tools. It’s important to do research and find a method that works best for your situation.

What Are the Benefits of Using Vinegar to Remove Paint?

The main benefit of using vinegar to remove dried paint from walls is that it is relatively easy and inexpensive, and can be done quickly without damage to the wall or surface. Additionally, it is less toxic than other removers and does not leave behind any stains or residue.

What Are the Risks of Using Vinegar to Remove Paint?

While vinegar is a safe and effective way to remove dried paint from walls, there are some risks involved. This method can be messy and can damage surfaces if not done properly. Additionally, it can leave behind a faint odor if not thoroughly cleaned after use.

We hope this article has given you some insight into how vinegar can be used to remove dried paint from walls. While there are some risks involved with this method, it is still an effective way to get rid of the stubborn residue left behind by paint.

Does alcohol remove paint from leather?

Are you looking to remove paint from leather? Have you tried removing the paint with alcohol but it didn’t work? You’re not alone – many people have the same question. In this article, we will discuss the different ways to remove paint from leather using different techniques.

The first way to remove paint from leather is to use a solvent. A solvent will dissolve the paint and then you can remove it with a cloth or sandpaper. Some solvents that work well for this are acetone, benzene, and lacquer thinner. Make sure the solvent is safe to use on leather and test it first on a small area before using it on the entire leather item.

Another method is to use a steel wool pad. Steel wool won’t dissolve the paint but it will remove the surface layer of the leather. You can use a mild abrasive like steel wool and water or you can use a harsher abrasive like sandpaper. If you choose to use an abrasive, be sure to wear gloves, eye protection, and a respirator.

The last method is called heat treatment and it’s probably the least desirable option because it requires heating the leather item above its normal temperature range. This will cause the paint to bubble and peel off in layers. You can also try using a hair dryer on low heat if this method sounds like it would work for you.

What is the Best Way to Remove Paint From Leather?

The best way to remove paint from leather is with a soft brush, a degreaser, and a solvent. Make sure you use the right combination of ingredients and follow the instructions carefully.

What Ingredients Should I Use to Remove Paint From Leather?

The most common ingredients used to remove paint from leather are water, soap, and a degreaser. You can also use mineral spirits, rubbing alcohol, or even lighter fluid if you prefer.

How Do I Know If My Attempts are Working?

When you’re removing paint from leather, it’s important to keep an eye on the progress – check for discoloration, see if the paint is coming off easily, and check for any streaks or marks on the leather. If all of these things look good, then you’ve successfully removed the paint.

What Are Some Other Tips for Removing Paint From Leather?

There are a few other tips that can help you remove paint from leather that we would like to list for you. First, make sure you allow sufficient time for the process – at least two hours. Also, try not to touch the leather with your hands – this can cause stains on your hands or clothing. And lastly, make sure to wear gloves when working with the leather – this will protect your hands and also prevent any stains from getting on your clothes.

Removing paint from leather can be a difficult task, but with the right ingredients and techniques, you can successfully remove it. We hope this article has given you some insight into how to remove paint from leather and what ingredients you should use.

Does paint thinner damage leather?

Leather is a durable material that can withstand a lot of wear and tear. It’s also a popular material for making leather goods, so it’s important to know how to take care of it. One of the most important things to remember when caring for leather is not to use paint thinner on it.

Paint thinner is a common household item that many people use to clean surfaces. However, paint thinner can damage leather if it is used on it. Paint thinner contains a high concentration of chemicals, which can cause the leather to become dry, brittle, and cracked. If paint thinner is used on leather goods, it is important to clean them immediately with a cleaner that doesn’t contain any chemicals.

Does Paint Thinner Damage Leather?

Paint thinner is an agent that is used to remove old paint from surfaces. It’s also used in some cleaning products and as an ingredient in some paints. However, it can be dangerous to use on leather, as it can cause damage to the material.

What Can Happen If You Use Paint Thinner on Leather?

Paint thinner can cause damage to the leather if it is not diluted properly. It can also cause the leather to become dry and brittle, which can be dangerous if you are using it on a leather item that is used regularly.

What Are Some Alternatives to Using Paint Thinner on Leather?

There are alternatives to using paint thinner on leather, such as using a cleaner that is designed for leather and using a leather conditioner. Both of these products are designed to keep the leather soft and supple and can help protect it from damage.

Leather is a durable material, but it’s important to take care of it when using paint thinner. Be sure to read the label and use alternative products if necessary.

How do you remove white paint from leather?

Have you ever had to remove white paint from leather? It can be a daunting task, but with the right tips, you can get the job done. Here are four steps to removing white paint from leather safely and effectively.

  1. Start by soaking the leather in warm water for several hours. This will soften the paint and make it easier to remove.
  2. Use a mild soap or a non-abrasive cleaner on a cloth to clean the surface. Be sure to use caution since harsh chemicals can damage the leather.
  3. Allow the leather to dry completely before applying any additional coats of paint or clear coat.
  4. Polish the leather as needed with a polishing cloth or beeswax and cream polish.

What is White Paint?

White paint is a type of paint that comes in a variety of colors and finishes. It is used for decorating objects such as furniture and walls, as well as for coating leather. White paint is applied in a number of ways, including with a brush, roller, or spray gun.

What Causes White Paint to Smudge on Leather?

White paint can cause the leather to smear if it gets onto the surface. This is usually due to something like a spilled drink or a smudge from your clothes. The paint will spread and run into the cracks in the leather, turning it white.

What Are Some Natural Remedies for Removing White Paint From Leather?

Natural remedies for removing white paint from leather include using baking soda and cornstarch, lemon juice and salt, or toothpaste and water. Simply mix the ingredients together and apply them to the leather in a thin layer. Allow the mixture to sit for a few minutes, then scrub it off with a cloth or brush.

How Do You Remove White Paint From Leather With Chemical Products?

If you don’t want to use any natural remedies, you can use chemical products to get rid of the white paint. These include rubbing alcohol, acetone, and lacquer thinner. Be sure to use caution when using these products, and wear gloves and a face mask to avoid inhaling the fumes.

What Are Some Other Ways to Remove White Paint From Leather?

If you still can’t get rid of the white paint, there are other ways you can try. You can use an abrasive sponge, sandpaper, or even steel wool.

Conclusion

Removing white paint from leather doesn’t have to be a daunting task. With the right tips and techniques, you can get the job done quickly and easily.


Spray Hardener

Are you thinking about using a spray hardener for your concrete? You’re not alone. Many homeowners are looking for ways to make their concrete more durable, and a spray hardener can be a great way to do that.

There are a few things to keep in mind when using a spray hardener, though. First, make sure you use the correct type for your concrete. There are several types of spray hardeners on the market, and each one works best on a different type of concrete. Second, be sure to read the instructions carefully before using the spray hardener. Finally, be prepared to wait several hours for the concrete to fully dry before walking on it.

What is a Spray Hardener?

A spray hardener is a liquid that is used to make concrete harder, more durable, and more resistant to cracking. It helps to improve the physical properties of concrete, such as its strength and stiffness.

What Does a Spray Hardener Do?

A spray hardener works by helping to create a more uniform, even texture in the concrete. It also helps to reduce cracking, making concrete more durable and resistant to stress and impact.

What Are the Benefits of Using a Spray Hardener in Concrete?

The benefits of using a spray hardener in concrete include improved durability, increased strength, improved appearance, and reduced cracking and maintenance.

How Do I Choose the Right Spray Hardener for My Project?

Choosing the right spray hardener for your project depends on your project goals and budget. You should consider factors such as the type of concrete you are using, how long you plan to leave it wet after application, and how long you plan to leave it wet before applying additional coats of concrete.

What Are the Risks Associated With Using a Spray Hardener in Concrete?

There are some risks associated with using a spray hardener in concrete, including potential chemical burns, staining, or cracking of the surface of the concrete. You should also be aware that some products are more potent than others and may require additional precautions when using them.

We hope this article has helped you understand the role of spray hardeners in concrete and how to choose the best product for your project. We also want to thank you for taking the time to read this article and for your interest in protecting your concrete from damage.

What is the purpose of paint hardener?

Are you looking for a purpose of paint hardener? You are not alone. Many homeowners are curious about the purpose of paint hardener, so they want to know what it is and how it works.

A paint hardener is a chemical that is used to make the paint more durable. It helps to prevent the paint from cracking, peeling, and chipping. Hardener also makes the paint more flexible so it can withstand repeated bending and stretching.

Paint hardeners can be found in many home improvement stores. It is usually sold in aerosol cans or tubes. You should always read the instructions that come with the product before using it.

What is Paint Hardener?

A paint hardener is a chemical compound that helps to make the paint stick to the surface of a surface. It is used in conjunction with other types of paints for better adhesion and durability.

What are the Benefits of Paint Hardener?

A paint hardener can help to make the paint stick to the surface and last longer. It also helps to reduce dust, water, and other materials from getting into the paint.

What is the Purpose of Paint Hardener?

The purpose of a paint hardener is to make the paint stick to the surface, reduce dust, water, and other materials from getting into the paint, and help make it last longer.

How Do I Use Paint Hardener?

You can use paint hardener by mixing it with water or by using it in spray bottles. You can also use it with brushes or rollers.

What Does It Look Like?

A paint hardener is a clear or white liquid that has a consistency similar to water. It can have mild or strong odors depending on the type used.

We hope this article has given you a better understanding of what paint hardener is, its benefits, and its purpose. We also hope that you now know how to use it properly and what it looks like.

Does spray paint need a hardener?

Spray paint is a great way to create customized furniture, but it can be difficult to get the right finish. In this essay, we will discuss the importance of using a hardener when using spray paint and how it will affect the outcome.

First, let’s talk about how to spray paint works. When a user sprays the paint onto a surface, the paint is atomized into small droplets. These droplets are then able to travel through the air and contact other objects. 

One of the biggest factors that can affect the finish of your project is the type of hardener you use. A hardener helps to thicken the paint so that it can better adhere to the substrate (the object you are painting). There are a few types of hardeners available on the market, but they all have different properties. 

One popular type of hardener is epoxy. Epoxies tend to be thick and have a high viscosity (thickness). This means that they take a long time to dry and can be difficult to work with. Another type of hardener is alkyd resin. Alkyds are thinner and easier to work with, but they don’t have as strong a bond between the paint and substrate. 

So, what should you do if you want to use spray paint? The first thing you need to do is decide which kind of hardener will work best for your project. Then, add it to your mixture according to the instructions. Be sure to wait until the hardener has fully dried before you start painting. If you don’t, you may end up with a finish that is not as durable or as accurate as you would like.

What is a Hardener?

A hardener is an agent added to the spray paint that helps it to cure or harden more quickly. This allows for better adhesion and longer-lasting finishes.

What Types of Spray Paint are Used?

Most commonly, you will find spray paints that are designed for use with hardeners. These types of paints have been formulated with ingredients that help to ensure a proper cure, reduce drying time, and reduce overspray.

What Are the Benefits of Using a Hardener?

The benefits of using a hardener include better adhesion, longer-lasting finishes, and reduced drying time. Additionally, using a hardener will help to protect your furniture from harmful elements such as UV rays, moisture, and dust.

What Are the Steps for Using a Hardener?

There are several steps involved in using a hardener. First, you will want to apply the correct amount of paint onto the surface to be painted. Then, you will need to allow the paint to dry completely before applying the hardener. Finally, you will need to allow the hardener to cure before applying any other coats of paint.

What Are the Pros and Cons of Using a Hardener?

The pros of using a hardener include better adhesion, longer-lasting finishes, and reduced drying time. Additionally, using a hardener will help to protect your furniture from harmful elements such as UV rays, moisture, and dust. However, there are also some cons associated with using a hardener such as increased cost, potential chemical reactions with other materials, and difficulty in cleaning up after use.

In summary, we discussed the importance of using a hardener when using spray paint and how it can affect the outcome of your project. We also discussed the various types of spray paint used and how they can be used in conjunction with a hardener to create custom finishes.

Is there a way to harden spray paint?

Are you looking for a way to harden spray paint? You’re not alone. Many homeowners are looking for ways to make their projects last longer and be more durable.

One common way to harden spray paint is to use a hardener. Hardeners come in many different forms and are available at most hardware stores. Some of the more common hardeners include:

– Aluminium Sulphate: This is a powder that is used to make paint harder and more durable. It can be used in small doses, so it’s not very expensive.

– Epoxy Resin: This resin comes in a liquid form and is used to make objects more waterproof and resistant to weathering. It also makes paint harder and more durable.

– Polyurethane: This type of resin thickens spray paint while also making it harder. It’s one of the most popular types of hardeners because it produces a strong finish with minimal effort.

There are many different ways to harden spray paint, so it’s important to choose the right one for your needs. If you’re unsure which hardener to use, or if you have any questions about how to use one, don’t hesitate to reach out to a professional. They can help you choose the best option for your project and make sure that your paint lasts long and looks great.

What is Hardening Spray Paint?

Hardening spray paint is a type of paint that has been treated with an additive that makes it more durable and resistant to chipping, cracking, and fading. It can be used on both interior and exterior projects and is often used by professionals.

What are the Benefits of Hardening Spray Paint?

Hardening spray paint can make your projects last longer and be more durable, making them easier to maintain and clean. It also helps protect against the elements, making it a great choice for outdoor projects.

How Can You Harden Spray Paint?

You can harden spray paint by adding a mildly abrasive or chemical agent such as sand, steel wool, or salt. This will help break down any bubbles or rough spots in the paint, making it smoother and more durable.

What Are Some Tips for Using Hardened Spray Paint?

When using hardened spray paint, it’s important to follow the instructions on the package. Make sure to mix the paint properly, use an appropriate amount of pressure when applying it, and allow it to dry before moving on to another project.

What Are Some Things to Avoid When Using Hardened Spray Paint?

Avoiding certain types of materials when using hardened spray paint is essential. Avoid using materials such as wood, plastic, or metal when using hardened spray paint as these can cause damage to the paint.

We hope this introduction to hardened spray paint has given you a better understanding of what it is and how it can be used to make your projects last longer and be more durable. Keep in mind when using hardened spray paint that there are certain materials that should be avoided and some tips for using it properly.

What can I spray on plastic to make it stronger?

Plastic can be a great material for many things, from food storage to building materials. However, plastic can be a weak material and need to be reinforced to make it more durable. In this essay, we will discuss what you can spray on plastic to make it stronger.

There are several things you can spray on plastic to make it stronger, including epoxy, polyurethane, and paint. Epoxy is the most popular choice because it has the longest-lasting and strongest effect. Polyurethane is another great choice as it is a water-based product that is easy to apply and clean up. Paint is an excellent choice if you want a more permanent solution.

How Do I Choose Which One To Use?

It all depends on what you want the end result to look like. For example, if you are looking for a more durable finish on a plastic piece, you may want to use an epoxy or polyurethane product. If you are looking for a more natural look, then you may want to use a paint product.

What Are The Benefits Of Using These Products?

All of these products have their own benefits and advantages. Epoxy is the most versatile as it can be used for both interior and exterior projects. It can also be used on both porous and non-porous surfaces. Polyurethane is an easy-to-use product that is water-based and safe for use around food storage areas. Paint has the advantage of being permanent and can be used in any environment.

In conclusion, there are several products that can be used to make plastic stronger. Epoxy, polyurethane, and paint are all great choices as they have their own benefits and advantages. It all depends on what you want the end result to look like and what type of surface you are working with.

Does hardener make the paint dry faster?

Have you ever noticed that the paint in your house is taking longer to dry than you remember? If so, you’re not alone. Many homeowners are noticing this phenomenon and wondering what’s causing it. Some say that the humidity in the air is causing the paint to take longer to dry, while others say that the paint has become harder over time and is taking longer to cure.

The truth is, there is no definitive answer as to why paint may take longer to dry. However, a few things you can do in order to help speed up the process include using a hardener and using quality paints.

Hardeners are a type of additive that is used in many household products, including paint. When applied correctly, hardeners can help increase the speed at which the paint dries. As a result, they can make painting projects go much more quickly and efficiently.

One thing to keep in mind when using hardeners is that they should be used in moderation. Too much of them can actually cause damage to your walls or other surfaces. Instead, use them as recommended by your painter or home improvement contractor.

Quality paints are also important when it comes to drying time. If you select paints that are specifically designed for indoor use, you’ll likely see better results when it comes to drying time. Paints with low water absorption rates will also take less time to dry than those with high absorption rates.

Overall, there is no one definitive answer as to why paint may take longer to dry. However, by using a hardener and quality paints, you can help speed up the process.

What Causes Paint to Take Longer to Dry?

There are a few factors that can cause paint to take longer to dry, including temperature, humidity, and wind. Additionally, some paints require more time to dry than others.

Why Does Paint Take So Long to Dry?

Paint dries in different ways depending on the type of paint and the thickness of the coat. The drying process can also be affected by temperature and humidity. Additionally, factors such as wind and sunlight can affect the drying process.

What Can I Do to Speed Up Paint Drying Time?

There are a few things you can do to speed up paint drying time, such as using fans or air conditioning to reduce humidity levels, using low-VOC paints, and keeping the temperature low and away from direct sunlight.

How Do I Know If My Paint Is Drying Too Quickly?

There are several ways you can tell if your paint is drying too quickly, including checking the paint surface for water spots and discoloration, checking for a tacky surface, and checking for signs of shrinkage or cracking.

What Are Some Other Ways to Speed Up Paint Drying Time?

Other ways you can speed up paint drying time include using a roller with a low amount of water and thinner, using an electric trowel or sprayer, and storing your paint in a cool place out of direct sunlight.

Now that you know why paint takes longer to dry and what you can do to speed it up, you’re ready to tackle this problem head-on! With some patience and effort, you can get your paint back on track in no time.

Is thinner and hardener the same?

Are thinner and hardeners the same? This question has been asked many times by many people and it has been a source of confusion for many. In this essay, I will try to answer this question and clear up any confusion that may have arisen.

What are Thinner and Hardener?

Thinner and hardeners are two types of dental materials used to make dentures, crowns, bridges, and other dental prosthetics. They are used to improve the appearance and durability of dentures, crowns, bridges, and other dental prosthetics.

What are the Differences between Thinner and Hardener?

Thinner is a more fluid material while hardener is a more solid material. Both materials can be used in dentures, crowns, bridges, and other dental prosthetics but they have different properties.

How Do Thinner and Hardener Compare?

Both thinner and hardeners can be used to make dentures, crowns, bridges, and other dental prosthetics but they have different properties. Thinners are more fluid while hardeners are more solid. This means that thinner materials can be used to create dentures that are more flexible while hardeners can be used to create dentures that are more durable.

What Are the Benefits of Thinner and Hardener?

Thinners can help create dentures with a more natural appearance while hardeners can help make dentures more durable. They can also help create dentures that are more comfortable to wear.

How Are Thinner and Hardener Used in Dentistry?

Thinners can be used to make dentures that are more flexible while hardeners can be used to make dentures that are more durable. They can also be used to create dentures with a more natural appearance or with improved comfort.

Conclusion

In conclusion, thinner and hardeners are two types of dental materials used to make dentures, crowns, bridges, and other dental prosthetics. They have different properties which can help create dentures that are more comfortable to wear or have a more natural appearance. Using thinner or hardeners can help improve the appearance or durability of a denture, crown, or bridge.


Wrinkle Spray Paint

Are you looking for the best wrinkle spray paint to restore your antique furniture? You’re not alone. In this article, we will discuss what wrinkle spray paint is, how to use it, and the best brands.

What is Wrinkle Spray Paint?

Wrinkle spray paint is a type of paint that can be used to restore antique furniture. It is designed to fill in holes and cracks in wood and other materials, making it easier to restore an item and look new again.

How to use wrinkle spray paint

To use wrinkle spray paint, first measure the area you want to treat. Then, mix the required amount of paint with the desired solvent. For example, if you are treating a piece of furniture with varnish, you would add the solvent to the paint and mix together well. Apply the mixture to the area you want to treat and wait for it to dry. Be careful not to breathe in the fumes produced by wrinkle spray paint; they can be toxic.

The best brands of wrinkle spray paint

There are many different brands of wrinkle spray paint on the market, but some of our favorites include Farrow & Ball and Sherwin Williams. Be sure to research each brand before selecting one as they all have their own unique features and benefits.

What are the Benefits of Wrinkle Spray Paint?

The main benefit of wrinkle spray paint is that it is a quick and easy way to restore antique furniture. It is also a cost-effective solution compared to other methods of restoration.

What is the Best Wrinkle Spray Paint for Antique Furniture?

There are many different wrinkle spray paints on the market, but one of the most popular brands is Krylon®. Krylon® has a wide range of colors and finishes, making it a great choice for restoring antique furniture.

What Types of Antique Furniture Can Wrinkle Spray Paint be Used On?

Wrinkle spray paint can be used on a variety of different types of antique furniture, including wooden chairs, tables, desks, and other items. It can also be used on fabrics and leather items.

How to Use Wrinkle Spray Paint?

Before using wrinkle spray paint, make sure you have a clean surface and that the item you are painting is dry. Then, apply a thin layer of wrinkle spray paint to the item and let it dry for 15 minutes. Once it has dried, you can use sandpaper or a Polish Kit to refine the finish.

How does wrinkle spray paint work?

Have you ever wondered how wrinkle spray paint works? If so, you’re not alone. There’s a lot of mystery surrounding this type of paint and its ability to create a lasting finish. In this article, we’ll take a closer look at the science behind wrinkle spray paint and see if it’s really as impressive as everyone says.

What is Wrinkle Spray Paint?

Wrinkle spray paint is a type of paint used to create a durable finish on various fabrics, such as leather, suede, and synthetic materials. It is designed to create a wrinkle-free finish, while also protecting the fabric from dirt and stains.

How Does Wrinkle Spray Paint Work?

Wrinkle spray paint works by creating a chemical bond between the fabric and the paint. This bond creates a protective layer that repels dirt and water and makes it easier to clean.

Is wrinkle spray paint safe?

There are a few things you should keep in mind if you’re thinking about using wrinkle spray paint in your home: First, make sure you have adequate ventilation in your room. This type of paint is very potent and can be dangerous if it’s inhaled or contact with skin is prolonged. Second, keep any small children away from the area where the painting is taking place – they may accidentally get their hands wet and start playing with the finish! Finally, always use protective gear when working with this type of paint – Safety glasses, a respirator, and gloves are all recommended precautions.

What Are the Benefits of Wrinkle Spray Paint?

The benefits of wrinkle spray paint include ensuring a wrinkle-free finish, protecting the fabric from dirt and stains, and making it easier to clean. Additionally, wrinkle spray paint is available in a wide range of colors and can be easily adjusted to match any decor.

What Are the Drawbacks of Wrinkle Spray Paint?

The drawbacks of wrinkle spray paint include the need for regular touch-ups, the potential for overspray, and the potential for damage to delicate fabrics. Additionally, some fabrics may not be compatible with wrinkle spray paint, so it’s important to test your garment before using it on your project.

What Are the Best Practices When Using Wrinkle Spray Paint?

The best practices when using wrinkle spray paint include taking care when applying it to delicate fabrics, using only a small amount of paint at a time, using special brushes or rollers to apply the paint, and using an acetone-free cleaner to remove any excess paint before washing your garment.

We hope this article has helped you understand how wrinkle spray paint works and what are the best practices for using it. If you have any questions or comments about wrinkle spray paint, feel free to contact us at info@twinlakesbootcamp.com.

How do you make spray paint wrinkles?

Have you ever wanted to know how to make spray paint wrinkles? It’s a great way to add dimension to your design and give it a unique look. Here are the steps:

  1. Start by spraying your paint onto a large surface, like a canvas or a wall.
  2. Allow the paint to dry completely before proceeding.
  3. Use your fingers to make the paint wrinkle by pressing down gently and pulling up at the same time. Be sure to do this in different directions to create an interesting effect.
  4. Finally, add any finishing touches you might want and enjoy your new wrinkles in spray paint!

What are Spray Paint Wrinkles?

Spray paint wrinkles are defined as lines in the paint that are caused by air pressure differences between the nozzle and the surface of the object being painted.

What Materials Are Needed to Make Spray Paint Wrinkles?

You will need a can of spray paint, some paper, masking tape, and an air compressor or other device capable of creating air pressure differences.

How Do You Make Spray Paint Wrinkles?

Before you begin, make sure that you have the right materials and that you have set up your air compressor or other devices properly. Begin by placing a piece of paper over the area you want to paint and then use masking tape to hold it in place. Now, start painting and watch as the wrinkles form.

What Are the Benefits of Making Spray Paint Wrinkles?

Making spray paint wrinkles can give your design a more realistic look and can also be used to create interesting patterns and designs. It is also a great way to add depth and dimension to your project.

What Tips Should You Follow to Make the Most of Making Spray Paint Wrinkles?

Here are a few tips for making the most out of your spray paint wrinkles:

  1. Make sure to use masking tape for better adhesion.
  2. Use masking tape to hold your paper in place before painting.
  3. Position your nozzle correctly so that air pressure is evenly distributed over your surface.
  4. Give your project plenty of time to dry before touching it.
  5. Once your project is dry, use fine-grit sandpaper to remove any excess paint or residue from the surface.

What causes wrinkles in spray paint?

Have you ever wondered what causes wrinkles in spray paint? For many people, this is a question that has been on their minds for years. There are a number of theories as to why this can happen, but at the end of the day, it all comes down to chemistry.

One of the most common causes of wrinkles in spray paint is low humidity levels. When the humidity levels are low, the paint can start to dry out and crack. This is because when the paint dries out, it becomes more brittle and susceptible to breaking.

Another common cause of wrinkles in spray paint is temperature fluctuations. When the temperature changes rapidly, it can also cause cracks in the paint. This is because when the paint heats up, it expands and becomes thinner. When it cools down, it contracts and becomes thicker again. This process can cause small fractures in the paint surface.

If you notice that your spray paint is starting to develop wrinkles, there are a few things you can do to prevent them from happening. First, make sure that your room has a high enough humidity level. Second, make sure that your temperature doesn’t fluctuate too much. And finally, keep your paint stored properly – refrigeration is a good way to keep your paint stable and free from cracks.

What Causes Wrinkles in Spray Paint?

Wrinkles in spray paint are caused by chemical reactions between the paint and the solvent used to make it. The reaction is generally triggered by temperature changes or exposure to sunlight.

What Are Some Solutions to Wrinkles in Spray Paint?

There are a few solutions to wrinkles in spray paint. You can try using a low-solvent brand, diluting the paint, or using a different type of solvent altogether.

What Are Some Factors That Can Cause Wrinkles in Spray Paint?

Factors that can cause wrinkles in spray paint include temperature changes, sunlight exposure, and humidity levels. These factors can also cause other types of paint-related problems such as peeling or cracking.

What Other Options Are There for Fixing Wrinkles in Spray Paint?

There are other options for fixing the wrinkles in your paint besides just diluting it or switching to a different type of solvent. You can try using a different brand of paint, using a more heat-resistant solvent, or using a more flexible brush.

What Are Some Tips for Preventing Wrinkles in Spray Paint?

One of the best ways to prevent wrinkles in your paint is to store it properly and avoid exposing it to high temperatures or direct sunlight. You can also use an airtight container when storing your paint and keep it away from moisture and dust.

We hope this has answered your question about what causes wrinkles in spray paint and some tips on how to prevent them.

Is wrinkle paint durable?

Have you ever wondered if wrinkle paint is durable enough to withstand the test of time? If so, you’re not alone. Many people are looking to find out if wrinkle paint is durable enough to stand the test of time.

The good news is that wrinkle paint is indeed durable. In fact, it can last for several years without fading or cracking. However, keep in mind that wrinkle paint is not impervious to damage. If you accidentally drop your wrinkle paint can, it may break. Additionally, if your wrinkle paint falls victim to water damage, it will likely start to fade and crack.

Still, overall, wrinkle paint is a very durable product. If youre looking for a way to protect your furniture from aging and fading, consider using wrinkle paint.

What is Wrinkle Paint?

Wrinkle paint is a type of paint that can be used to cover up wrinkles in fabric and furniture. It is made up of powdered pigments, resins, and binders that come together to create a smooth, wrinkle-resistant finish.

What Are the Benefits of Wrinkle Paint?

Wrinkle paint offers several benefits, including being easy to use, long-lasting, and affordable. It can also be used on a variety of surfaces, making it ideal for covering up wrinkles in fabric and furniture.

What Are the Drawbacks of Wrinkle Paint?

The biggest drawback to wrinkle paint is that it can be labor-intensive to apply properly. It can also be difficult to remove and can damage fabrics if not applied correctly.

How Long Does Wrinkle Paint Last?

Wrinkle paint is typically expected to last for up to five years depending on how often it is used and how often it is cleaned. It should be cleaned with warm water and a mild detergent every six months or so to ensure that it remains in good condition.

What Are the Best Practices for Storing Wrinkle Paint?

To ensure that your wrinkle paint lasts as long as possible, it is important to store it properly. Make sure that it is kept away from heat and direct sunlight, and that it is stored in a cool, dry location away from direct sunlight.

In conclusion, wrinkle paint is a great way to cover up wrinkles in fabrics and furniture. It offers several benefits, such as being easy to use, long-lasting, and affordable, but it also has its drawbacks. We hope you now have a better understanding of wrinkle paint and how to best store and use it.

Does wrinkle paint need a primer?

Are you looking for answers about wrinkle paint without primer? Well, you’re not alone. Hundreds of people just like you are looking for answers to questions like these.

But first, what exactly is wrinkle paint? Wrinkle paint is a type of paint that is used to cover up irregularities on wood or other surfaces. Primers are not necessary for wrinkle paint, but they are often recommended because they help the paint adhere to the surface.

Now that we’ve answered the question about whether primers are necessary for wrinkle paint, let’s talk about whether or not you should use one. 

Primers can help the paint adhere to the surface, which can make it durable and easier to apply. However, primers also add an extra layer of complexity to the painting process. If youre is not careful, using a primer could lead to mistakes and uneven coverage.

In short, using a primer with wrinkle paint is optional but can make the painting process easier. If you decide that a primer is necessary for your project, be sure to choose one that will work best with this type of paint.

What is Wrinkle Paint?

Wrinkle paint is a type of paint that can be used to cover up existing minor imperfections on walls, floors, and other surfaces. It is made from special ingredients that help to hide and cover these imperfections.

Is Wrinkle Paint Needed With a Primer?

Generally, yes, wrinkle paint needs to be applied over a primer before it can be used. A primer helps to improve the adhesion of the paint and makes it easier to apply.

What Should I Look For When Buying Wrinkle Paint Without Primer?

When buying wrinkle paint without primer, you should look for a paint that is specifically designed for use on walls and other surfaces without a primer. This type of paint is usually less expensive than those with a primer and usually lasts longer.

How Do I Apply Wrinkle Paint Without Primer?

Generally, you will need to use an airless sprayer or a roller to apply the wrinkle paint without primer. You will also need to use a primer underneath the wrinkle paint to help it adhere better and last longer.

What Are the Benefits of Using Wrinkle Paint Without Primer?

The benefits of using wrinkle paint without primer include the fact that it can be used in more applications and areas than those with a primer, as well as the fact that it is cheaper than those with a primer.

We hope this article has helped answer your question about wrinkle paint without primer. It is important to note that while wrinkle paint without a primer can be used in many applications, it is not as effective as those with a primer.

Do you need to heat wrinkle paint?

Are you looking for ways to remove wrinkles from your walls? You’re not alone. Millions of people around the world are looking for ways to make their homes look newer and cleaner. One way to do this is by using wrinkle-free paint.

What is Wrinkle-Free Paint?

Wrinkle-free paint is a type of paint that is formulated to reduce the appearance of wrinkles. This type of paint is designed to stay on longer and last longer than traditional paint, which is why it’s so popular among homeowners.

Why use wrinkle-free paint?

There are a few reasons why you might want to use wrinkle-free paint in your home. First, wrinkle-free paint can help to make your walls look newer and cleaner. Second, using wrinkle-free paint can reduce the amount of time that it takes to clean your walls. Finally, using wrinkle-free paint can help to protect your walls from damage.

How do I get wrinkle-free paint?

There isn’t a one-size-fits-all answer to this question, as the best way to get wrinkle-free paint depends on the type of walls that you have in your home. However, some tips on how to get wrinkle-free paint include checking out online stores or malls that sell this type of product, looking for stores that offer free samples of the product, or contacting a company directly to ask about their wrinkles-free paint solution.

How Does Wrinkle-Free Paint Work?

Wrinkle-free paint is formulated with ingredients that help to reduce the appearance of wrinkles in the paint. These ingredients include resins, silicones, and other products that help to create a smooth finish on the wall.

What Are the Benefits of Using Wrinkle-Free Paint?

There are many benefits to using wrinkle-free paint, including the following:

  1. It stays on longer than traditional paints.
  2. It is easier to clean than traditional paints.
  3. It helps to reduce the cost of painting a room.
  4. It helps to reduce the amount of dust that is created while painting a room.
  5. It helps to create a smoother surface for wallpaper or flooring.
  6. It helps to create a cleaner, fresher look in a room.

Conclusion

Wrinkle-free paint is a great way to make your home look newer and cleaner without having to spend a lot of money on professional painting services. With its many benefits, it’s no wonder that millions of people around the world are looking for ways to remove wrinkles from their walls.


Commercial Painting Machine

Are you looking for a commercial painting machine to help you get your business up and running? You’re not alone. Hundreds of businesses just like yours are looking for the right solution to help them get their business off the ground.

Here at Commercial Painting Machine, we have the perfect solution for you. We have a wide variety of commercial painting machines to choose from, all of which are designed specifically for businesses. Whether you need a high-powered machine that can paint large areas quickly or a more specialized model that is tailored to your specific needs, we have it.

We also have a team of experienced professionals who are ready and willing to help you get started with your new business. We can walk you through the basics of using our machines and help you find the perfect solution for your needs. Contact us today to learn more about our commercial painting machines and how they can benefit your business.

What is a Commercial Painting Machine?

A commercial painting machine is an automated tool that helps businesses paint walls, ceilings, and other surfaces with precision and speed. It is designed to save time and money by eliminating the need for manual labor.

What Are the Benefits of Using a Commercial Painting Machine?

There are many benefits to using a commercial painting machine, including faster completion times, more repeatable processes, and less risk of human error. Additionally, a commercial painting machine can help reduce noise levels and fumes in the workplace, making it easier for employees to work without distractions.

What Is the Best Commercial Painting Machine?

There are many different types of commercial painting machines available, so it’s important to research which one is right for your needs. Some of the popular options include robotic painting machines, magnetic painting machines, and pneumatic painting machines. It’s important to consider factors such as price, features, and reliability when choosing an appropriate commercial painting machine.

How Do I Choose the Right Commercial Painting Machine?

Choosing the right commercial painting machine can be a complicated process, so it’s important to do your research and find one that meets your needs. Consider factors such as price, features, and reliability when choosing an appropriate commercial painting machine. Additionally, you should consult with professionals who are familiar with the options available for your specific application.

What Are the Costs Involved With a Commercial Painting Machine?

The costs involved with a commercial painting machine vary depending on the type of machine you choose and the size of your project. Generally speaking, however, you can expect to spend between $3,000 and $5,000 on a commercial painting machine. Additionally, there may be additional costs associated with training or maintenance contracts.

Choosing the right commercial painting machine can be a complicated process, but it’s worth it in the long run. We hope this article has helped you understand what a commercial painting machine is and why businesses should consider investing in one.

What are the 4 types of paint sprayers?

Are you looking for the best paint sprayer for your home? You may be surprised to learn that there are actually 4 types of paint sprayers – and each one has its own advantages and disadvantages.

Paint sprayers come in three main types: air-powered, electric, and spring-loaded. 

Air-powered sprayers are the simplest to use and are the least expensive option. They work by using an air compressor to generate pressure, which atomizes the paint and causes it to be shot out of the gun at high speed. 

Electric paint sprayers are more powerful and usually have higher ratings than air-powered sprayers. They use an electric motor to create pressure, which atomizes the paint and causes it to be shot out of the gun at high speed. 

Spring-loaded paint sprayers are unique in that they use a spring mechanism to power the gun. This makes them easier to control than electric and air-powered sprayers, but they can be more difficult to operate due to their reliance on gravity.

What is a Paint Sprayer?

A paint sprayer is a device used to apply paint to a surface. It typically consists of a wand, which is connected to a container to hold paint, and a trigger, which is used to activate the wand.

What Are the Benefits of Each Type of Paint Sprayer?

There are four types of paint sprayers – airless, gravity feed, pulsating-action, and rotary-action. Each type has its own advantages and disadvantages, so it’s important to do your research before making a decision.

What Are the Disadvantages of Each Type of Paint Sprayer?

Each type of sprayer has its own set of downsides, so it’s important to consider these factors before making your decision.

How Do I Choose the Best Paint Sprayer for My Home?

When choosing the best paint sprayer for your home, it’s important to consider factors such as price, features, durability, and ease of use.

In this article, we’ve discussed what a paint sprayer is, what types there are, their advantages and disadvantages, and how to choose the right one for your home.

What is the price of a home color paint machine?

Are you looking for the best price on a color paint machine? Do you want to know exactly what to look for when buying a color paint machine? In this article, we’ll discuss the features and benefits of a color paint machine and the best price for a color paint machine. So, whether you’re new to painting and need the perfect tool for your home or you’re simply looking to save money, read on for our top tips.

When it comes to painting, the choice of color can be daunting. Whether you need to paint a whole room or just a few pieces, choosing the right color can be tricky. That’s where a color paint machine comes in handy. A color paint machine is a device that mixes different colors of paint together, creating a custom color that you can use on any surface.

There are a few things to consider when buying a color paint machine, including the price and features. Here are three factors to keep in mind:

Price: When buying a color paint machine, it’s important to consider the price tag. Not all machines are created equal–some are more expensive than others. It’s important to find one that fits your needs and budget. 

Features: Another factor to consider is the features of the machine. Some machines come with more features than others, such as preprogrammed colors or adjustable settings. 

Performance: Finally, make sure you choose a machine that will produce high-quality results. Some machines are more reliable than others; be sure to read reviews before making your purchase.

Now that you know what to look for when purchasing your own color paint machine, it’s time to find the best price! There are many online retailers that offer great deals on quality machines, so be sure to do your research and compare prices before making your purchase.

What is a Color Paint Machine?

A color paint machine is a device that allows you to paint walls or other surfaces using different colors of paint. It is a popular choice for homeowners who want to customize their space or create unique designs.

What are the features of a color paint machine?

There are a few features that are important when purchasing a color paint machine. First, it is important to make sure that the machine has the ability to mix multiple colors together. Second, it is important to make sure that the machine has easy-to-use controls so you can create beautiful colors quickly and easily. Third, it is important to make sure that the machine has enough power to create consistent colors while painting. 

How much do color paint machines cost?

The price of a color paint machine can vary depending on the type of machine and its features. For example, small handheld devices can cost as little as $50, while larger industrial-grade machines may cost hundreds of dollars. However, there are often discounts available if you buy a machine in bulk or through special promotions. So, whether you’re looking for the best price or want to find the perfect machine for your needs, our top tips will help you get started.

What Features Should I Look For in a Color Paint Machine?

When looking for the best price on a color paint machine, you should look for one that has all the features you need. This includes features such as variable speeds, variable pressure settings, and an easy-to-use interface.

How Do I Identify the Best Price on a Color Paint Machine?

There are several ways to identify the best price on a color paint machine. You can search online for reviews, read customer reviews and ratings, and compare prices across various retailers.

In conclusion, finding the best price on a color paint machine is easier than you think. We discussed the features to look for and how to find the best price on a color paint machine.

What is the price of the texture paint machine?

Are you looking to buy a texture paint machine? You’re not alone. Hundreds of people just like you are looking to add texture to their projects. But, what is the price of a texture paint machine?

The price of a texture paint machine can vary depending on the make and model. But, in general, a texture paint machine will run you around $1,000.

What is a Texture Paint Machine?

A texture paint machine is an automated system that creates textures on surfaces using paint and other materials. It can be used for both decorative and functional purposes.

What Are the Benefits of Using a Texture Paint Machine?

A texture paint machine can be used to create texture on porous surfaces, such as wood, metal, and plastic. It can also be used to create textures on non-porous surfaces, such as glass and ceramics.

What Are the Different Types of Texture Paint Machines?

There are several types of texture paint machines, including airless sprayers, manual sprayers, and robotic sprayers. Each type has its own advantages and disadvantages.

What Factors Should I Consider When Buying a Texture Paint Machine?

Before you buy a texture paint machine, you should consider its features and specifications, as well as its cost. You should also consider the type of surface you will be painting, as well as its size and weight.

How Do I Care for My Texture Paint Machine?

There are several steps to take care of your texture paint machine, including cleaning it after each use, checking the pressure gauge regularly, and checking the nozzle regularly for clogs.

We hope this article has helped you understand what a texture paint machine is, its benefits, types, and specifications. We also hope it has given you some insight into how to take care of your own texture paint machine.

What is the cost of the spraying machine?

Spraying machines have become an essential part of the business of pest control. They are used to apply pesticides to a targeted area, and the cost of these machines can vary greatly depending on their features and size.

The cost of a spraying machine can vary greatly depending on its features and size, but you can expect to pay between $1,000 and $10,000 for a basic model. More advanced machines may cost more than $20,000.

How Does a Spraying Machine Work?

A spraying machine works by using pressurized water to apply pesticide to a targeted area. The type of pesticide used depends on the target pest and the type of treatment required.

What Are the Benefits of a Spraying Machine?

The benefits of a spraying machine include easy application of pesticides, reduced labor costs, and improved customer service. Additionally, the use of a spraying machine can help reduce the spread of pests and diseases.

What Are the Different Types of Spraying Machines?

There are several types of spraying machines available, ranging from hand-held units to large-scale units that can be used for large-scale pest control applications.

What Are the Pros and Cons of Each Type of Spraying Machine?

Some types of spraying machines have pros and cons, such as hand-held units that are easier to use but may not be as effective as larger models. Additionally, larger models may be more expensive but can provide greater coverage and more accurate pesticide application.

We hope this article has given you a better understanding of what is involved in buying a spraying machine and how it can be used to combat pests in your business or home environment.

What is the cost of 1 Litre of paint?

Are you looking to buy a gallon of paint? You’re not alone. Many people are looking to purchase a gallon of paint for various reasons. But what exactly is the cost of a gallon of paint? Lets take a look. 

The cost of a gallon of paint varies, depending on the brand, the color, and the quantity. In general, however, a gallon of paint will cost between $8 and $15. However, this price range can vary greatly depending on the location and the time of year. Additionally, the cost of a gallon of paint can also vary depending on the type of paint you are purchasing. For example, premium paints will often cost more than lower-quality paints.

What is the Cost of a Gallon of Paint?

The cost of a gallon of paint can vary depending on the brand, the type, the finish, and the quantity. Typically, basic interior and exterior paints can range from $5-$10 per gallon. Premium paints may cost more, and specialty paints may be more expensive as well.

What Factors Impact the Cost of a Gallon of Paint?

Factors that impact the cost of a gallon of paint include quality, brand name, finish, quantity, and additional services such as primer, top coat, or gloss.

What Are Some Alternatives to Paint?

There are many other options for painting your home or business without having to spend money on paint. These options include faux finishes, wall coverings, wallpaper, and even chalkboard walls.

How Can I Save Money on My Painting Project?

You can save money on your painting project by shopping around and comparing prices. Also, consider using coupons and discounts available in stores and online.

What Are Some Tips for Shopping for Paint?

When shopping for paint, consider looking for brands that offer quality products at affordable prices. Also, be sure to read reviews to find out what other customers have experienced with the specific brand you’re considering.

In conclusion, purchasing a gallon of paint can be an expensive endeavor but there are ways to save money on your project. We hope this article has given you some insight into the cost of a gallon of paint and how to save money on your project.

What is the cost of 20 Litres of paint?

Are you looking to buy paint for your home? It’s important to do your research before you make any purchases. One of the most important things to consider when buying paint is the cost. In this essay, we’ll discuss what the cost of 20 liters of paint is and how this can affect your decision.

First, it’s important to understand that the cost of paint will vary depending on the brand, color, and type. However, a typical 20-liter container of paint can cost between $10 and $20. This means that the price you pay for a gallon of paint will be roughly one-seventh to one-half of the cost of a 20-liter container. Additionally, the price of paint can also change depending on where you live. In some cases, the price of a gallon of paint can be more than double the price of a 20-liter container.

When you’re deciding how much paint to buy, it’s important to consider your needs. For example, if you only need a small amount of paint for a specific project, buying a smaller container may be best. On the other hand, if you’ll be using a lot of paint for multiple projects over time, it may be worth investing in a larger container.

Overall, it’s important to remember that the cost of paint is an important factor to consider when shopping for supplies. By understanding how much different types and brands costs and comparing prices in different stores or online retailers, you’ll be able to make an informed decision about what products are best for your needs.

What is the Cost of 20 Litres of Paint?

The cost of 20 liters of paint will vary depending on the brand, type, and quantity of paint you choose. Generally, you can expect to pay between $20-$30 for this amount of paint.

Why is Cost Important When Buying Paint?

Cost can be an important factor when buying paint because it can impact the overall look and feel of your project. For example, if you choose a cheaper brand, you may end up with a thinner coat of paint or one that contains lower-quality ingredients. Similarly, if you choose a more expensive brand, you may get higher-quality paint that lasts longer and has better protection against UV rays.

What Factors Affect the Cost of 20 Litres of Paint?

The cost of 20 liters of paint will depend on a variety of factors, including the brand, type, and quantity of paint you choose. This can also be affected by factors such as the type of surface you are painting, the size of your project, and whether or not you need additional supplies such as primer or sandpaper.

What Can I Do to Save Money on My Paint Project?

There are a few things you can do to save money on your paint project. First, look for a quality brand with lower-cost options. Second, shop around for discounts and deals. Third, look for deals on shipping costs and make sure to compare the costs between stores. Fourth, consider purchasing in bulk to save money on shipping and storage costs. Fifth, consider renting a paint sprayer to speed up the project and reduce waste. Sixth, use artificial paints and stains instead of using real wood or tile for your project. Finally, consider using natural alternatives such as chalkboard paint or chalkboard stencils to reduce waste and save money.

Conclusion

Buying paint can be a challenging task but it doesn’t have to be expensive! By understanding the cost of 20 liters of paint and taking steps to save money on your project, you can ensure that your project looks great and stays within budget.