High quality airless paint sprayers are the easiest tool for fast and effective painting. The secret to a functional and longer lasting sprayer is ensuring proper care and maintenance. The most important job is to clean your sprayer properly after every paint job. But for the first timers it might be confusing how to clean because you are dealing with many different parts. Fear not! Even though each model might differ slightly, the main components are generally the same. Once you have done it a few times, you will get used to the process and it’ll feel like a straightforward routine.
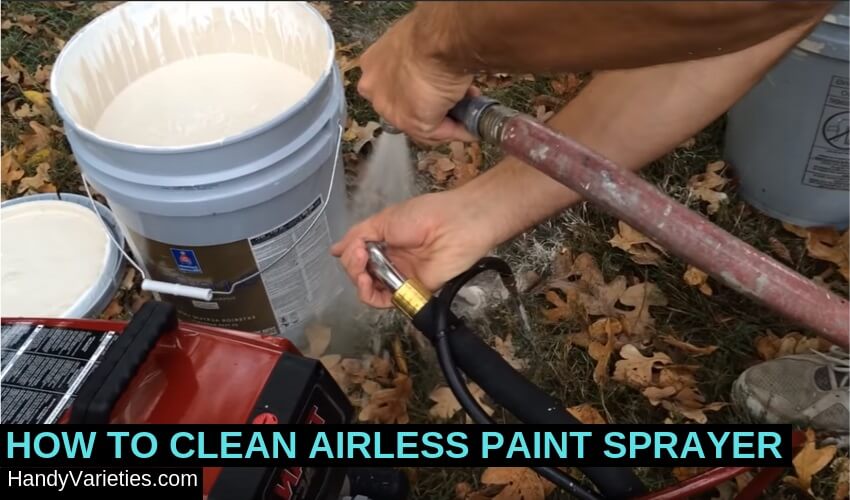
While cleaning an airless paint sprayer it’s better to take apart the device to get rid of the paint and grime stuck inside and outside. The 3 main parts of the sprayer are the whole device, the nozzle and the gun. At first, keep the tool assembled to clean the majority of the paint, but later take apart the gun and nozzles for easy cleaning.
Water Or Paint Thinner?
It can be confusing for newbies to choose from what to clean with – water or paint thinner? But there’s a simple solution. Use tap water (lukewarm even better) to clean water-based paints like latex and use paint thinner to remove oil-based paints like lacquer.
Although never confuse between these 2 types because it can damage the whole device. And, don’t use heavy corrosive liquids like lacquer thinner, which could damage internal parts of the sprayer.
Preparation
The things you will need for cleaning:
- Water
- Paint thinner
- Buckets
- Paintbrush
- Gloves
- Rags
You need one bucket filled with water or paint thinner and one empty bucket to empty the device into. Trim the length of your old paintbrush to one inch for scrubbing the dirt. Before cleaning, turn the power off of the device and also turn pressure to the lowest setting and trigger the gun to relieve pressure. When cleaning your paint gun, you should be wearing gloves, this way your hands will be protected from chemical thinners and hardeners.
How to Clean Water-Based Paint ?
Take a bucket with water and put the suction of the airless sprayer in it. Allow it to draw water in. Taking an empty second bucket, spray the remaining liquid until you get a clear and clean spray. Use both the prime mode and spray mode to push out the remaining paint. In this way, no paint is wasted.
Disassemble the gun and take the suction strainer, the main filter and the gun filter, then place them in the empty bucket to soak in the water. Put on a pair of gloves and start swiping away the remaining paint. For the stubborn leftovers, use an old stiff brush and scrub away gently. Put some lacquer thinner on a clean cloth rag and rub the over sprayed paint off of the frame and body of the paint sprayer. If the sprayer is to be stored, especially over winter where it might freeze, run a small amount of paint thinner (never lacquer thinner) through the sprayer to remove any water which could freeze. Once all the parts are completely free of paint, wipe off the water with a clean dry cloth until all the parts are completely dry again.
How to Clean Oil-Based Paint ?
Cleaning oil-based paint from the sprayer is the same process as water-based paint cleaning as mentioned above, just use paint thinners instead of water. Avoid harsh/heavy liquids like lacquer or acetone. Run paint thinner through the sprayer until the thinner comes of the sprayer clean. Do not run the same thinner through the sprayer more than once. Take the sprayer apart and soak all of the parts in paint thinner. Do not place the entire gun in the solvent because this can be abrasive, only let the filters should ideally soak. Rub them or scrub down with brush gently if necessary to remove any last vestiges of paint. Rinse the filter in paint thinner and allow the filter to air dry. Finally, reassemble the sprayer.
Maintenance and Storage
Besides cleaning the sprayer thoroughly, you need to do some maintenance too. The essential part is to take care of the piston and packing kit. The pump system is particular to specific brands so always read the user’s manual to check what needs to be oiled and how often. If you don’t want unexpected cleaning and repair cost, keeping it clean is the absolute requirement.
You may not need to use the airless sprayer regularly and there’s a fair time gap between your painting projects. If you do not properly prepare your airless paint sprayer for storage, you will often bring it out to use and not be able to get it to spray. That’s why storing the sprayer is vital to maximize the life of your sprayer.
Use pump preserver / protector products like pump armor, liquid shield, mineral spirits and mineral spirits with engine oil only in the pump; do not run the material through the hose and gun. If the sprayer will be stored in freezing temperatures, choose a pump preserver that will not freeze.
Additional Tips
- Carefully read the user’s manual and follow the instruction
- Clean the equipment between coatings
- Not all paints and coatings are compatible with each other
- Store your airless indoors in a climate controlled area for best results
- Do not allow water to freeze in the sprayer, hose or gun
- Never leave the airless sprayer under pressure
Conclusion
Airless paint sprayers can become clogged when paint left in the sprayer thickens or dries. That’s why cleaning is so important to keep the sprayer from clogging. No clogging means even and smooth spraying job and easier to clean the inside of the sprayer. The cleaning task may seem daunting, but the job itself is not that hard. Just following this easy process you can be free from all the dirt and paint and have a squeaky clean sprayer. So, don your work gloves and get ready to clean!
Related Posts: