Are you looking to know how many coats of primer are needed for cabinets? If so, you’re not alone. Many homeowners are trying to figure out the right amount of primer for their cabinets.
According to the National Home Improvement Show, you’ll need two coats of primer for every 100 square feet of the cabinet surface. So, if your cabinets are measuring 300 square feet, you’ll need 600 coats of primer.
Remember that primer needs time to dry before you can paint. So, plan on spending a few hours sanding and priming your cabinets before painting.
What is Primer?
Primer is a thin layer of paint designed to protect the surface of a surface from water and dirt while allowing it to bond with the underlying surface. It is usually applied before painting a surface and helps to reduce the amount of time needed for the paint to dry.
What Is the Best Primer for Cabinets?
There are many primers available for use on cabinets, but some are better than others. The best primer for cabinets is one that is formulated specifically for use on wood surfaces.
How Many Coats of Primer Do I Need?
The amount of primer needed for your cabinets depends on several factors, such as the type of wood used in your cabinets, how thick you want your primer to be, and how many coats you want to put on the surface. It is best to test a small area first to get an idea of how much primer is needed.
What Are the Benefits of Using a Primer?
Primer is an essential tool in preventing damage to your cabinets and can help make them look more beautiful and longer-lasting. It also protects the surface from water, dirt, and other materials that can damage or stain the surface. Additionally, it can help reduce dust and dirt buildup, making your cabinets look cleaner for longer.
What Are Some Tips for Applying Primer?
When applying primer, it’s important to be patient and take your time. Make sure you cover the entire surface with enough coats to ensure that it adheres properly and that it is completely dry before moving on to the next step. Additionally, it’s important to wear gloves when applying primer so that you don’t accidentally end up with an oil-based primer on your hands.
Sealants can also be applied after priming to help protect the surface from water damage or staining.
Do you sand between coats of primer on cabinets?
Are you looking to do a project and need to know whether you should sand between coats of primer? There are a few things to consider before deciding if you should sand between coats of primer. Primers are designed to provide a smooth surface for the paint to adhere to, but if the primer is sanded too much it can create imperfections in the finish. If you decide to sand between coats of primer, make sure to use fine-grained sandpaper and work in small increments.
What is Primer?
Primer is a substance used to help protect the wood or other substrate from moisture, dust, and other contaminants. It also helps to seal the wood, making it easier to paint over.
What is Sanding Between Coats of Primer?
Sanding between coats of primer is the process of removing any imperfections from the previously-primed surface so that the second coat of primer can be applied evenly and smoothly.
What are the Benefits of Sanding Between Coats of Primer?
Sanding between coats of primer can help ensure that the second coat will be applied evenly and smoothly, as well as making it easier to paint over. It can also help to reduce the amount of needed sanding later on in the project.
What Should I Consider Before Sanding Between Coats of Primer?
Before starting any project, it’s important to research the type of primer that you’re using and make sure it’s compatible with your project. You should also research the best way to sand between coats of primer and make sure you have the right materials for the job.
How Do I Know When to Sand Between Coats of Primer?
There are a few signs that can help you determine when it’s time to sand between coats of primer. These include checking for any imperfections in the surface, checking for any discoloration in the primer, and checking for any warping or cracking in the wood.
We hope this article has answered your questions about whether or not you should sand between coats of primer on your next project! If you have any additional questions or comments, feel free to let us know!
Do you need 2 or 3 coats of paint on the cabinets?
Are you planning on painting your kitchen cabinets? You may be wondering if you need 2 or 3 coats of paint. Here’s what you need to know about the right amount of paint for your cabinets.
To start with, your cabinets are made from different types of wood, so the paint you use will affect the finish differently. If your cabinets are made from a soft wood like pine, you’ll likely need 2 to 3 coats of paint. If your cabinets are made from hard woods like oak or maple, you may only need 1 or 2 coats of paint.
Another thing to consider is the size and shape of your cabinets. If they’re small and shallow, you may only need one coat of paint. But if your cabinets are large and deep, you may need two or three coats.
So whether you need one or two coats of paint, make sure to read the instructions on the can of paint and follow them precisely. Doing this will ensure that your cabinet finish looks good and lasts for years to come.
What is the Right Amount of Paint for Kitchen Cabinets?
The right amount of paint for kitchen cabinets depends on a variety of factors, including the type of finish, the type of material, and the size of the cabinet. Generally, two coats of paint are sufficient to cover all surfaces and provide protection against water and wear.
What Should I Look for When Choosing the Right Amount of Paint?
When choosing the right amount of paint, it’s important to consider the type of finish you want and the size and shape of your cabinets. You should also consider the type of materials used in your cabinets, such as wood or metal.
How Many Coats Should I Use?
Generally speaking, two coats are sufficient for most kitchens. However, if you have particularly porous or absorbent cabinets, you may need three coats to ensure full coverage.
What Should I Avoid When Painting Cabinets?
Avoid using too much water or too much thinner when painting cabinets. Also, don’t forget to clean any dust off your cabinets before painting to avoid streaks or smudges.
What Are the Benefits of Painting Cabinets with Two Coats?
Painting cabinets with two coats provide a better finish than one coat alone and helps to protect against water and wear. It also provides a better bond between the paint and the surface.
If you’re considering painting your kitchen cabinets, it’s important to consider a variety of factors, such as the type of finish, size, and shape of cabinets, the material used in the cabinet, and the amount of paint needed. We hope this article has helped you understand how to paint your cabinets with the right amount of paint for your needs.
Do I need two coats of primer?
Are you considering applying two coats of primer on your next home improvement project? It may seem like a simple task, but it’s not always as easy as it seems. In this article, we’ll explore the basics of primer, the pros and cons of using it, and how to get the most out of it.
Primer is a product that is typically applied to wood or other porous surfaces before painting or other types of staining. Its main purpose is to provide a barrier between the substrate and the paint or stain and to help the paint or stain adhere to the substrate.
There are many different types of primer, but all of them share some common properties. They all have a thick consistency, they all require multiple applications, and they all have a tendency to dry quickly.
The biggest difference between primers comes down to their purpose. Primers intended for paint are formulated to be water-resistant and to resist chalking, staining, and peeling. In contrast, primers intended for woodworking are designed specifically for use on wood and other porous substrates.
There are some exceptions to these general rules, but they are relatively rare. If you’re unsure if you need a primer for your project, it’s usually safest to go with one of the more water-resistant options.
There are a few things to keep in mind when using primer. First, make sure that the surface that you’re priming is free of any oil, paint, or other contaminants. This will cause the primer to not adhere properly and may lead to problems later on.
Second, make sure that the primer is evenly applied. Over-application can cause the primer to dry too quickly and create unsightly cracks and peeling.
Finally, be patient. Primers tend to dry quickly, but they can take a few hours to fully adhere and settle into the substrate. If you apply the primer too soon, you’ll likely end up with incomplete coverage and uneven results.
What is Primer?
Primer is a thin, water-based sealant that is used to protect surfaces from water, dirt, and other contaminants. It also helps to improve adhesion and reduce dust.
What Are the Benefits of Primer?
Primer can help to protect surfaces from water and dirt, reduce dust and improve adhesion. It also helps to reduce the appearance of scratches and chips on surfaces.
What Are the Cons of Primer?
Primer can be hard to remove and can leave a sticky residue that can be difficult to clean off. It can also be expensive and difficult to find in some areas.
How to Apply Primer?
The primer should be applied with a brush or roller and then misted with water to help it stick to surfaces. It should then be allowed to dry completely before applying any other paint or stains.
What Should I Look For in a Primer?
When looking for a primer, you should look for one that is made from high-quality materials, such as acrylic or urethane, is water-based, and has a low odor. You should also look for one that has been approved for use on your specific type of surface.
So now you know the basics of primer and how to apply it properly. We hope this article answered all your questions about primer, its benefits, and cons, as well as what to look for in a primer for your next home improvement project.
Are 3 coats of paint too much for cabinets?
Are 3 coats of paint too much for cabinets? Many homeowners ask this question because they are unsure of how much paint is needed to cover the surface. In this essay, we will discuss the answer to this question.
First, it is important to understand that the paint must be applied in a thin layer in order to achieve the desired results. Too much paint will not only cover the surface with a thick coat but may also cause damage to the wood.
Second, factors such as the quality of the paint, the type of wood, and how often the cabinet will be used will affect how much paint is needed. For example, wood that has been treated with sealants or waxes will require more coats of paint than untreated wood.
Finally, if you are unsure about how much paint is needed, it is always best to consult a professional. They are familiar with different types of paints and can help you determine how much is necessary.
What Are the Different Types of Paint?
There are many types of paint, each with its own characteristics and coverage. Some are more durable than others, so it’s important to choose the right one for the job.
How Much Paint Should I Use?
The amount of paint needed will vary depending on the type of surface you are painting. Generally speaking, 1 to 2 coats are enough to cover most surfaces.
How Much Paint is Too Much?
If you are unsure about how much paint you need, it’s best to start with a light coat and add more if necessary. Too much paint can cause streaks and can also weaken the finish of your cabinet surface.
What Are the Benefits of Using 3 Coats?
Using 3 coats of paint can be beneficial if you want a stronger, longer-lasting finish. It can also be beneficial if you want to cover a large area quickly and efficiently.
What Are the Drawbacks of Using 3 Coats?
The biggest drawback to using 3 coats is that it can be more expensive than using 1 or 2 coats and it can also take longer to complete the job. Additionally, it can be difficult to get a consistent finish with 3 coats.
As you can see, there are pros and cons to using 3 coats of paint on cabinets. In order to make an informed decision, it’s important to understand the type of paint you’re using, how much is needed, and the advantages and drawbacks of using more than one coat.
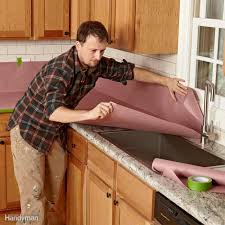
What is the best way to apply primer to cabinets?
Primer is an essential part of any home renovation project. It holds the paint or stain in place and prevents it from drying out, making it easier to apply. But what is the best way to apply primer to cabinets?
One popular technique is to use a foam roller. Rolling the primer into the wood creates a smooth surface that is less likely to trap moisture and the cabinets will look freshly painted every time. If you’re using a spray primer, be sure to shake it well before each application and avoid spraying near windows or doors.
What Types of Primers Can Be Used on Cabinets?
There are several types of primers that can be used on cabinets. These include water-based, oil-based, and hybrid primers. Each type has its own advantages and disadvantages.
The best way to apply primer to cabinets is by brush or roller. Brush application is best for small areas, while roller application is better for larger areas.
How Long Does it Take to Apply Primer to Cabinets?
It usually takes about 30 minutes to an hour to apply primer to cabinets. Make sure to give yourself enough time so that the primer can dry properly before you move on to the next step.
Primer is an essential part of any home renovation project. It holds the paint or stain in place and prevents it from drying out, making it easier to apply. There are several types of primers that can be used on cabinets, and each type has its own advantages and disadvantages. The best way to apply primer to cabinets is by brush or roller. Make sure to give yourself enough time so that the primer can dry properly before you move on to the next step.
How long after priming can you sand cabinets?
Are you looking to refinish your kitchen cabinets? You’ve come to the right place. We’ll discuss the best time to sand and prime kitchen cabinets.
Sanding cabinets is a task that many homeowners complete after priming. The goal is to smooth out any bumps or imperfections on the surface.
After priming, it’s important to sand the cabinets in order to remove any excess primer. Too much primer can cause the wood to become rough and uneven.
If you’re looking to refinish your cabinets, we recommend waiting at least two weeks after priming before sanding. This will give the primer time to bond firmly to the surface of the wood.
What is the Best Time to Sand and Prime Kitchen Cabinets?
The best time to sand and prime your kitchen cabinets is after they have been polyurethane-coated, or after they have been painted. This gives the best results, as the polyurethane will help protect the wood from damage.
If you are refinishing your cabinets, we recommend waiting two weeks after priming before sanding.
What is the Best Method for Sanding Kitchen Cabinets?
You can use a power sander or an orbital sander for sanding kitchen cabinets. For a power sander, start with medium-grit sandpaper and work your way up to fine-grit sandpaper. For an orbital sander, start with coarse-grit sandpaper and work your way up to fine-grit sandpaper.
When sanding cabinets, be sure to wear gloves and eye protection. Also, be sure to take care not to damage the finish on the cabinets.
What is the Best Method for Priming Kitchen Cabinets?
The best method for priming kitchen cabinets is with high-quality primer and paint. For a high-quality primer, use one that is made specifically for indoor use. For high-quality paint, choose one that is made specifically for indoor use.
After priming, it’s important to coat the entire cabinet with a good layer of paint. This will protect the surface from moisture and wear.
How Long After Priming Can You Sand Kitchen Cabinets?
You can sand your kitchen cabinets after they have been primed, but it’s best to wait at least 24 hours before doing so. This allows the primer to fully dry and set in the paint properly.
Conclusion
We hope this article has given you all the information you need to know about when it’s best to sand and prime kitchen cabinets. Remember, it’s always best to follow the manufacturer’s instructions for your specific project.